|
Canon A70
Microscope Adapter
by
Howard Webb (St. Louis, MO, USA)
|
Introduction
I finally got a new digital camera to
replace my Kodak DC3200. While the factors of the decision were
not
just microscopy, it was a definite consideration. The features I
wanted
were:
- Lens adapter
- More pixels
- Optical zoom
- More image control
- Still use AA batteries
- Use my existing Compact Flash memory cards
The Canon A70 met all these
needs. In fact, most of the Canon line of cameras are similar;
and what I say about the A70 likely applies to the other models as
well. Price kept me down to the 3 megapixel range; for more
money, I could have had the same basic camera with more pixels (Canon
A80).
One of the unique features of the
Canon camera is its lens adapter. There is a tele-extender lens,
and wide angle lens available that screw into the front of the lens
adapter via a standard 52mm thread. The
lens adapter attaches to the camera via a 'bayonet' mount, and extends
forward
enough so anything screwed to it clears the camera lens.
This adapter
opens up the possibilities for all sorts of other mountings (of my own
making).
The camera mount
 I asked at my local camera store
what they had in the way of 52 mm rings. I expected that I would
have to take a
52mm filter, and smash out
the glass to get a
ring. It turns out they had a drawer of used adapater rings, and
gave me a 52/58mm ring for almost nothing.
I asked at my local camera store
what they had in the way of 52 mm rings. I expected that I would
have to take a
52mm filter, and smash out
the glass to get a
ring. It turns out they had a drawer of used adapater rings, and
gave me a 52/58mm ring for almost nothing.
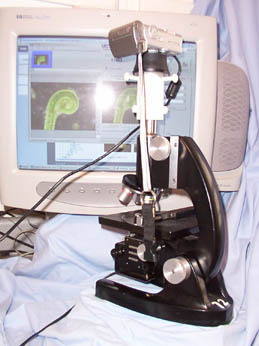
Building the rest of the adapter was fairly simple. I need a
'plate' to hold the camera just off of the microscope objective, and a
way to securely hold the camera in place, centered over the objective.
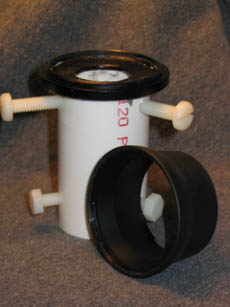
The plate was made from a scrap piece of 4" PVC pipe. I cut the
pipe in half (vertically) then dropped a piece in boiling water.
The heat allowed me to flatten the PVC into a sheet. With
a compass, I drew circles on the PVC sheet; for the outer diameter,
inner opening, and at 1.25 inch as a gluing
guide for
the pipe. The
inner hole
is slightly larger than the objective lens, yet smaller than the
objective
housing. This allows the plate to sit on top of the lens, without
obstructing any of the light path.
1.25 inch PVC was the smallest pipe which will fit over the
objective and the microscope barrel, a piece of this holds
the camera to the microscope barrel.
I assembled these three pieces using epoxy cement, taking care to not
get any cement in the threads of the ring. I painted the top of
the plate black to avoid any stray light reflection.
I drilled and tapped three 1/4 x 20 holes around the base of the pipe
for nylon bolts (this is the same size as a standard camera tripod
mount). The nylon does not scratch the microscope, yet holds the
mount solidly to the microscope. Initially I had planned to shim
the inside of the pipe to center the objective lens, but I was unable
to find anything that fit snugly around the lens, yet would smoothly
slide into place. I ended up adding three more bolts to the
top of the pipe, which has
proven to be a simple but effective solution
for centering.
Use
 Initially the mount was a
frustration. I thought I was getting a good picture
when looking at the
LED display on the back of the
camera; yet, when I downloaded the image and looked at the enlarged
version, I usually discovered it was
out of focus.
Initially the mount was a
frustration. I thought I was getting a good picture
when looking at the
LED display on the back of the
camera; yet, when I downloaded the image and looked at the enlarged
version, I usually discovered it was
out of focus.
Initially I had not wanted
to use the remote capture software, which
came bundled with the camera. I thought it would be too much work; not
only moving the microscope up to the computer desk, but the light
rheostat and
other stuff. It turned out the program
exposure setting of the Canon automatically adjusted to the full
light intensity, hence the rheostat was not necessary. The remote
capture actually reduced the work.
The software proved to have a number of advantages. First, it
provides a good size screen image for sharp focusing of the microscope,
it also avoids the standard digital camera delay between the time the
shutter is pressed and when the image is captured. Triggering the
'shutter' via the mouse also eliminates any fingers
jiggling the camera.
I am now no longer touching the camera, it is just a computer adapter
for the microscope. The set-up allows me to concentrate on the
subject, adjusting the focus, and clicking away as many images as I
want.
Negatives
Larger images and better detail
does have its down side. For web publishing it is good to keep
the images small (about 50-80K). A 2048 X 1538 image (high
quality) can easily run 1.5 to 2 meg in size - a long download.
Fortunately, dark field images have a lot of the same color and average
only 600k (still a large file). The zoom lens also avoids
vignetting, so there is less image to crop
off. Every speck of dirt and air bubble also show in the image,
making a clean slide becomes more critical. Then again, these are
the very challenges that interested us in photomicroscopy.
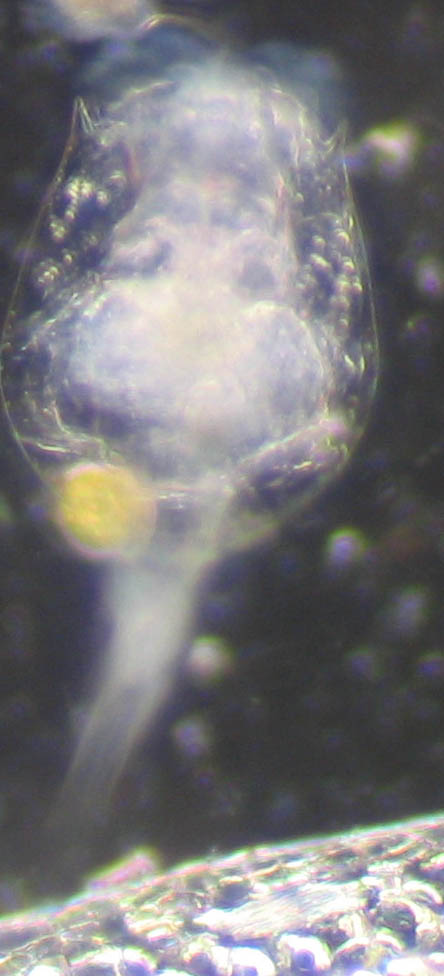
Images
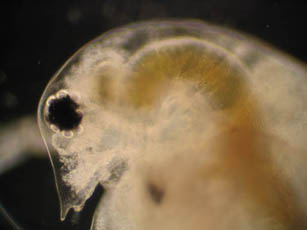
The
following subjects were quick grabs from my daphnia cultures and
aquariums. The image on the left is a reduced version of the full
frame image (15%). The image on the right is a cropped, full size
portion. Magnification is the microscope lens combination; the
camera was likely zoomed to 3x.
|
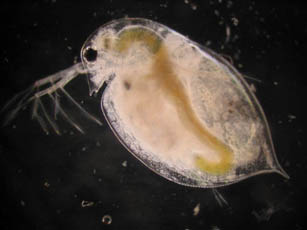
Daphnia pulex - 40x
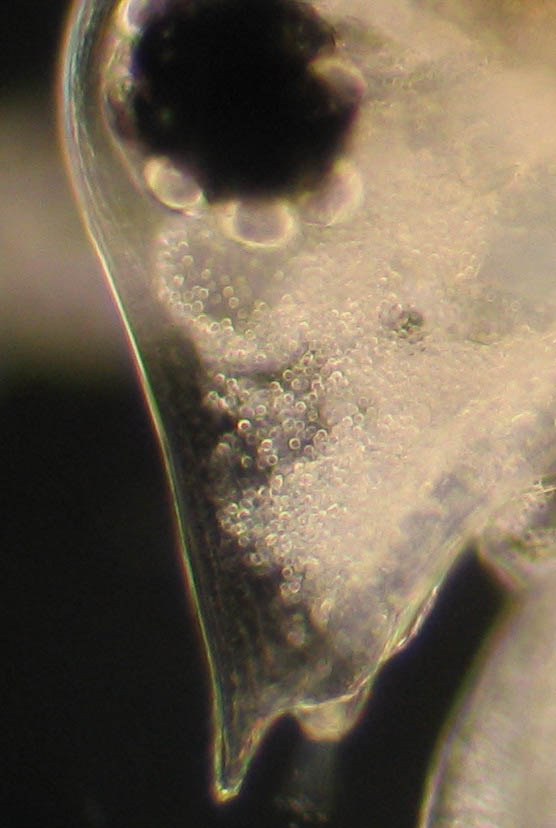
|
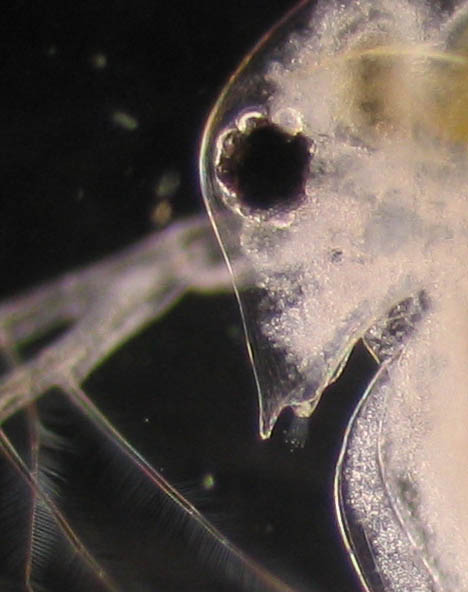
Daphnia pulex - 100x
|
|
Daphnia pulex - 100x
|
|
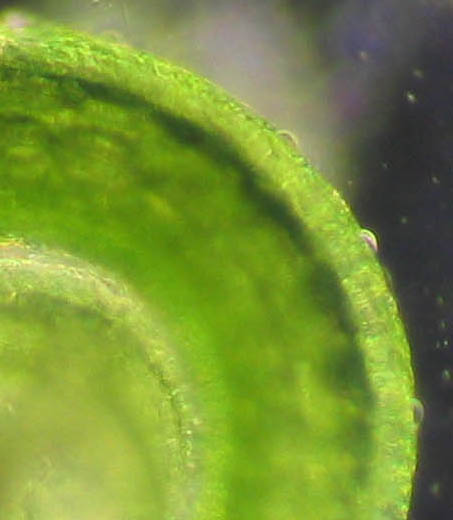
|

Bladderwort tendril - 100x
|
|
|
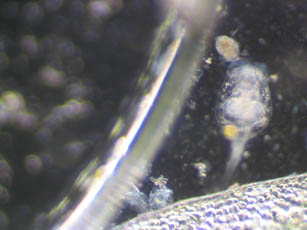
Rotifer (sp?) 400x
A live rotifer is a real challenge to get while moving!
|
|
Technical Details
Microscope:
Bauch & Lomb monocular, 10x ocular, 4x, 10x and 40x
objectives.
Camera: Canon A70.
Via the remote capture software, turn off auto-focus and auto-focus
light. All other settings were left at default (I will learn to
play with them another time).
Software: Photoshop Elements
Comments to the
author Howard
Webb are welcomed.
© Microscopy UK or
their contributors.
Published in the
April 2004 edition of Micscape Magazine.
Please report any
Web problems or offer general comments to the Micscape
Editor,
via
the contact on current Micscape Index.
Micscape is the
on-line monthly magazine of the Microscopy UK web
site
at http://www.microscopy-uk.org.uk/