Digital Photography and Stray Light
Robert R. Pavlis
Girard, Kansas USA 66743
When images are obtained using through the lens epi illumination there is always a problem with "washed out" images. Although this problem can be reduced somewhat by having very clean lenses, the problem will always exist because some light is reflected off of even the best coated optical surfaces, and because there are other scattering processes that simply cannot be eliminated.
Bright contrast phase contrast images have a somewhat related problem. Objects appear brighter than the background as a result of constructive interference. The images would really be improved by reducing the background image intensity to black, or nearly so.
One wonderful characteristic of digital photography is that it permits mathematical manipulation of the large digital array that is used to form the image. The stray background illumination on images from both epi illumination and from bright contrast phase contrast tends to be rather uniform. That means that one can obtain the numerical values of red, green, and blue pixels that are responsible for the stray light, subtract the correct value from each pixel in the image, and then re normalise the intensities so that the brightest pixels are near the maximum value.
There are two ways to accomplish this. The simplest, though not necessarily the best, is to use image editing software. The Gnu Image Manipulation Program, gimp, is free and works very very well for doing this. Originally gimp was only available for POSIX operating systems, but other versions of it are now available. The gimp can handle many different image formats. It can read an image in one format and write in another. (The gimp program can be obtained by downloading it from the gimp website.)
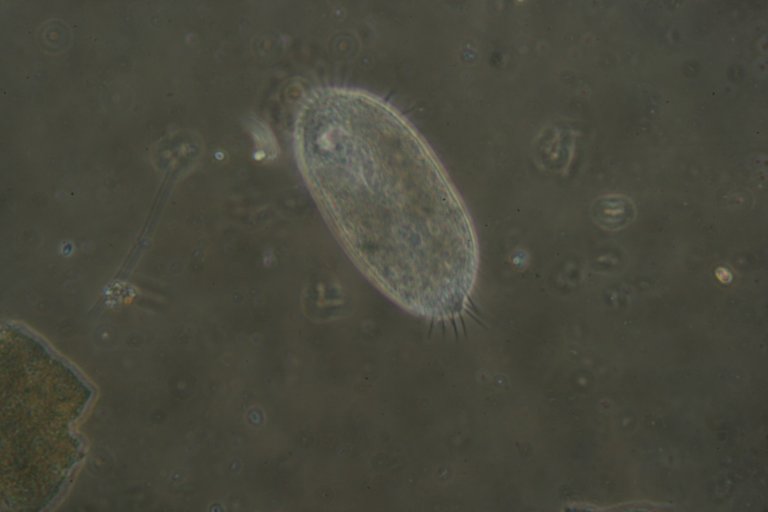
Consider the rather "washed out" bright contrast phase image shown below.
This image can be corrected using the gimp by executing the following steps:
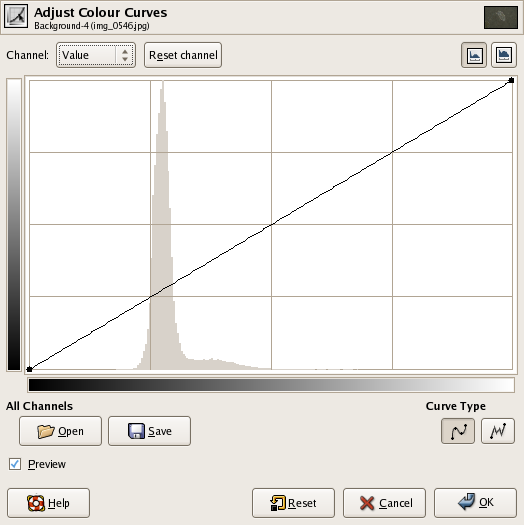
The great advantage of this technique is that the image changes can be observed during the image modification process. Probably the worst negative is that one is often tempted to make corrections that look attractive, but that do not represent the original image.
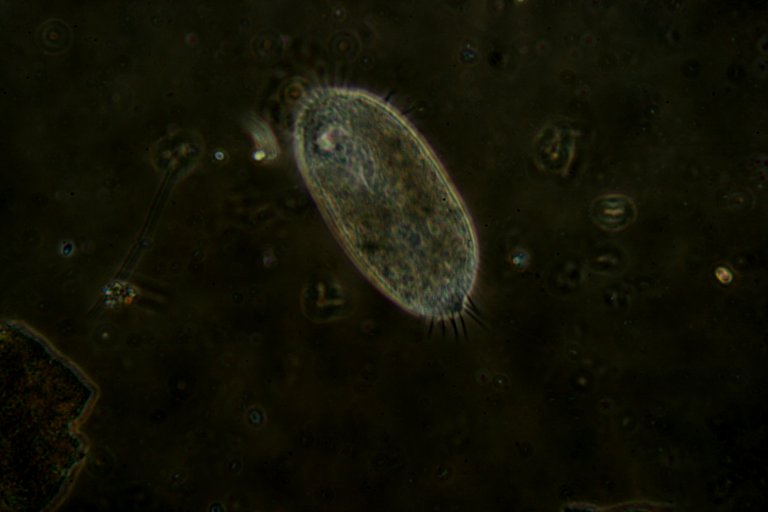
The image below was modified using the technique described above:
There is another technique that can sometimes produce better results. This technique requires that the image be in an uncompressed format. At this point in time the most common formats of this type are the pnm formats. For colour images the pnm format most commonly used is ppm. One can convert the image to ppm format by using systems like netpbm or by saving the images in programs like the gimp in ppm format.
Once the image has been converted to ppm format, the next step is to determine the red, the green, and the blue components of the darkest part of the image background. Programs like the gimp have a "colour picker" routine that permits reading these values.
The next step is to subtract the pixel value correction from EACH pixel in the entire image. After doing this, it is generally best to normalise the pixel values, so that the bright part of the image remains about as bright as it was in the original image. It would require YEARS of constant labour to do this manually, however, it is a relatively simple task to write a computer program to do this.
One that I have written can be obtained by clicking here This program should compile without any errors or warnings on any good C compiler. (On a POSIX operating system compile it by entering at the command line "cc -o pnm_black pnm_black.c".) It can be executed from the command line by simply typing the name of the program followed by the ppm file to be modified. The program will ask for pixel values to subtract from red, green, and blue. It will then generate a modified version of the image and write it to a new file. (The program presented here does not have a routine to handle more than 8 bit/colour images. It could be modified quite easily to handle 16 bits/colour.)
The image below was obtained by converting the original image to ppm format and executing the pnm_black program on it, with red=66, green=67, and blue=56.
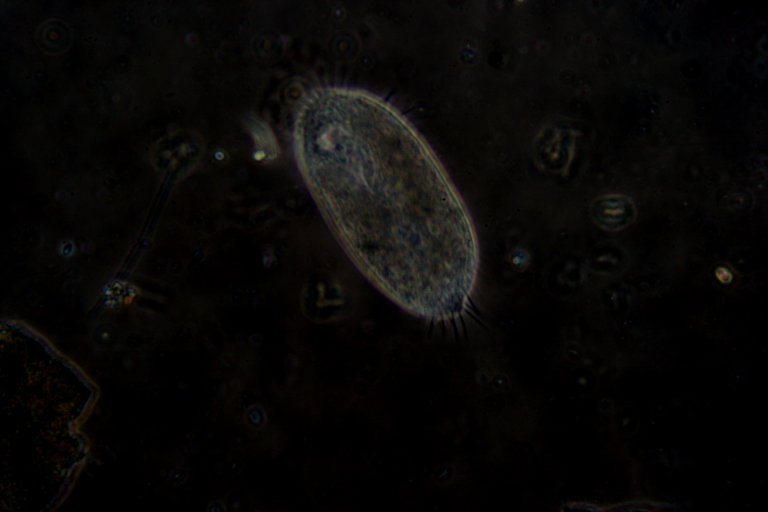
Remember that ppm files are huge, it is best to convert them back to jpg or png after the modifications are complete.
From time to time one may find that other types of images can be improved by using this type of technique.
All comments to the authors via Robert Pavlis are welcomed.
Microscopy UK Front Page
Micscape Magazine
Article Library
Please report any Web problems or offer general comments to the Micscape Editor.
Micscape is the on-line monthly magazine of the Microscopy UK website at Microscopy-UK