By Daniel Holloway
Illinois USA
I do most of my microscope work with the compound microscope. After many hours or days peering and photographing I need a change. I find that change with my Lomo MBC-10 stereo microscope. Beetles, spiders, flys and various other backyard, window sill subjects are available during the summer and fall.
I have grown accustomed to using the x-y mechanical stage with my compound microscopes and really wanted one on the stereoscope. After checking for prices and having a tough time finding one for a Lomo I decided to try to make one for myself.
The prices were too high for someone like me who uses the stereoscope only occasionally. So I went to the drawing board and came up with a simple solution that works for me and cost me about $27.00 (US).
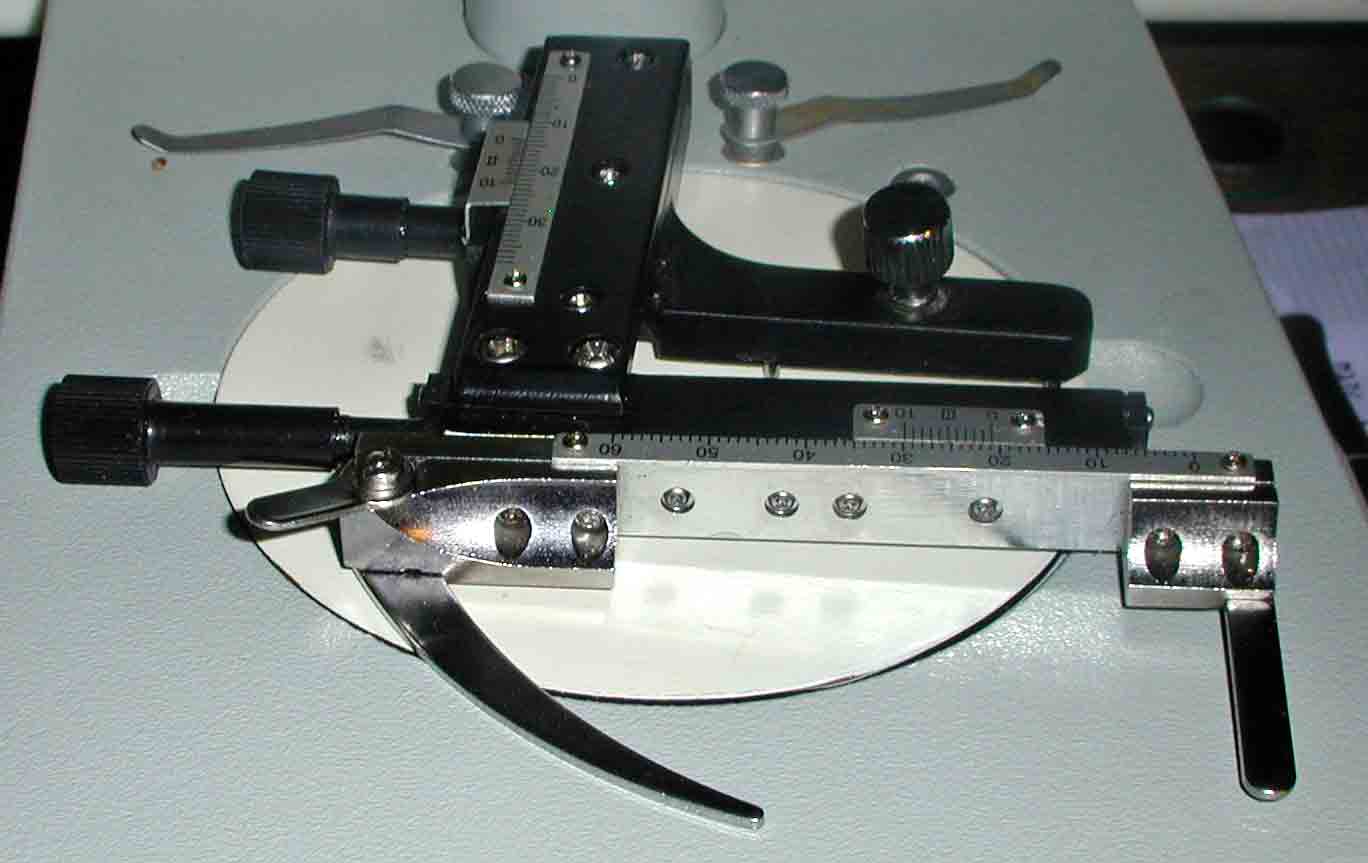
Below is a step by step description of how this can be done. (Any wood can be substituted for those I used). Obtain an inexpensive graduated mechanical stage attachment. You can buy these on eBay for about $25.00. Precision World has them. They look like this.
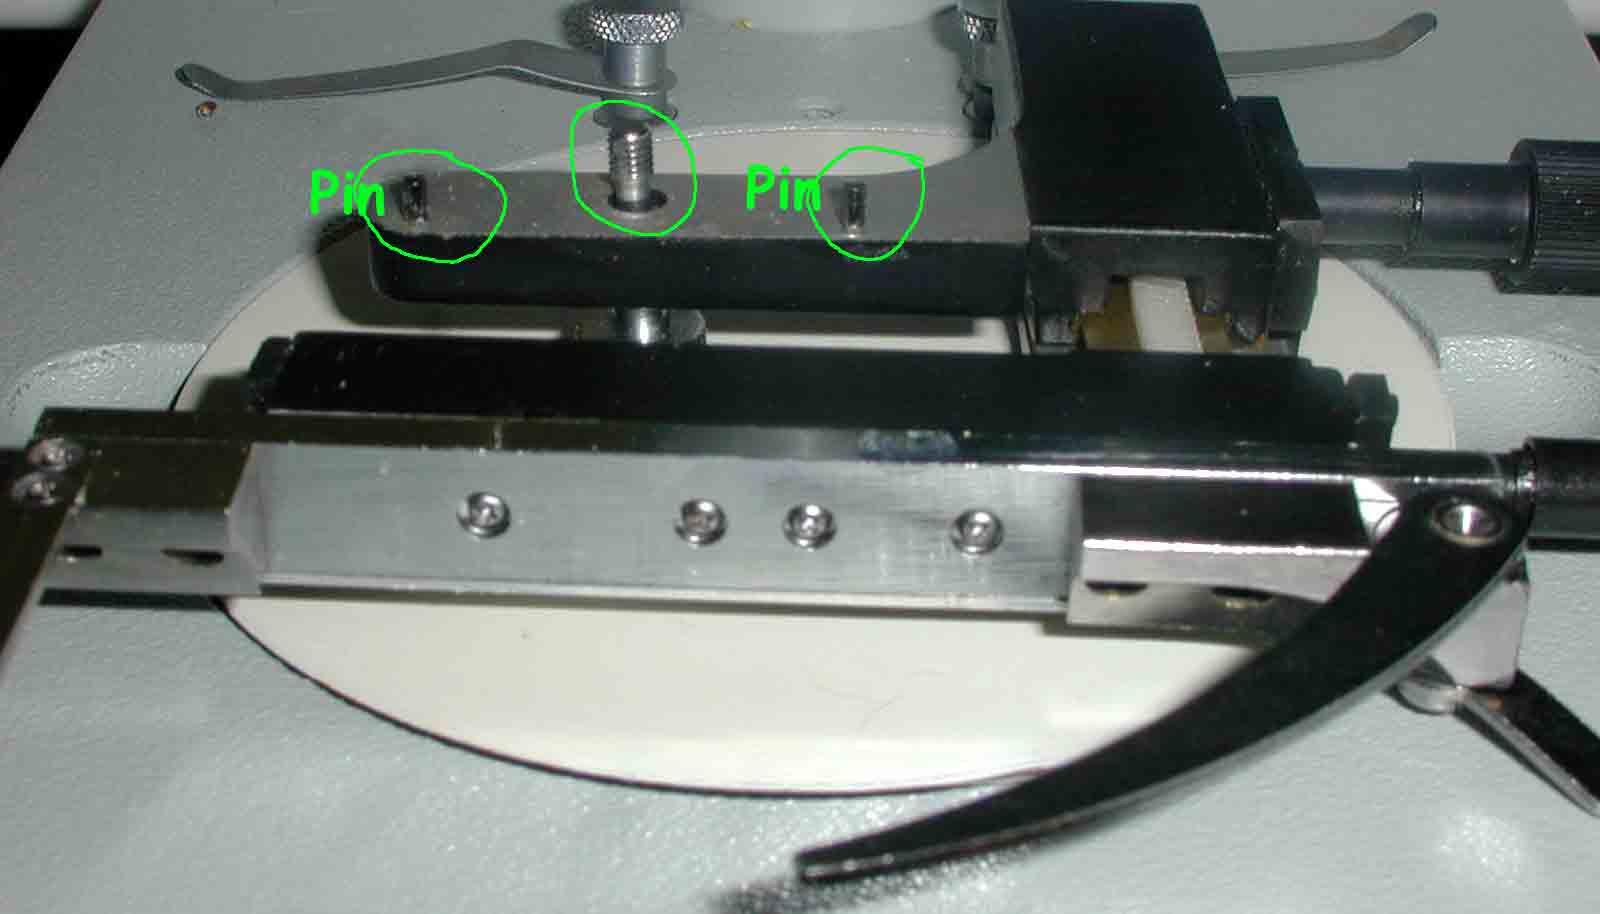
On the underside are two short pins and the thread on the thumb bolt that would ordinarily attach to a metal stage. Here is the underside.
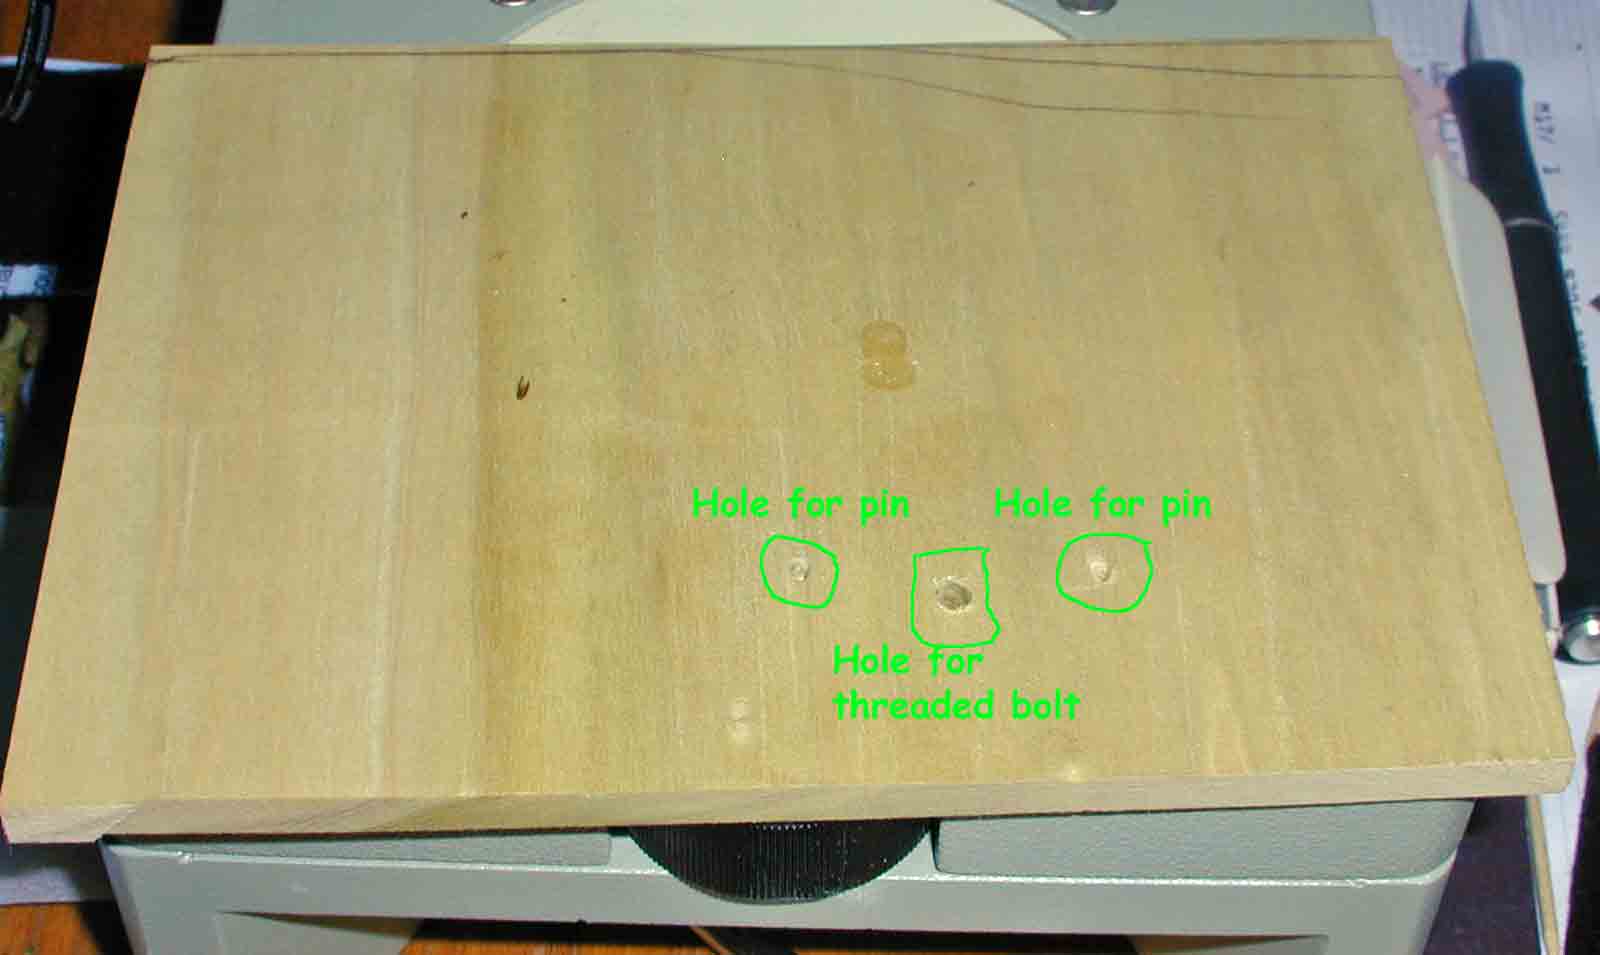
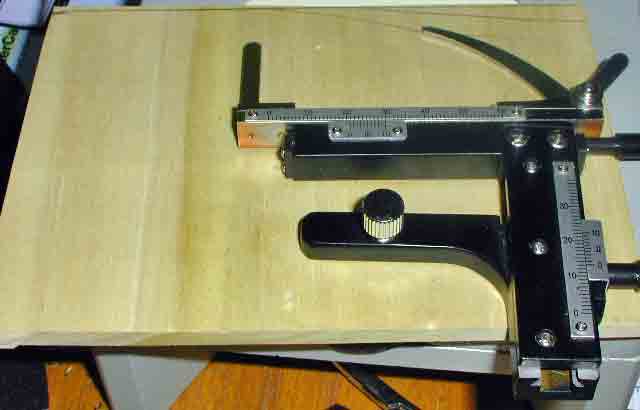
I used a poplar square piece of board for my base. In order for the graduated mechanical stage attachment to sit level on the board you need to make three holes. I used an awl for the pin holes and made them a little oversized by rotating the awl. The hole for the threaded bolt needs to be very close the size of the bolt so you get no jiggle. I used a drill bit to make this hole. I didn't do this, but the hole on the underside where the bolt comes though could be counter sunk and a nut of the proper size used to tighten the parts together. Here is the drilled board.
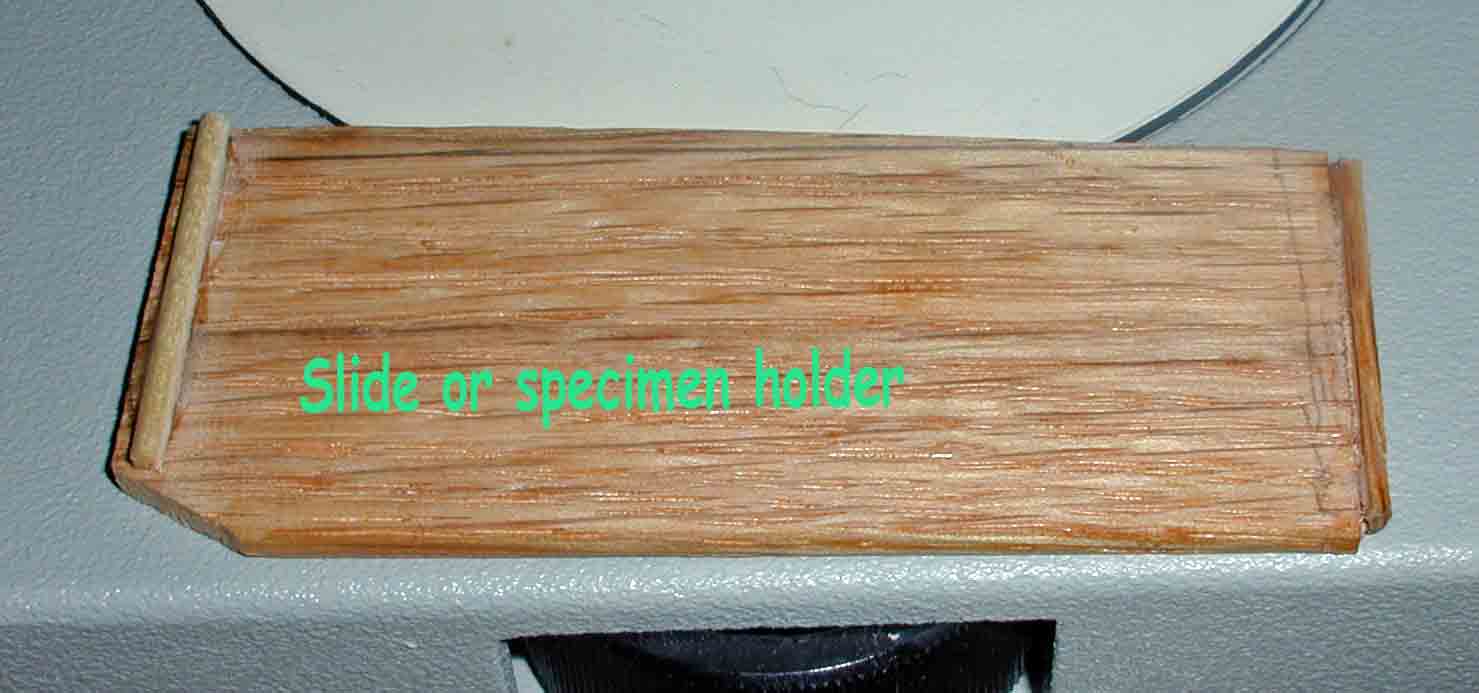
Now you need to make a small carrier for a slide or specimen. I made mine out of a thin piece of oak. It needs to be larger than a slide with a stop on either end of the carrier to secure the slide. I used wood toothpicks as stops. Here is the carrier.
And here is the completed home made stage! (The construction paper below the slide is really black.)
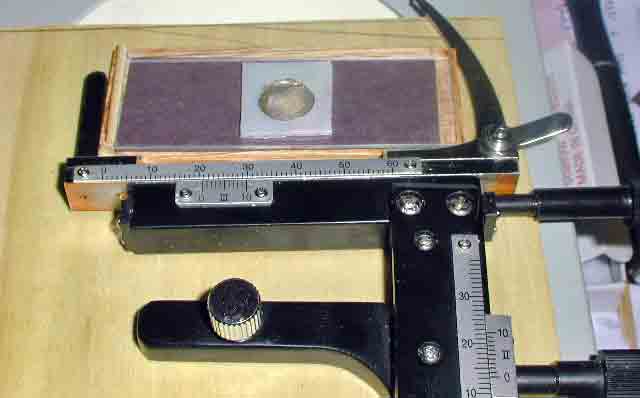
Now I can place a specimen on the slide or on the carrier and by placing one hand on an empty place on the board I can move the specimen up or down a very short distance. This comes in handy for anaglyph photography too. The reason I chose black felt and black construction paper is because some subjects look better with a black or white background. For a white background a strip of printer paper can be used.
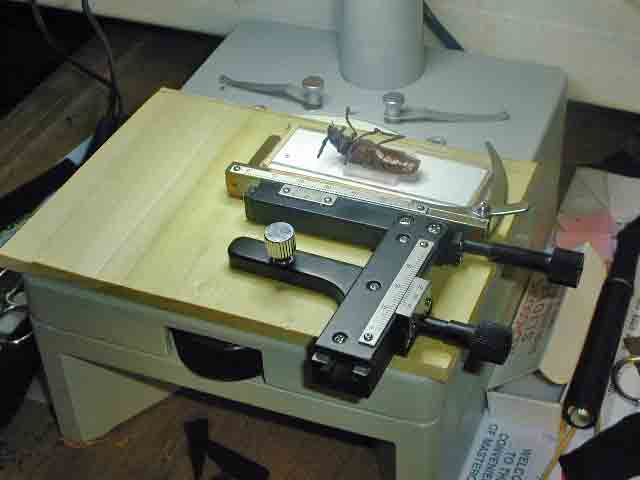
Here is the stage being used on my Lomo.
All comments are welcome. I may be contacted at admin@hollosenso.com
Now all I have to do is figure out how to fix the stage to the base with an easy attach/detach feature.(A friend suggested magnets for a ferrous base.)
Published in the August
2007 edition of Micscape.
Please report any Web problems or
offer general comments to the Micscape
Editor.
Micscape is the on-line monthly magazine
of the Microscopy UK web
site at Microscopy-UK
© Onview.net Ltd, Microscopy-UK, and all contributors 1995 onwards. All rights reserved. Main site is at www.microscopy-uk.org.uk with full mirror at www.microscopy-uk.net .