Fun with a QX5 digital microscope. A personal
review.
by David
Walker, UK
Notes on its use both as a toy, and
with modification, its potential as a cheap imaging route
for the microscopy enthusiast.
|
Summary:
As a toy:
A great way of
introducing the youngster to the world at the
microscopic scale and digital imaging. The higher
resolution sensor can give smoother results
than the QX3. The LED's provide a cooler better
colour balanced illumination. Works well for top
lit subjects at all mags or bottom lit at 10x and
60x. The time lapse is a particularly exciting
feature.
The bottom light isn't strong enough at 200x for
best results but a modification can significantly
improve them. For the youngster expressing a
particular interest in prepared slides and higher
mags, a student compound optical microscope which
sell in a similar price range would offer superior
results.
The 'sample measurement tool' mentioned on
the maker's website is apparently a hardware
feature not part of earlier units, including the
author's example.
Well supported with third party student and
teacher resources (written for the
QX3).
In the
author's view, if introducing youngsters to the
macro and microscopic world, a digital
microscope should be a complement to, but not
a replacement for, simple and easy to use optical
microscopes and hand lenses.
For the enthusiast: The QX5 offers a cheap,
quick and easy way of achieving VGA images at 10x
and 60x. At higher mags a compound microscope with
digital eyepiece or webcam potentially offers
superior results. Modifying the bottom
lighting is worthwhile to improve transmitted
light results especially at 60x and
200x.
Exported videos are 640x480 but stills are
downsampled to 512x384 if acquired / exported
using the QX5 software. Third party software
can acquire 640x480 stills via WIA support
although the images benefit from being downsampled
and post capture processed.
|
Ever since the Intel Play QX3 microscope
was first released in Autumn 1999, it has become firmly
established as a fun, affordable and educational toy
to explore the world of microscopy. This is reflected in
the extensive resources for teachers and students that have
been developed for it and the enthusiasts of all ages sharing
their experiences and images, (see below for a
selection).
The QX5 has recently been released
in Prime Entertainment's 'Digital Blue' product range
which from the maker's website is based on a QX3 with
significant upgrades to both hardware and software. (The
QX3+ model released after the QX3 had a software update.) The
stated upgrades are:
-
The sensor is now 640x480, (the QX3
sensor had 320x240 usable pixels interpolated to 512x384
pixels).
-
The top and bottom lighting are now
'ultrabrite LED's' rather than tungsten bulbs.
-
Facilities to measure samples
are included.
-
The video frame rate has been
increased to 15 frames per second.
Typical selling prices for the QX5 in
Nov.2004 are £70 in the UK and $80 in the US (from Amazon
websites).
Although marketed as a toy, the QX3 has
also proved popular with some enthusiasts seeking a
cheap route for digital imaging on the microscopic scale.
So the author shares his impressions below of the QX5 'as
is', but for fellow enthusiasts includes trials on
improving the imaging.
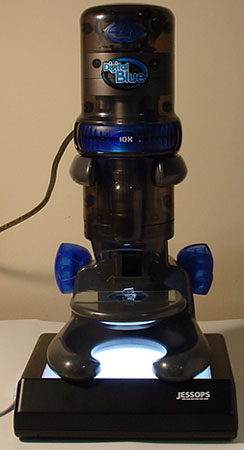
The QX5
is attractively presented, well made and looks fun and
'cool'! The microscope is ca. 10.5 inches high.
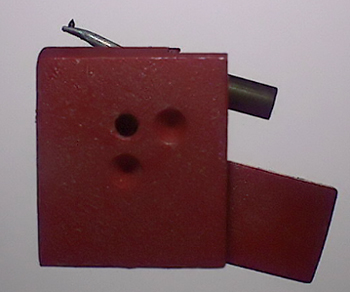
The accessories are similar to those supplied with the QX3.
i.e. a sample slide, tweezers, stage clips, pipette,
two stage containers and two sample containers. Software on
CD and set up sheet.The box states
that an activity booklet is included but was
missing in the author's unit, but can be downloaded.
Out of the box: As the QX5 is
based on the QX3 it's essentially identical in use. It has
total mags of 10x, 60x and 200x (for a 15 in. screen) and
focusing stage. The microscope body can be removed from the
stage for 'on the fly' image capture to the extent of the USB
cable; 10x is probably the highest practical mag for studies
off the stand. The makers have thoughtfully incorporated a
real time 'image flip' in the software, so that subject
movements aren't inverted as occurs with compound microscopes.
This improves the ease of subject manipulation on the stage
especially at the highest mag. Younger users may have problems
with the delicate 'touch' required for manipulating and
focussing subjects viewed at 200x.
The rack and pinion works fine and the
focus controls are large. Focussing is a little tricky at 200x
with some lateral image movement but not unduly so. The turret
lens change from 10x, 60x to 200x has a positive
feel.
Software: The software supplied is
very easy to use and offers a range of features. The unit is
supplied with Windows software. The makers and third
parties can offer Mac compatible drivers and/or software
for the QX3, but unsure if these will work with the
QX5.
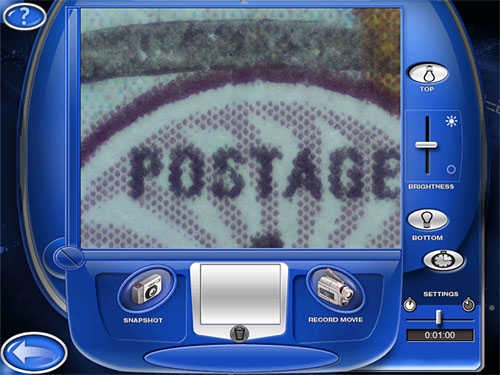
Image
capture menu, the software resizes the computer screen to
800x600 during use. Buttons for top or bottom light, time
lapse (1 sec to 1 hour), still or movie capture are shown. The
brightness control doesn't alter lamp intensity but presumably
the gain of the sensor. The live video shows no lag on the
author's laptop with Windows XP (Pentium PIII 866MHz with
256MB RAM). Images are auto saved when captured. The 'arrow
button' bottom left takes user to image editing page
below.

Image
editing menu. 'Collection' button accesses capture images and
video (also some makers' samples). The last captured image
immediately appears in editing frame. Buttons on right access:
a simple but functional paint / editing program, special
effects, slide show compiler, printing. Images are autosaved
in a proprietary .smp ('sample' format) but can be
exported as jpeg or bmp. Button top right exits program,
button bottom right goes back to live image capture menu.
The hardware / software supplied of the
author's QX5 didn't offer the 'sample measurement tool' on the
maker's website. (The box the QX5 came in mentions the
improved sensor and lighting but not the measurement
facilities.) The maker's were helpful who informed me that the
'initial release' didn't have this feature but the 'latest
version' does. Apparently it's an upgraded hardware
feature not software (if buyers of the QX5 have this feature
in their example, I would be interested to know what it
is).
Still image captures exported using the
QX5 software are 512x384 pixels in size i.e. the same as the
QX3 after interpolation from 320x240. Videos exported from the
QX5 software are 640x480. Images captured with the QX5 using
the
WIA support accessed by third party photo-editing software
are 640x480 pixels and show the same field as the 512x384
captures, so presumably the QX5 software is downsampling
(the maker's have confirmed this). The maker's may have
decided to retain the QX3's 512x384 capture size to
ensure the original mags are retained in the QX5. Another
benefit of downsampling is that 'as-captured' images from
budget sensors usually benefit from resampling and post
processing.
The author
did a quick comparison between VGA images captured via the WIA
support in Photoshop Elements (appears in File / Import menu
alongside TWAIN drivers for scanners etc owned) and the
512x384 exported .bmp images from the QX5 software, but all
captures apart from lens tests below used the QX5
software.
Setting up and using the operating
software was intuitive; the set-up sheet was easy to follow
but was printed in a tiny font. The software includes a
help guide but no operating guide. The downloadable QX3
student (and parent) activity guides on the maker's website
are excellent.
Objectives in use and
characteristics: The three objectives are parcentral
within an image capture field (ca. 2 mm off from 10x to 60x,
and ca. 1mm off from 60x to 200x in the author's unit) so only
the smallest subjects may need scanning to find a feature.
As for the QX3 the objectives are protected from fingers
and dust by a replaceable flat plastic plate.
The bottom cowling of the main unit
extends beyond the optics so working distance for manipulation
is quite small. (ca. 9, 5 and 3 mm for 10x, 60x and 200x
respectively). Smaller subjects benefit from being placed on a
glass slide or piece of paper to manipulate with the fingers
away from the cowling.
The test subjects below show that the
lenses give a good account of themselves.
|
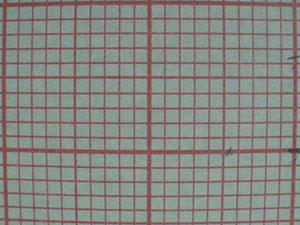
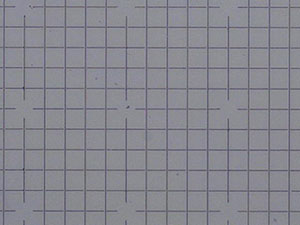

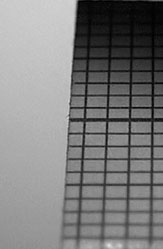
Above: Fields of view of the three lenses
(downsampled VGA masters, no cropping).
Transmitted illumination using light box not the
built-in light.
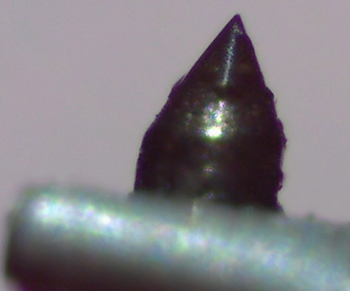
Left: 10x lens. 1 mm grid graph paper.
Some barrel distortion but a good image. The field
of ca. 2 x 1.5 cm is a useful one.
Centre: 60x lens. 0.2 mm reticle field of
view ca. 3 x 2.2 mm.
Right: 200x lens. 0.2 mm reticle field of
view ca. 0.9 x 0.7 mm.
Commendably good images from the 60x and 200x, no
obvious colour aberration, a flat field in
focus and little geometrical distortion. (Note
that the optical magnification of the lenses in a
digital microscope will be and only needs to be
modest; a major part of the final mag is a
consequence of projecting small CCD sensor images
on a larger display screen.)
Right: Depth of field at 10x using 1 mm
grid at 60° angle. Depth of field good with a few
mm either side of focus point. At 60x and 200x
d.o.f is progressively lower as
expected.
|
Lighting: the LED's give a good
white light source, and although the author hasn't used a QX3
for comparison, should offer a cooler and better colour
balanced source than the QX3's tungsten bulbs. The author's
captured images didn't show any evidence of the pink cast
noted by some QX3 users. The life of LED's are
usually excellent but can be replaced by the user.
The implementation of the top and bottom
lighting seems identical to that in the QX3. Thus the top
light is mounted to one side giving oblique light. The
bottom light is to one side of a white
receptacle below the stage with a diffuser fitted in the
stage. The light source is selected from the software, but top
and bottom lighting can't be used together.
The top light at all mags. gives
plenty of light for image capture although can benefit, as
noted in the maker's guide, from additional top lighting. An
LED torch in a simple stand would be a good choice to match
the colour balance of the unit's lighting. For the user
seeking an evenly illuminated capture area an additional top
light is vital as the side mounted fitted light gives some
light fall off.
The bottom light is sufficient for
the 10x mag but is getting noisy at 60x and not intense
enough at 200x for the sensor to work at its best.
There's no easy way for the parent or youngster who doesn't
want to pull the unit apart to improve the
transmitted lighting.
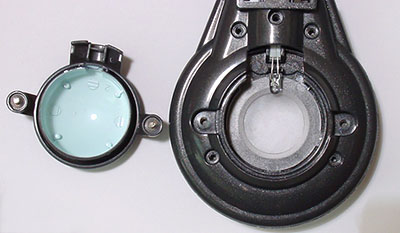
Underside
of stage with cowling removed showing the bottom LED, painted
cowling and stage diffuser.
The limitations of using an offset LED and coarse diffuser is
especially apparent at 200x mag.
The author has tried extending the LED legs to bring it
central but this gives a hotspot.
The Molecular Expression's web site
describe a selection of condenser designs to improve the QX3
lighting. Their side by side image captures show the dramatic
improvement in quality when the bottom light is upgraded. The
QX5 should respond to similar lighting upgrades.
 Trial at improving the QX5 bottom lighting: Admirably, the
microscope is predominantly screwed together, not glued, so
ideal for the careful adult enthusiast to dissect, explore and
improve upon.
Trial at improving the QX5 bottom lighting: Admirably, the
microscope is predominantly screwed together, not glued, so
ideal for the careful adult enthusiast to dissect, explore and
improve upon.
To improve
the bottom light the built-in stage diffuser needs to be
removed. The upper and lower halves of the stage have to be
split which isn't for the feint hearted as in the author's
unit they were still firmly held together even with screws
removed. Gently inserting one and then two thicknesses of
stiff plastic card prised them apart but the stage plastic is
brittle so requires caution.
With stage diffuser, bottom LED and light
cowling removed, the enthusiast can experiment with any bottom
light sources to hand that may suit (but beware of hot lamps
near plastic). The author sat the microscope on a small 'cold'
light box used for viewing 35mm slides and this offered a very
even white light and bright enough to be used up to 200x
(shown right). With care, perhaps with some securing lugs for
the microscope base, this is a practical set-up for
youngsters using safe low voltages (the next size up light box
to the one author used would be stabler).
For the user who may be more interested
in even, color corrected light than the youngster, improving
the bottom lighting is worth doing. The captured images
at all mags with the light box the author tried are much more
pleasing as the light is brighter, even and unstructured, the
built in diffuser gives a very coarse background to subjects
placed on the stage. It also enables a mix of top and bottom
lighting to be used where appropriate.
One of Molecular Expression's design
improvements to the bottom light did suggest a simple two lens
Abbe condenser and prompted the author to try a LOMO Abbe
condenser which sits neatly in the underside of the stage with
elastic band to secure, but for the most part, for
practicality the author just used the light box.
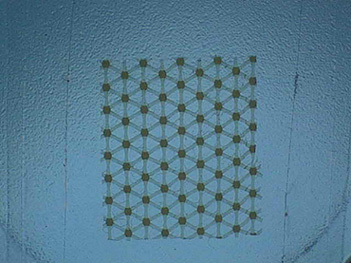
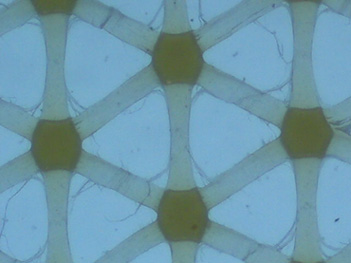
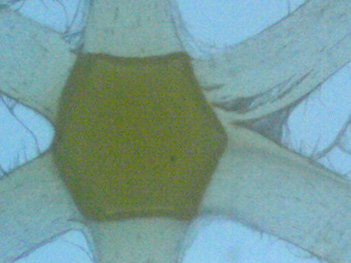
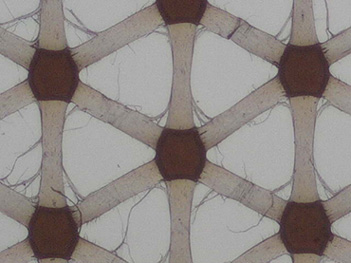
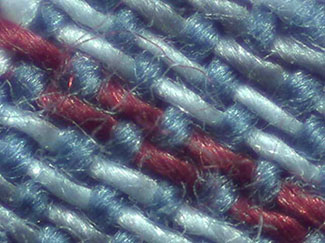
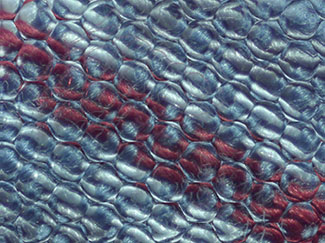
Image gallery 1:
Built-in bottom light cf external cold light box.
(The turret lens mags
of 10x, 60x, 200x are used for the image
descriptions below, but aren't true mags which are
dependent on crops,
resizing, screen size and resolution.)
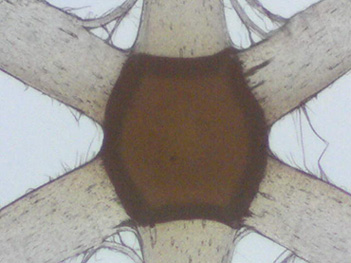
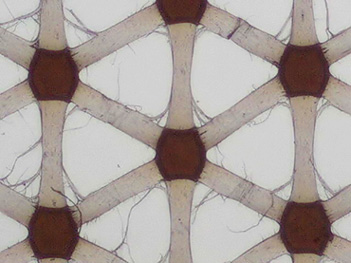
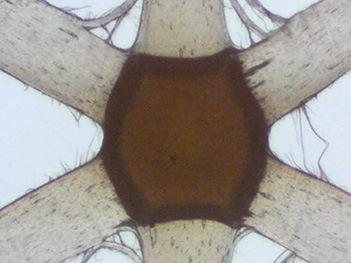
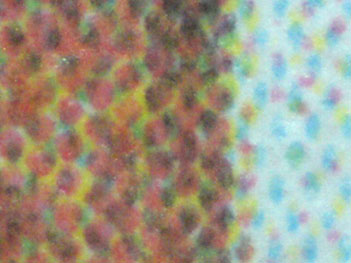
Three
sets of three images of ca. 1 cm square of plastic gauze at
10x, 60x and 200x. Resized to 350 pixels wide from 512
pixels.
Line 1)
using built-in LED bottom light, has a blue cast, structured
background and lack of light at 200x gives noisy
images.
Line 2)
External cold light box used as shown above. Even,
unstructured neutral lighting and less noisy images at 200x
now possible.
Line 3)
Line 2 images where masters before resize have Neat Image
noise reduction algorithm and adjustments to tonal
levels.
Image gallery 2: Built-in top
light.
Images resized, no other
adjustments. Stamp detail at 10x, 60x and 200x. Apart from
light fall-off in top corners at 10x,
the built-in light works well, neutral colour and still
bright enough at 60x and 200x.
Improvements to image quality: The
use of even lighting makes a dramatic improvement to overall
image quality. The built-in LED's and external cold light
source used required little if any colour cast correction.
'Raw' image captures from a microscope can often benefit from
adjustments to contrast, brightness, and tonal levels. Some
noise is seen in as-captured images from the QX5 but resizing
images from native size with a little resharpening if needed
can give a smoother look. The author extensively uses the
Fred Miranda WP Pro v1.1 plug-in for Photoshop Elements
for downsampling. Various software packages can significantly
reduce noise in digital images without undue loss of detail
e.g. Neat
Image and
Noise
Ninja. The author owns Neat Image and has used it in all
the images below. (A 'Device Noise Profile' was created for
each mag.)
Image gallery 3: Various
subjects, mixed lighting using light box, post image noise
reduction before downsampling and tonal adjustments. Slight
sharpening to correct resize softening.
|
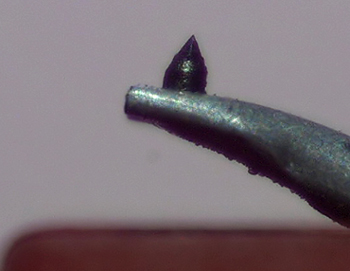
 A record cartridge with stylus illustrates the
useful mag. range of 10x, 60x and 200x for
studying many common objects. Built-in top
lighting gives modelling, bottom light gives good
background. For the 10x and 60x the focus was set
midway between lower and upper focus points to
gain max. of depth of field.
A record cartridge with stylus illustrates the
useful mag. range of 10x, 60x and 200x for
studying many common objects. Built-in top
lighting gives modelling, bottom light gives good
background. For the 10x and 60x the focus was set
midway between lower and upper focus points to
gain max. of depth of field.
For undemanding quick and easy imaging of subjects
with gross structure where a screen image is
adequate, the QX5 may even fill a useful niche in
a professional environment. (As has been noted and
discussed for the QX3, e.g. see this
abstract from a paper presented at Inter/Micro
2000 by Louise Harner.) The Motic DigiScope
150 / 300 models would also be worth considering
with their greater versatility (reviewed next
month).
|
|
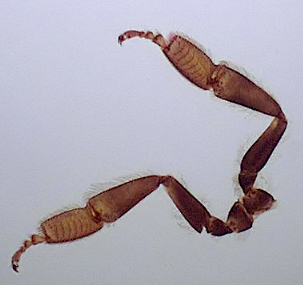
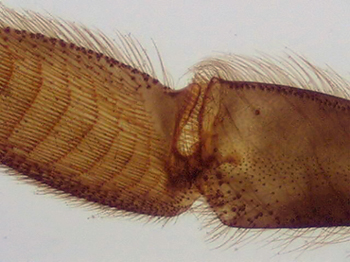
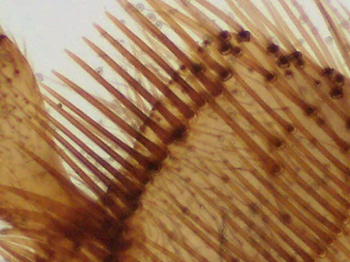
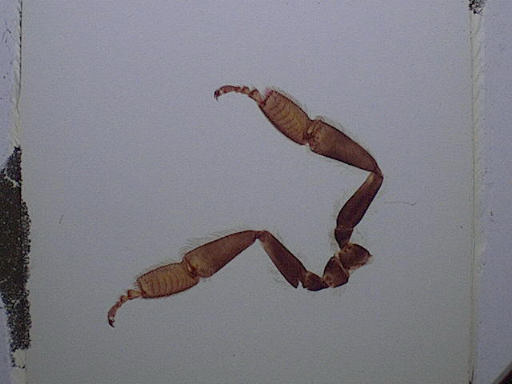
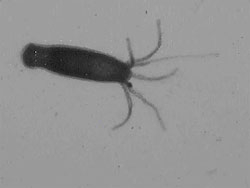
Pair of third legs of honey bee (Apis), prepared
NBS slide at 10x, with detail at 60x and 200x.
Transmitted light from light box, no
condenser.
Click each bee leg image to view video capture
master.
|
|
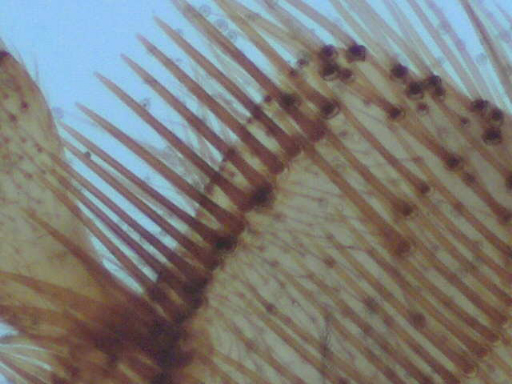
Right: Monarch butterfly forewing scales, 200x,
Biosil slide. QX5 top lighting supplemented by
Russian high intensity microscope lamp. The QX5
struggles with top lit subjects at 200x with fine
detail just using the built-in LED. Supplementing
the lighting drops the noise but subjects with
fine detail aren't ideal for it. Noise filtering
and downsizing with sharpening gives a usable
image to appreciate the organisation of scales on
a wing.
|
|
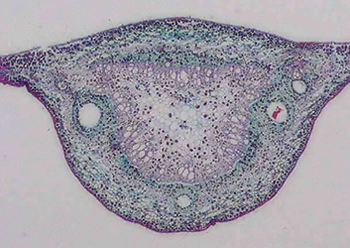
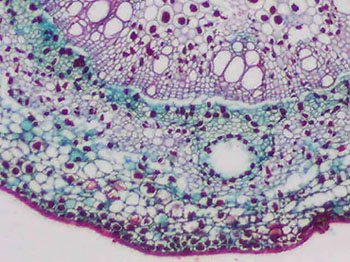
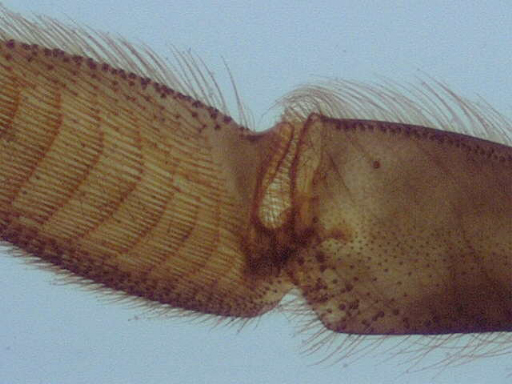
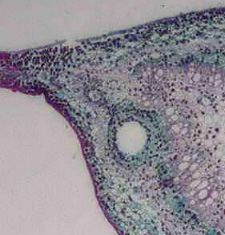
Cashew leaf T/S stained, Biosil slide. Transmitted
light. Left, 60x, right 200x. The QX5 doesn't as
expected capture very fine detail but at 200x
many features of a plant section can be
seen.
Trial using a condenser. A LOMO Abbe
condenser was temporarily mounted below the stage
and focussed on light box. The images below
compare captures with and without
condenser.
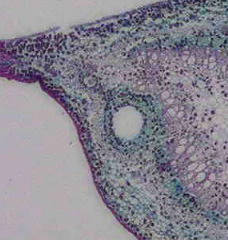
60x: left without, right with condenser.
Resized.
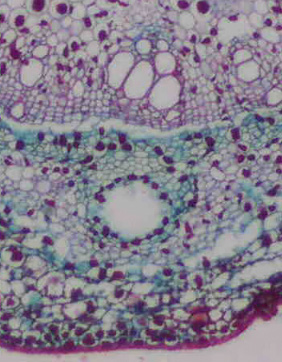
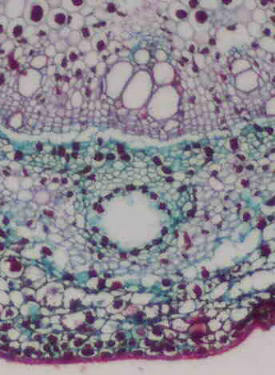
200x: left without, right with
condenser.
(Crops from masters, unmodified apart from
bringing tonal balances
comparable.)
The images are comparable which suggests, for this
type of subject, an even bright unstructured
light source is the main improvement to
transmitted light images. A condenser does allow,
as Molecular Expressions have impressively shown
with the QX3, the use of contrast enhancement
techniques such as darkfield.
|
|
 Polarisation: Inserting a polariser and
analyser above and below the subject at convenient
points can open up the world of polarising
microscopy. The author preferred to lay a 1 cm
square of Polaroid sheet immediately on top of and
below the subject. Making a simple rotating
subject support for more advanced studies is
possible. With time lapse, crystal growth video
clips are possible, as
Brian
Darnton
has effectively
shown with the QX3.
Polarisation: Inserting a polariser and
analyser above and below the subject at convenient
points can open up the world of polarising
microscopy. The author preferred to lay a 1 cm
square of Polaroid sheet immediately on top of and
below the subject. Making a simple rotating
subject support for more advanced studies is
possible. With time lapse, crystal growth video
clips are possible, as
Brian
Darnton
has effectively
shown with the QX3.
The light box the author used was bright enough
for crossed polar studies at 10x and
60x.
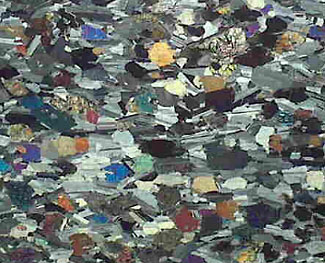
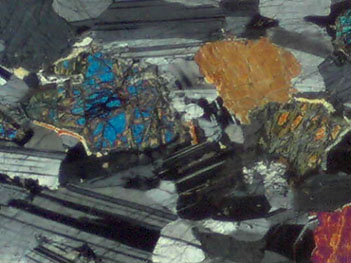
Above: Gabbro rock thin section, Open University
slide.
Left, 10x; right, 60x.
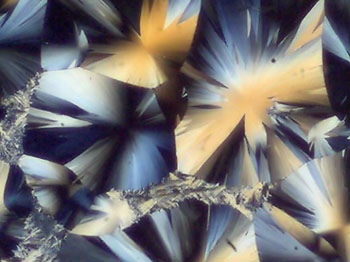
Right: Santonin crystals, prepared slide, NBS.
60x.
|
|
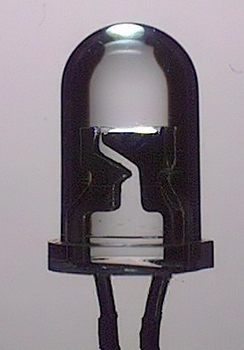
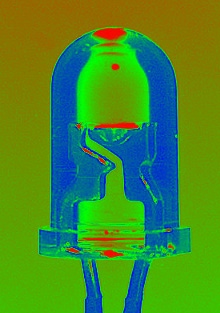
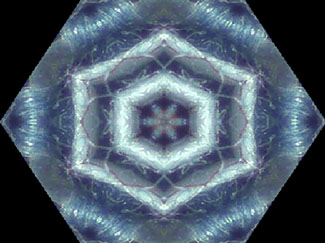
The post image capture special effects can give
some neat results. Left is an LED (from the QX5)
at 10x with bottom light and top light fill-in as
well as low illumination of LED from a
variable power supply made by the
author's brother. The 'atomic glow' effect works
well with this structured sort of
subject.
Linen handkerchief 60x.
Above left, 60x.
Above right, original capture image after
using 'insect eye' effect.
Right, original capture image after using
'kaleidoscope' effect.
(Images can be imported into the QX5 software
to use the effects if
desired.)
|
Image
gallery 4: Video / Time
lapse
Real time video can be captured or single frame with time
lapse can be set in the QX5 software from 1 sec to 1 hour.
Progress is shown on the screen. The video is saved in avi
format at 15 fps using Indeo 5.1 compression.
This is such a versatile feature I'm hoping to explore its
potential in more depth and
share a video gallery at a later date. Here's a
quickie.
|
Above left: The two stage containers supplied are
useful for live subjects and pond life at 10x but
at 60x and 200x a microscope slide with cell and
coverslip works better to avoid vibration and
to limit subject movement.
Above right: Video - live green hydra, 60x. 390
kbyte avi file. Click to open in new frame.
(Requires Intel Indeo R3.2 codec on PC to view. A
poorer animated gif with artefacts is
here, 790 kbytes). Video capture was one frame
every second then played back at 15 fps. VGA
masters resized to 320x240. Time lapse is a
way of keeping video files small and speeding the
motion of slowly moving creatures. Video
editing using the freeware
VirtualDub.
|
Alternative budget digital imaging routes for the
enthusiast: Although
like many enthusiasts, I own a variety of imaging routes for
macro and micro, I was struck with how easy imaging from 10x
to 200x is with the QX5. The field of view of the QX5 (0.9
-20mm) overlaps that of typical stereo and compound optical
microscopes and digicams in macro, so is versatile in this
respect. I would normally have bits and bobs on tripods,
homemade gizmos dangling on the end of microscopes etc. The
QX5 is particularly useful for 'around the house' type
subjects. The stylus sequence above for example I have no
single device that can achieve that mag
range.
It is a toy of course, so the limitations of its lighting and
lenses are seen when fine detail needs to be captured e.g. of
prepared thin section slides. A better bet for the enthusiast
in this case would be a digicam with macro or webcam / digital
eyepiece (VGA models sell for a similar price to the QX5) on a
compound microscope. An old but trusty favourite of mine is a
lensless security style camera with 'C' mount attached to
a microscope and using a video capture box.
For the enthusiast or parent seeking a more professional and
versatile microscope, for about twice the cost of the QX5
there are optical microscopes supplied with dedicated digicams
such as the Motic DigiScope 150 and 300. If megapixel images
are required, the QX5 is clearly not suitable and devices to
add a consumer digicam to an optical microscope would be one
option.
One final thought
.... digital microscopes are great fun and for easy image
capture, particularly time lapse, but the images can't compare
with the crisp visual images from a student optical microscope
at 60-200x or good quality hand lens or monocular at 10x.
In my view, if introducing youngsters to the macro and
microscopic world, a digital microscope should be a
complement to, but not a replacement for, simple and easy to
use optical microscopes and hand lenses.
Comments to
the
author
David
Walker
are welcomed.
Acknowledgements: To judge how the
QX5 performed and operated compared with the earlier QX3 model
and as a basis for my own trials of the QX5, the author is
heavily indebted to the many who have shared their experiences
and images from the QX3 on the Web. Notably past Micscape
contributors' articles and Molecular Expression's superb
QX3 resources.
Thanks also to Digital Blue's Customer Service Department who
were very helpful with queries regarding the still image
capture size and the 'sample measurement tool'.
Resources:
1)
Digital
Blue - the maker's website provides resources such as
student and parent activity guides for the QX3 which are also
applicable to the QX5.
2)
Molecular Expressions Intel Play QX3 computer
microscope - impressive and very detailed
resources; these include the microscope's construction,
mechanical and optical features, modifying to widen its
versatility, interactive Java tutorials and many image
galleries.
3)
'
Using the digital microscope' by Brian J Ford. A
manual written by the noted author and scientist for
'Science Year 2002' (UK). A beautifully presented
and informative book on using the QX3, includes many
project ideas. Purchasable as a book or the first edition (36
pages) can be freely downloaded in pdf
format.
4)
Micscape contributor's articles on various aspects of the
QX3 - includes images and videos. Type 'QX3' into search
box.
5)
Yahoo
group QX3 - QX3 owners discuss the microscope and share
images and tips.
6)
'
Small beginnings - introducing digital microscopes in physical
science' - a 24 page illustrated downloadable booklet
in pdf format with practical advice on the uses and
limitations of digital microscopes in a classroom environment,
includes discussions on the QX3. Produced by 'The Science
Enhancement Programme' (SEP).
7)
'
Using the QX3 microscope' - web page on the '3D
Photography' website describing how to take 3D images with
examples.
© Microscopy UK or their contributors.
Published in the December 2004 edition of
Micscape.
Please report any Web problems or offer general comments to
the
Micscape
Editor
.
Micscape is the on-line monthly magazine of the Microscopy
UK web site
at
Microscopy-UK
© Onview.net Ltd, Microscopy-UK, and all contributors 1995
onwards. All rights reserved.
Main site is at
www.microscopy-uk.org.uk
with full mirror
at
www.microscopy-uk.net
.