|
|
| Off axis COL illumination
A distinctive form of Oblique Illumination By Paul James (UK) |
Editor's
note: COL is circular oblique lighting. For further articles on COL by Paul James and
other authors,
see the 'Oblique / COL' section in the Micscape
Library - Lighting Techniques.
It must be said at the outset that there are as many subtle configurations of oblique illumination as there are varieties of objective, condenser, specimen etc. and microscopist. The microscopist's own ideas about what seems to be acceptable in this setup is just as pivotal here for we all have our personal preferences regarding suitable representations of oblique illumination.
Off axis COL illumination (0bCOL) is subtly different from the general run of the mill oblique illumination techniques , because the short arc of annulus that elicits these effects continues to raise high contrast reversal effects and more importantly enables the specimen to appear in higher relief than otherwise would be the case with standard oblique illumination. But before I carry on here I must strongly emphasise that I have found, as with COL illumination itself, the success of the venture depends not only upon the skills of the observer, but as importantly the type of specimen used. In a nutshell few specimen types are shown to advantage. If you are interested in small soil amoebae then you are fortunate! The smaller ciliates are reasonably rendered, and other forms such as living diatoms somewhat less so. Optimists like me should not be discouraged from experimenting further for there is a very large variety of specimen types, some of which must be suitable candidates under ObCOL lighting ?
Eliciting the effects of COL requires, amongst several other things, collimation of all optic elements in the microscope, yet despite this necessary constraint, there is merit in experimenting with the lateral displacement of the annulus itself. This article shows a number of images of this effect on my setup, and for those who are interested and have successfully generated COL's imagery, I must add that patience is required when trying to create images similar to those shown below. The essential difference between Oblique and ObCOL is that the latter seems more capable of rendering imagery of some specimens which reflect more faithful impressions of their physical shape.
Methodology
So far as I can tell, the most pleasing effects of ObCOL are confined in my situation to the x20 objective, though the effects are basically reproducible with other objectives, they are not worthy of reproducing here. The very subtle 'lifelike' impressions of imagery seem to require a very narrow set of conditions which seem to relate to the objective aperture/condenser type/height/specimen suitability combination!
Fundamentally all that is required is that the annulus be moved laterally away from the optical axis by an amount which can be governed by observation of the image. There are a number of factors which will directly affect the success of this maneouvre, such as annulus diameter, numerical aperture of the objective and that of the condenser plus the latter's proximity to the specimen.
The lateral displacement of the annulus is only a few millimetres, but it is important that the motion is smooth and positive, and in my setup I simply rotate the Zernicke disc that houses the annuli until the effect is optimised. I must emphasise that the effect is not generated by crude adjustment of the substage components mentioned above. The beauty of this is that the range of adjustment to increase one or other of these components is infinite, and therefore can be tweaked to suit the specimen under observation. It never fails to amaze me, despite careful mental records, that the precise positioning of the annulus and condenser's altitude is a very critical one, and that it even varies for different samples of the same species. So there are no definitive positions for the substage components BUT the annulus should be greater than the aperture of the objective in use. So ideally those that generate darkfield field in the objective chosen are candidates for experimentation. I strongly advise using the x20 objective as a starting point .
Thus with my dry 0.9 na Abbe condenser and annulus of 0.5-6 na when off set with a Wild Plan x 20 fluotar generates the effects.
|
|
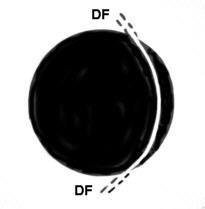
Here's what the view through a phase telescope looks like when the conditions are about right. Note the annulus's light will also contain DF on each side, shown with dotted lines. The advancement of this arc of light across the objective from right to left can be seen in the imagery which changes dramatically. The images below show examples of ObCOL with a setting similar to that shown above, with slight alteration of condenser focus. The latter's position is occasionally revealed by greenish to bluish light on one side of the field.
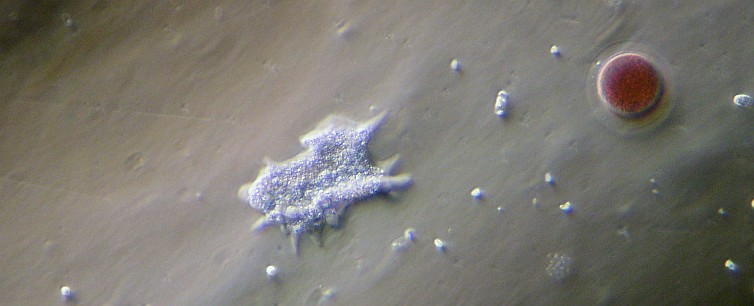
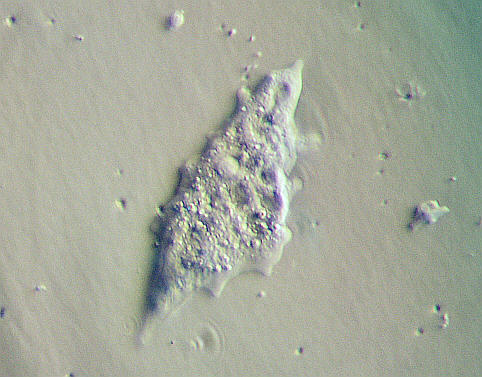
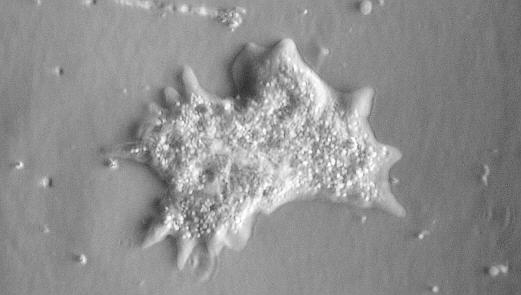
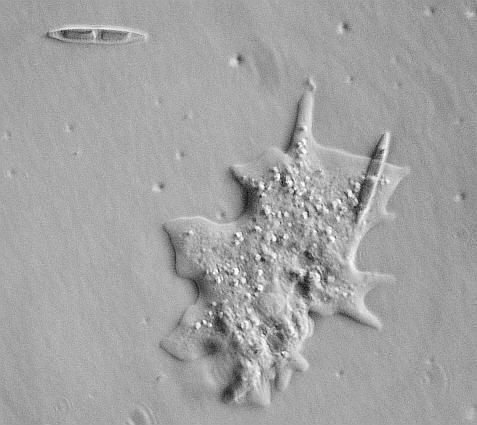
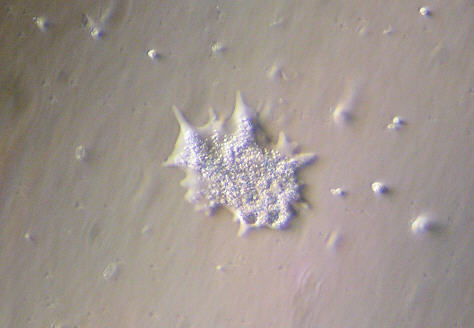
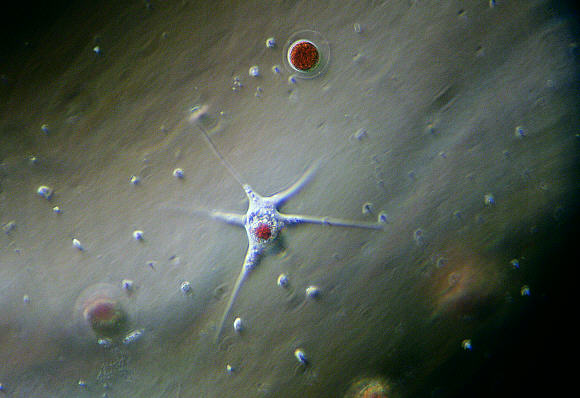
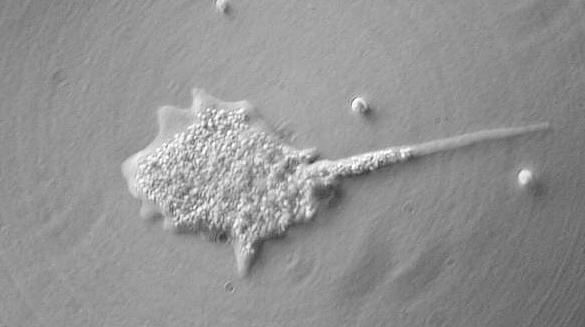
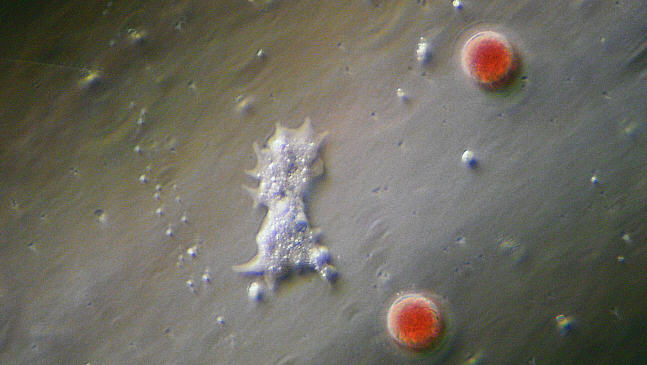
Have a peep at these images which have all been taken using the x20 objective with varying degrees of annulus displacement. The background colour casts are different because the camera's 'white balance' setting varied also. The subjects are the various varieties of soil amoeba ( plus occasional red Haemoccus cysts, diatoms and bacteria ). As usual the visual imagery was superior to these images. Blurring of parts of some amoebae are the result of relatively longish camera exposure times.
|
|
|
|
|
|
|
|
|
|
|
|
|
|
|
|
|
|
|
|
Principle points
1) When first trying to implement this technique look for the initial central band of light when shifting the annulus. When ideally set the image should show darkfield effects each side as depicted in the above image.
2) The angle of the band of ObCOL light will of course vary according to the angle of the arc in the back lens of the objective.
3) Different specimens will almost certainly need more adjustments of annulus and condenser focus.
4) Though the annulus needs to be sufficiently wide to elicit DF when centrally located, I have found the best effects come from an annulus with an effective aperture about 0.15 na more than the objective in use. Wider apertured annuli are useful but do not seem to provide the subtle effects so easily. But this may not be the case with your own equipment.
5) Protoplasmic subjects seem to work extremely well but not so rigid structures.
Final thoughts
There is no doubt in my mind that such techniques are of great value in live observations, and would be more faithfully reproduced in photographic images with low noise large CMOS or CCD sensored cameras. The light values are on the low side which the eye is perfectly capable of utilising, but perhaps those who have mastered the flash technique in photomicrography can take further advantage of this phenomenon which yields remarkably 'life' like images of suitable specimens.
The fact that this is 'hinterland' illumination should not put observers off attempting to create its effects. My photographic efforts do not do justice to this technique .......... fortunately though, the real joy is in the observing !
| All comments welcome by the author Paul James |
Microscopy
UK Front Page
Micscape
Magazine
Article
Library
Please report any Web problems or offer general comments to the Micscape Editor.
Micscape is the on-line monthly magazine of the Microscopy
UK web
site at Microscopy-UK