How I upgraded my travel microscope
by Bill Resch, USA
It seems as far as microscopes are concerned, I have two hobbies: Using them and tinkering with them. This is about the tinker-part of it.
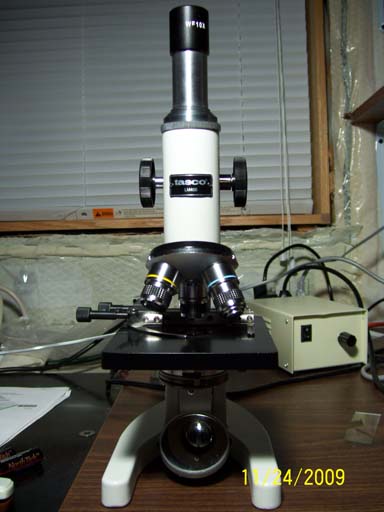
Camping is one of my favorite summer past times. I always like to have a microscope with me, in case I see something interesting to explore. To this, my fancier microscopes are not suitable. Too heavy and expensive. I tried one of those cheap plastic ones from Meade, but this one broke after the first trip. Then I saw a Tasco LM400 for $20.- on eBay. I put a bid on it and got it for that price and no shipping charges. I think, the brand name "Tasco" scared serious bidders off. Tasco is known for toy microscopes, but I happen to know that they also used to make full size microscopes. When I received it, I was amazed because it was brand new. Not even finger prints on it.
It is a simple straight horseshoe type microscope, with no fine adjustment. It also had a condenser built into the stage. Below the stage was a wheel with different size apertures, acting as a cheap diaphragm. I calculated the condenser's N.A. to be less than 0.4. This became evident when using the 40X objective. I got very high contrast low resolution images. The illumination cone was just too narrow. It performed very well up to that, mechanically and optically. For me there is something romantic about this classic frame. Optically these straight tube microscopes have the advantage that no prisms or mirrors can affect the image quality. There is only the objective and the eye piece.
For kicking it around in the car and camp grounds this $20 microscope was perfect, but it bothered me that I could not use it to its full potential. First, I added a better eye piece and a mechanical stage. (I paid more for the eye piece than for the microscope).
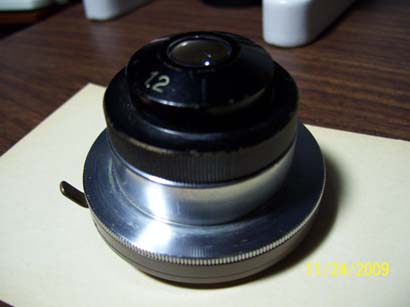
But the biggest challenge was, doing something about the condenser: I went on eBay and entered a bid for a used 1.2 N.A. condenser. I won it for $10 plus shipping.
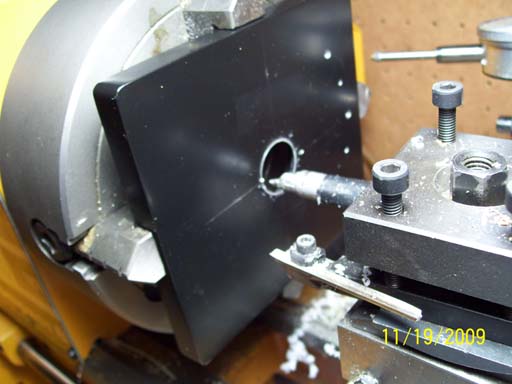
Now I had to figure away how to attach it. I decided to make an aluminum ring, attach it to the table and slide the condenser into it. First I had to mark the optic center on the table.
I made a cross on a small piece of paper and by looking through the microscope centered it exactly. I then taped it to the stage, removed the stage from the microscope and scribed the center lines into the table.
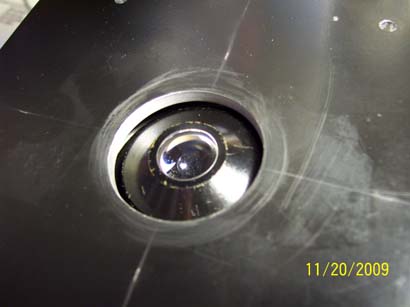
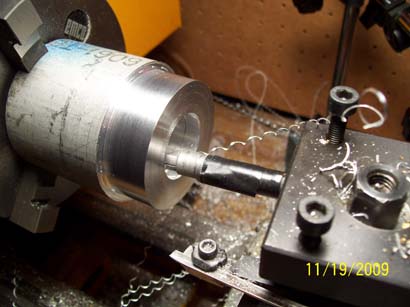
To accommodate the new condenser, I had to make the center hole larger. A small lathe with an independent four jaw chuck makes this possible.
Then the ring. Except for the inside diameter, I did a lot of intelligent guessing. The microscope had 3 evenly spaced threaded, 3mm holes, centered around the optical axis ( so I assumed). With a little trigonometry, I was able to put the hole location on to the ring. I made the ring thick enough to allow for the condenser to come even with the top of the stage and also allowed me to lower it as much as possible. The thickness came to .5 inch.
The finished ring mounted to the underside of the table. I milled some space out for the screws so that the condenser could come up flush to the ring. I used one set screw to hold the condenser in the ring.
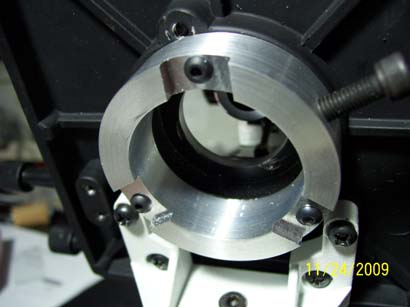
The condenser installed into the ring. I couldn't wait to see how it worked. Now I could get the full .65N.A. needed for the dry high power objective in this microscope. I also had an iris diaphragm.
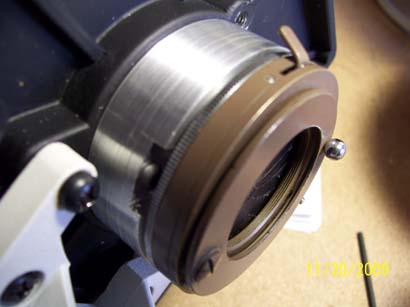
This is the test setup. I used a beehive fluorescent bulb with a piece of ground glass in front, to simulate the most primitive condition.
The condenser almost all the way up. I used the Tasco 40X objective and a 20X eye piece to reduce aliasing which I sometimes see when taking digital images of diatoms. I used a Turtox slide labeled: Pleurosigma Angulatum. For some reason this slide gives me more contrast than my test slide.
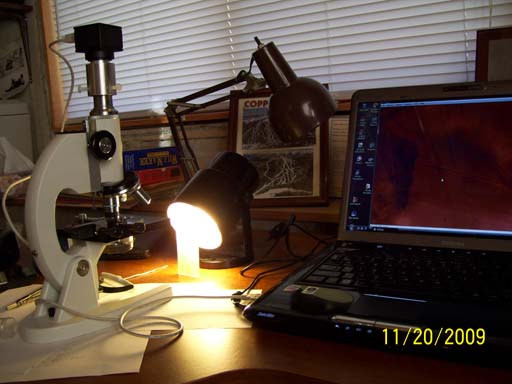
The camera used is a
1.3 mega pixel unnamed device I reviewed a while ago on Micscape. It
was a little tricky, but not impossible, to focus without having a
fine focus knob. Using a 20X eye piece with a medium grade objective,
makes the image less crisp, but it also has its advantages when
taking pictures.
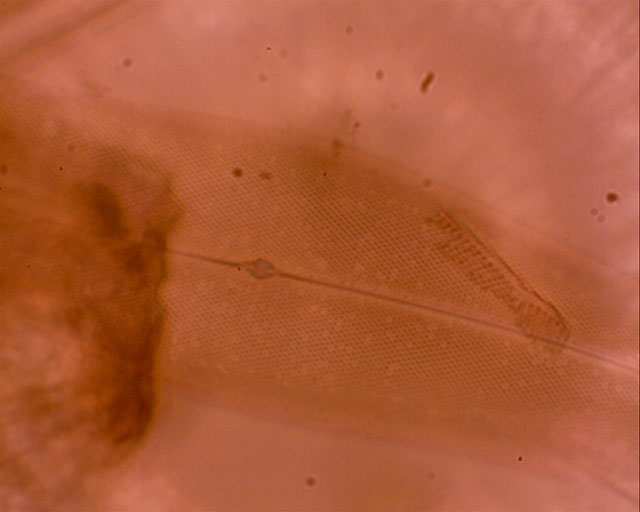
I did not make any Photoshop changes to this image, except to reduce its size. I am very happy with this result.
I probably could have gotten a brand new microscope with all these features for a few dollars more. But then, where is the fun in this?
Comments to the author Bill Resch are welcomed.
Published in the December 2009 edition of Micscape.
Please report any Web problems or offer general comments to the Micscape Editor .
Micscape is the on-line monthly magazine of the Microscopy UK web site at Microscopy-UK
©
Onview.net Ltd, Microscopy-UK, and all contributors 1995
onwards. All rights reserved.
Main site is at
www.microscopy-uk.org.uk
with full mirror
at
www.microscopy-uk.net
.