INTRODUCTION.
Last month an article was published on the investigation of an old slide from 1871, in order to find out as much as possible about both the material and the construction of the cell. This month the article goes on to follow the reconstruction of such a cell using materials that are available to us today. The development not only revealed a certain aesthetic potential but it seemed to be very inexpensive since it mainly uses everyday materials excluding only the cover-slips of course.
THE CAVITY.
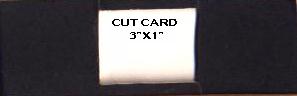
The first question was how to cut out the rectangular hole
from picture-mounting board. Mounting board (from an art
shop) 1.5mm thick was cut down to a 3" x 1" strip
with a scalpel, and a second similar board was cut for the
basal portion. A modern glass slide was used as a template.
 The rectangular cavity was marked
centrally 15mm wide and 25mm long on one of the pieces. Again
a scalpel was the best tool for cutting. This configuration,
before the glass was applied, lacked rigidity and could
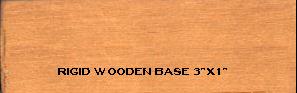
easily be bent. The substitution of a piece of 3" x
1" wood 1.5 mm thick for the lower piece improved this
aspect. This very thin hardwood can be purchased in one of
the growing number of dolls-house retailers. This improvement
then allowed me to use not the heavy 3" x 1"
slide-glass, but a large rectangular cover-slip.
The rectangular cavity was marked
centrally 15mm wide and 25mm long on one of the pieces. Again
a scalpel was the best tool for cutting. This configuration,
before the glass was applied, lacked rigidity and could
easily be bent. The substitution of a piece of 3" x
1" wood 1.5 mm thick for the lower piece improved this
aspect. This very thin hardwood can be purchased in one of
the growing number of dolls-house retailers. This improvement
then allowed me to use not the heavy 3" x 1"
slide-glass, but a large rectangular cover-slip.
 At this
point we may note that the Hailes slide had a total weight of
15 grams and indicates that the mounter must have used pretty
thick heavy glass in the structure. The completed slide was
4.5mm thick, whereas my prototype weighed only 2.0 grams and
was marginally over 3mm thick.
At this
point we may note that the Hailes slide had a total weight of
15 grams and indicates that the mounter must have used pretty
thick heavy glass in the structure. The completed slide was
4.5mm thick, whereas my prototype weighed only 2.0 grams and
was marginally over 3mm thick.
THE COVER-SLIP.
 During
the dissection of another broken Victorian slide, I had
discovered that large rectangular cover-slips could be simply
fixed to cells, not by gumming under the edges, but by fixing
the slip first to the paper, which had been rendered with
adhesive. The 3M spray-on Photo-mount contact adhesive did
the trick very neatly indeed.
During
the dissection of another broken Victorian slide, I had
discovered that large rectangular cover-slips could be simply
fixed to cells, not by gumming under the edges, but by fixing
the slip first to the paper, which had been rendered with
adhesive. The 3M spray-on Photo-mount contact adhesive did
the trick very neatly indeed.
THE MOUNTING SURFACE.
The area where the objects are to be dry-mounted can be
treated with matt paint or a photographically produced matrix
could be gummed onto the top of the lower slide. In practice
elaborate grids can actually be sandwiched between the two
component 3" x 1" parts and held initially with 3M
spray adhesive on surfaces which would be covered at a later
stage.
THE GUM.
As with ordinary dry-mounts, gum tragacanth may be mixed with
a suitable amount of distilled water.
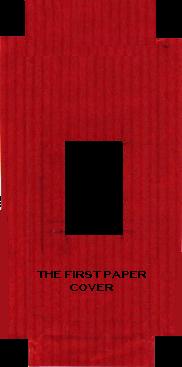
THE PAPER COVER.
Many of our modern parcel papers have garish patterns or are
often fluorescent in appearance. The impressions they gave,
were not at all compatible with the Victorian decor required!
In an old art shop I discovered some bright red paper which
has linear striations which helped with marking out and
lining up. The maximum size required is 95 mm x 45 mm and
again a 3" x 1" glass slide is an ideal template
for marking out. The window in the paper, over which the
cover-slip is secured, can be cut out using the scalpel on a
hard board. A plastic ruler can ensure a straight line. The
3M spray was again useful before gumming together, and then
the labels can be added later. It's a good idea to secure a
3" x 1" self adhesive label on the reverse of the
slide of the completed work with all relevant information,
because this ties in the paper and secures what could become
loose ends.
OTHER CONSIDERATIONS.
 In
order to shortcut the construction stage I discovered that
3mm thick 1" wide hardwood could also be purchased at
the Dolls-house shop and after marking out, the cavity could
be cut with a small router machine to be later smoothed with
sandpaper. The optimal depth is 1mm plus the thickness of any
artwork inserted. This was an ideal solution and gave a much
neater compact finish.
In
order to shortcut the construction stage I discovered that
3mm thick 1" wide hardwood could also be purchased at
the Dolls-house shop and after marking out, the cavity could
be cut with a small router machine to be later smoothed with
sandpaper. The optimal depth is 1mm plus the thickness of any
artwork inserted. This was an ideal solution and gave a much
neater compact finish.
The Hailes slide had only survived so well because it had
been stored in ideal conditions but a certain amount of
greying would be expected in a normal dusty environment after
a few decades.
The cell slide is only suitable for dry mounting. It is
rather too thick to fit into slot-in slide boxes but is very
suitable for the cabinet or the Victorian pine boxes.
Plastic at first seemed to be a possible alternative but
again rigidity became a problem until the thickness neared
3mm. Any flexibility or bending can cause the objects to be
thrown from the surface on which they are mounted.
CONCLUSION.
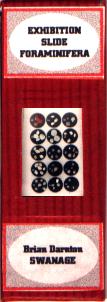
The reconstruction of the Victorian dry-mount can be a
rewarding and inexpensive experience for the enthusiast with
a good supply of suitable material like Foraminifera,
Radiolaria, fabrics, feathers and suchlike things. In early
microscopy dry mounting was for some workers the main method
of mounting. The potentially greater suface area available
for mounting has advantages over the constraints of the
standard 19mm aluminium ring. The ornamental aspects of
Victoriana can be thoroughly indulged in this form of
invesigational development.
Comments to the author Brian Darnton welcomed.
Visit Brian Darnton's home pages.
Microscopy UK Front Page
Micscape Magazine
Article Library
© Microscopy UK or their contributors.
Published in the February 2000 edition of Micscape Magazine.
Please report any Web problems or offer general comments to the Micscape Editor, via the contact on current Micscape Index.
Micscape is
the on-line monthly magazine of the Microscopy UK web
site at Microscopy-UK