|
by Colin Duke, UK |
Care and cleaning of a microscope lens is something that is poorly dealt with in books and manufacturers' brochures. This article gives insight into some of the issues with a view to best practice.
There is no substitute for good microscope care. A unit that is stored and covered, with lens protected in constant temperature-humidity environment which is dust free (in the laboratory away from acid wash areas) speaks for itself. During cleaning, oculars in particular microscope tubes should be covered to prevent entry of dust. A lens should be inspected with a view to cleaning if there is a lack of contrast, cloudiness or poor definition
Whist extolling the virtue of cleaning, it should be emphasized that this can equally cause as much damage if done incorrectly. There are three ways that lenses are commonly damaged during cleaning.
(1) Grinding microscopic grit into the soft glass and causing scratches.
(2) Using caustic agents that remove the anti-reflection coatings.
(3 ) Applying too much solvent to the glass surface so that the solvent flows around the edge of the lens and attacks the cement between the various components causing "delamination".
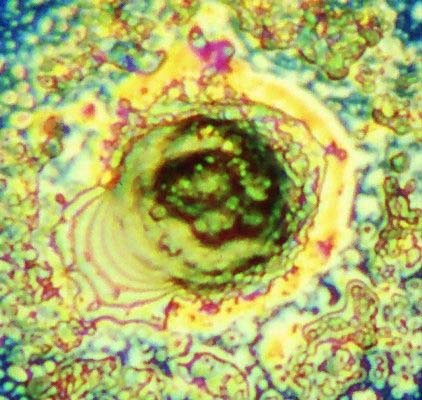
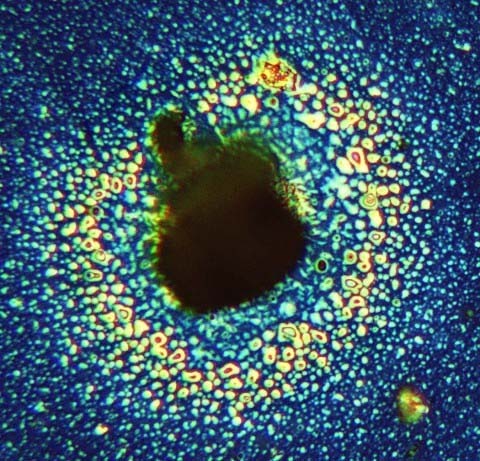
Fig 1: Illustrates close inspection of the top lens of an anti-reflection coated eyepiece which has been removed and placed under a microscope set up for vertical illumination brightfield, showing dust and particulate oils on its surface, x160.
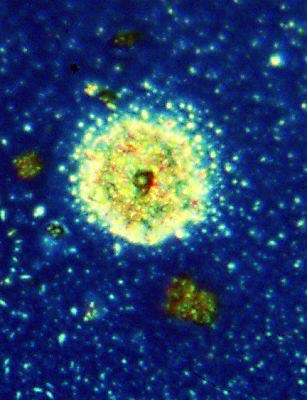
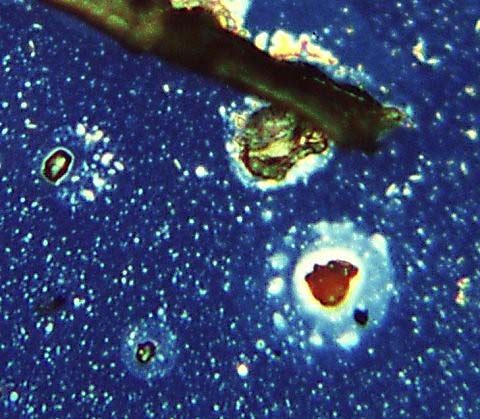
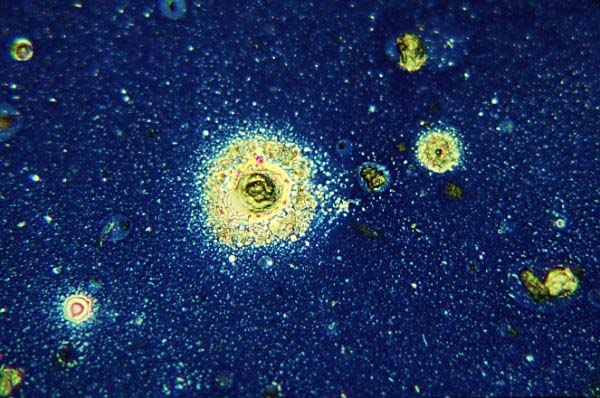
Figs 2-5: Subsequent figures in the same field show dirt and oil components of this surface at higher magnifications, x600. Images in some cases are a mix of real objects and optical artefacts such as interference fringes, commonly known as Newton's rings. Interference fringes form contour patterns similar to a map; here the lines represent the depth of oil film which has flowed out of the central particle and formed a meniscus around each of the numerous smaller surrounding particles. Clear zones formed around other particles are a result of surface tension effects too mysterious to explain.
|
Fig. 2 |
Fig. 3 |
|
Fig. 4 |
Fig. 5 |
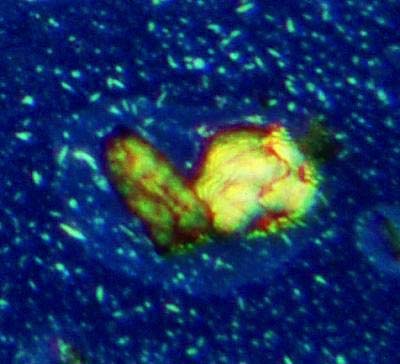
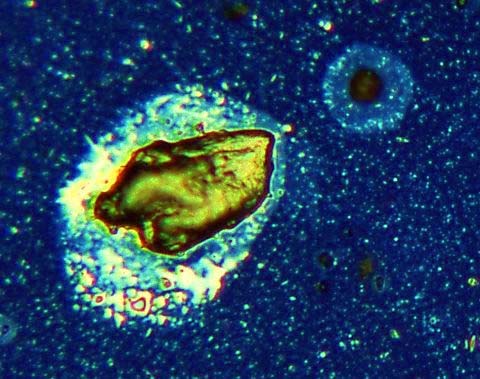
Figs 6-10. Show dirt specks on the coated lens surface and the spreading of oil to surrounding particles.
|
Fig. 6 |
Fig. 7 |
|
Fig. 8 |
Fig. 9 |

Fig. 10
Materials - Dusters Lens Tissue & Papers
Mindful of points 1-3, a systematic approach to cleaning should be adopted. Dust is the most common contaminant. Begin by blowing off any dust with a dry Air Duster. Caution should used to ensure that the product chosen will not disperse aerosol propellants or fluids on to lens surface, (can occur when tilted or prolonged). Specialist high grade air dusters are available for use with optical equipment with key features being specialist nozzles and filters. Many prefer the use of a bellows ball or vacuum suction
Kim Wipes are lint free tissues that have been used and are of value in the general cleaning of stages and stands: they should not be used to clean lenses as these can leave particulate material behind. Ideally purpose made lens tissue can be purchased. Eg: Kodak or Whatman but are generally less absorbent than Kim Wipes; limiting solvent contact time is important. Kodak manufactures lens-cleaning paper and stipulate they are lintless, safe to use on coated lens and specially prepared for cleaning lens, filters and other glass surfaces. SPI & Ross also manufacture tissue for critical surfaces. Hard lens papers should avoided as they do not readily absorb water or oil quick enough.
Cotton, which is a natural product, can retain small silica particles from soil, (for that reason synthetic Q-tips are suggested). Little scientific scrutiny has been applied to fibre deposition from such products, however: crude evaluation can be made by rubbing a slide for each new batch of material as part of a quality control regime.
The use of suitable light gloves when handling microscopes to discourage body oils and grease is generally good practice: however latex gloves coated with talc or powder are not suitable. Specifically designed lint-free / powder free gloves can be purchased made from a variety of materials (polyethylene to nylon). Gloves eliminate fingerprints. Finger Cots can purchased (or made) which cover finger tips only.
Methods & Techniques
There are many variations on technique depending on circumstance. No one method can be prescriptive; often a combination of approaches may achieve best results. Three basic principles underlie cleaning. 1. Remove particulates and grit, 2. Dissolve grime in minimal solvent 3. Remove by absorbing and or moving residue away by progressive changes of tissue.
Avoid cleaning lens with abrasive or lint cloths. Never dry wipe a lens as this may cause scratching. Begin by blowing off dust or loose material with pressurized optical duster (sometimes called canned air or Air Duster (filtered dry nitrogen) or bellows ball. Flooding or placing solvents directly on the lens is discouraged. Spraying directly onto a lens is highly questionable. Dust areas of the condenser lens prior to objectives in view of minute glass fragments that may present from broken or chipped slides. This article is directed at front lens elements only.
Careful fogging of the lens with breath can assist in removing water-soluble residue although caution should be exhibited in regard to excluding saliva. Keep lens upright allowing tissue to touch base surface so solvent does not run into cements or other substances holding the lens in place.
(i) Remove the objective and place it on a flat surface with front lens uppermost. Fold a piece of lens tissue four or five times to give a narrow triangular shape with a finely pointed end. Moisten the pointed end of the lens tissue with a small amount of cleaner, keeping fingers away from the solvent to avoid contamination by oils. Do not use excessive solvent such that the tissue is saturated. Place the tissue against the objective front lens, so wiping and rotating the lens in one corkscrew motion from the centre of the lens to the outside edge to avoid going back and forth over the same area. In this way the lens can be cleaned up to the edge of the cell. Further pressure will cause the tissue to spread sufficiently to clean the whole surface. Remove any obstinate marks by repeating the process. A new and clean piece of tissue should be used each time.
(ii) Roll up some good quality lens tissue, tearing across the roll to leave a brush like end. This can be dampened with solvent, and then gently applied to soften deposits. A
lens should be cleaned in the following manner, never wipe the lens using a circular motion (does not move grit or dirt away from area of contact); instead, tear a small piece of lens paper and sweep once only across the lens. Use a different piece of lens paper for each subsequent sweep, if necessary. Monitor the cleaning process using a hand lens or stereomicroscope using light reflection as a progress indicator.
(iii) Other variations used sometimes following the latter, include a Q-tip. The Cotton Bud is discouraged and should be replaced with synthetic Q-tips on a wooden swab. The abrasive nature of cotton has led some favour the use of swabs with urethane foam heads. If this method is used a small amount of xylene is placed on one end of the bud which is gently worked in a spiral fashion and allowed to evaporate, the procedure is repeated with the opposite clean end. Slowly turning the lens and applying gentle pressure in the centre and working outward, this pulls dirt off the lens instead of redistributing on the surface. It is important not to use plastic Q-tips. Tipped applicators have advantages over lens paper. They work better on small, concave, or recessed lenses, they are not touched by fingers, and so do not transfer skin oils. They prevent contact between skin and any toxic solvents (xylene) used. Practice techniques using an old lens; time and patience are key attributes.
Cleaning Oil Immersion (O.I) Lens
Oil immersion lens are generally wiped clean after use initially removing oil from the outer edges but if a lens does need cleaning due to it being left it may necessitate use of a solvent. Some have questioned the validity of cleaning OI lenses. It would seem apparent that leaving a lens dirty will attract particulate matter, and impair image quality if it becomes dried to lens surface. It may also promote scratching due to pick up of particulates. Oil in this context may act in a similar manner to alcohol if by capillary action or gravity it travels into cements it may delaminate them. This article therefore recommends cleaning them. For the Cargille Type A or B immersion oil, you can use naphtha, xylene, or turpentine (use very small amounts on lens tissue). Do not use water, alcohol or acetone, as the oil is insoluble to these solvents. Consult the MSDS (Material Safety Data Sheets) information that is supplied with the immersion oil to see what solvents are recommended. If it is not cleaned well, the residual oil will crystallize on the lens. Companies tend to advocate the use of one brand oil to meet lens criteria, inadvertent mixing can promote crystals and therefore cleaning issues.
Table 1: Cargille Oils
|
OIL TYPE |
SOLUBLE |
INSOLUBLE |
|
TYPE A; B; 30 TYPE 37; NVH; OVH
|
CARBON TETRACHLORIDE; ETHYL ETHER; FREON FF HEPTANE; METHYLENE CHLORIDE; NAPTHA; TOLUENE; TURPENTINE; XYLENE
|
ACETONE; ETHANOL; WATER |
|
TYPE DF |
ACETONE;CARBON TETRACHLORIDE; ETHANOL; ETHYL ETHER; FREON TF; HEPTANE; METHYLENE CHLORIDE; NAPTHA; TOLUENE; TURPENTINE; XYLENE
|
WATER |
|
TYPE FF |
; CARBON TETRACHLORIDE; ETHYL ETHER; FREON FF HEPTANE; METHYLENE CHLORIDE; NAPTHA; TOLUENE; TURPENTINE; XYLENE
|
(PARTLY SOLUBLE ACETONE) ETHANOL WATER |
NOTE : Type A; B Most widely used .
High-grade synthetic immersion oils should be resistant to oxidation containing no volatile materials, and therefore should in theory not form gummy deposits, Natural oils, such as red cedar oil, may contain volatile components, and are likely to be subject to oxidative degradation, and therefore often leave gummy residues if not thoroughly removed from the lens.
Cleaning Older Lens
Caution is required when dealing with older microscopes if too much solvent is applied then this may affect the integrity of the mountant e.g. cement or balsam in particular. With modern microscopes this is less of a problem due to the use of polyacrylamates and other more resistant substances. Old lenses mounted with balsam will dissolve in most aromatic solvents and should be avoided. In view of this, minimal application with a high vapour solvent on a synthetic bud is often the solution. In very rare cases some antique collectible microscopes had lens coatings which where actually water-soluble. Consequences of lens becoming delaminated include their subsequent misalignment rendering them obsolete.
Fungus & Mould
Usually a problem in climates with high humidity. Fungus and mould can cause physical etching of glass due to acid and enzymes produced. Proprietary anti-fungals can be used to coat lens but this is a specialist area done best with consultation of manufacturer and professional. An on-line review of this topic can be found.
Anti-Reflection Coatings
Detailed discussion is beyond the scope of this article but suffice is an awareness that caustic substances may damage such layers. Anti-reflection coating technology helps to reduce unwanted reflections (flare and ghosts) that occur when light passes through a lens system, ensuring high-contrast images. Typical coatings contain magnesium fluoride. With this in mind the choice of commercially available lens cleaner should be based on proven recommendation and fitness for purpose. Some have indicated the acid version of Windex to be corrosive to lanthanide oxide coatings on the glass and to metal coatings, and to metal parts with an ammonia version preferred.
Solvents & Commercial Cleaners
It must be emphasised that when cleaning the objectives the manufacturer's recommended guidelines must be followed, this is particularly important in regard to solvent contact.
Generally high vapour solvents are used in order to limit contact time with surfaces and cements.
Distilled water has been recommended for removal of dirt, this may not be wholly effective for a lens that has oily or greasy particulates or smears. Such airborne oils can find their way onto a lens surface from the atmosphere or skin. See Figs 1- 4. Xylene is a popular solvent for cleaning of objectives and has been much preferred particularly for more stubborn stains. Considered caution is advised due to carcinogenic properties. Xylene almost always leaves a small residue where the last of it evaporates. When this is the only defect remaining, use a dry swab. An alcohol such as ethyl, methyl, or isopropyl may be used. Ethanol is also advocated by many. Isopropyl is also a favourite increasingly in commercial formula. Acetone on objectives has been discouraged on some brands. (Mostly American Optical) have a painted "mask" around the lens, and acetone can dissolve the mask and deposit the paint onto the lens. Benzene is strongly suspected of causing liver damage and leukaemia; do not use it. Xylene and toluene are also toxic, and should be handled carefully in a ventilated area. Solvents may leave small amounts of residue which can be wiped off. Glass distilled reagent grade solvents are preferable.
Some of the larger corporates produce their own fluids Leica, Zeiss (ammonia-free formula). Especially designed for anti-reflective, multi-layer coatings. Kodak produces a lens cleaning solution. Fisherbrand Optical Lens Cleaner is used for removing oil from objectives or any optical surface with claims that the cleaner will not affect a coated optic or soften the mounting that holds the objective in place. This optical lens cleaner is laboratory safe and non-flammable. ROR is another widely used commercial cleaner as is Windex and Sparkle.
Manufacturers Guidelines
If in doubt contact the manufacturer or follow the recommended procedure in manuals mindful of information relating to lens coating and hardness etc.
Acknowledgements
The author acknowledges Microgaphia for the use of micrographs featured in this article http://www.micrographia.com/
Disclaimer:
No responsibility can be accepted for loss or damage resulting from the use of materials or techniques discussed. If in doubt the manufacturer should be contacted in the first instance regarding specific questions or the service of a professional service technician sought. This article is protected under copyright.
Copyright © 2003 Colin Duke BSc (Hons).
All comments to the author Colin Duke are welcomed.
Please report any Web problems or offer general comments to the Micscape Editor.
Micscape is the on-line monthly magazine of the Microscopy
UK web
site at Microscopy-UK