Sponges are found in marine environments throughout the world, and there are also a few species that survive in fresh water as well.
Biology textbooks frequently refer to them as "primitive'' or as "simple''. In many ways those two words make a very poor characterisation of these organisms! Sponges are generally placed in the Phylum Porifera.
Most sponges have skeletons made of a protein material called spongin and spicules made of calcium carbonate or silica.
Traditionally the living species of sponges have been divided into three Classes:
Some taxonomists list a fourth class, Sclerospongiae. These have massive skeletons of calcium carbonate. They are often called reef sponges.
Another class of sponges, Archaeocyatha, lived in the Cambrian period and is extinct.

Sponges contain internal channels that contain a type of cell called choanocytes that have flagella that cause water to flow through the channels to bring in food and oxygen and to take out carbon dioxide other waste products. Large quantities of water are pumped through a typical sponge each day. Sea water contains about 65 milligrammes of silicon per litre. Demosponges and hexactinallida Sponges are able to extract the silicate from the water and precipitate it as the silica.
The spicules serve most sponges primarily as skeleton support. However, they may provide at least a bit of defence against predation, particularly for species that contain massive amounts of silica. A fish or other organism eating such sponges essentially would be eating glass!
Sponges are sessile, so they do need many forms of defence to avoid becoming lunch. Many make complex toxic compounds that seem to be their primary line of defence.
The massive amounts of hard spicules in most sponges makes preparation of sections of them a bit difficult. It is best to use only disposable microtome blades or to adapt single edged razor blades to microtomes when this is done, because the spicules can inflict severe wear on standard microtome blades.
The spicules of sponges, however, are fascinating. Traditionally large spicules have been called megascleres and the small ones microscleres. Siliceous sponges almost always have both, and often several types of both.
There are two methods in common use to prepare spicules for microscope examination. One is best suited for recently collected specimens and the other for preserved specimens.
Both methods require some care to avoid injury. Do not omit the washing steps described below or there is serious risk of expensive damage to microscope equipment.
This is the best method for recently collected, unpreserved specimens. Preserved specimens must first be soaked in at least two changes of distilled water to remove the organic preservative, usually ethanol or formalin. Unless this is done the preservative will destroy the sodium hypochlorite. (With ethanol preserved specimens it may also make toxic vapours of ethyl hypochlorite.)
The first method involves the use of sodium hypochlorite solutionstandard chlorine bleach. This is obtainable at grocery stores. It is best to use a "short and fat" test tube for this, though any small glass container can serve. Obtain a piece of sponge about 5 to 10 millimetres on a side and place it in the container. Add about five to ten volumes of hypochlorite bleach. Let stand until the organic part of the sponge has been completely destroyed. This occurs quite rapidly with most samples. Do not allow the sample to stand for long periods of time after the tissue has disintegrated. Allow the spicules to settleif a centrifuge be available it is best to centrifuge the sampleand then carefully draw off the liquid with a pipette. Replace the liquid with distilled water. Allow it to settle or centrifuge it again, and draw off the water. It is essential that the inorganic salts be removed because they may emit corrosive vapours, and they are likely to crystallise.
To make a temporary preparation, simply draw up the spicules with a wide tipped dropper and transfer them to a slide, and place a cover slip on top.
To make a permanent preparation, it is best to repeat this water wash cycle at least another time with water, and then repeat it still another time with alcohol. Draw off most of the alcohol and discard it, and then draw up the spicules in alcohol and place them in the centre of a slide. Allow the specimen to dry, and add a drop of mounting fluid and then a cover slip.
This method works best with preserved specimens. Instead of placing the tissue in sodium hypochlorite solution it is placed in ordinary concentrated nitric acid. This technique, obviously, cannot be used on sponges with calcium carbonate spicules!
SAFETY NOTE: NITRIC ACID AND ETHANOL WILL EXPLODE, AND SOMETIMES DETONATE, IF MIXED TOGETHER IN THE WRONG CONCENTRATIONS!!! IT IS BEST TO PERFORM THIS TECHNIQUE BEHIND A SAFETY SHIELD!!! Nitric acid is also highly corrosive and will cause severe chemical burns. It will also rapidly react with metal parts of instruments..
The "short and fat" test tubes are again the ideal glass ware. Place about 10 ml of nitric acid in one, and add the alcohol preserved sponge tissue to it, respecting the cautions mentioned above. The tissue volume should be between one half and one millilitre. Explosion probability is reduced by using larger volumes of nitric acid relative to the quantity of preserved tissue. Swab the tissue with absorbent paper before dropping it into the nitric acid to further reduce the risk of explosion. There will be immediate evolution of nitric oxide, and the tissue should disintegrate in only a few seconds. After this step the nitric acid solution should be carefully drawn off and discarded and replaced with water. Note that there is no problem with salts here, the wash is only to remove nitric acid. The spicules can be placed on slides in either of the methods described earlier.
This method is best performed only in a suitable equipped laboratory.
Sponge spicules are fascinating. Their shapes are often very complex and fascinating. Their types are the most important physical feature that can be used to identify sponges because the shape of living sponges is generally strongly influenced by environmental factors.
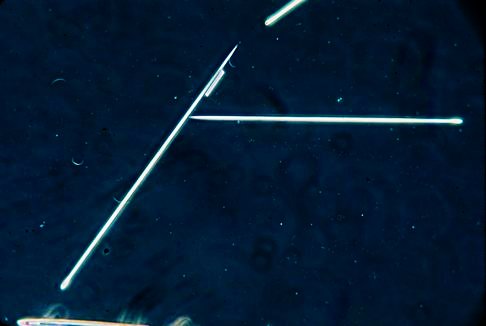
The image to the right of this text was taken in 1972 using a Wild M-20 microscope equipped with a Nikon F2S camera. The original slide was scanned to make this image. If the label on the original slide were correct, these show spicules from Haliclona rubens, a fairly common sponge in the West Indies. The megascleres are rather like hat pins in appearance, while the microscleres form tiny crescents.
Many years ago I routinely made spicule preparations for identification of sponges that we were testing for biological activity. I generally used the nitric acid technique because it is fast, and one does not have to deal with inorganic salts in the final preparation. We always used Wild Microscopes they were wonderful instruments then and they still are! I always performed the chemical reactions in a fume cupboard because of the evolution of nitric oxide. I also always used a safety shield, though I never had a preparation explode or detonate. I did this many many times. Only once did I ever make a preparation of an hexactinallida sponge, and unfortunately I do not have any images of this preparation.
Many sponges contain bromine compounds that seem to make them inedible for fish and to retard bacterial growth.
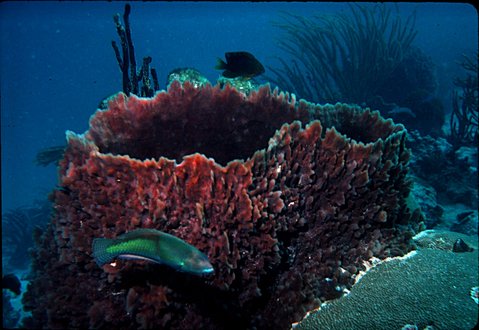
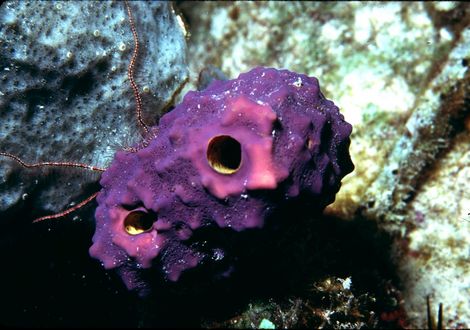
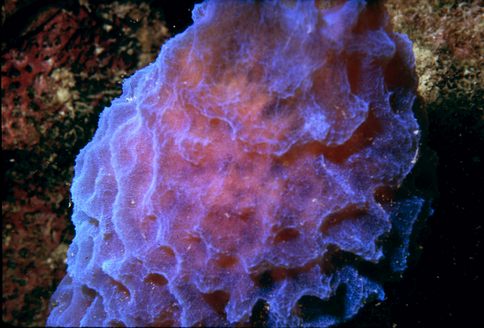
All of the images of sponges that appear throughout this article were obtained underwater using a Nikonos camera equipped with 1:1 or 1:3 extension tubes except for the first one which was obtained without the extension tubes.
All of the images were obtained in the waters around Tortola, Saint Thomas, and Saint John in the Virgin Islands.
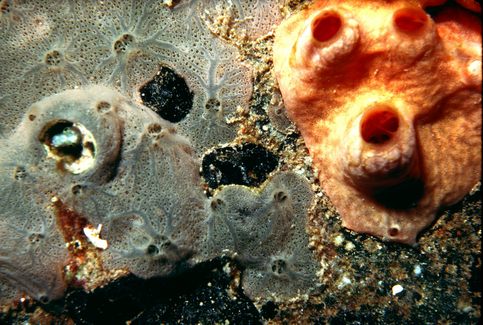
The image to the lower left is interesting. Two different sponges of the same species have grown into one another. Note that they do not fuse into a single sponge! It demonstrates that tissue transplantation has problems even in sponges!

All comments to the author Robert Pavlis are welcomed.
Microscopy UK Front Page
Micscape Magazine
Article Library
Please report any Web problems or offer general comments to the Micscape Editor .
Micscape is the on-line monthly magazine of the Microscopy UK website at Microscopy-UK