
The Learning Curve. (My approach to phase contrast .)
by Michael Stubbs-Race, Australia
A year or so ago I bought several slides, one of which was a mount of plankton. It had many odd things on it, but most were feint or almost transparent with little detail. A bit of reading suggested these objects might be better revealed by means of a phase contrast microscope, an instrument which I didn’t posses at that time, and knew little or nothing about.
A review of makers catalogues made it clear, that a phase contrast kit would cost about as much again as the microscope it‘self, possibly a lot more when international postage is added. Enquires were pressed home to various suppliers, all of whom promised to furnish me with a suitable kit for my particular microscope, but there they fell silent; probably because it got too hard. Like many retailers today, they are eager to sell the basic instrument, but it’s always some other company that is supposed to handle parts and accessories. China has a lot of good web pages displaying all manner of microscope accessories, but they don’t answer your email, because they couldn’t read it in the first place. I didn’t want to buy another microscope as the one I have has become something of a friend.
Plan “B”.
More reading through Micscape’s excellent papers soon brought a degree of understanding of phase contrast and what was needed. For example, phase objectives, and a condenser with matching phase annuli. Most if not all items may be acquired through eBay, given a bit of time and luck. So it was decided to follow this path, as after all, I was not really in any great hurry. Well I was, but my options were now somewhat limited.
The first item that came my way was a Hi-100 phase objective - actually no one else bid on it, so I got it for the starting price of five quid. It duly arrived in the post and was in good condition. What I had failed to notice, was that it was not of the usual length (DIN) of modern objectives. Damn! So the extension collar I had to buy, cost twice as much as the objective it‘self. Never mind, at least I had made a start.
An essential tool required for phase contrast alignment is a centering telescope or CT for short. These don’t appear too often, so I thought I should perhaps make sure I won the bidding, when such an item was offered. Luckily about a month following the Hi-100 purchase, an old Watson centering telescope appeared on eBay. Certainly it looked in very nice condition, and I had dealt with the seller on several previous occasions. So I placed a very high bid, to ensure that the CT would be secured; as indeed it was.
Postage from the UK usually takes eight days or so, and eventually my much sought after CT arrived safely in the post box. It was as the seller had described, about fifty years old but in very nice order. So hurriedly mounting the Hi-100 into the microscope turret, I placed the CT into one of the eyepieces and began to search for the image of the phase ring on the back element of the objective. Couldn’t see a thing. Funny. I could see light through all the individual components, but not much when they were placed in order. Had some idiot removed the lenses from the CT, and replaced them wrongly? No, they were definitely the right way round. Had I overlooked something? A quick re-read of things confirmed I was, or should be, on the right track. So I thought, “back to first principles“.
First step was to check the focal range of the centering telescope. It has a little focussing sleeve with which I was able to determine this range by looking at an object on the desk. That certainly worked as expected. So next with the aid of a cardboard tube, I set the CT to mid-range, and focused on the phase ring in the back of the Hi-100 objective with it propped up on the desk. Again, this worked perfectly. So why the H@## doesn’t it work in the microscope? There’s little else in there - or so I thought. Put everything back in the microscope, try again. No! . . . . . . . . It don’t work!!!
Following more fiddling it became clear that the light path through the prismatic binocular eyepieces, was quite a lot longer than the CT could bring to focus. So now what do I do?
Well of course, the binocular head can be removed from the stand for storage, leaving a dovetail socket with a hole straight down to the objective turret. A common design on the majority of compound microscopes today.
Another cardboard tube, secured with elastic bands and the CT now placed on top of the stand where the binocular head fitted. A quick fiddle, and low and behold the phase objective’s phase ring came into focus. After sorting through the junk box, I came up with a couple of pieces of tube which fitted both the microscope stand, and the CT, so together they made a neat extension with which I could align the condenser, phase ring, etc.
I have to presume that modern centering telescopes do in fact focus through binocular heads.
A lesson which first became apparent from all this, was how far out of alignment my microscope had been, without my noticing it. The CT is really a most useful instrument, even if one is not interested in phase contrast. But then you probably already know that.
Somewhere in the Micscape pages, I read a comment to the effect that usually, given any set of phase contrast objectives, one mostly uses a 20X and a 40X. From my point of view that did seem a reasonable assumption, and one which I would follow. My next acquision came in the form of a 16X Ziess objective. Well near enough to 20X , and as it turned out, a very nice one. Worked very well in both bright field and dark field, without any apparent softening of the image. Now I just have to watch out for a matching 40X.
Phase contrast condensers come a variety of shapes. There is the single Abbé type condenser with one annulus; suits one objective and can be very pedestrian to use. Next an Abbé condenser with a slide on which (usually) two annuli are mounted, with a central bright field position. Then the most useful, common and costly; the rotating turret. This universal condenser may have three or more phase annuli, dark field stop, bright field iris plus of course the Abbé condenser proper.
Over these past several months I had been scanning eBay for a phase or Zernike or universal condenser. The trouble is they seemed to fetch such high prices. I placed modest bids on several, only to be left very far behind the final price. Financial modesty wasn’t going to get me anywhere. Another problem was that none of the condensers offered would be a direct fit into my own microscope. Both Zeiss and Leitz appear to use a dovetail of some sort; obviously peculiar to specific models. Olympus seems to use a different system altogether. However, being a bit mechanically minded, I felt that with the appropriate part I could get something rigged up, fully realising that it had to be focusable and with adjustment for centering.
Some time passed before a CTS (Cooke, Troughton & Simms) Zernike type condenser, with 39mm condenser mounting boss flashed across my screen. Well now my present condenser has a 37mm fitting, so why not bid for the CTS, and if successful, get a new condenser carrier turned up to suit? It might be a bit cramped, but the possibility of success seemed finally to be within my reach. So throwing caution to the wind, so to speak, I placed a hefty bid on eBay. A few days passed, and no one else had bid - yet. Within the final hour, I felt sure some blighter would be bound snipe me. So I upped the bid - more in panic than considered thought. I shut the computer down, tried to forget the whole saga and went out to cut a bit of grass.
Following lunch, I could wait no longer, so I fired up the system, nervously opened my Inbox - - - “Congratulations, you have won . . . . . “.
So the rest of the day left me in a state of euphoria. All I had to do now was to pay for it and await it‘s arrival. Now being Yuletide did not mean that Santa would deliver: so I still had to await the passing of twelve long days before my package arrived.
My microscope has all sorts of odd bits hung from it; all of different makes and provenance, so the phase turret being CTS wasn’t going to look out of place at all.
Whilst giving the phase turret a clean up, it became clear that some clown in the past had thoughtlessly oiled the iris diaphragm. So my next Sunday morning was spent in taking the whole thing apart, cleaning out the sticky oil, and re-assembling it. Yes! I got it all back, and it works very smoothly indeed.
The condenser is mounted in a tapered ring, supported on a sub-stage fork having centering screws. The ring has an aperture of 37mm, and common to many similar instruments. My new part was 39mm in diameter, so a new ring would need to be turned up. Not a big choice of machine shops here; just the one that repairs tractors and pumps. So taking my existing condenser mounting ring as a pattern, requested a new one to be made with a larger central hole. The work took a week, but the charges were quite modest, so I came home happy, and eager to see if things fitted.
It was going to be a very tight fit but it did go in with fractions of an inch to spare. Not knowing how the optical alignment would turn out, I thought it best to ensure that at least all the mechanical adjustments looked centred from the start. Aligning the new condenser was achieved by racking it down to the lowest position, with the iris diaphragm fully closed. There is still a small aperture even in this position. Then I focused the objective onto the iris. It was of course well off centre, as might be expected. Some screw adjustments soon rectified that problem.
Replacing the binocular head with the Watson centering telescope, and tweaking three pairs of adjustment screws, the objective phase ring and condenser annulus were finally persuaded to co-inside. A quick rummage through the drawer for that plankton slide, and YES! I had a classic phase contrast image. In the fullness of time, doubtless I’ll find that 40X phase objective - but for now I have my phase.
As for dark field, well this seemed considerably improved over the card patch stops I had previously used. At first it seemed poor, but then when I racked the condenser down, the background became truly black, with the specimen brightly illuminated. Yes, definitely a step forward here too.
Looking back, it seems I got my phase contrast kit for about a fifth of what it may otherwise have cost, if I had been able to find one. True, the individual components are around fifty years old, but they work and they are a lot younger than me anyway.
Comments to the author Michael Stubbs-Race are welcomed.
Cautionary
note.
It’s
not a good idea to attempt to dismantle any optical system, diaphragm
or precision mechanics, unless you are quite familiar with
instruments of this kind.
Since writing the above, I am reliably informed that compatibility betwixt one maker's phase objective, and another's condenser may be very poor. In fact, some phase objectives and condenser turrets of even the same maker, don't always match. So perhaps I was lucky, but I'll continue to search for objectives that will match. Beginner's luck or “For fools rush in where angels fear to tread” (Pope).
Fig 1. View of the Centering telescope in use. Crude, but works fine.
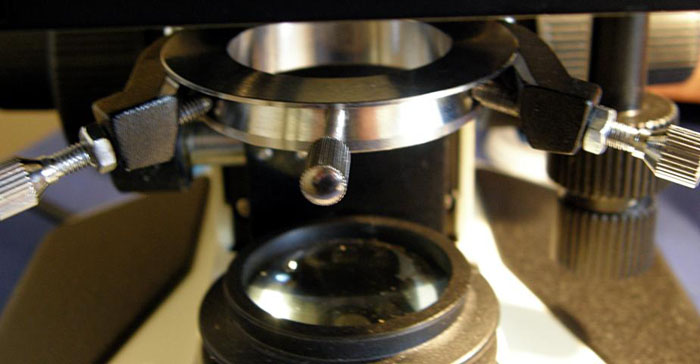
Fig 2. Sub-stage view of the original condenser mounting ring with centering screws.
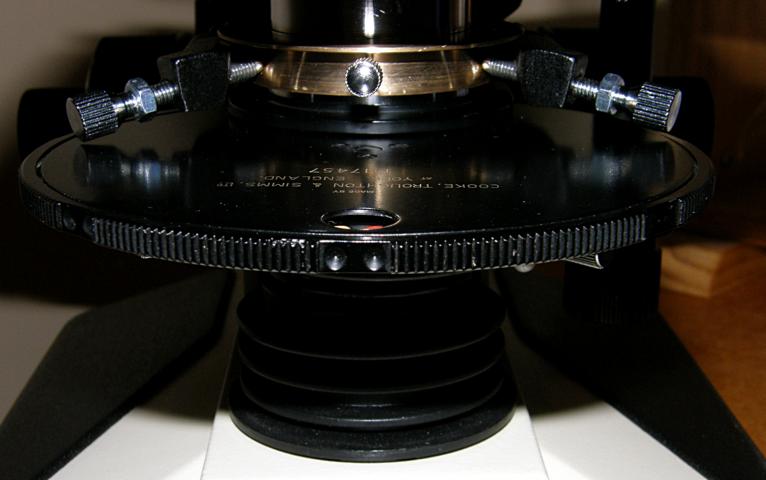
Fig 3. Sub-stage view of new (brass) centering ring supporting universal condenser.
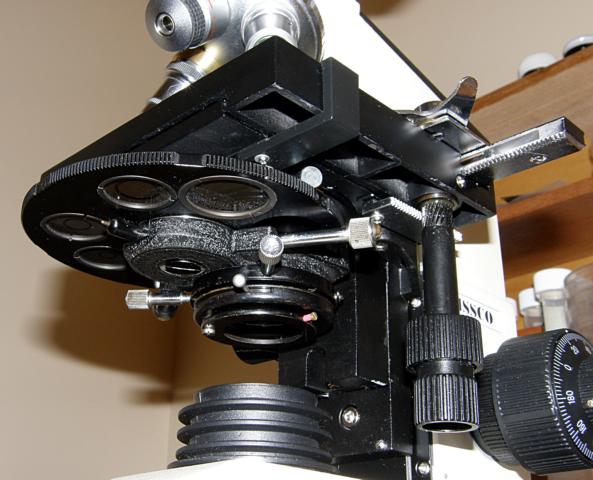
Fig 4. Sub-stage view of universal or Zernike condenser in position.
Published in the February 2009 edition of Micscape.
Please report any Web problems or offer general comments to the Micscape Editor .
Micscape is the on-line monthly magazine of the Microscopy UK web site at Microscopy-UK
© Onview.net Ltd, Microscopy-UK, and all contributors 1995
onwards. All rights reserved.
Main site is
at www.microscopy-uk.org.uk
with full mirror
at www.microscopy-uk.net
.