THE REVIVAL OF THE MOUNTED NEEDLE
For the 360 Degree rotation of objects such as Radiolaria, Foraminifera and Crystals for the microscopic examination of macro objects,
with a view to digital photography.
by Brian Darnton, UK
INTRODUCTION.
Most of the Foraminifera can be identified from the common plan view through a low powered microscope in reflected illumination. Some species however require a much more in-depth examination. Not only is a plan view required but also side elevations in detail may be needed. Some species have anatomical attributes that can only be seem by rotation of the tests under the microscope, combined with X and Y manipulation. Such instruments that facilitate this operation are no longer available in the United Kingdom, but quite recently I was fortunate in being able to inspect an instrument made by The McCrone Institute USA. It was classified as a spindle stage in the manner of N.H.Hartshorne for the examination of objects such as crystals in polar illumination. The stage was a complicated and very precise piece of hardware and looked quite expensive when new. The stage was superbly exhibited by Ms. Hamer of the QMC at our local meeting, but I started to think of simpler and cheaper methods of construction or even DIY. I discovered that over the decades several workers had put together similar instruments but they all seemed rather complicated and all seemed destined for use in polar illumination.
In the history of the development of the microscope right back to the time of van Leeuwenhoek mounted needles had appeared on stages. They usually had a couple of screws to move the pin around in order to focus the impaled object. A simple mounted needle usually figured as an optional extra on stage attachment until the end of the brass era. The reason for decline was probably nothing more complicated than the fact that we were mounting in Canada balsam and the needle became more or less redundant.
In addition to objects in polarised light, forams, testate amoeba, radiolarians and other objects also benefit from being mounted on a needle just for identification. Having enjoyed the ability of being able to cut glass and also benefited from the use of glass bond, I attempted to put together a mounted needle in the simplest possible manner. Of course when it comes to glass there are dangers to eyes, and skin in particular. This work is not for children and straightforward common precautions like gloves and goggles should be worn. The broken bits should be well wrapped before being thrown away in a glass recycle area. The following illustrated plans may help to illustrate the general idea.
CONSTRUCTION.
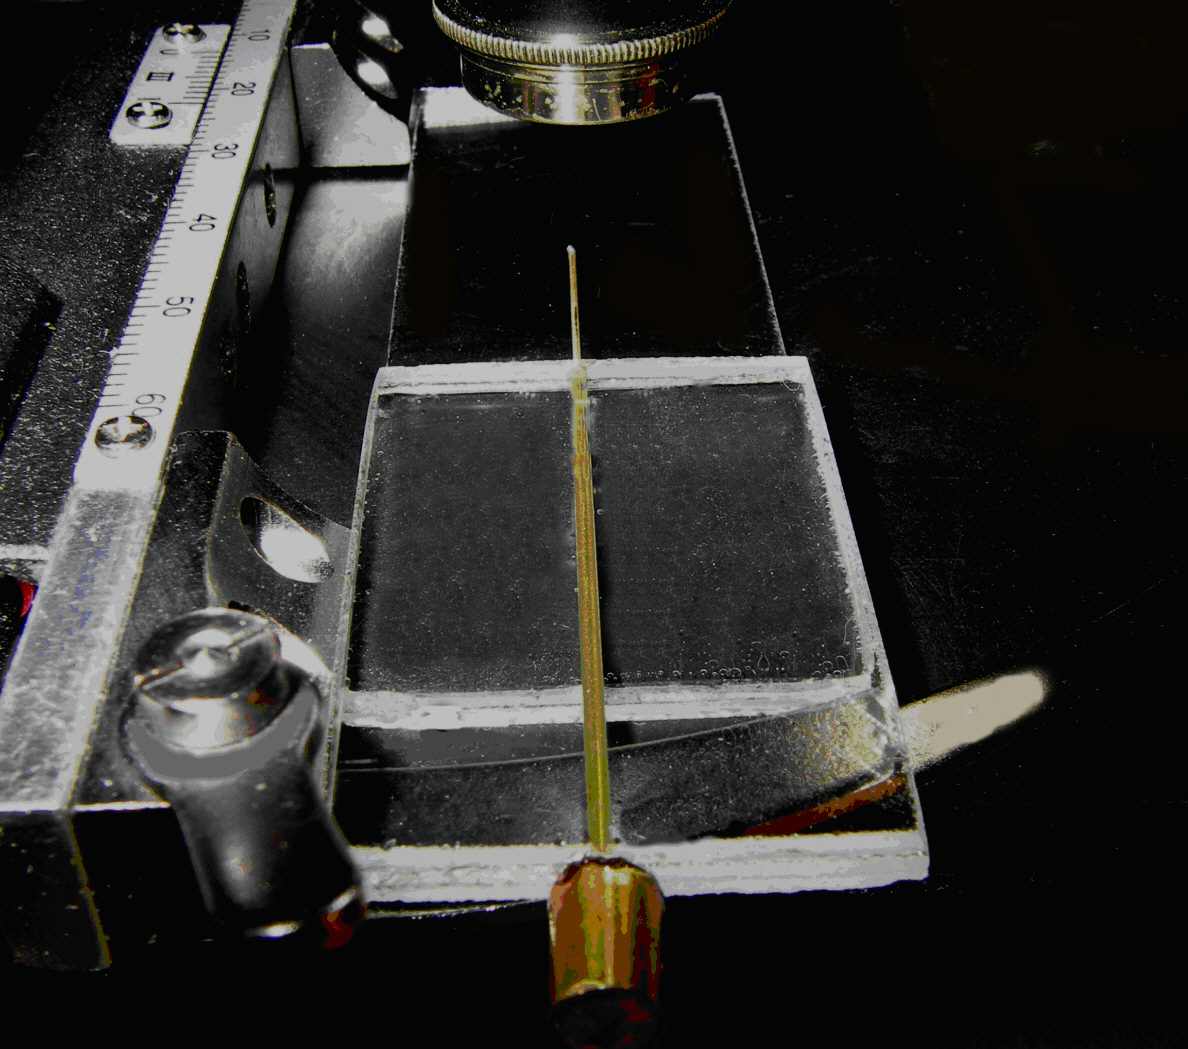
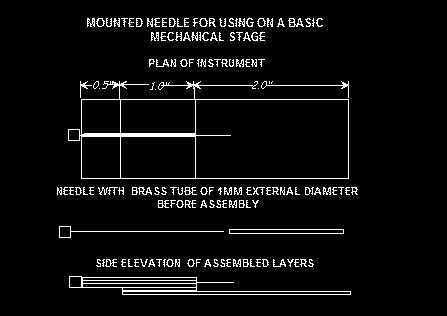
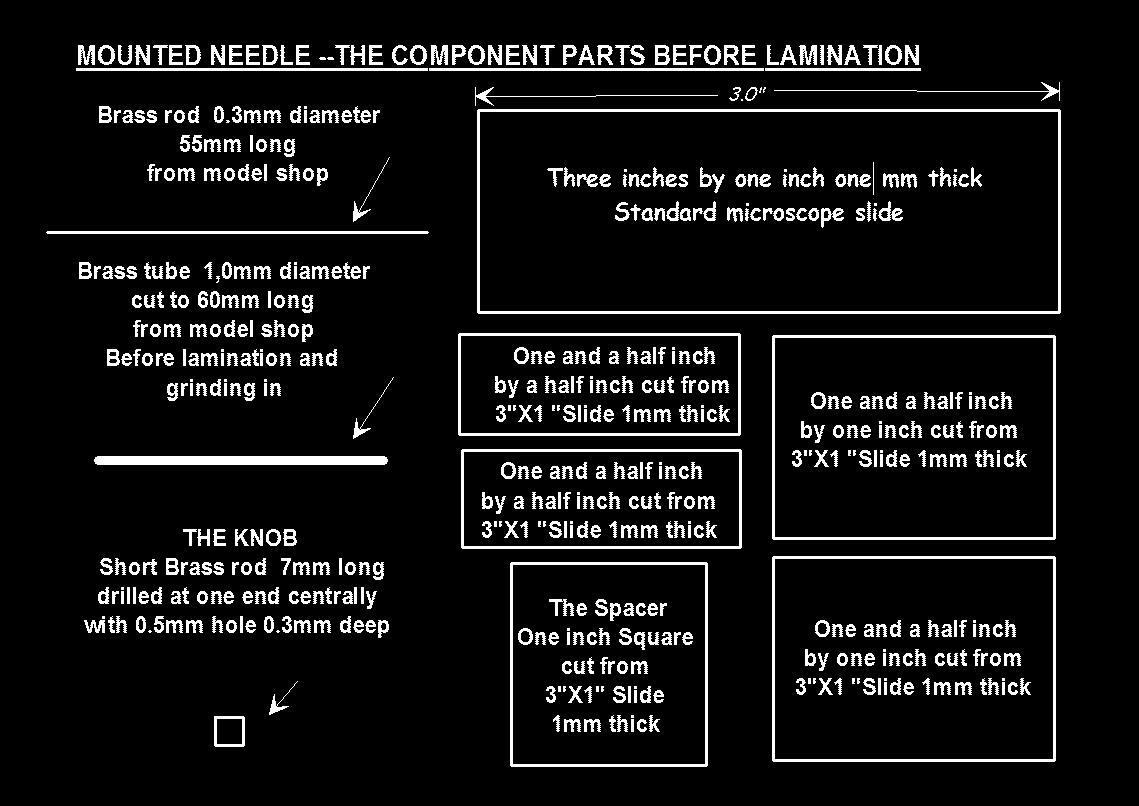
The instrument is constructed from pieces cut from normal 3"X1" 1.0mm thick blank microscope slides, a 60mm long hollow brass tube with an external diameter of 1.0mm (see footnote for a supplier) and a 0.3mm brass needle that fits within. Some form of knob is also required.
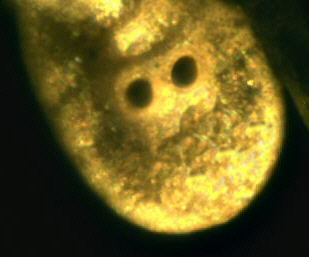
First the 52mm brass tube is sandwiched between two 1½" by 1" glass pieces and two strips of 1½"X½",that hold the tube central. The two strips fit either side of the central tube as in the diagram and project a little at the sides. During assembly Glass Bond is smeared between the glass and the Brass so that all bubbles are excluded. When all is centralised and fitted, this unit is subjected to either a UV lamp or better still sunshine for a few minutes. The brass tube is deliberately too long in order to exclude bond and debris from the inside of the tube. When the whole needle bearing is set solid, soapy water can be used to wash away the excess bond. Since the sides of the central slits surrounding the brass tube are proud they need to be ground flat and level with the upper and lower pieces. A fine carborundum stone lubricated with water usually does a good job and costs only a few minutes. Grinding on a glass plate is a much more complicated as grinding powder needs to be purchased. At this stage the protruding brass tube can be cut level with the glass at either end with a small triangular file. The ends can then be ground on the stone so that the protruding brass tube is ground flat with the glass. At this stage an extra 1"by 1" may be bonded to the basal part to give clearance from the bottom 3"X1" slide, but leaving a ½" recess for the spring clip of the mechanical stage. For species selection and general evaluation a modern binocular microscope with some form of peripheral illumination is required with . low magnifications from X20 to X60 diameters. For the individual examination of tests for species determination a higher powered instrument may be required up to X 120 diameters.
An example of the photographic capture of a very small part of an arenaceous test of the small arenaceous foraminifera Jadammina macrescens, showing the cribrate openings near the aperture, a diagnostic feature of this species.
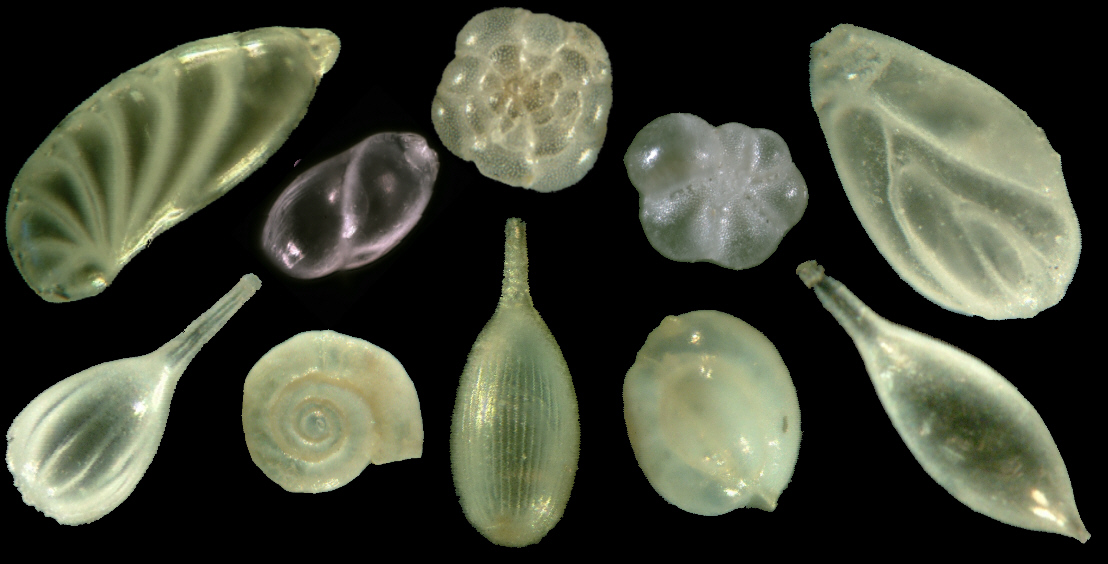
Collage of Swanage Foraminifera.
Comments to the author, Brian Darnton are always welcomed.
FOOTNOTE: A SUPPLY OF 1MM HOLLOW BRASS TUBES.
At first I could not find any tube less
than 1.5mm in diameter in the UK. When I started using it, I had to use thicker glass up to 1.5mm but it was much more difficult to cut neatly.
Even on
scanning US sites, I found nothing; they still seem to be using
imperial measure anyway. Then I began to look at the EU and sure enough there
was the 1mm I was looking for on a Dutch site for hobbyists. http://www.plasticmodelbouw.nl/contact
The
internal hole was 0.3mm which was just right. A pack of several tubes was
less than £10 with postage and took only 3 days.
Editor's note added Feb 14th: further details on mounting specimens onto the needle end can be found on the author's web site blog at http://dorsetmicroscopy.blogspot.com/
Microscopy UK Front
Page
Micscape
Magazine
Article
Library
© Microscopy UK or their contributors.
Published in the February 2010 edition of Micscape Magazine.
Please report any Web problems or offer general comments to the Micscape Editor .
Micscape is the on-line monthly magazine of the Microscopy UK website at Microscopy-UK .
© Onview.net Ltd, Microscopy-UK, and all contributors 1995 onwards. All rights reserved. Main site is at www.microscopy-uk.org.uk with full mirror at www.microscopy-uk.net .