|
Non-Obese Rocks and Minerals by Richard L. Howey, Wyoming, USA |
In this age of political correctness when everybody is offended and/or offensive, I didn’t want to upset anyone by talking about “skinny” rocks and minerals, but these sections are only about 30 microns thick (skinny!) when viewed from the side and that is non-obese. I guess we dare speak of “thin sections,’ since that was the term used before T.A.O. P.C. (The Age of Political Correctness). Microscopists are strange beings. We’re not satisfied with just looking at the surface of a rock, nor even the polished surface; no, we want to have a piece so thin that we can get light through it and, if that isn’t enough, we want to polarize the light and introduce filters and compensators and even optical devices for measurement.
Why all this fuss? Well, for one reason, such investigations can tell us a great deal about the composition of our planet and (dare I use the “e-word”?), yes, the EVOLUTION of planet Earth. Geology, materials science, and crystallography are all beneficiaries of thin sections. The access to such sections has helped make significant advances in understanding this fragile world upon which we live. A secondary reason is aesthetics for, as it turns out, many of these thin sections are remarkably beautiful under polarized light. So, if you want to skip the essay and just look at the pictures, I put them all at the end this time.
On the other hand if you wish to emulate the 19th Century microscopists, you can try your hand at grinding some sections by hand. This was an extremely tedious, time-consuming, and frustrating undertaking, but what else did they have to do?–no radio, no TV, no stereos, no computers, no Internet, no video games, no cell phones.
A Brief Digression
I’m not a complete Luddite and I do enjoy many of the benefits of our new technologies, but I am more and more concerned that they are controlling us in some quite undesirable ways and that we are gradually, through a kind of technological addiction, losing our control and further trivializing many of our interactions with other human beings. But enough.
The obvious candidates for early microscopists and contemporary masochistic amateurs are rocks that readily split into relatively thin layers–slates, micas, selenites. In fact, I would guess that mica was one of the very first minerals ever observed in thin section. if you take a scalpel or very thin-bladed knife and apply it to a good specimen of mica, you can very easily obtain some pieces that can be observed with transmitted light. some pieces of selenite are also readily sectioned. Slate is another matter which we’ll get to in a bit.
Interestingly, mica and selenite both came to be used as compensators with polarized light. However, let’s back up a step. If you take a thin mica piece and look at it with transmitted brightfield, you will observe many lines crisscrossing through the specimen, lines which are primarily indicators of layers and differences in thickness in various parts of the sample. These differences of thickness are quite significant. If you now insert a polarizer and an analyzer, you will get some very interesting results. [Note: A polarizer and an analyzer are made of the same material, but the “polarizer” is placed below the specimen plane and the “analyzer” is placed above the specimen plane.] When you observe your mica piece with polarization, you will notice that different thicknesses show up in different colors and most of these colors are rather delicate pastels.
If you rotate either the analyzer or polarizer, you will see the colors change. If you can slice layers until you get a piece of mica that has a largely consistent thickness throughout, then you have a handy compensator. Remove it and put it aside for the moment.
Put a slide on the stage of a specimen which you know is birefringent, i.e., shows color differences under polarized illumination, such as, a snail radula, some calcareous spicules, or some Orange G, or Vitamin C crystals. Align your filters so that you have crossed polars with good extinction (in other words, a virtually totally black background) and then, at the substage level above the polarizer, insert your mica compensator. You will notice that if you rotate and/or shift the angle of the compensator, that colors will change. A variety of special compensators can be purchased, but you need to be sure that they are compatible with your microscope or you can spend several thousand dollars and buy a microscope specifically dedicated to polarization. Fortunately, for the amateur, there are some inexpensive alternatives. You can now buy a 2 inch square of material that is a 1/4 wavelength compensator and another type that is a full wavelength compensator for just a few dollars each. Even cheaper is simply to use either the top or bottom of a small plastic Petri dish. However, it does need to be noted that there is an extraordinary variety of types of substances that fit under the general category of plastics. Some are specifically designed not to produce birefringence, so they won’t work for our purposes. You need to experiment a bit and I suspect that you’ll find one that works well without much trouble. What I like about using part of a Petri dish is that most of them are full of optical irregularities and as you turn and tilt it, you can get remarkably striking variations in a single area of a single slide.
Back to slate for a minute. Because of it’s very different composition from mica and selenite and because of its opacity, this is a specimen which must be ground and some types flake very easily. This means that you will have to follow a technique traditionally used for harder and denser minerals. Select a small piece which is as thin and as flat as you can find, then mount it on a glass slide. The classical method involved the use of Canada balsam, but now there are synthetic resins which set up more quickly so that one can begin to grind the specimen sooner. Just be sure that you use a resin for which you have a supply of solvent. [Caution: These solvents are highly flammable and the vapors are toxic. Use in a well-ventilated area away from flame or potential sparks.] Once the slide has set up sufficiently, the first task is to get the top surface as flat as possible. You might even need to begin with some small files embedded with diamond powder. This is not as costly as it might sound, since minute industrial diamonds are abundant and quite inexpensive and when you are through with them–whether out of sheer frustration or having worn them out–you can go to your local jeweler and buy an empty DeBeer’s necklace box, put the files in them and present them to your wife telling her that since she has always wanted diamonds you are now presenting her with some. (Hint: To avoid divorce proceedings, have a nice backup gift, like a world cruise or a Maserati.)
After the files, one uses a variety of whetstones of progressively finer grit and then finally a very fine powdered abrasive and a second glass slide to polish the top surface until it is as smooth and as flat as you can get it. In many instances, depending upon the type of rock or mineral and its porosity, the resin will penetrate the section and provide additional strength and support while you are subjecting it to these treatments.
And now the fun begins. You need to get out your bottle of solvent and soak the section off the slide by dissolving the resin. when that’s accomplished, you get to start all over by gluing the side you’ve just been working on onto a fresh slide and begin all over again and hope that you have a sufficiently large vocabulary of four-letter words when your section cracks or splits. For such possible disaster, I recommend that you have a completely separate cabinet where you keep a large bottle of gin. My final recommendation is–don’t try to make your own thin sections except perhaps some mica or selenite ones; instead, buy a few. Modern companies and geologists have access to equipment that few amateurs can afford and they can save you many hours of tedium and elevated high blood pressure. Ward’s Natural Science, which has an online catalog, provides a fairly wide variety of such sections. They are a bit pricey at about 20 dollars per slide but, consider, at that price you can pick up 4 or 5 slides for what it would cost you for a single visit to a psychiatrist. Another source is a geologist who has just recently created a website and who is beginning to offer a nice variety of sets at quite reasonable prices. There are some sets of 5 slides for $25 and some additional special slides at somewhat higher cost. You can find this site at: www.Rock-Slides.com
All of the photographs which I am including here were made from slides purchased from this individual.
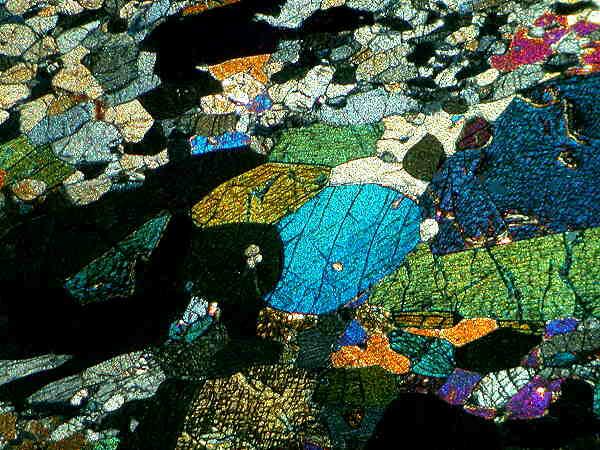
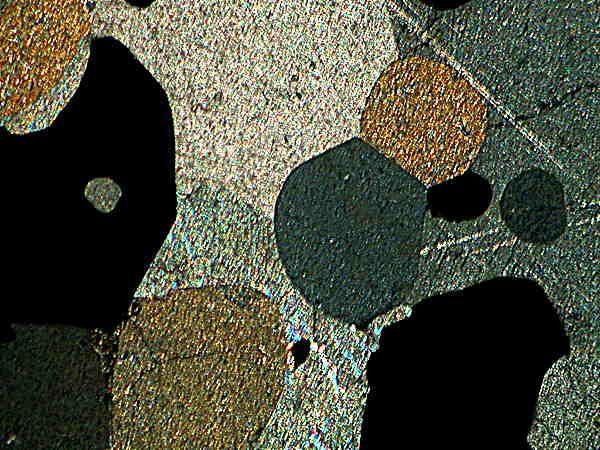
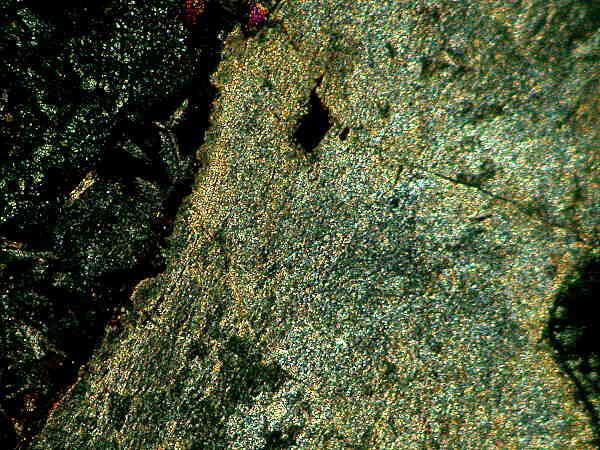
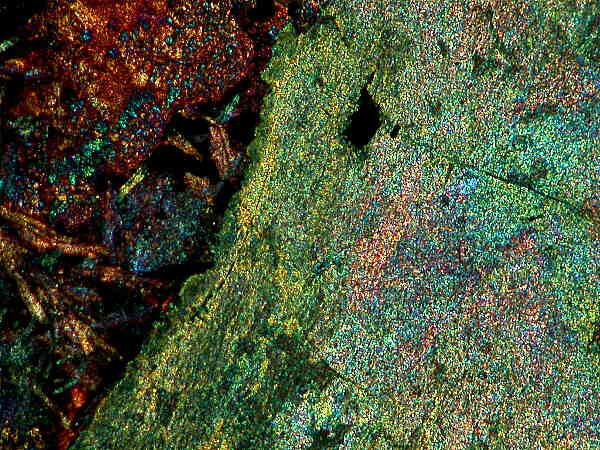
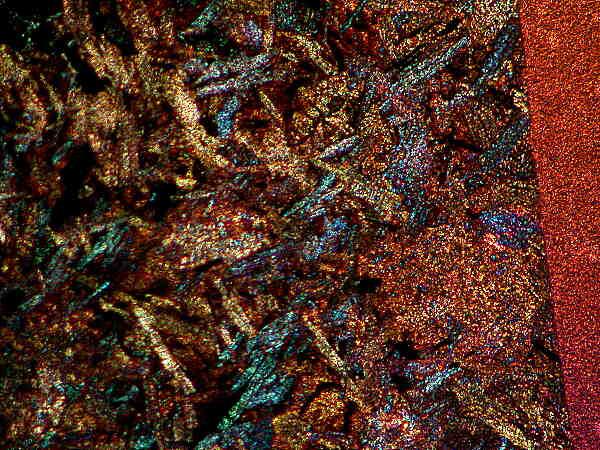
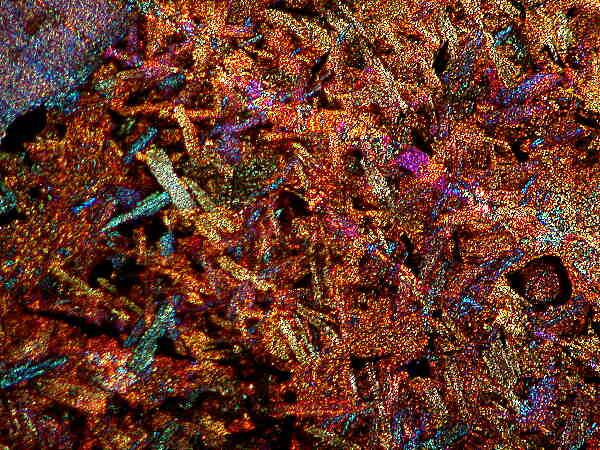
These first two sections are two different areas of a section of Ruby in Zoisite. All of the sections were photographed with polarized light. I will indicate when the Petri dish was introduced into the light path.
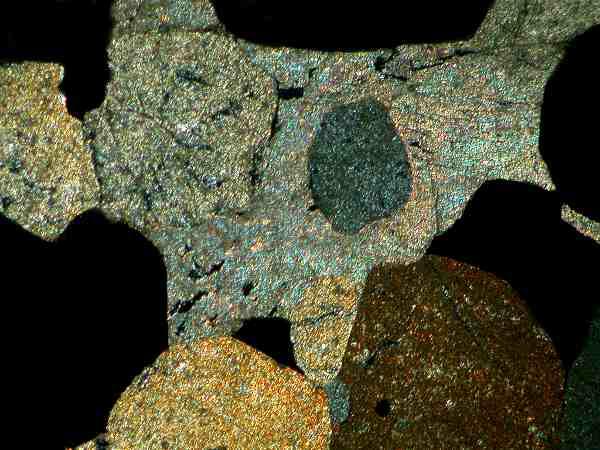
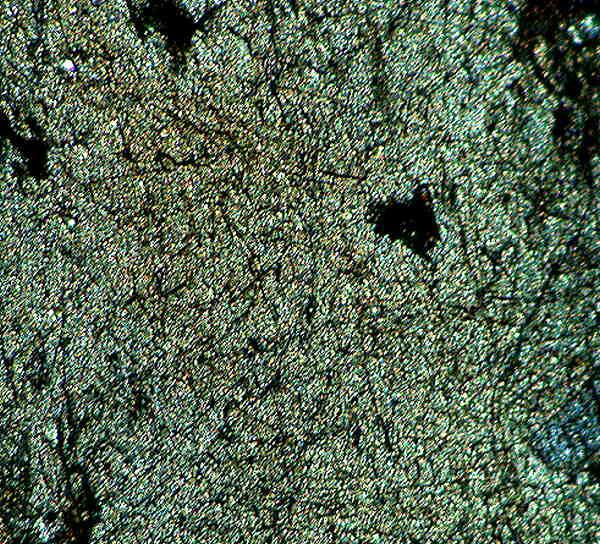
This image is of Rhodonite from the Sand Bernadino Mountains in California.
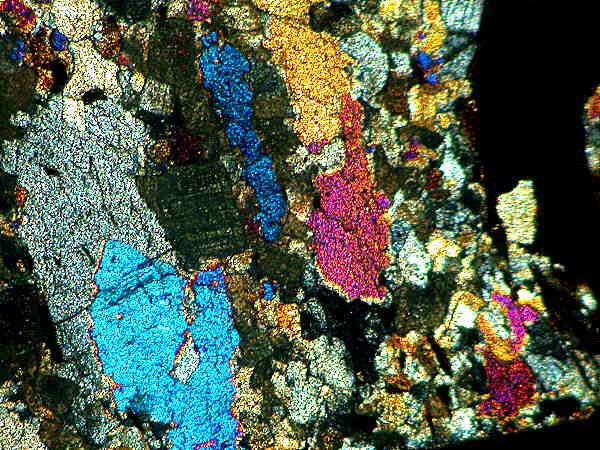
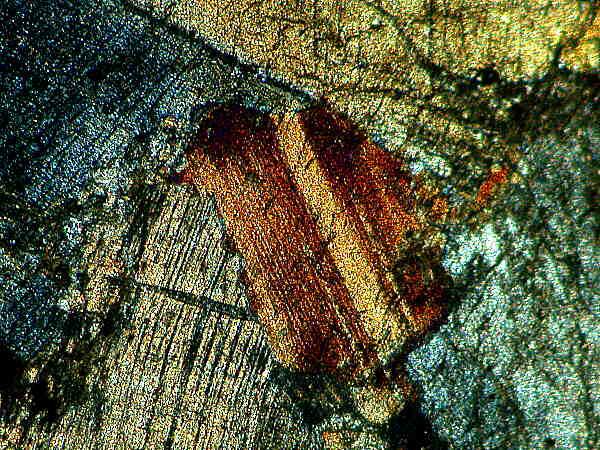
These two images are of Zinc minerals in Calcite The sample came from Franklin, New Jersey.
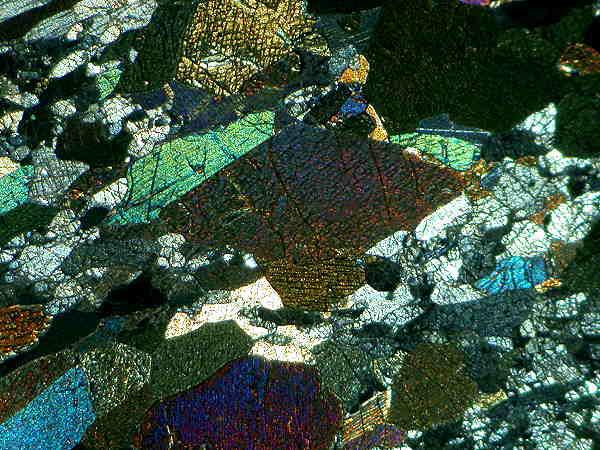
This first image of Feldspar in Basalt from the Wolverine mine in Minnesota was taken with ordinary polarized light.
This second image of Feldspar in Basalt was taken with the addition of the Petri dish filter.

These three images of Feldspar in Basalt were all taken at the same position on the slide the only difference being shifts in the placement or angle of the Petri dish filter.
This image is of Anorthosite (Plagioclase Feldspar) which is 1.4 billion years old and taken from Sybille Canyon in Wyoming. It was photographed only with polarized light.
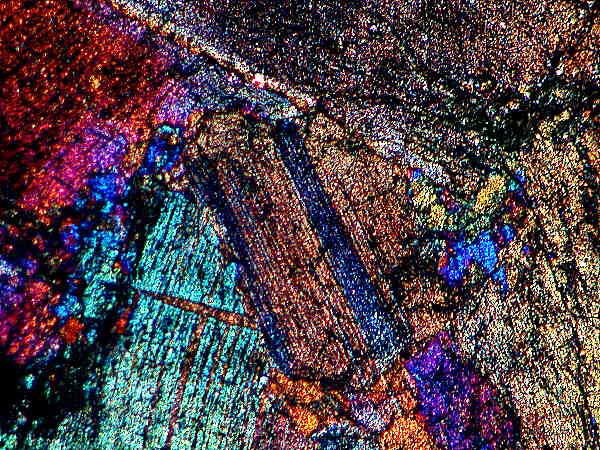
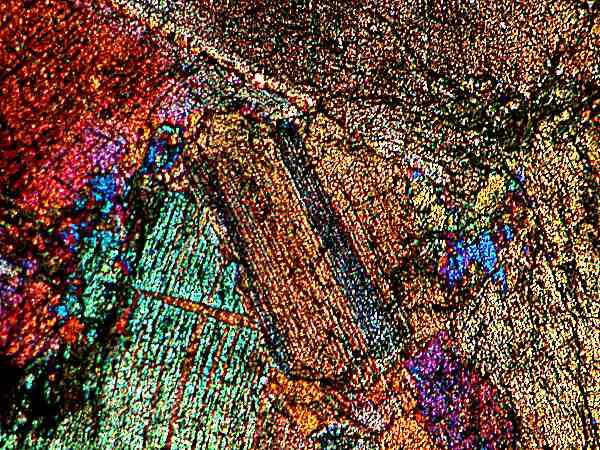
This is Anorthosite again at a different location on the slide. All three image of these images were, however, taken at the precisely the same point and the differences are a result of shift in the placement or angel of the Petri dish filter.
All comments to the author Richard Howey are welcomed.
Microscopy
UK Front Page
Micscape
Magazine
Article
Library
Please report any Web problems or offer general comments to the Micscape Editor.
Micscape is the on-line monthly magazine of the Microscopy UK website at Microscopy-UK