 |
 |
| Bark's Winter Garden A Peep At Life On Rotting Tree Bark By Paul James, UK |
The origins of my interest in wood rotting fungi took off in earnest a long time ago when I stumbled across a small Ash bole lying on the floor of our wood. It was about 6" in diameter and about 3' long and saturated through with water, and so rotten the bark had all but vanished leaving a heavy cylindrical mess almost soft enough to push the finger through. My instinct was to toss it onto the compost heap, but I thought I'd put it under cover to dry and see if the rotting process would actually stop. Naturally I forgot all about it, then chanced upon it many months later, realising the drying of it had halted the rotting process. No big surprise I thought, but I was intrigued by its lightness and wondered how it would burn in our slow burning log stove. I could easily make out the cross sectional skeletal structure left behind that the fungi and bacteria hadn't appeared to affect or alter in any way. Fascinated by this simple revelation I cut the log in half ( 3 strokes of the hand saw ! ) and put each piece side by side over the raked hot charcoals from the previous charge of wood in the log stove. Within several minutes these 2 remnants glowed like the incandescent mantles of an old gas lamp. I reasoned that Lignin, the carbon rich material laid down in considerable quantities in growing wood, was in fact responsible for the highly efficient production of heat in the stove. The fungi and bacteria had managed to reach and feed on the softer cells rich in carbohydrates leaving the back bone of lignin behind more or less intact. Bereft therefore of the starchy contents of the cells together with its high water content, the wood is therefore transformed into a 'Carbon Loofah' like structure : the perfect fuel, being light, bone dry, and riddled with imnumerable air passages throughout, being therefore almost instantaneously ignitable.The upshot of all this was to intensify my interest in wood rotting fungi, lichens and bacteria.
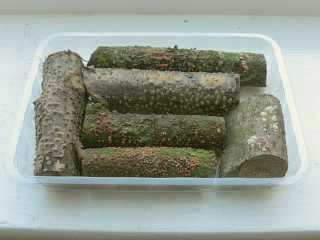
Since then I've cultivated a habit of leaving the smaller branches from hedgerow cut backs in clumps out in the corner of fields over winter. I find that this encourages fungi and bacteria to go to work on the bark: a process which eventually destroys the moisture resistant properties of the bark. Once this occurs the wood is cut to length and then left to dry completely under cover. A simple method which not only speeds up drying dramatically, but yields a more compliant fuel suitable for wood stoves. This winter's weather has for some unknown reason produced more decorative fungal growth, which is rather more colourful than I've seen before. So I gathered a few choice examples and prepared them for macroscopic inspection by planing off 5-10mm from one side to form a flat surface guaranteeing their stability beneath the objective or camera lens.
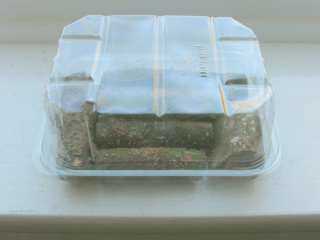
However it soon became apparent that the loss of moisture would not favour the fungi, so I devised a simple method of keeping their habitat suitably moist by keeping the branch stems in a discarded plastic fruit tray containing a few drops of water, and then moderated the evaporation levels by covering the tray with another as and when necessary :-
|
|
I noticed that the wood substrate needs to be reasonably moist for the purposes of photography as in drier circumstances the fruiting bodies start their final spore dispersal processes. Just prior to this event is the ideal time to take images as it seems that their form and colour are at their most attractive stage.
IMAGING
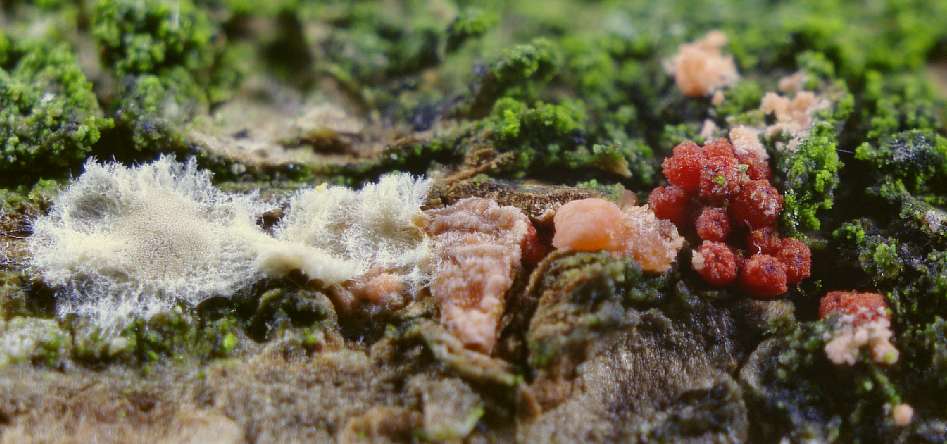
The following images are a selection I've taken under varying lighting conditions. As you may imagine, the perennial problem is the restriction of depth of focus in macro photography, which was exacerbated by the curvature of these cylinders of wood and so proved a little frustrating. The images below simply reveal the complexity and colourful arrangement of various varieties of bark fungi and lichens that favour the bark and sapwood of particular trees here in the UK.
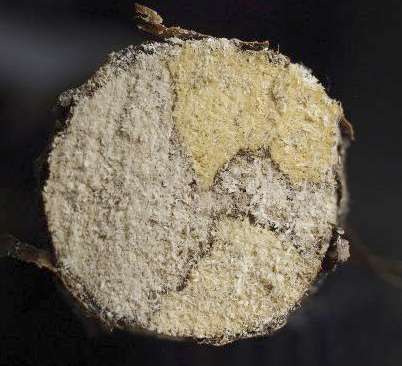 |
| Typical end section of branch revealing fungal activity |
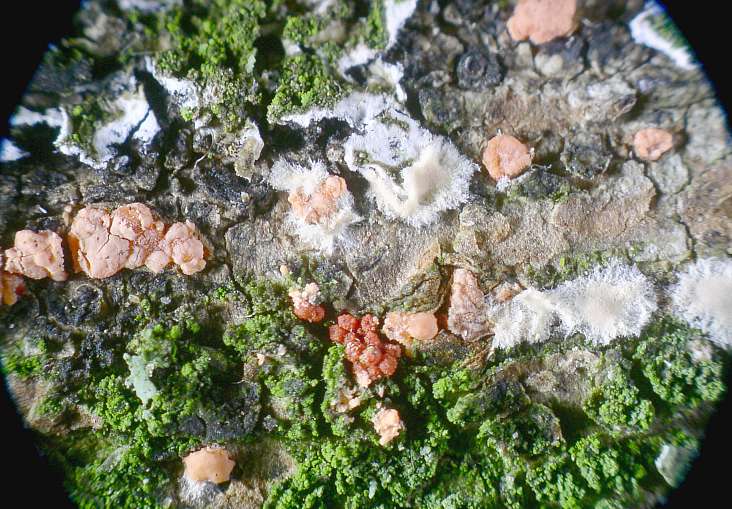 |
| Face on wide angle view through DIY Macroscope imaging from eyepiece directly onto sensor. |
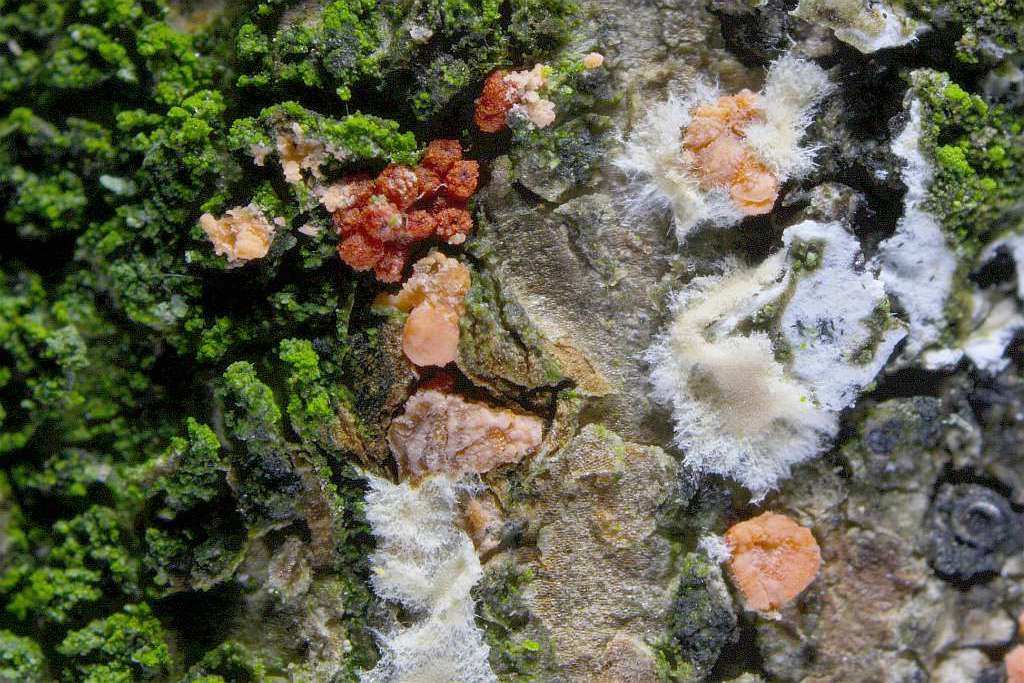 |
| Closer view utilising extension tubing behind a Pentax 35mm f 3.5 M42 film camera lens imaging directly onto sensor |
|
|
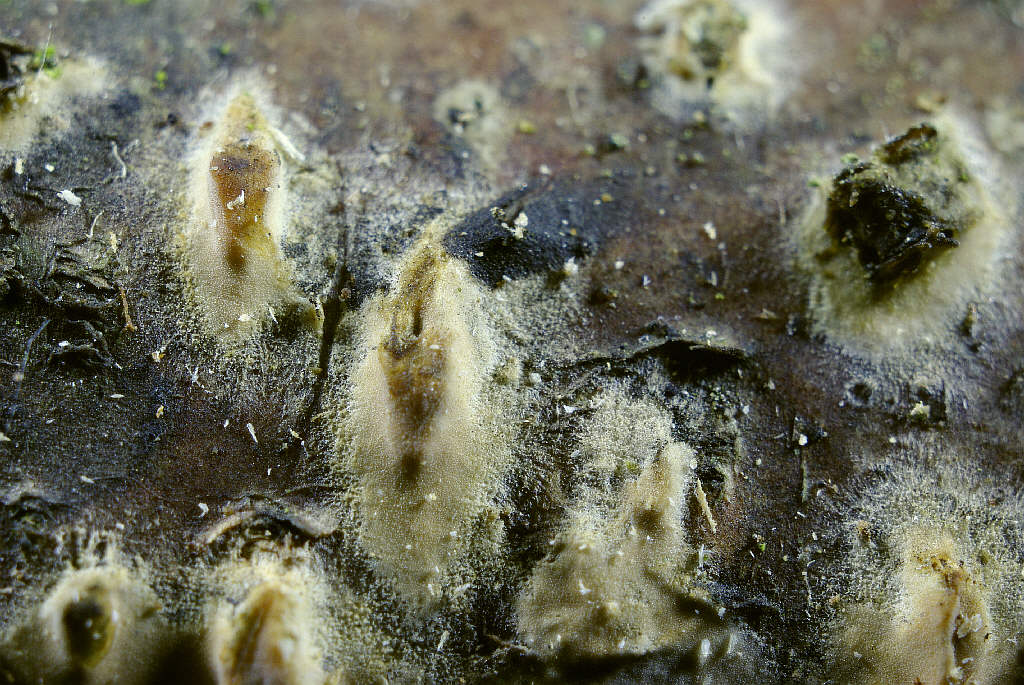
| Oblique view : More extension rings
cause more restriction of dof even at f.11 Note the bluish cast left caused by LED lighting |
 |
Exceedingly delicate "Powder Puff" fungal fruiting bodies scattered over Hazel branch. |
 |
"Camel Hump" fruiting bodies on Birch branch bark. |
These are the first images I've taken using a dSLR camera (Canon 40D + 35mm Pentax film camera lens) . Their potential seems to be encouraging, but more care is needed in lighting, and in post processing too I must admit. Nevertheless the subject matter is clearly deserving of continued effort.
The technique of multiple exposure to enhance depth of field which I'd not taken too seriously to date, seems to be the way forward especially for oblique perspective imaging. I shall be giving this considerable thought in due course.
| All comments welcome by the author Paul James |
Microscopy UK Front Page
Micscape
Magazine
Article
Library
Published in the January 2011 edition of Micscape.
Please report any Web problems or offer general comments to the Micscape Editor.
Micscape is the on-line monthly
magazine of the Microscopy UK web
site at
Microscopy-UK