 |
(and a discussion of the use of the Nikon Coolpix 4500 as a photomicrographic camera) by Brian Johnston (Canada) |
|
|
(and a discussion of the use of the Nikon Coolpix 4500 as a photomicrographic camera) by Brian Johnston (Canada) |
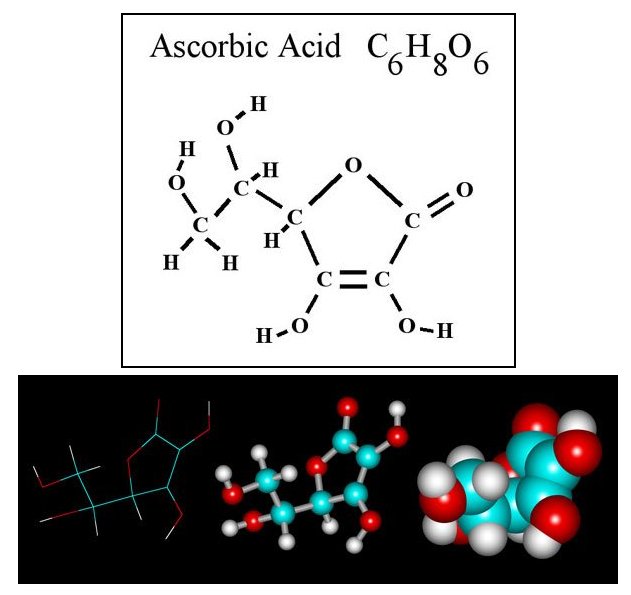
Ascorbic acid, or Vitamin C as it is more commonly known, is found in citrus fruits and green leafy vegetables. Its name is derived from the Latin 'scorbutis' which refers to the unpleasant disease Scurvy. Historically, persons with a diet lacking in fruits and vegetables developed spongy, bleeding gums with additional bleeding under the skin. The 'a' in ascorbic acid means without and therefore the name without scurvy or ascorbic.
The slides photographed in this article were prepared using pure ascorbic acid rather than Vitamin C capsules or tablets intended for human consumption. The crystals formed are thus not contaminated by any other compounds. Crystal formation on a microscope slide is usually accomplished in one of two ways: melting and resolidification, or by the evaporation of the solvent from a solution. The first method is not useful with ascorbic acid, as it melts about 190 degrees Celsius accompanied by decomposition. One is left with an uninteresting brown-black residue. On the other hand, solutions which are left to evaporate provide an almost limitless supply of interesting shapes and patterns of crystals to be photographed.
The chemical formula and molecular structure of the compound are shown below. ('HyperChem' was used to produce the molecular visualizations.)
All of the OH groups make this a very polar molecule. Chemists are fond of the rule 'like dissolves like'. This means that polar molecules dissolve well in polar solvents - and what better polar solvent than water! I recommend using distilled water rather than the tap variety which can contain dissolved calcium and magnesium compounds that may precipitate out as fine white specks and contaminate the field of view.
I wish that I could tell you the exact concentration of solution to prepare. (As a chemistry teacher I insisted that my students report results quantitatively as much as possible!) Unfortunately, there are simply too many uncontrolled variables in this situation. Temperature, humidity, dust content in the air and the cleanliness of the slide are just a few. In general, low concentrations of the acid work best. High concentrations result in a glassy looking coating on the slide that may never form crystals. Success may still be achieved in this circumstance by providing sites for crystal growth. Drawing a needle that has touched ascorbic acid crystals over the uncrystallized coating may do the trick, as may placing your thumb print on the coating! I leave you to think up alternative methods of providing growth sites.Once the crystals have formed, the slides may be photographed without a cover slip if you are using low power objectives. This is usually the case, since most crystal patterns are too large for high magnification. I prefer to keep the slides for many years and so I have used 'Permount' liquid between the slide and cover glass. Many slides prepared in this way twenty five years ago are still in perfect condition. 'Permount' is not soluble in water and does not influence the long term stability of the crystals. (I however recommend against using this product today, as it contains toluene and is considered a dangerous substance.)
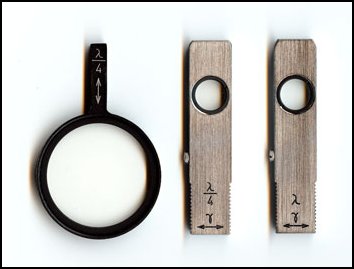
All of the photomicrographs were taken with the equipment shown in the second part of the article. At this point I should mention that the microscope polarizer and analyser were adjusted to give complete extinction (black background) in all cases. In order to produce a variety of lighting effects, the compensating devices shown below were utilized in some cases.
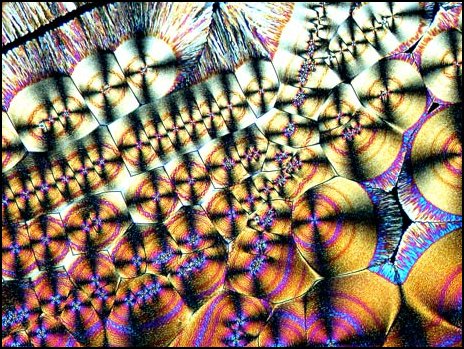
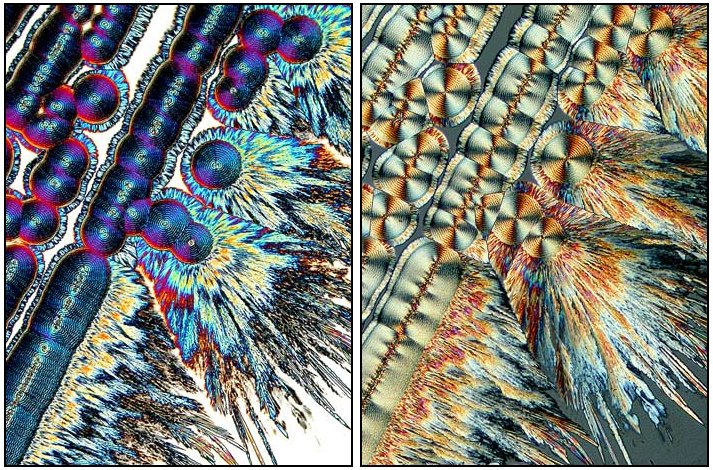
In the first photomicrograph in the article and the two below, no compensating devices were used. Notice that the picture on the right is a magnification of the top right section of the one on the left. A flat field, strain free 2.5 X objective was used for one and a similar 6.3 X objective for the other.
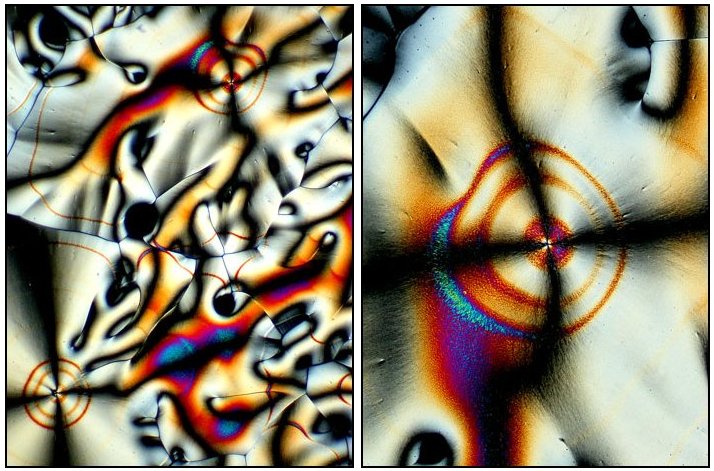
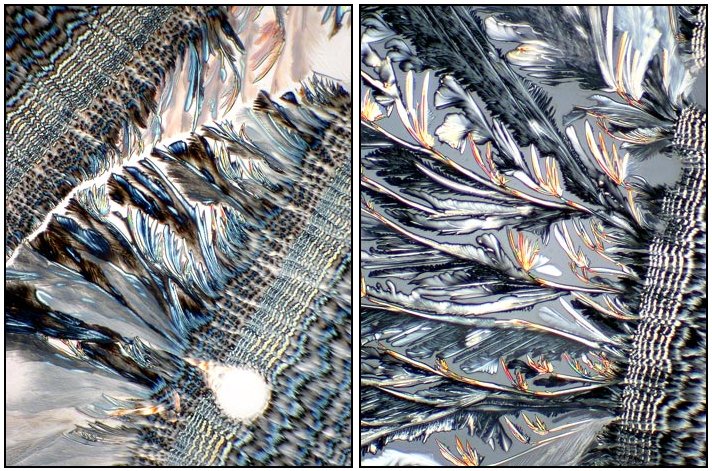
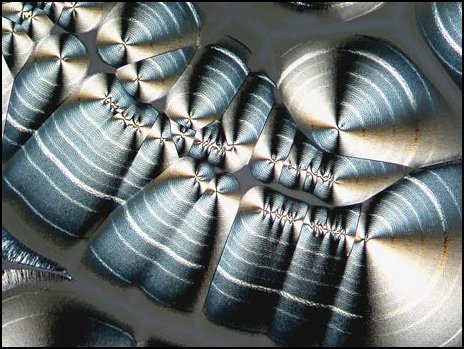
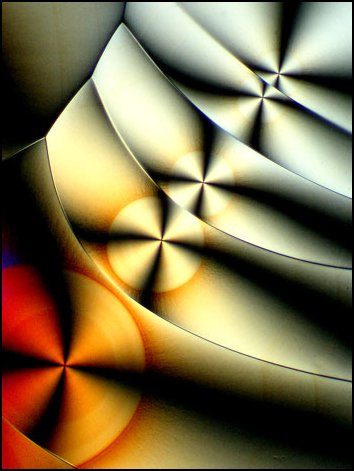
The two examples below show a common phenomenon in which crystal growth begins at a point and grows somewhat circularly for a time. If the slide is then placed in a different temperature environment, the growth pattern may proceed in a completely different way. No compensators were used.
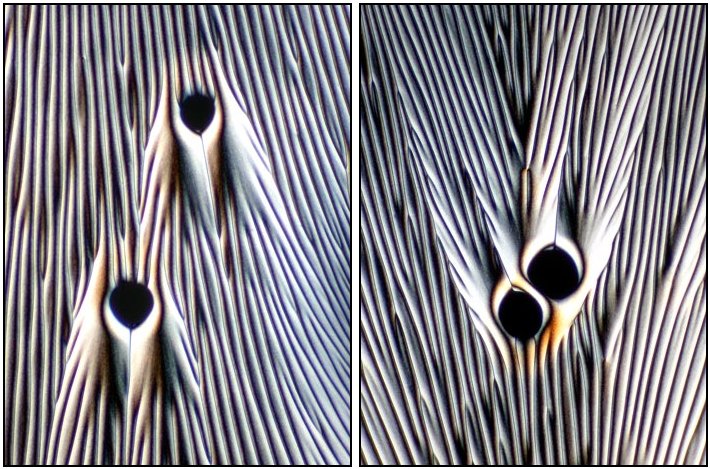
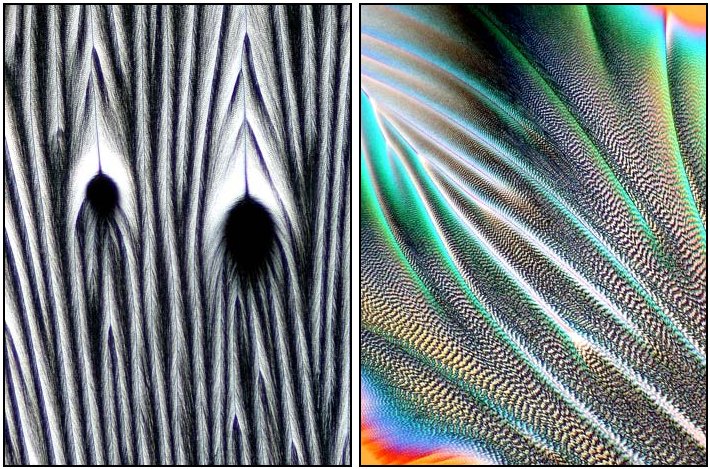
The example below shows what may happen when a more concentrated solution, which resists crystallization, has the point of a needle drawn across the surface several times. Crystal growth begins in a variety of locations along each line and continues until the growth fronts meet. No compensators were used. You can tell that this is so by observing the couple of places where no crystal growth has occurred. The background is black in such locations.
A circular lambda/4 compensator plate was used just above the polarizing filter and another lambda/4 slot type compensator was used just below the analyser to produce the effect in the two examples below. The circular compensator was rotated slightly to alter the background colours. When these two compensators are used together, circularly polarized light instead of the normal plane polarized light is the result.
In the next four photomicrographs, the only difference was that the lambda/4 slot compensator was replaced by a lambda slot compensator.
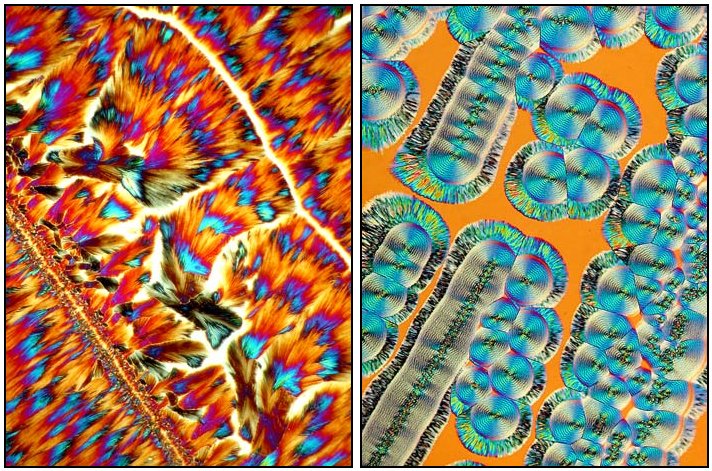
As can be observed below, different compensators produce quite different results when used on the same section of a slide.
The gray areas in the example below may have been produced by a slide that had been cleaned by a slightly oily towel. The solution did not adhere to the slide in these areas.
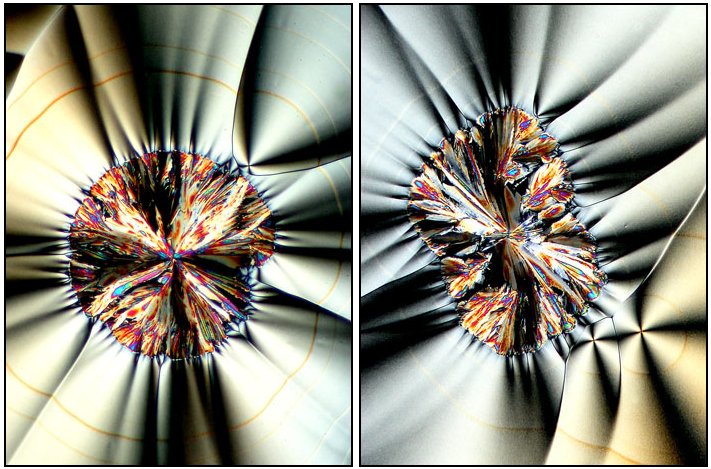
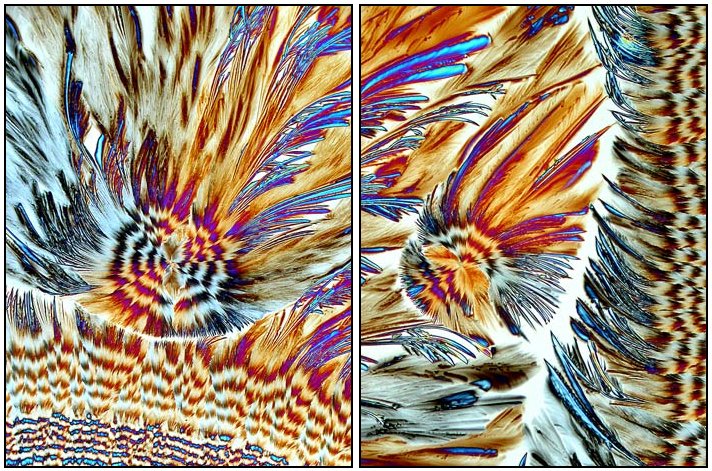
Sometimes, (many times), there is simply no explaining the crystal growth that occurs. Often the result is uninteresting, but occasionally serendipity shows its hand. The four photomicrographs below are all taken from the same slide!
Careful examination of the originals of the above photographs shows that the field of view is critically sharp from corner to corner. This brings me to a description of how all of the photographs in the article were obtained.
Photographic Apparatus
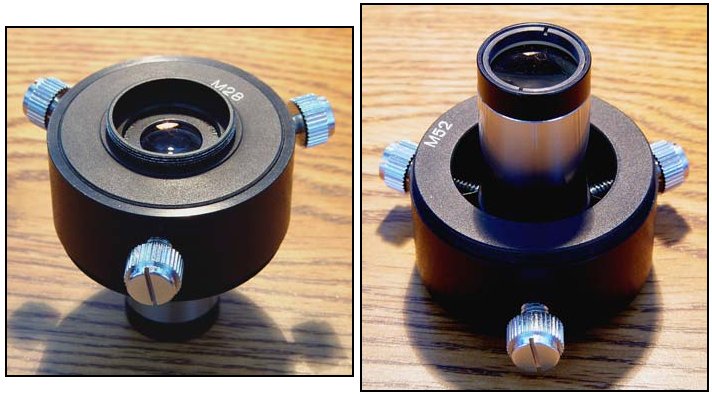
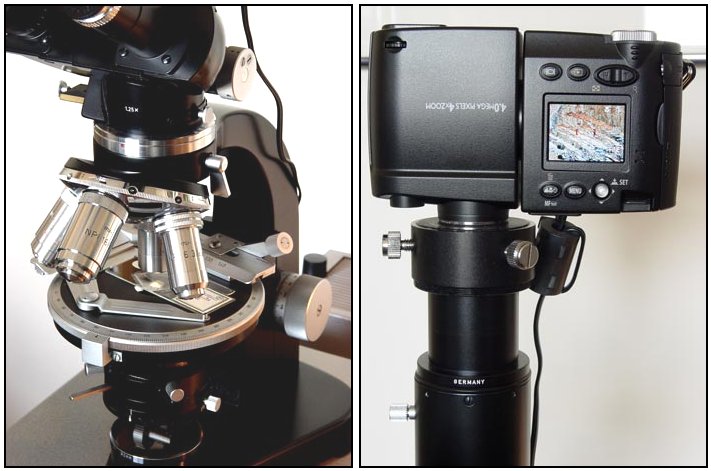
The photomicrographs were taken using a 4 megapixel Nikon Coolpix 4500 attached to a Leitz SM-Pol Microscope. Microscopes of this vintage (1960's) require an eyepiece with specific characteristics to match the objectives in order to produce excellent colour correction and flat fields. For this reason I chose the adapter shown (www.microscopesusa.com) which allows the microscope's corrected eyepiece to help produce the image. The adapter allows eyepieces of widely varying diameters to be used and positions the eye lens very close to the camera lens, resulting in little or no vignetting. The clamping system for holding the eyepiece is very firm but does not mar the finish of the eyepiece. The adapter screws into the filter threads of the camera lens. (Some manufacturers' adapters replace the eyepiece with their own poorly corrected field lenses and do not produce superior results.)
Since the camera is on for long periods, I use an external power source in order to minimize battery use. The wire carrying current for the camera can be seen in the photographs below. The cylindrical object is a ferrite core used to minimize interference with other electronic equipment.
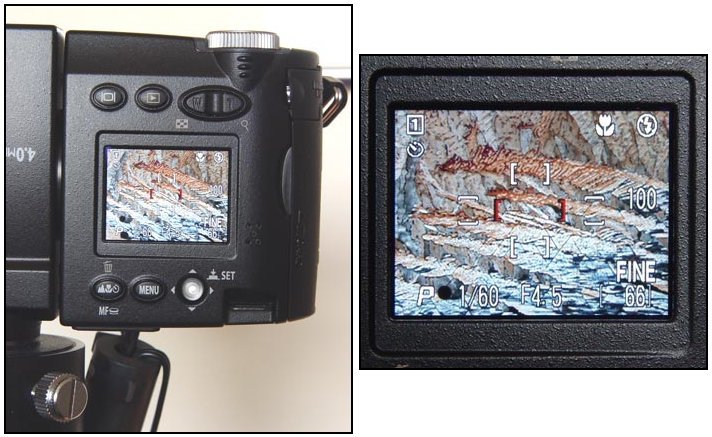
For best results, I use the maximum image size of 2272 x 1704 pixels with 'Fine' JPEG quality. For most photomicrographs the 256 segment matrix metering of exposure option works extremely well. Only if the field of view has a crystal structure surrounded by a large expanse of black, do I use the center-weighted or spot options. Rather than using the factory set Auto Sensitivity function, I choose to fix the ISO rating at 100 in order to minimize noise in the darker portions of the image. Auto White Balance seems to work fine. The Programmed Auto setting for exposure automatically picks a shutter speed and aperture for optimal results. (There is no evidence of any camera vibration during exposure as there often is when using an SLR with mirror and focal plane shutter.)
The secret of focussing success is to choose Single AF in the Auto-Focus Menu. This means that the camera no longer focusses continuously while it is on. Only when the shutter release button is pushed in half way does the focussing happen. One can then use the microscope to focus the image on the LCD screen of the camera. When the shutter release button is pushed half way, the camera can then 'improve' on your rough focus. The results of this technique are amazing. I have never once had an image that was not perfectly sharp. (Tests done with diatom dots confirmed this.) When using high magnifications, this technique allows the user to determine the plane to be in focus.
For each exposure, I perform the following steps.
Adjust the camera's zoom control to completely fill the LCD screen with the image. (For the eyepiece that I use, the last 30% of the zoom capability is available with no vignetting .)
Turn on the Macro mode with self-timer option.
Use the coarse and fine focus of the microscope to focus the image to the best of your ability on the LCD screen of the camera. (The screen is small, but it's easier than it sounds!)
Press the shutter release button half way down. The camera will focus.
Press the shutter release button the rest of the way down. The camera will count down about 10 s and the exposure will be made.
Although the camera is capable of sharpening the image, I prefer to turn this function off and to sharpen the image in Photoshop using an unsharp mask.
For the last forty years I have used an analog camera and film to record photomicrographs. I must admit that my experiences with the Coolpix 4500 have convinced me to forsake my old camera and to go digital unless colour slides are required. The results are simply better. For too long I have been at the mercy of photo finishing machines that look for 'ordinary' scenes and have no idea of how to cope with a single bright object surrounded by a sea of blackness! Digital photomicrography affords much more control over the final result. The process is time consuming, but the results justify the extra effort.
All comments to the author Brian Johnston are welcomed.
Please report any Web problems or offer
general comments to the
Micscape
Editor,
via the contact on current Micscape Index.
Micscape is the on-line monthly magazine
of the Microscopy UK web
site at http://www.microscopy-uk.org.uk with mirror site at http://www.microscopy-uk.net.