| Making a Phase Telescope Converting old eyepieces into Phase telescopes By Paul James (UK)
|
| Making a Phase Telescope Converting old eyepieces into Phase telescopes By Paul James (UK)
|
Though checking the state of the illumination in the back of the objective has been accomplished by eye over many decades in microscopy, it is a fact that the use of a small 'telescope' makes the whole process easier and also allows other uses more easily accomplished than with the naked eye alone.
The 'Phase telescope' is so called because it resembles a miniature telescope which is designed to focus on close distances so as to be able to inspect the phase annuli alignments in phase contrast microscopes. This device is also useful for other illumination techniques and I'd imagine that most microscopists would find it of great use. It can also be used to examine the state of the internal glassware of objectives and to check on optical collimation too. In photomicrography it can be used to spot blemishes such as dust, smears and scratches in the optical system which can spoil an otherwise successful image.
Phase Telescope's Principal of Design and suitability of Huygenian eyepieces
The fundamental requirement for this optical device is that it fits in the drawtube and focusses at a point effectively 5"- 12 " ( 125mm - 300mm ) where the back of the objective plane lies. This distance varies from one microscope to another but is broadly the same. Since a simple telescope requires only two optics : The objective and eyepiece, it seems in principle that we can make one for our own use, and indeed in practice we can.
Utilising an unwanted Huygen eyepiece as the basis for experimentation will pay dividends and I recommend anyone wanting to make a phase 'scope to start dabbling with one in the first instance. The diagram below demonstrates the suitability of the standard Huygenian eyepiece, by extending its overall length to allow the eye lens to focus on the image which will be further away from the field lens than is normally the case. In phase telescope usage the primary image of the field lens will be nearer the eye lens as shown below and so the eyelens should be mounted either in a sliding unit or placed in an extension tube as explained later.
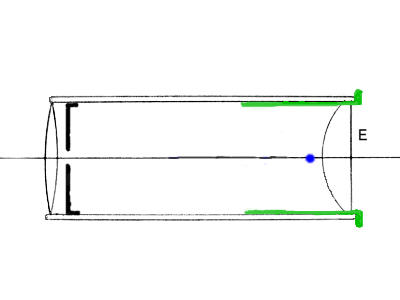 |
Some manufactured phase telescopes have small achromatically corrected field lenses which adequately furnish the eyelens with a quality image, but our Huygenian eyepiece's field lens, though much larger and not achromatically corrected, will do fine. Fringe colouration and flare in the image can be reduced dramatically by simply placing a small aperture stop in front or behind the field lens as shown above.The aperture should be about 3 mm in diameter and can be placed either side of the field lens but should be centred on axis for best results. Small aperture stops bring about an increase in depth of field too and the image is infinitely better with one in place.
Necessary features of the phase telescope
A useful and practical phase telescope needs to satisfy the following requirements :-
1) Be 23mm diameter so as to slip easily into the draw tube yet have ideally little 'play'.
2) Be able to focus on an object about 5" - 15" (125mm-375mm) in front of the field lens OR simply a fixed focus on the plane of the phase annuli and / or iris diaphragm etc.
3) Be free enough from optical aberrations to image the high contrast annuli clearly and with sufficient amplification.
4) Be optically collimated for multi purpose uses, though for phase annuli alignment this requirement is not so necessary.
Since we all have varying ideas, requirements and skills, as well as varying quantites of suitable materials at hand, I think it best to dwell on 3 examples which might appeal to those readers .
1) Utilising old eyepieces
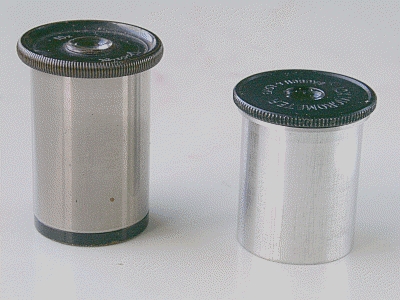 |
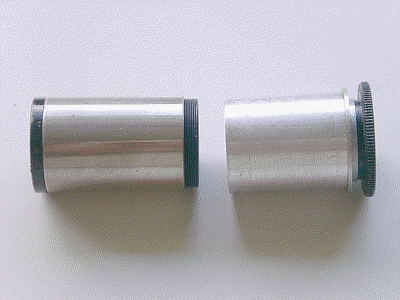
Eyepieces are ideal for starting the process of making a phase telescope because they are already 23mm in diameter and contain threaded ends etc for experimentation. The tubes will be accurately made and therefore minimise any metalwork necessary to effect the construction of a telescope.
The two redundant Huygenian eyepieces above where 'fused' into a useful telescope which was assembled without need of any tools. The one on the right is a Bausch and Lomb x 10 having a sliding eyelens to focus on its internal graticule which was removed as unwanted, leaving the focussing facility which was. The other is also a Huygenian and is a standard x10.
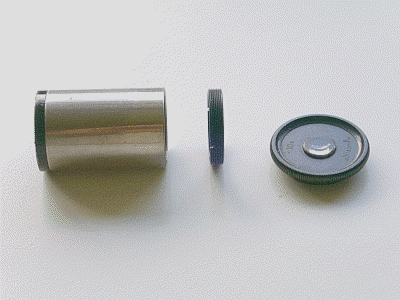 |
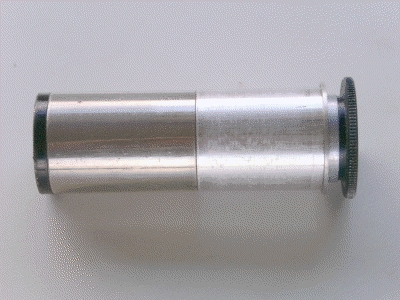
The problem was that neither tube was long enough to do the job so I decided to use the standard eyepiece's tube and original field lens, but remove the eye lens as shown. To join this tube up with the B&L eyepiece tube I conveniently found that the lens's internal collar shown above centre, which held the unwanted B&L's field lens in situ, also matched the other field lens thread.......how convenient !
 |
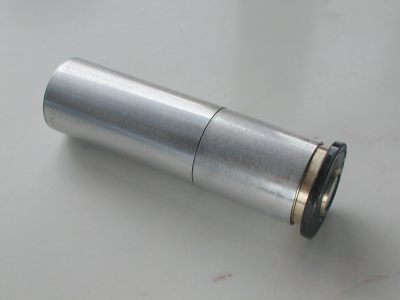
So the two tubes could be attached firmly and accurately together using this internal collar. In so doing the total unmodified length of these 2 tubes was just sufficient for my purposes, allowing the scrutiny of the back of the objective with focal adjustments to delve deeper into the optical path if need be.
 |
I admit that this was about the easiest project I've had to date, taking only a few minutes to work out and put together. It works just as the manufacturered product does, though its imagery is just a fraction inferior to the best of them. The installation of the aperture stop is absolutely essential to improve imaging quality. The original field stop(s) in each eyepiece can be left in situ as they do not affect the imaging process which is confined to a small area around the central axis of the telescope.
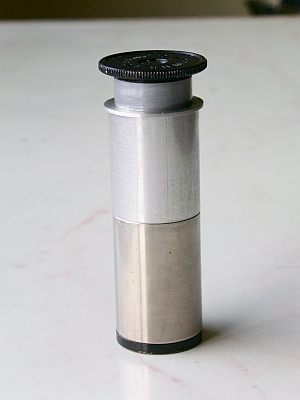
2) A more refined 'scope
Two features of the DIY telescope described above can be improved, though they are not absolutely necessary, they do elevate its usefulness. By using a lower power eyepiece casing say x5 as the starting point we will end up with more amplification of the image since its field lens will have a longer focal length. Also the eye lens can be an achromat form which yields fewer aberrations. Kellner eye lenses are ideal. The actual amplification of the annuli's image is dependent also on the focal length of the eyelens of course.
 |
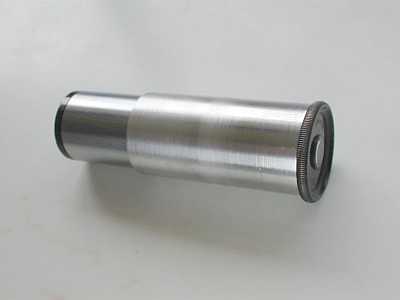
| This
example used a long x5 eyepiece tube and field lens, plus
a x 10 eyepiece tube secured with internal screw collar. Plus a Kellner achromatic eyelens in a multi start screw mount. A 3mm aperture stop provides excellent imagery comparable to the manufactured forms. |
3) Another method of construction
If only one redundant eyepiece is available it can be adapted by using an external tube which is a firm fit over the 23mm eyepiece cylinder leaving a shoulder which will register against the top edge of the drawtube, and at the other end holds the eye lens at the correct distance. Although the tube used here below is an offcut from an old tent pole any material able to be fashioned in a similar manner will do.
 |
| Sleeved eye lens
extension with bonded eye lens in a fixed focus position shown above is perfectly adequate for Phase annuli alignment |
A Few more words
Rotating the finished 'telescope' in the drawtube whilst peering through it will reveal any variance from the ideally concentric image of the objective/annulus. A small misalignment error will be of little consequence in phase contrast use, but ideally should be absent if collimation work is to be carried out.
The Golden rule : Use a small 3- 4 mm aperture stop accurately on axis before or behind field lens .
| All comments welcome by the author Paul James |
Microscopy
UK Front Page
Micscape
Magazine
Article
Library
Please report any Web problems or offer general comments to the Micscape Editor.
Micscape is the on-line monthly magazine of the Microscopy
UK web
site at Microscopy-UK
© Onview.net Ltd, Microscopy-UK, and all contributors 1995 onwards. All rights reserved. Main site is at www.microscopy-uk.org.uk with full mirror at www.microscopy-uk.net .