A
convenient method of photomicroscopy
By Wan Yu,
China
 I am still interested in microscopic science while I am a data
communication engineer working in Langfang, a city in the north of
China, far away from my hometown. At the end of last year I bought
an XSP-02 microscope which has three achromatic objectives (4X,
10X and 40X) and two Huygens eyepieces (10X and 16X). This kind of
microscope is very basic - there is no condenser, the light reflected
by a double-sided mirror (flat and concave) illuminates the sample -
but a classic which is widely used in senior high schools for
biological teaching and training.
I am still interested in microscopic science while I am a data
communication engineer working in Langfang, a city in the north of
China, far away from my hometown. At the end of last year I bought
an XSP-02 microscope which has three achromatic objectives (4X,
10X and 40X) and two Huygens eyepieces (10X and 16X). This kind of
microscope is very basic - there is no condenser, the light reflected
by a double-sided mirror (flat and concave) illuminates the sample -
but a classic which is widely used in senior high schools for
biological teaching and training.
There is a very
convenient method for beginners to DIY a photomicroscopy system. You
just need a digital camera, a tripod, and certainly a microscope is
necessary. The fundamental of this method is the same as Paul
James’ equipment that was published in the
November 1999 edition of Micscape. In the photographic setup, the
virtual image of the eyepiece is converted to a real image by the lens of
the digicam and falls onto the sensor – instead of the retina. This method
is so well-known that photographers always share their photos but
omit the technical detail. As a beginner I tried a lot of methods to
take a micrograph. The following is the best way that I have ever
tried.
Section 1:
Preparation and discussing
A compound
microscope, a digicam and a tripod should be prepared before taking
a micrograph. To avoid the shaking when you press down the shutter, a
remote controller is recommended.
Microscope
The
eyepoint of my Huygens eyepiece is too low (about 3mm) and the field of
view is small, it is not fit for micrography. We should change it
for a wild-field eyepiece, especially a WF10 eyepiece is recommended.
Furthermore, the use of a condenser can improve the quality of
images a lot.
Camera and lens
Both digicams
and DSLRs that support macrophotography are fit for taking micrographs
because of the image of the eyepiece is within the distance of distinct
vision (250mm) from the eyepoint – the point we put our eyes to or
camera lens to for observing. For a DSLR lens, the best choice is using a
macro lens and the reverse of a standard lens such as 50mm/F1.8 can
be an alternative – someone tried the experiment and the photos
were amazing (See
this webapge). For digicams, the Canon A640 is well-known. I used
a Nikon Coolpix S8 with Zoom 5.8-17.4mm lens for imaging one month ago.
When I adjusted the focal length of its lens to the maximum of
17.4mm, the images recorded could fully fill the sensor (Fig.2).

Fig.2: The
micrograph taken with a Nikon Coolpix S8 Camera, a compact digicam design, showing
some bacteria stained by methyl violet. (with 10X objective and WF10
eyepiece).
Otherwise,
micrographs can be taken by simply putting the mobile phone camera
over the eyepoint of the eyepiece. But some details are lost since images
are too much compressed by the camera's software (Fig.3).

Fig.3:
Cells of heart, a slice for biological teaching, was taken
with a mobile phone camera (LG KT878).
In my photographic
setup, I use a Nikon D90 digicam and a 35mm/F1.8 standard lens (I
suppose that using a 50mm/1.8 lens may allow a full field of view to be
recorded on the CMOS sensor). For some reason that I do not know exactly,the 18-105 zoom lens does not work as well as a standard lens in practice; there is more chromatic aberration or coma aberration (compare Fig.4 and Fig.10).
Section 2:
Installation and operation
Install the digicam onto
a tripod and move the lens over the eyepoint of eyepiece. Observe the
image through viewfinder and adjust the objective to get the clearest
view then take the photo. When you take the photo, remember to use
your remote controller to reduce shaking.
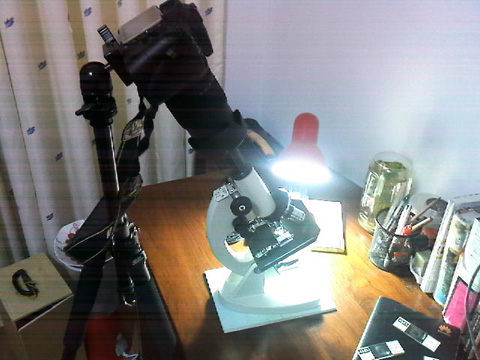
Fig.4
Fig.5
shows another photomicroscopy system which consists of a XSP-35
microscope and a Nikon D90 camera, the lens used was a 35mm/F1.8 DX.

Fig.5
Sometimes
the real image can not fully fill the CMOS sensor, so the photo should be
cropped to an appropriate size using software (See Fig.6).
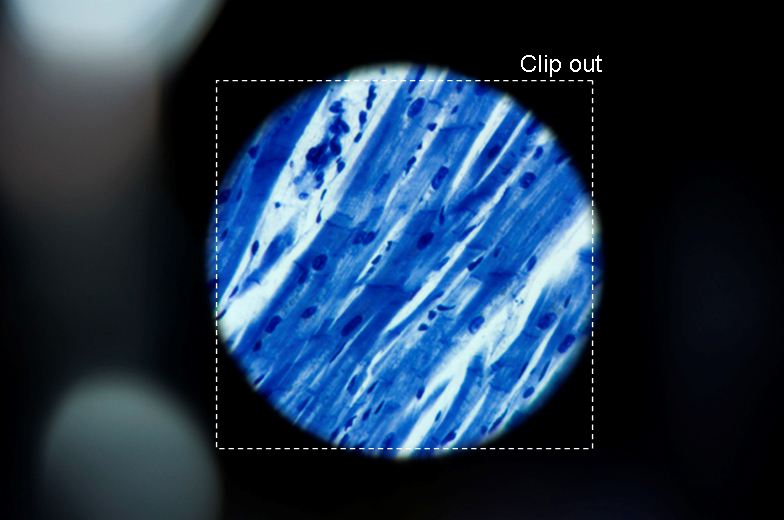
Fig.6
Section
3: Image Gallery
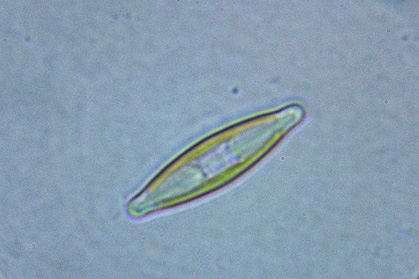
Fig.7:
A fresh water diatom, this cropped photo was taken with the 40X
achromatic objective and WF10 eyepiece, 18-105mm Zoom lens ( 92mm
focus length was used).
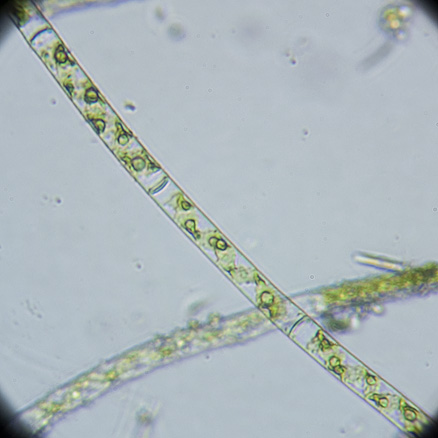
Fig.8:
The well-known green algae Spirogyra, 10X objective and WF10
eyepiece.
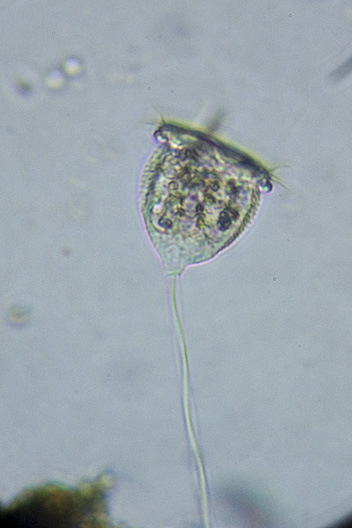
Fig.9:
Vorticella campanula, 40X achromatic objective.
When I changed the D90’s lens for a 35mm standard lens, the
quality of image improved a lot. The following two photos shows the
cells of durian, stained by iodine, and were taken with a WF10 eyepiece.
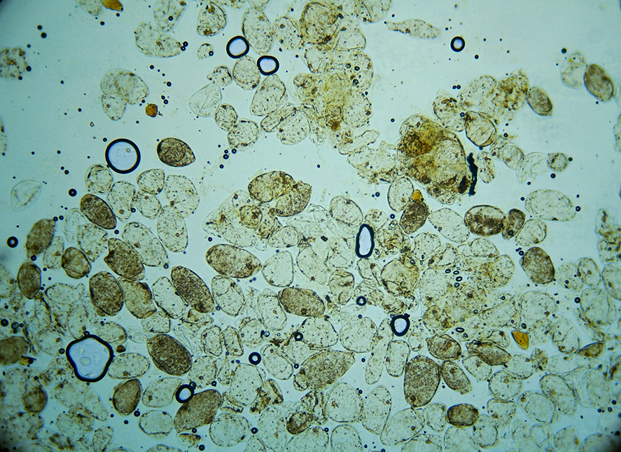
Fig.10:
10X objective
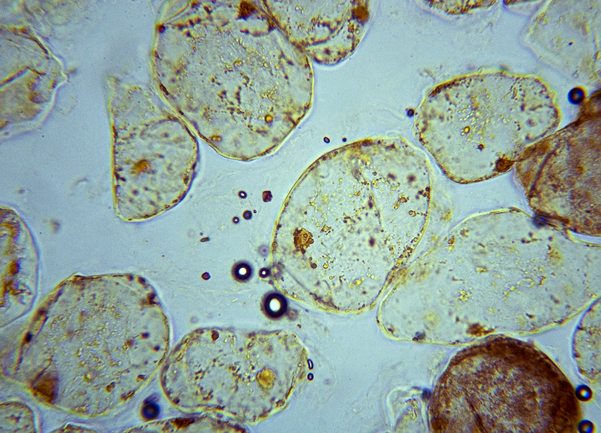
Fig.11:
The photo was taken with a 40X objective.
Comments to the author will be welcomed.
Microscopy UK Front
Page
Micscape
Magazine
Article
Library
© Microscopy UK or their
contributors.
Published
in the June 2010 edition of Micscape
Magazine.
Please report any Web problems or offer general comments
to the
Micscape
Editor
.
Micscape is the on-line monthly magazine of the Microscopy
UK website at
Microscopy-UK
.
©
Onview.net Ltd, Microscopy-UK, and all contributors 1995
onwards. All rights reserved. Main site is at
www.microscopy-uk.org.uk
.