The
inner epidermis of the onion bulb’s cataphylls
(the
onion skin)
Easy
and not so easy methods to work with
3) fixing with
citric acid. (with some pictures of Aspergillus
cf. niger)
Continued from part 2 –
fixing with hot water and staining with Blue 1
As I said in
the first article of this series, I am seeking a technique to make
“onions
skin” wet-mounts without (or with the least possible) air bubbles.
I said, in my previous article that, even if the hot
water technique I tried allows me to do
onion skin preparations totally, or almost totally free of bubbles, I
think
that it is a risky option to apply in a classroom. And even if this is
not
my main objective, it has become some of a personal responsibility, and
I wish
to make some tests on “cold methods” that equally fulfill the task. And
I have
some alternatives to explore.
A LITTLE MORE OF
MEXICAN GASTRONOMY
Is it funny!, the “association of ideas” continues: In
Mexico, of course,
cooks also make "cocido" similar to the Spanish one (but pungent,
with lots of "Chile" (Capsicum
anuum) of which there are at least 14
varieties in the country!!), but
above all, Mexicans are fond of "ceviche",
a dish based on seafood, mostly fish and shrimp, that is “cooked cold” , as they say, submerging it raw, for a few hours in
a lemon dressing. Without forgetting their dose of “chile”, of course!
Note: Take note that I say “chile”, not “Chili”. Chili
is a tex-mex spicy
dish (spiced with chile of course), made with meat, beans, and rice.
Well, you already realized that, in reality, although
they don’t known
the elaborate scientific term, Mexican housewives are “fixing” the
seafood’s
protein, precipitating it with the acid of lemon juice, and sometimes a
little
vinegar, which is also added to the sauce.
A recipe of fish ceviche in english: http://www.motherearthnews.com/Real-Food/1980-05-01/Mexican-Ceviche.aspx
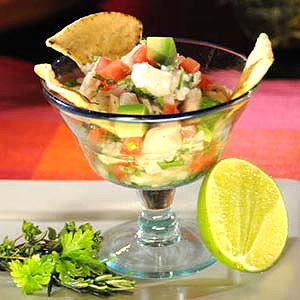
Fig 1 - A “ceviche” as is shown at http://tucocinafacil.net/2009/04/03/ceviche-de-cuaresma/
Another recipe, of shrimp ceviche: http://recipes.epicurean.com/recipe/2957/ceviche-de-camarones.html
And one with vinegar: http://www.recipecottage.com/mexican/seviche10.html
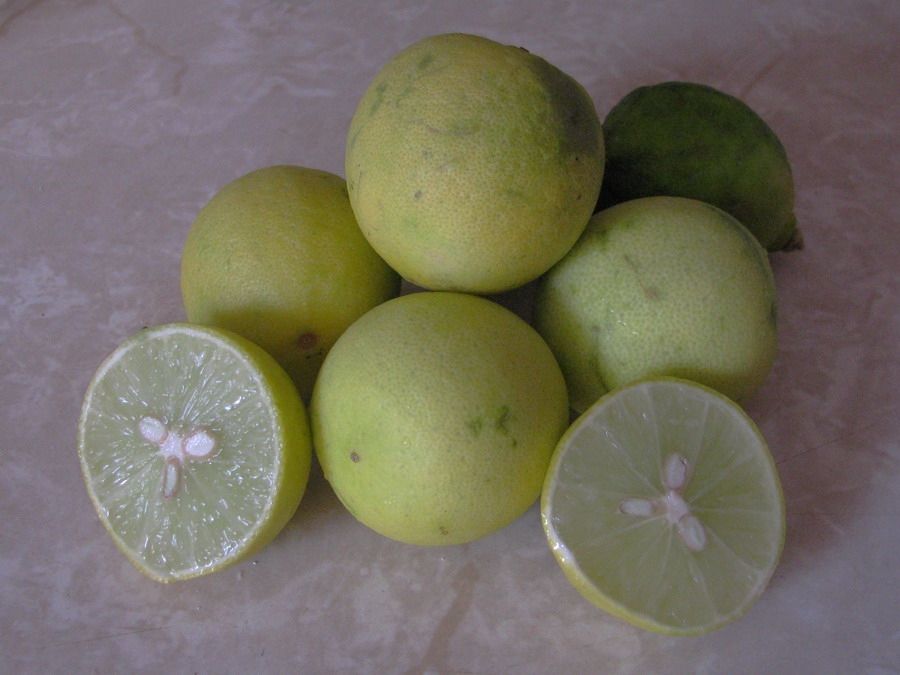
Fig 2 - These are what in México
are named “limones” (lĩmõ̞nẽ̞s, following the International
Phonetic Alphabeth) (or li.’mon,as
Wikipedia
says) (lemons) o
leemonais as I think can be pronounced. They have a diameter of at most
4 cm.
In the USA these are called “limes”, but in Mexico this is not
appropriate
because “lime” translates for “lima” (lee mah) and “lima” in Mexico is
another
fruit something bigger than these, with the scent and some taste of the
“limones” but nothing of its acidity. So I best show my material as it
is.
Fixation with lemon juice
According to the recommendations of the histologists,
who know about
these things, I put in a capsule enough lemon juice (my proposed
fixative) to make its
volume at least 10 times
the volume of the epidermis… i.e. I
filter through a fine sieve enough
juice to fill two or three tablespoons… and left the epidermis** in it,
abandoned to their fate for 10 minutes. Remove the peel from the lemon
juice,
and wash it in clean water for 2 minutes, stirring from time to
time. The
sheet does plunge easily in the lemon juice, but tries to float in the
washing
water. The waxy cuticle, therefore, is not totally neutralized. So I
give it 15
more minutes. This time it does not float.
**For this and all coming experiences, I use fresh
cut onion
cataphylls. Those that were left exposed to air, or preserved to work
“next
day” could fail, or have erratic responses to reagents.
Also, when sinking the epidermis in any reagent, I take
the precaution
to do that with the dorsal (external) side of the piece down. Think of
the
pieces I prepare, with two handles. Doing this the handles can surface,
more or
less, but the epidermis would be in the underside, well submerged in
the
liquid.
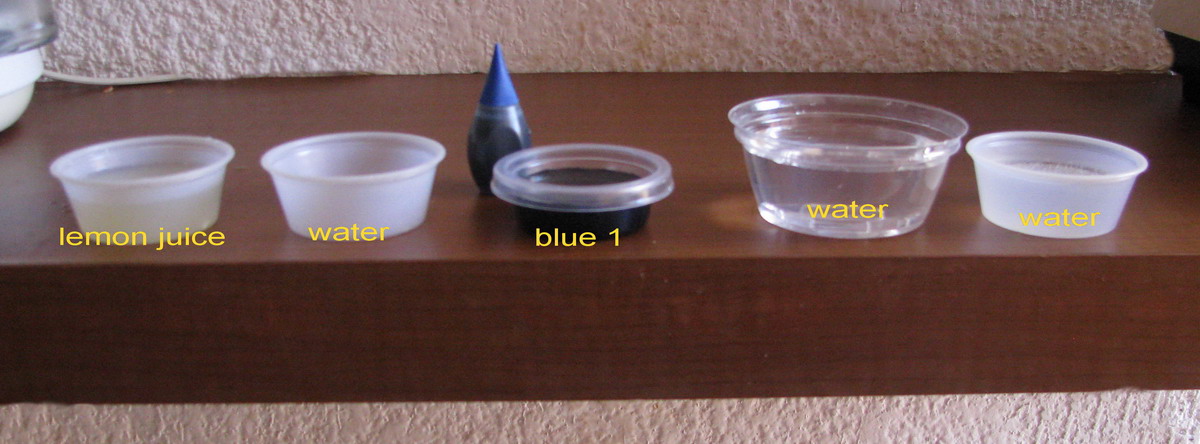
Fig 3 – This is the series I use to prepare the onion
skin peels. Of course those who can buy the appropriate laboratory
glass
material must do so. But no one can say that there is an amateur so
poor who
cannot have the opportunity to conduct meaningful experiments.
Have lids available for all reagents, especially those of the dye and fixative to prevent dust from falling on the surface of the reagents. And often
change the first washing water, to minimize the carryover of fixative’s
traces
to the dye.
Then I pass it for 10 minutes to a capsule with water
colored with Blue
1, which was a successful nuclear stain in my last trials.
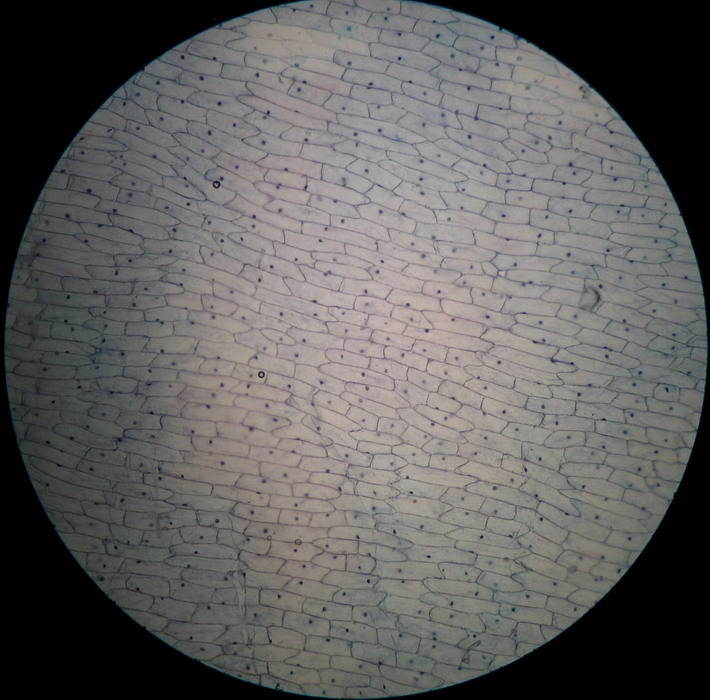
Fig 4 – 4x obj. You can see two minimal
bubbles (I search for them) This is a common image, but not all times
is so
favorable

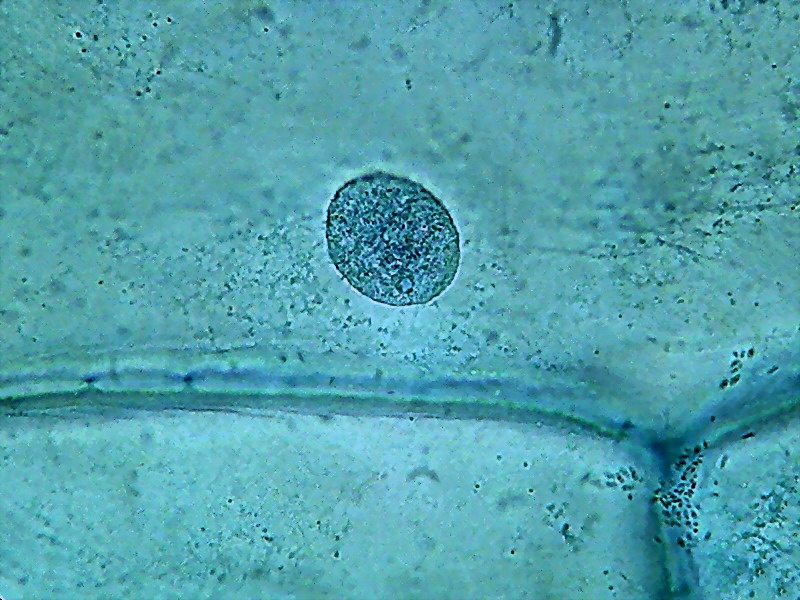
Fig 5 - An image with the 10x objective (another
preparation) no
bubbles. The shadows are coloured
mesophyll in the underside of the skin
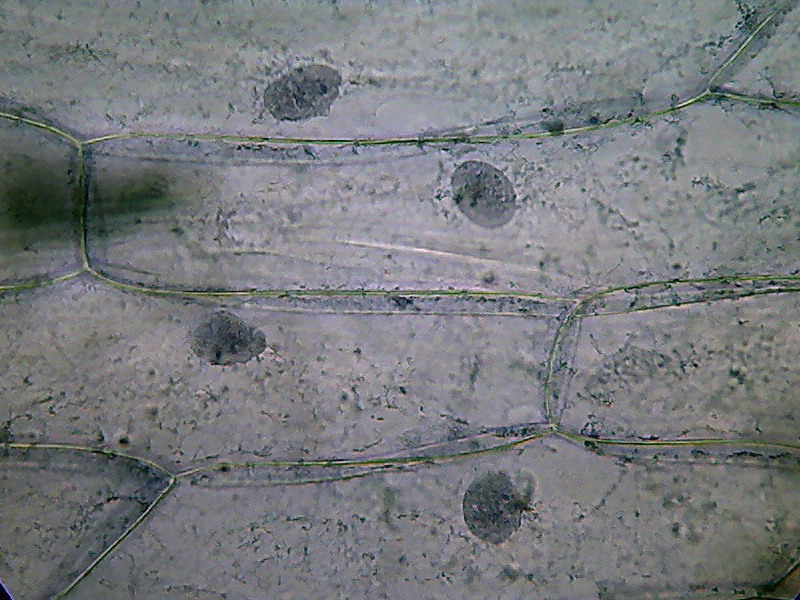
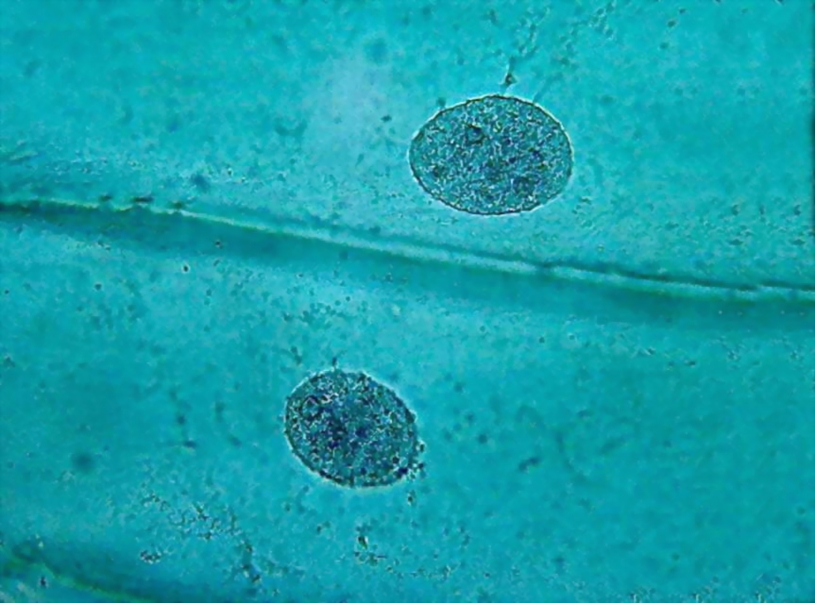
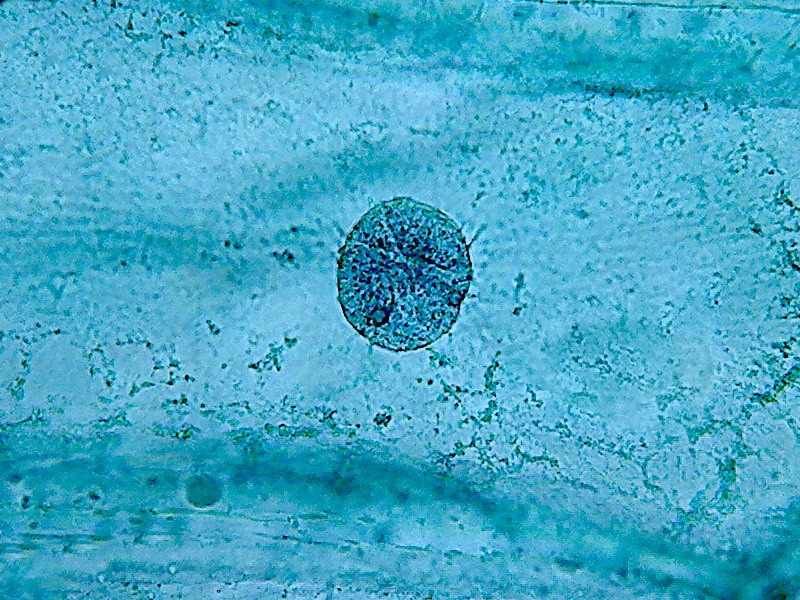
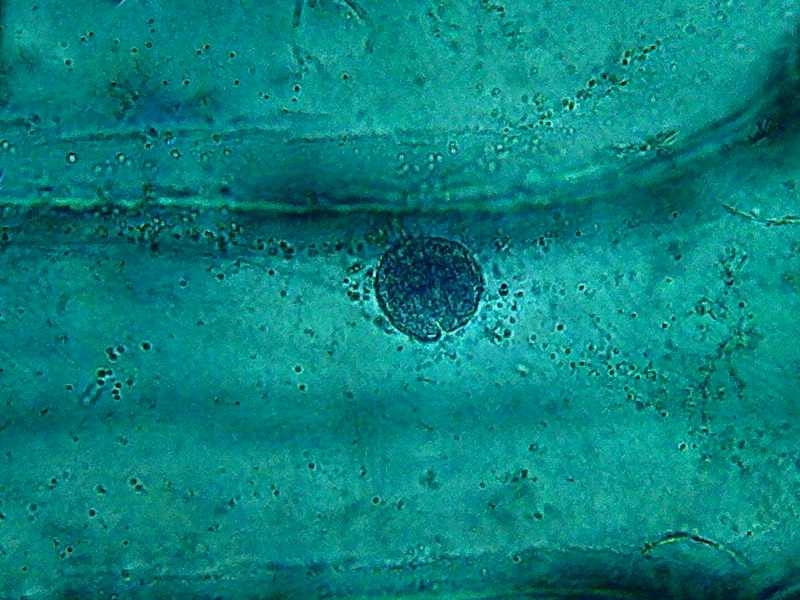
Fig. 6 – 40x obj. General fixation will
be rated as fairly good, nuclei are neat and well differentiated from
the
cytoplasm. Cytosol is depicted as an irregular reticle, but at this
magnification, nucleoli are shown faintly or not at all.
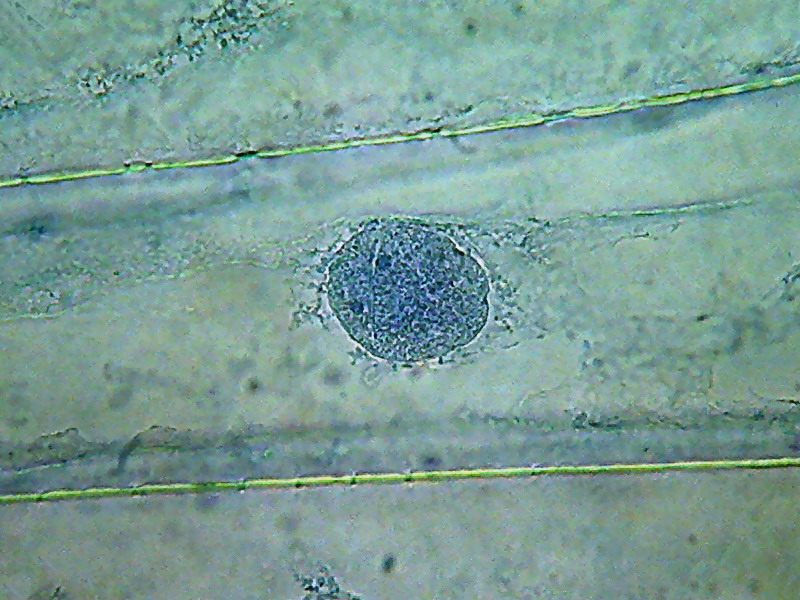
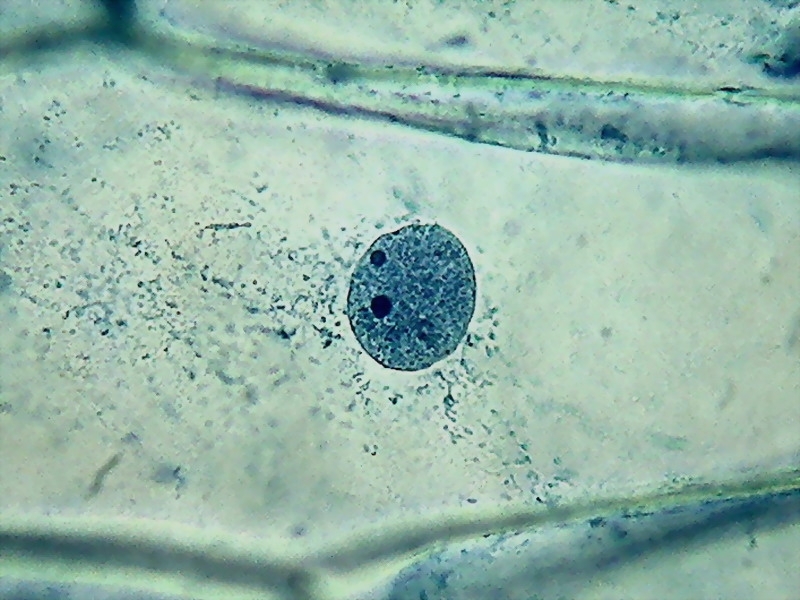
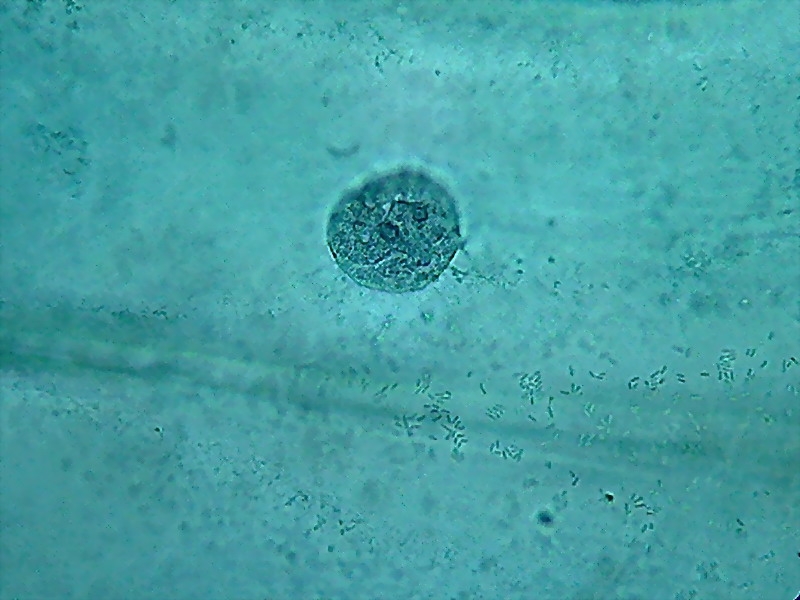
Fig 7 - Nucleus fixed in
lemon juice, 100x
obj. The image is very similar to those given by the 60ºC hot water.
But
nucleoli in the juice are a lot less prominent
8 – Nucleus fixed in 60 ºC water (fig. 12 from last month's article)
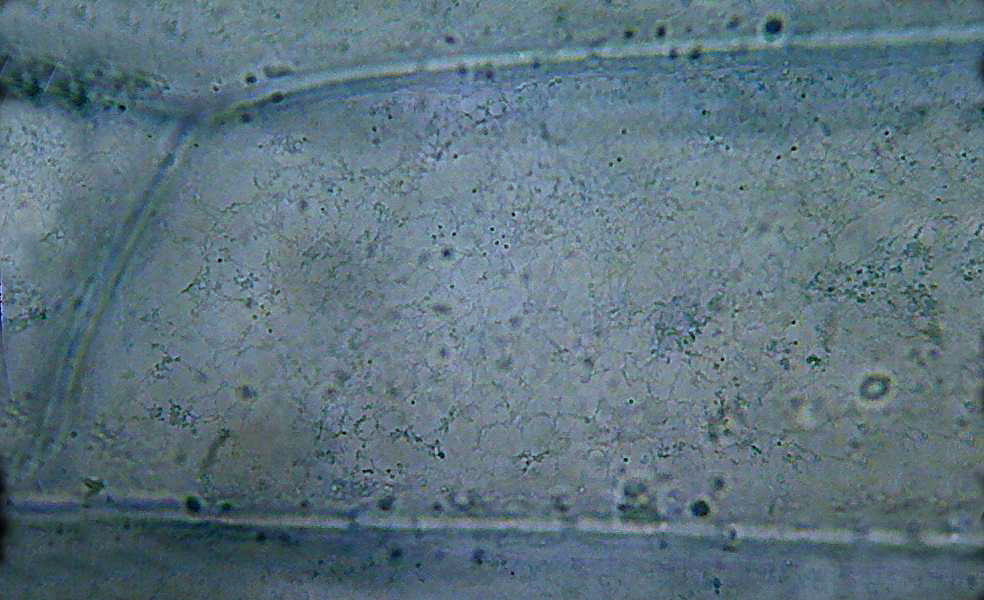
Fig 9 – the cytosol near the cell wall. Lemon
juice
It is evident that the lemon juice fixed
the epidermis, probably not so well as the 60ºC
water did, but good enough to show the general cell morphology in some
detail.
Fixation is cruder, and in some cells the cytoplasm is detached from
the
cell
wall. Perhaps all is needed is a better timing, but I have verified
what I
suspected (plain lemon juice fixes cells), and also I see now what
could have
been a foreseeable problem
The
“ceviche” of onion epidermis was quite effective!
But... a major drawback is that the exact composition
of lemon juice, and even the exact concentration of acid in the juice,
may vary
(within tight limits of course) from variety to variety, from lemon to
lemon,
from production area to production area, even from country to country.
This is not trivial. My first trial was a success. By
good fortune I had
not ready the photographic cameras. So I needed to repeat the essay...
with
another lemon... and it caused great plasmolysis.

Fig. 10
– 10x obj. See that. You don’t need the beautiful red onion outer
epidermis to
see plasmolysis.
DC3
Motic Camera, picture resized with ACDSee Lanczos
It also happens in some batches that the piece appears
sprayed by fine
refractive, mostly yellow drops, which after much thinking I guess that
they
may be of essential oils of the lemon peel that were incorporated into
the
juice when I squeeze it.
So, fixation and colorations are fairly viable, bubbles
are fairly well
reduced, but the overall process doesn’t merit to be retained. It is
very
insecure.
I think there is, however, a way to
overcome these limitations of lemon juice, and
build on what we have learned from ceviche until now.
Fixing with citric acid –
According to Wikipedia the
lemon juice contains 5-6% citric acid , with a pH between 2.1 and 2.3,
which is
responsible for its tasty acidity. If this is also the main agent
responsible
for fixing, as I suspect, the pure product (which is cheap and easily
achieved
with suppliers of products for pastry) could perform the same function
as the
lemon juice. With a big advantage: the concentration can be fixed at
will. I
prepare 4 concentrations, 10%, 5%, 2% and 1%.
The 5% would be roughly equivalent to the lemon juice, but in a clean solution, and with exactly
known and repeatable concentration, without any other salts or organics
added.
The best results I have obtained with the 1%
solution followed by the 2 %. I discarded for the moment the 5% and 10%
concentrations.

Fig 11 - I made the following experiment (a silly
experiment may be) I mixed fixative and color and mounted a strip of
onion skin
in this media. For most of the ten minutes the image was similar to the
upper
one. You can only see the surface of the cells. After this time and in
a more
or less rapid succession the nuclei start to stain and show through the
cells
wall. I think that the citric had killed the cells and allowed the dye
to
penetrate and bind to the proteins.
Citric acid 5%
In all the following protocols I used
the same series of reagents used for the lemon juice trial, changing
only the
content of the first cup, using in each test the different fixative to
be
assayed.
The tested materials are epidermis
peelings from the third or fourth cataphyle of an onion bulb
This is an example of a working protocol
Cítric
5%
25
min
Washing
(distilled
water)
1
min
Blue
1
15
min
Washing (bottled commercial water)
Rinse (bottled commercial water)
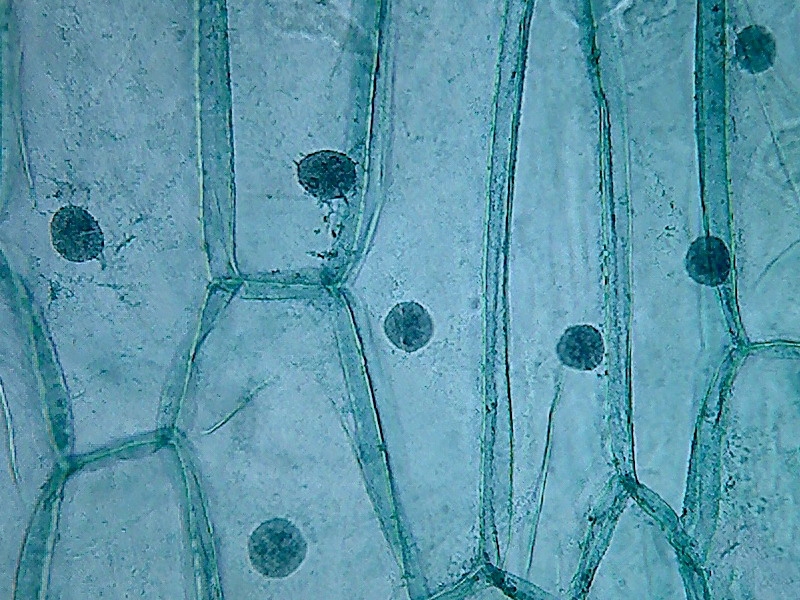
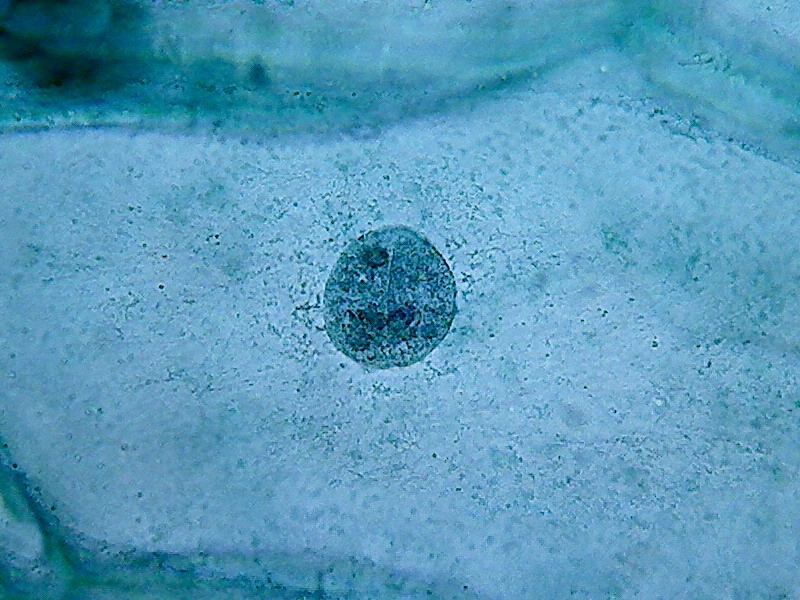
Fig.
12
– 40 x obj. - Good fixed cells. Nuclei well stained, but with a
greenish colour. Nucleoli are hard to be distinguished.
To show both the cytoplasm and the nuclei response to citric acid I add the following six pictures taken through the 100x OI objective.
 13
13
 14
14
 15
15
 16
16
 17
17
 18
18
Nuclei (1000x). On the external face of the epidermis (pictures 13
and 15) you can see that there is a bacterial invasion. Bacteria, fixed
by the
citric acid, have been coloured by the Blue 1. The nuclei are well
fixed, two
nucleoli are clearly seen, although the contrast of the RNA of the
nucleoli
with chromatin in the nucleus is much lower than with other methods of
preparation I already experienced. For some reason, which I leave to
the
biochemists to elucidate, citric acid decreases the affinity of the dye
with
the RNA.
If, used in the raw form that I have used it, it gives
acceptable results as a fixative, I believe that the citric acid
deserves,
later, a more detailed investigation.
Citric acid 2% - 25 minutes fixing, 5 minutes washing, and 15
minutes staining. Washing, rinse.
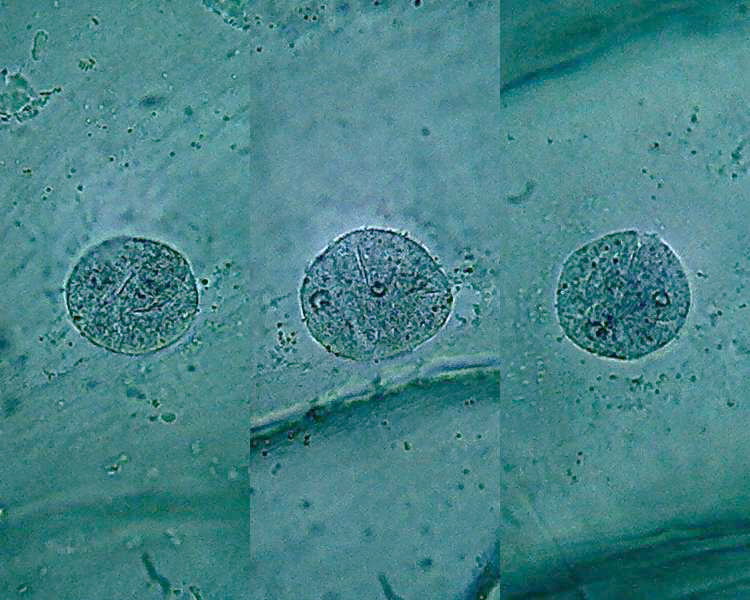
Fig. 19
- SIMILAR RESULTS TO THOSE OBTAINED WITH THE 5% CONCENTRATION
Citric acid 1%
- 25 or 30 min. Fixative; 10 min. washing; 25
min. Blue 1
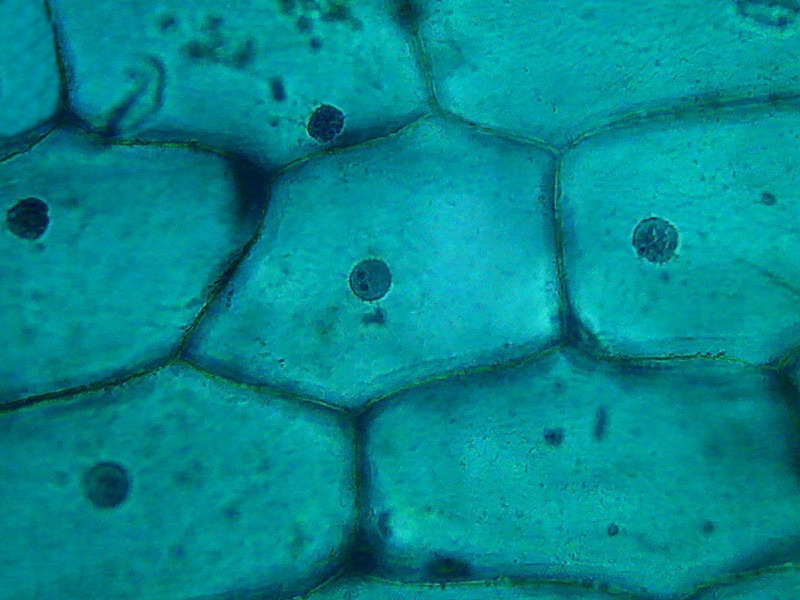
Fig 20 - 40x obj
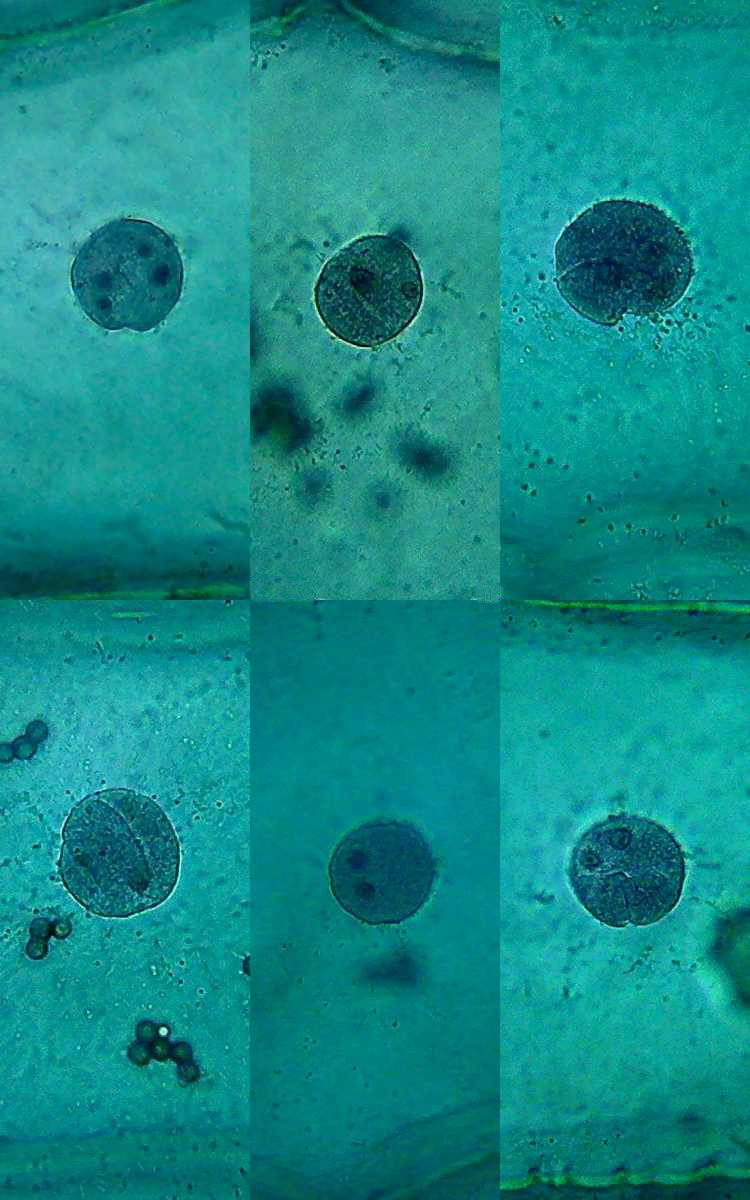
Fig. 21 - six nuclei, 10x obj. 1% citric acid
The consequences of using this lower
concentration appear to be several.
1) The
differentiation between the intensity of coloration of nucleus and
cytoplasm
was very high.
2) The nuclei were intensely coloured, but
in a transparent manner which gives a sense of three-dimensionality
that
previously were not achieved.
3) The nucleoli are much better distinguished,
even for the color, that is more reddish.
4) The structure of chromatin is dense and
does not appear hard grained as in all previous pictures.
22 - citric acid 10% - obj. 100x OI
I feel that the really good
concentration
is the 1%, which of course is the cheaper of this cheap reagent. Two
per cent
is almost as good. Pending a more intense investigation, I discard
for the
moment the 5% (only for economic reasons) and the 10% concentrations.
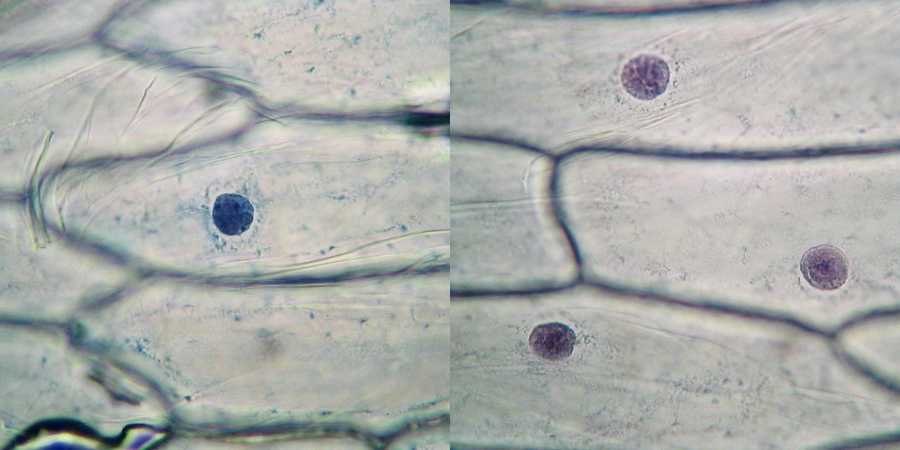
Fig. 23 – In Citric 5% and 10%
the circular gap of the cytoplasm around some nuclei are evident.
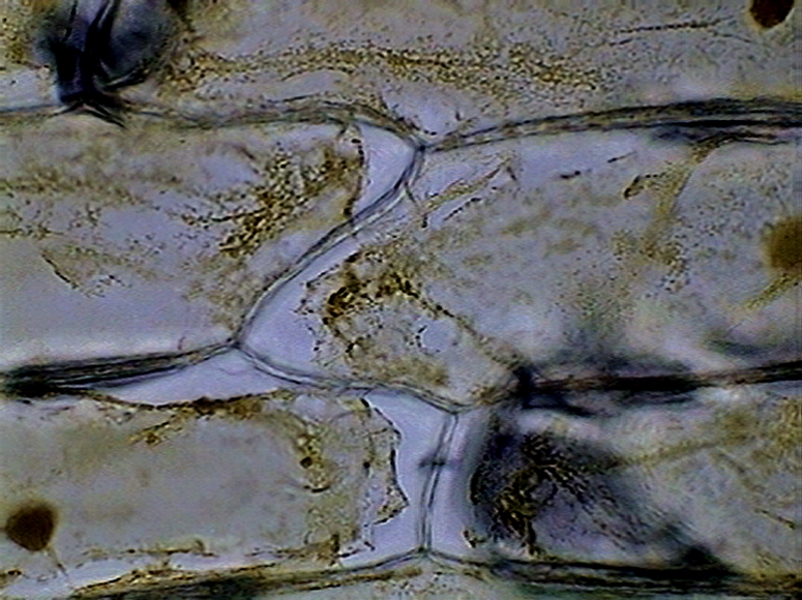
Fig 24– 40x, plasmolysis, a trial some months ago with the 10% citric acid and 10 minutes of exposition.
DC3 Motic
camera resized with ACDSee Lanczos
My inevitable conclusion was that plain 1% citric acid
is the best concentration. But... at least in the temperatures of
Cancún, don’t think about having diluted aqueous citric acid solutions
in stock! In
some
weeks, even days sometimes, mine become good sources of mould,
specially Aspergillus sps., whose black sporangia, and felt-like mycelia,
floating on the surface, denounces them immediately. So you must
prepare your
solution when required, or, at least, frequently ... or find some
antiseptic
that preserves the solutions (which I have not searched for, until now).
This is the Aspergillus sp. As I can see it.
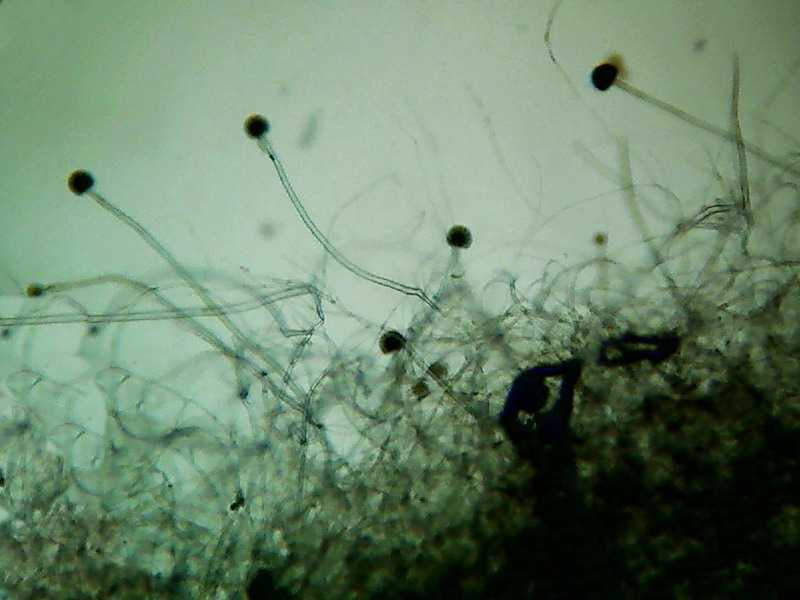
Fig. 25 – Aspergillus, colony border
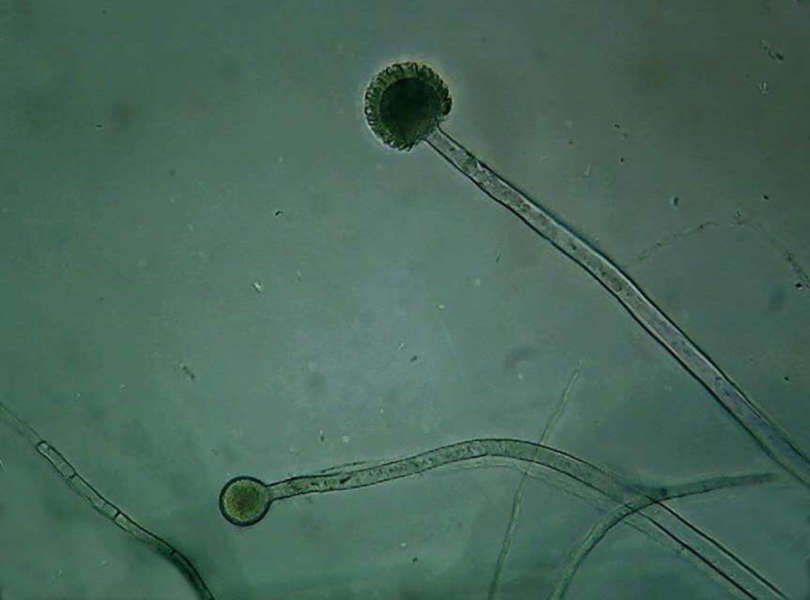
Fig 26 – A complete conidiophore, and a
naked head showing the spherical form characteristic of the genus.
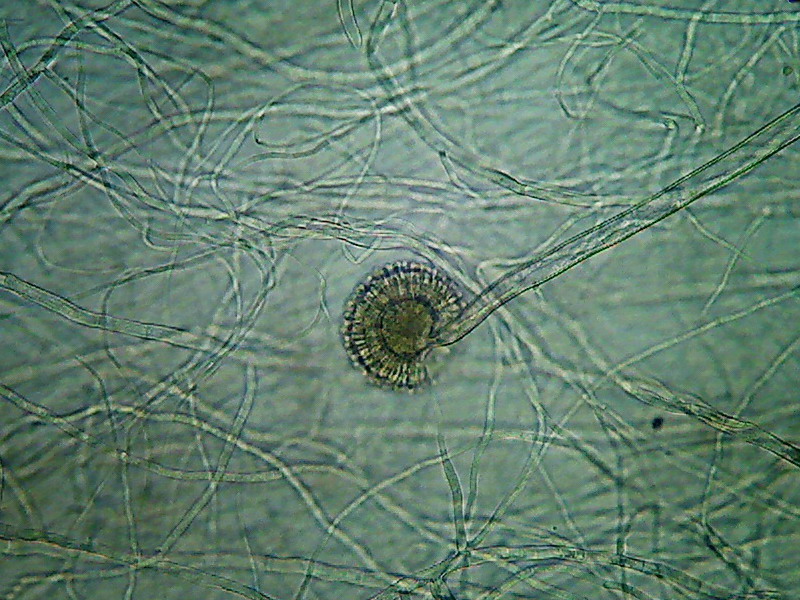
Fig. 27 – a complete head, and the same
with text labels if move mouse over image.
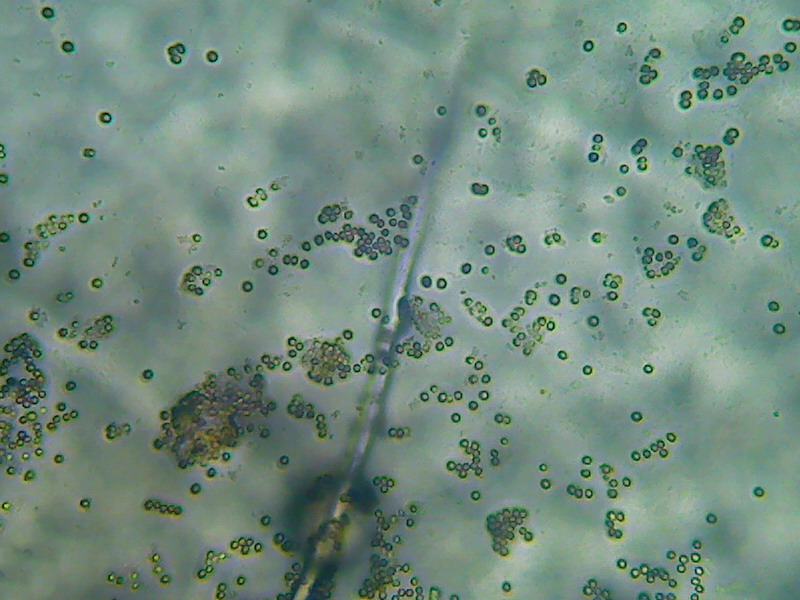
Fig. 28 – conidiospores spread by the
coverslip preassure. All pictures from Aspergillus mounted
in Lactoglicerol – 100x obj.
Even so, using citric acid provide me with an easy to
find reagent, not even previously assessed, as a long search on the
Internet
suggests, which in the simple and cheap 1% or 2% concentration gives
very good
fixation.
And I must declare that almost all
preparations I made had no visible air bubbles, even with the
sensitive 4x
objective.
Perhaps...
But I am very curious about the action
of the other acid included in many ceviche recipes: the acetic acid,
and...
citric acid is very promising, and I am developing and testing some
fixative
formulas which, if successful, would be shared in some subsequent
articles.
So...
you understand me...