Nothing matches the restful ease of use of a well adjusted binocular head. Unfortunately several things mitigate against this. Binocular heads get knocked, manufacturers dont provide any external alignment adjustment (apart from width), and human eyes are different; not just in focus terms, but in alignment. These two defects both tend to get worse with age, focus is relatively easy to correct, alignment isnt. How often have you heard Oh, I prefer a monocular head, cant get on with bino heads, or I shut one eye!. Now before I start, I should say I am not an optician or a microscope technician. However, engineering is my line and I have dismantled and renovated quite a few microscopes.
If you look down your microscope and you cant make the images coincide without strain, one of two things is wrong. Either the bino head is out, or your eyes are. The latter is most likely as the best manufacturers take great care with setup. If you have trouble with most bino heads, it's definitely your eyes! The trouble with a manufacturers careful setup to get the optical paths out of bino's parallel, is that it assumes all humans have similar eye setups, and they dont.
Most people can go cross eyed, in other words converge the eyes optical paths. Children do it a lot, some say it exercises the eyes, others that it damages them. Unfortunately diverging the eyes is rarely possible, and this is where misalignment becomes most problematic. Most humans can converge to align two images (at its extreme to view two 3D pictures). So converging to superimpose images in a bino head is relatively trouble free. Wide divergence is impossible, and very uncomfortable to do even slightly.
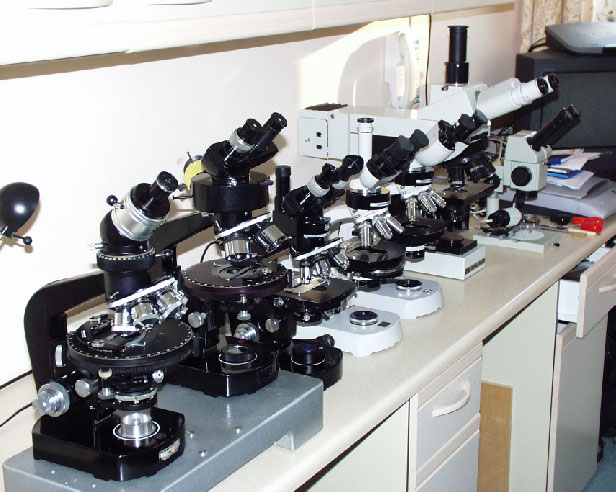
I have three Wild, three Zeiss, two Russian, and two Leitz microscopes with binocular heads. I could only use one Wild, one Zeiss and one Russian, without annoying eye strain. I decided to do something about it.
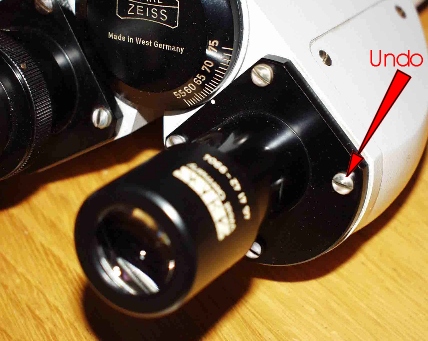
The Zeiss' have Seidentopf bino heads. These proved easy to fix, no need to go anywhere near the prisms. Loosening the four screws shown in the photo on the right eye tube (after careful set up and individual eye focus of the image), I found there was considerable lateral and vertical movement available and perfect alignment of the images was possible. This five minute job made use of the microscope a strain free pleasure. If the alignment problem had been more severe, adjusting the prisms may have been necessary. On the two Wild heads adjusting prisms was the only way.
If you are going to attempt dismantling any part of a microscope you must be prepared. Only the best quality tools will do. Screwdrivers must be the correct width and thickness for each screw, cheap tools will be a disaster (mainly to the finish and screw heads). Working on a binocular head requires a scrupulously clean area and great care not to touch optics. If you decide to adjust your Wild heads read through the instructions first, it is basically easy but needs care and a lot of patience.
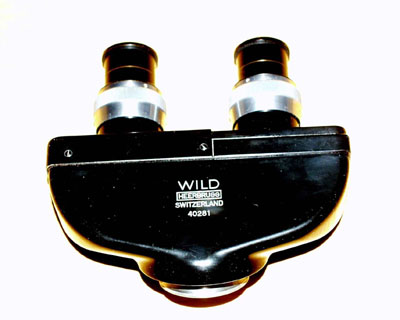
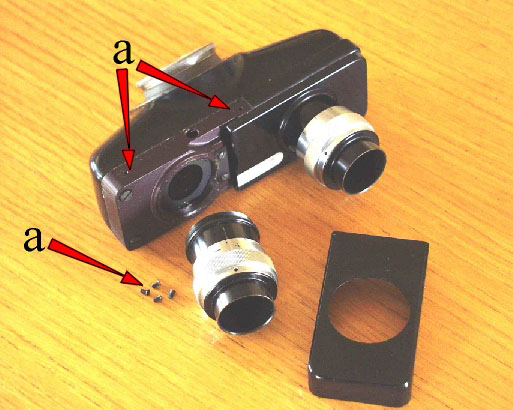
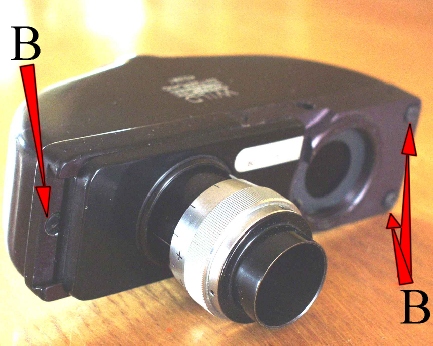
On inspecting the Wild heads I found there are two main types. One standard type with left eye individual focus, and one type with two focussing eye tubes (for teaching/conference heads etc). The photos show how access is gained to the prism assembly. Note the two lenses (d) on the facing surfaces of the two prisms shown in last photo. These compensate for tube length error as the optical separation is changed. Four screws (a) release the right hand metal cover. I unscrewed the right eye tube on both types of head before removing this cover. The left tube can be left on throughout, it actually helps manipulation later. The separation slide must be shut completely to access the third of the screws (b) holding the prism assembly to the housing casting. Turning the assembly over reveals a sliding prism mounted in a cage. At this point I marked the position of the cage at both ends with a sharp scriber (see photo). Remove the cage complete taking care not to touch any optics while undoing four screws (c). Take extreme care not to loose the four very thin shims/washers UNDER the cage.
I used these shims to correct the horizontal convergence/divergence errors in the images. On one head it was sufficient to take out the outer two shims; on the other I had to put two shims on each screw under the inner end of the cage. Basically, raising the inner edge of the cage converges the images; lowering the inner edge (or raising the outer) diverges the images. Heres the snag, the only way to test the result of the adjustment is to re-assemble the head and try it. This is where another difficulty lies. You will remember I marked the alignment of the prism cage at both ends, you must make sure it realigns perfectly. Of course you may wish to correct image alignment vertically as well using the tolerance in the screw holes to rotate the cage slightly (one of my heads needed it). Trial and error is the only way. The first head took me six disassemblies and assemblies. The second only took two - I knew what I was doing by then.
Of course purists will now be screaming at me. Tightening screws on washers slightly out of square! Fractionally tilting prisms to the optical path! (Purists who have never looked inside a Swiss microscope may also be horrified at the bits of foil shimming and the cemented prisms). But, only the left optical path is changed, the change is very slight, probably within the manufacturers tolerance anyway. The entire change does not affect camera tubes and accessories below the head, and if you take photos down the bino head you can use the unaffected tube. The majority of my objectives are Planapos, plan Fluotars, and Neofluar phase, I can detect no aberrations. Several people have used the heads since and none noted any strain, in fact they all commented how easy to use the heads were. Remember, a very slightly over converged optical path is easy to accommodate. The images I now get are so easy on the eyes, even after several hours at the microscopes. Im going to investigate the other makes and types now.
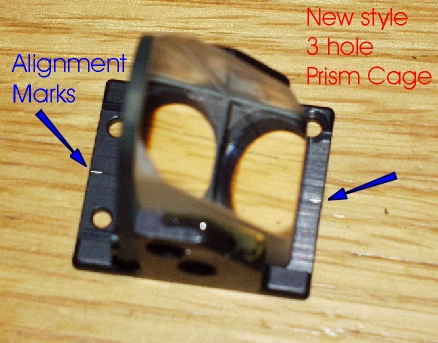
Note that later Wild heads have a slightly different prism cage. The cage has only 3 screws fixing it in place (last photo). I did not find any shims in two that I have since adjusted. I used extremely fine shim washers to adjust both heads. The adjustment principle was the same as the earlier models.
If you are a man or woman of steel with a slightly unsatisfactory bino head-go for it, it really is a revelation-but dont blame me if you cant get it back together!
Comments to the author, Raymond Sloss are welcomed.