by Ron Neumeyer, Canada
Introduction
As spring rains beat against the study window you settle down for a pleasant afternoon of microscopy. Removing the cover from the scope you put a carefully prepared slide of pond water on the stage and adjust the sound system, filling the room with your favourite music, drowning out the sound of the pounding rain. Pity your friend down the road, who has taken up astronomy, not much chance of star gazing tonight! With these thoughts in mind you flick the lamp switch - the bulb flares to brilliance, and dies. The smile fades from your lips as you search in vain for a fresh bulb, sadly recalling this was the last of your hoard of 20 year old bulbs. No problem, a quick (albeit wet) trip to the local lamp shop and you should be back in business. You give them a call. Yes, they have a new replacement, but the phone falls from your hand as they quote the price - more then you paid for that lovely planapo 10x on eBay! If this sounds familiar it may be time to enter the world of fibre optics, where bulbs cost less then a movie ticket and, more importantly, the illumination is brighter and cooler than any conventional tungsten illumination system. Interested?- read on.
I use fibre optic lighting on both my microscopes. The Leica Macroscope illumination is pretty much standard - the light source supplies a large 8 inch ringlight. However I have “retrofitted” my Zeiss Photomicroscope (PM) II for fibre optics. The PM came with a 60 watt – 12 volt tungsten bulb located in a lamp house fitted to the base by means of a bayonet coupling. For bright field, low power darkfield and phase, the bulb output was more than adequate. However, this arrangement fell short for high mag work in darkfield or phase, especially when attempting to capture a digital, or film image. Furthermore, high intensity tungsten bulbs emit a good portion of their electromagnetic energy in the infrared spectrum. Infrared radiation translates to "heat", and is readily absorbed by certain types of optical glass and other components in the optical path, especially at planes conjugate with the surface of the bulb filament, such as objective phase rings. Such heating can soften optical cement causing glass elements to separate (“delaminate”). Infrared radiation may also raise the temperature in aquatic preparations under observation – bad news for any associated micro-organisms. Converting the PM to fibre optic lighting eliminated both concerns. This article outlines how I modified the lamp house for a fibre optic feed. My approach should be suitable for lighting configurations found on most microscopes - including free standing lamps.
Installing the Fibre Bundle
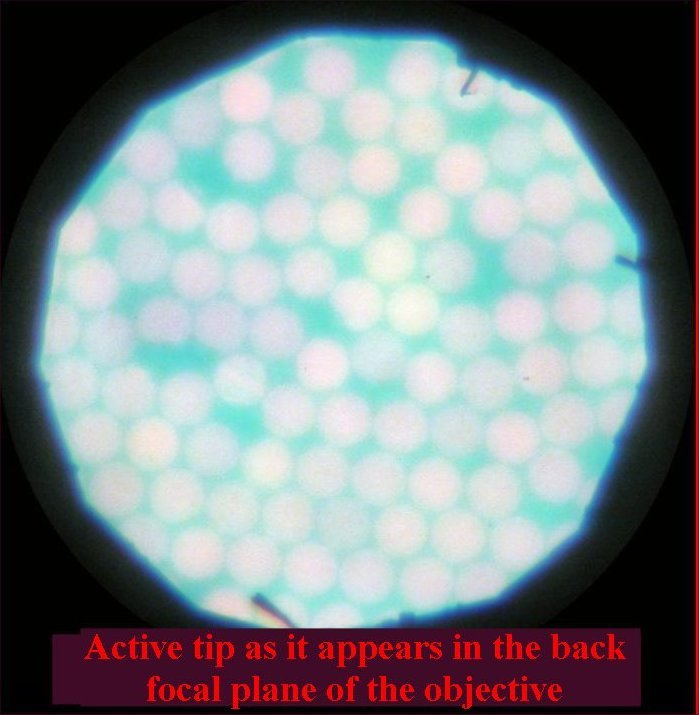
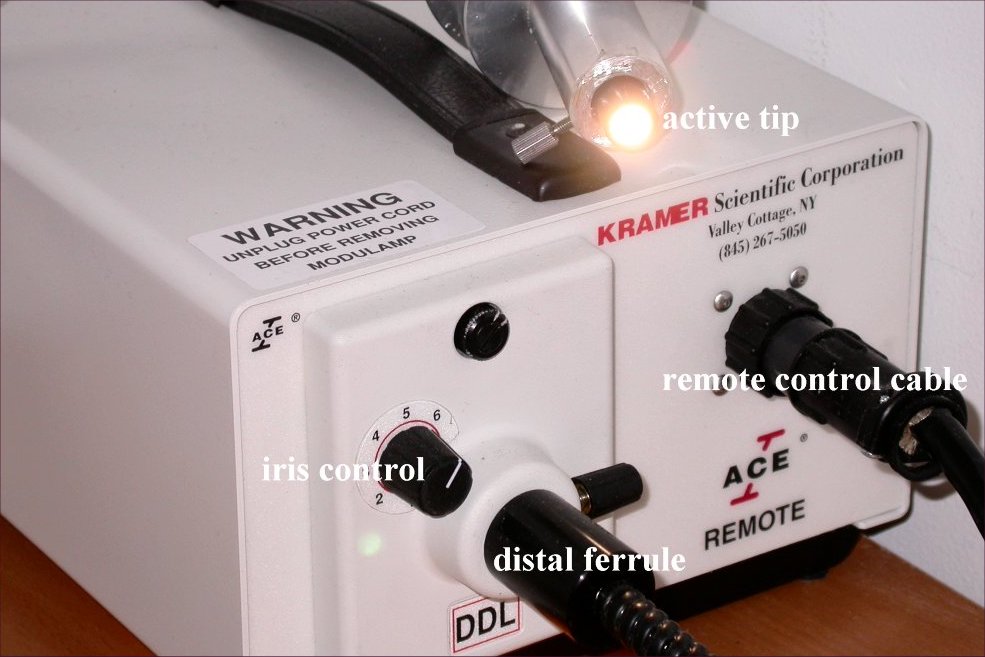
The PM lamp house is typical of most illuminators designed for Köhler illumination. It consists of two discrete components, a lamp socket assembly and a lamp housing with a built-in condenser lens. The tungsten bulb has a relatively large, tightly wound filament. In accordance with the principles of Köhler the microscope condenser is adjusted to give a sharp image of the field diaphragm in the plane of the specimen. Next the lamp filament is brought in to focus in the rear focal plane of the objective by sliding the lamp socket in and out of the housing. Once this is done the subject is evenly illuminated. With fibre optics it is the "active" fibre tip, not the filament, that is imaged in the focal plane of the objective (picture 1). Let's have a closer look at a fibre optic cable and illumination system.
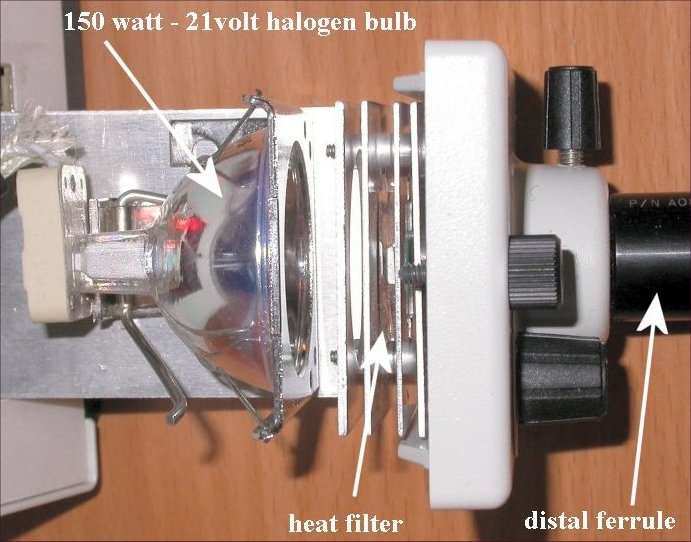
In cross section, a fibre optic light transfer cable consists of a central core made up of hundreds of very fine glass filaments cemented together to form a bundle which is wrapped in a flexible protective outer jacket or cable. The ends of the bundle are polished to optical flatness and embedded in an aluminium or brass casing. One of the casing ends is designed to mate with a fitting on the light source housing – the so called “distal ferrule”. This fitting aligns the fibre bundle with a high power halogen bulb of a type used in slide projectors (typically 150 watts - 21 volts). Most modern fibre optic light sources have an infrared heat filter located between the bulb and ferrule tip (picture 2). Although the outside diameter of the distal ferrule is not consistent among manufacturers (note: be very careful when purchasing a light source and cable separately - in some cases it may be impossible to combine the two), it typically falls between 10 and 20 mm. The fibre bundle is generally more than 6 mm across. Transmission efficiency in a good cable approaches 99%, so cable length is not a fact.
(1) (2)
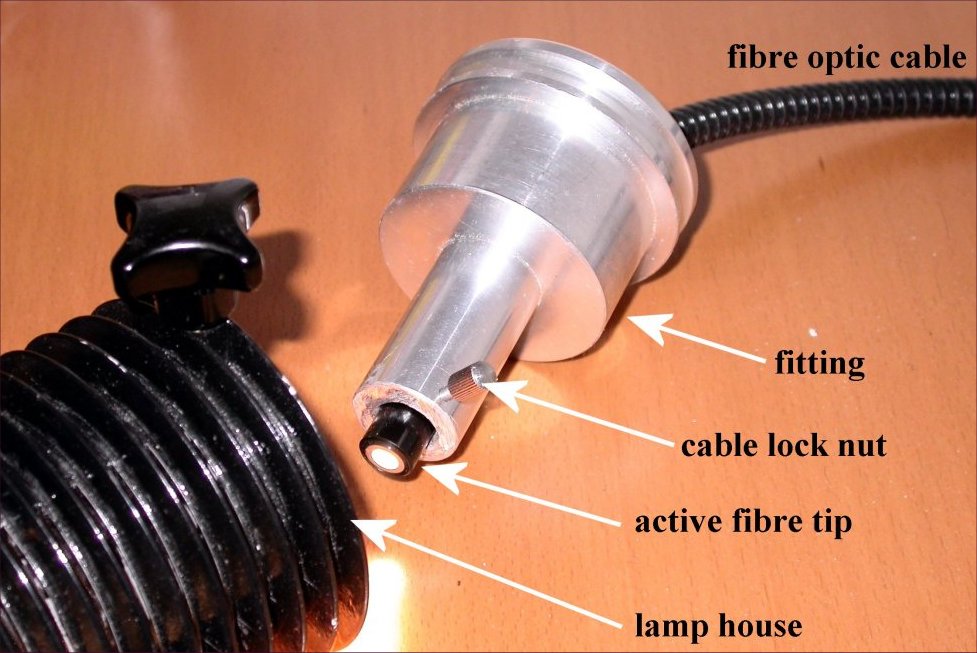
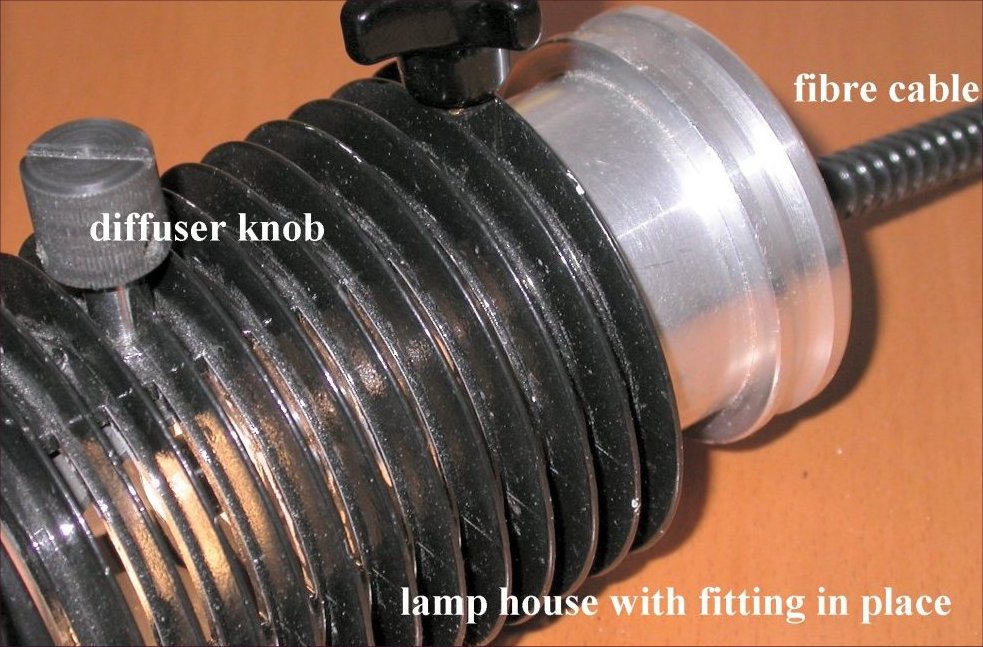
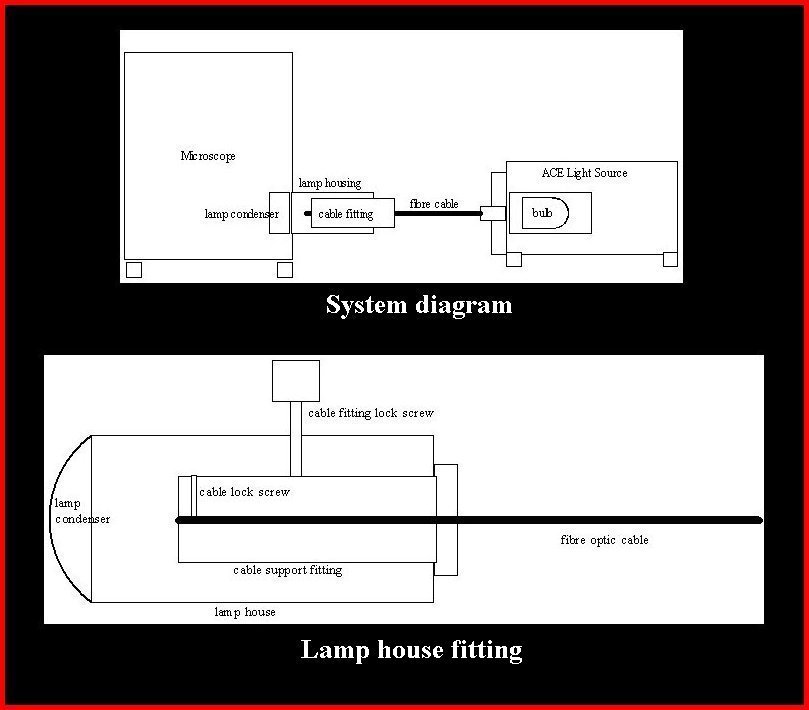
The goal of the conversion process is to replace the lamp socket assembly with a fitting that puts the active fibre tip in same relative position in the housing as the bulb filament. Precise alignment of the tip with the optical axis is not essential as it is much larger than most lamp filaments. The metal fitting I used (picture 3) is more elaborate than necessary as the machinist used a piece of scrap work that had been tooled to this shape – a straight piece should work fine. Metal is nice but it can be fashioned from wood or plastic as the cable does not become excessively hot. The OD of the fitting should match the old lamp socket. A lock screw for securing the cable in the fitting is useful. To allow the fitting to slide in to the housing you may have to countersink this screw. The fibre cable, snug in its fitting (picture 4), is secured in the lamp housing by means of a lock screw after aligning the tip for Köhler illumination. The opposite end is inserted in the light source.
(3) (4)
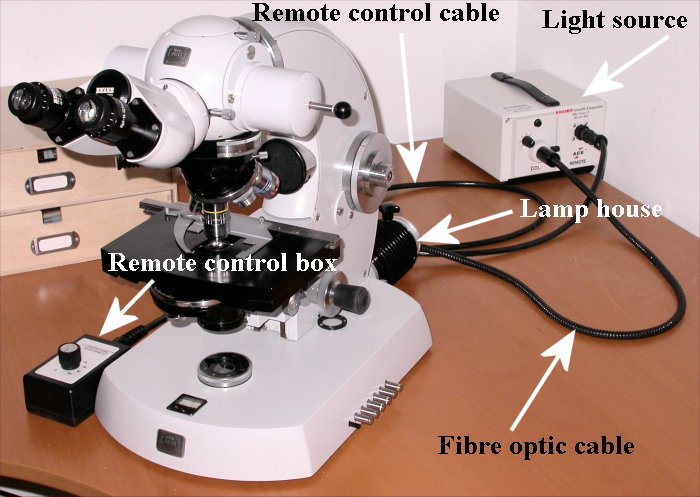
One of the best light sources currently available, at a reasonable used price (although new systems are falling rapidly in price), is the (Schott) Fostec ACE Light Source. These come up several times a month on eBay (look for the body style shown in the picture below as these units are sold under various brand names - such a "Kramer" - picture 5). A crafty bidder can generally “win” one, with a cable, for less then $150 USD. SF continues to offer a range of fibre cables for this style illuminator (also common items on eBay). The Schott-Fostec site has all the gory details - complete with dimensional drawings. In addition to the selection of bundle types this light source features a bulb carrier that is very easy to remove from the case (shown in an earlier picture), making bulb replacements a snap (the standard carrier can be replaced with an iris version if needed). There is also a remote control ACE, which allows you to place the illuminator in an out-of-the-way spot (all of these units have a cooling fan which some may find a tad noisy – I have no problem with it – also a rheostat can be fitted to slow the fan and reduce the noise). Finally, picking up a second or third unit is easy, inexpensive and greatly increases both convenience and flexibility (e.g., epi and trans illumination at the same time). On the flip side you can use one light source for several scopes by inserting the appropriate cable feed in to the light source. The final picture (6) shows the PM2 with the remote control fibre optic system ready for use.
(5) (6)
In Conclusion Converting to fibre optics is easy and relatively inexpensive. These illuminators and cables provide a degree of flexibility, light intensity and heat filtering not attainable by any other means. Replacement bulbs are readily available and cost very little. In my experience microscopists often overlook the illumination system on their scopes, being satisfied with whatever comes out the light port. Pity, as in many cases this is far from ideal. In my opinion, fibre optic illumination is the most efficient and effective way to make your optics hum!
All comments to the author Ron Neumeyer are welcomed.
Editor's note: The article is mirrored on Micscape from the author's web site the Light Microscopy Forum with permission. The site includes a wide range of links to microscopy and related resources as well as valuable resources written by the author.
Please report any Web problems or offer general comments to the Micscape Editor.
Micscape is the on-line
monthly magazine of the Microscopy UK web
site at
Microscopy-UK