|
The Vickers Epi-Illuminator.© by Michael Race, Australia |
Microscopy undoubtedly appeals as a hobby due to its limitless range of specimens for study and many differing modalities from cardboard stops for dark field, to confocal and beyond for those with deeper pockets and servants. Having explored the lower end accessories for my microscopes I felt that a look at epi-illumination would be enlightening and offer yet further interest. It would seem that epi-illumination can be used for most common modalities in microscopy including bright field, dark field, phase contrast, DIC etc., but careful setting up is required, and some adjustments may have to be made even when switching objectives.
At first enquiry I found that this particular form of illumination may be achieved more or less in three ways.
The first choice of an external light would mean that only low power objectives could be used because of the space needed above the slide for the light to shine onto the specimen. Also the specimen can only be lit from the side, so not getting down into any deeper features.
The third option may require another microscope and prove to be too expensive both legally and maritally, so the second was chosen for further study.
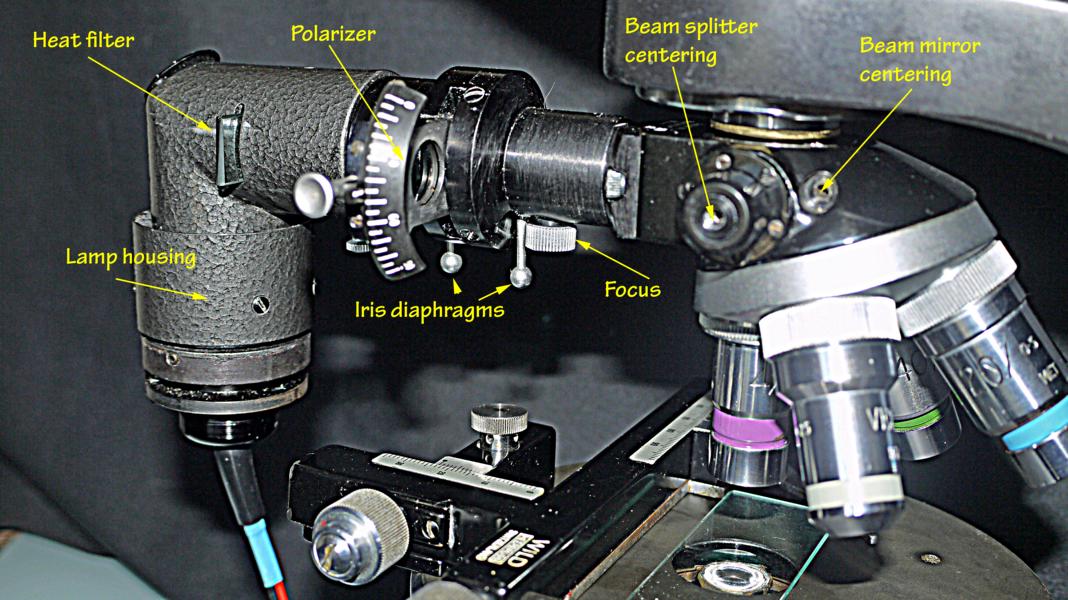
For this type of illumination a beam splitter is placed between the objective and the eyepiece (binocular head) in a special housing. The eyepiece looks straight down through the splitter to see the image presented by the objective. The light source is directed into the side aperture of the beam splitter, and via added optics, is passed down through the objective to illuminate the specimen. The objective being it's own condenser as well as serving it's intended purpose.
Beam splitters take many forms but the two most common are a semi-silvered mirror or a special 45° prism. Whilst the prisms are probably the more versatile, the semi-silvered mirror is more compact and usually the more economical. Beam splitters split the beam by various ratios*, the normal being 50 : 50% but depending upon application, may also be 60 : 40%, 70 : 30% etc. In fact the one I have is probably more like 80 : 20%. The reason for imbalance is that in the case of epi-illumination we have a somewhat feint image passing one way, and a powerful light the other. Obviously we can afford to sacrifice some light in order to achieve better use of the weaker image beam, by having the image pass through the mirror at some angle much less than 45°.
One of my particular interests is foraminifera, but I always wanted to see them from the top rather than with light passing up through them. This want could only be satisfied by finding a suitable epi-illuminator for white light, using bright field. I certainly didn't need fluorescence units with expensive dichromatic cubes, mercury lamps and blocking filters. Of the several epi-illuminators I considered, the Vickers appeared to offer the best choice mainly because it is a very compact unit which can be attached to many different kinds of stand apart from those of Vickers. Unfortunately these units are somewhat rare so it required a lengthy wait until one was offered for sale.
Eventually one appeared for auction and following something of a bidding frenzy I managed to win the contest; I am not always that lucky ! Eventually my illuminator arrived in the post and proved to be in excellent condition, if not totally unused, and at just 7 inches in length, contains all components in one very neat unit.
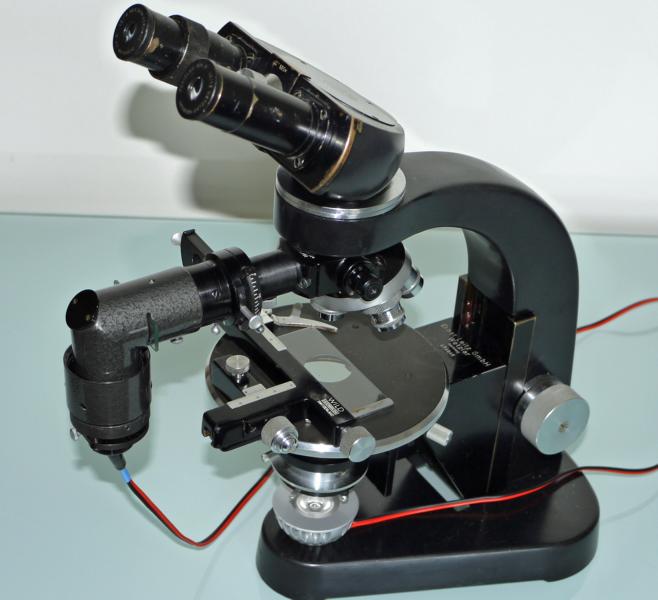
Fig. 2. The Vickers epi-illuminator fitted to the Leitz Laborlux III.
The complete Vickers illuminator really comprises three distinct parts.
Diagrams I have found detailing an epi-illuminator system show a single semi-transparent mirror used for the beam splitter. However, the Vickers model actually employs two mirrors for this job. The semi-silvered mirror being almost normal to the optical axis and therefore markedly reducing image reflection losses. The second mirror directs the illuminating beam up onto the splitter from the horizontal.
Whilst it is not actually marked as a Vickers piece, it does have a list of British patent numbers, in case I wished to verify its provenance.
The attachment boss with securing nut has an RMS thread which simplifies its mounting on a variety of microscope stands. Except the one I then had! Considerable surgery would have been needed, so it was decided to locate another stand and one having plenty of travel on the stage. Attachment is by removing the existing objective turret, and fitting the illuminator in its place where it only adds ½ inch to the total depth. I eventually located an old Leitz Laborlux III stand, with lots of room above the lowered stage, and limb turret holder with RMS thread. This find was pure luck rather than design but you have to be lucky sometimes !
It would seem the majority of illuminators are fitted above the limb, so the optics tube and lamp house can hang out the back. On mine not so easy, since the unit attaches below the limb, so has to stick out to one side or even the front, where one has to lean over it I order to use the eyepieces or of course, turn the whole 'scope through 180 degrees. Where illuminators are above the limb, additional inbuilt optics are required to correct the tube length, unless it is an infinity corrected instrument.
Whilst I had a suitable transformer to feed the 6 volt, 15 watt lamp it was decided to replace the tungsten lamp with a 1 watt Star type LED. This made for a much simpler power supply, and obviated the need for the heat filter. Also my LED was quite white, so I decided not to bother with a blue correction filter may try that later on. Seemingly the large loss of light with this system certainly requires the LED to be run at full brilliance. In fact I have recently changed the LED for a 3 watt model.
At first, switching on and looking down on something just isn't that simple, well, never is I suppose, with first impressions being disappointing if not disastrous. A bright blurry scene, hard to focus and with almost no contrast meant that my learning curve was still pretty flat. Overhead lighting tends to produce somewhat featureless images, which is one reason why photographers avoid shooting around midday. So I learnt that many specimens are unsuitable for this type of lighting.
The objective obviously acts as both condenser and objective making the best use of its NA in both directions so the light beam must be adjusted to fit the back aperture of the objective. This is achieved by means of the field diaphragm, the aperture diaphragm being used in the normal way, except in this case having limited travel. A result of the foregoing is that when changing magnification to a higher value, the NA improves so the illumination actually gets brighter instead of the reverse under normal trans-illumination. However, judicious use of the field and aperture diaphragms is needed in order to produce an acceptable image, otherwise both flaring and ghosting will ruin whatever can be seen or discerned.
Obviously the image forming rays cross over with the illuminating rays so the internals of any objective have a lot to contend with. Most manufacturers produce dedicated optics for epi-illumination. One way to reduce this mixing of light inside a lens system is to polarize the incident beam, and view the image beam with a polar partly or wholly crossed to the illuminator. It certainly does clean up the image, in fact for some specimens it's about the only successful method of viewing.
In my short experience I find that many specimens don't quite look as one might expect; it's harder to focus, the image is very dim, adjustments are quite sensitive. And as I mention above, the polarizer is I think, an essential feature. Better results are from those items which have a good reflectivity; metals, light coloured specimens etc.
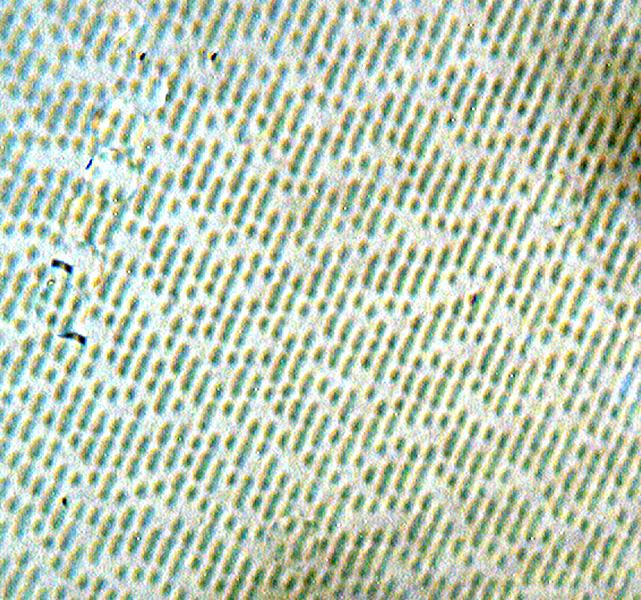
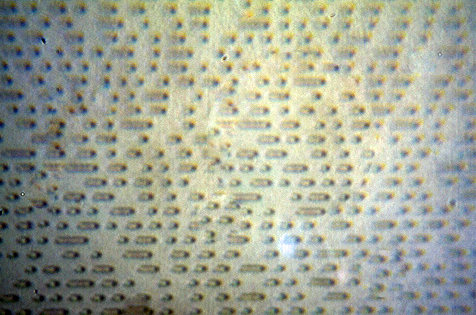
Fig. 3 Inkjet pattern
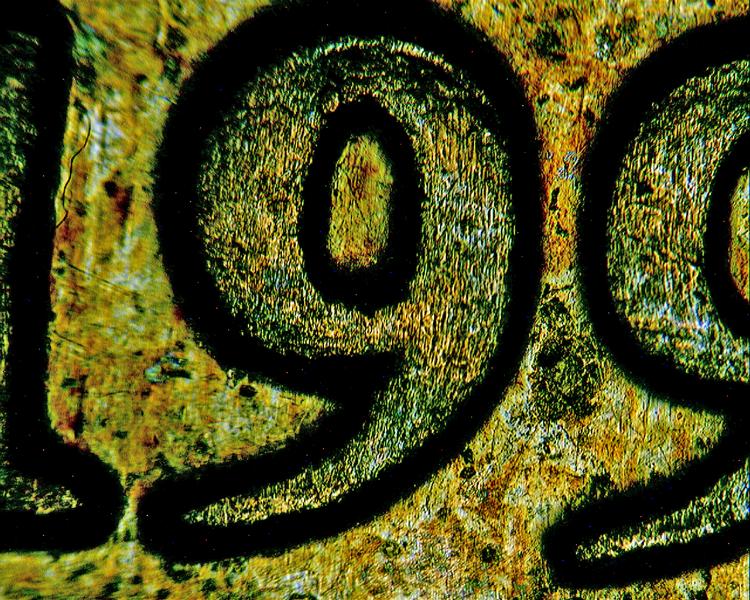
Fig. 4 Details of coin.
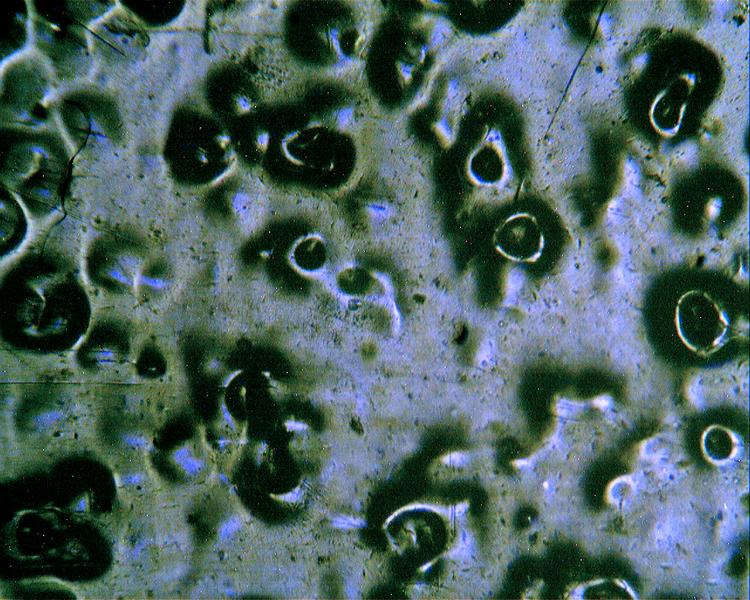
Figure 5 is X40 cleaned up in Photoshop CS5. Some moulding within the binocular head is evident; strangely only noticeable with the camera.
Figure 5b is X1,250, four images stacked and cleaned up in Photoshop CS5.
Objective a Leitz X100 achromat oiled with glycerine!
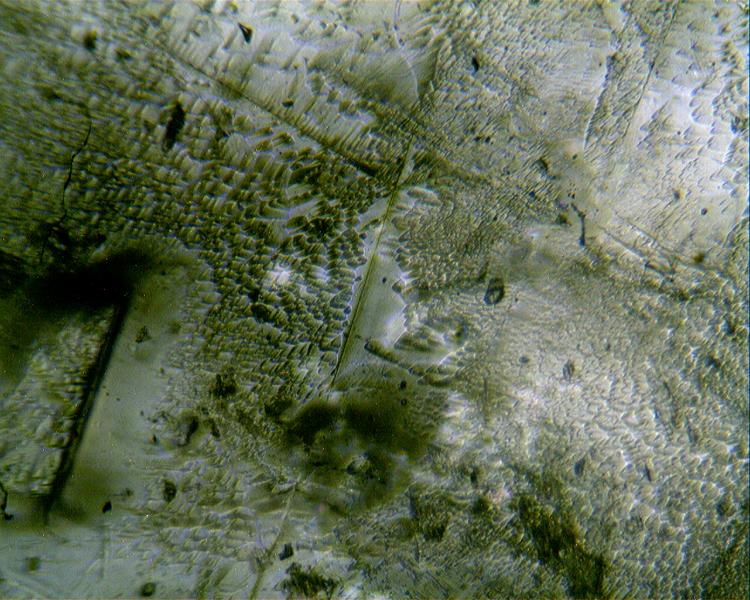
Fig.6 Surface of crystal.
Naturally when a specimen is either opaque or a top view only is required, then epi-illumination comes into its own, being a valuable adjunct to normal trans-illumination but I find is not quite as straight forward to use. Often finding an illuminator to fit a particular microscope stand may prove difficult unless one owns a recent model and such a unit is offered as an accessory. Where the Vickers really scores is in being very slim and adding no more than 12 mm to the effective tube length. As far as objectives are concerned, it must be realised that many are not suitable for this kind of work since they can produce undesirable artefacts such as ghosting. Of course many do work quite well, especially pol models, so it's a matter of trying what you have in the drawer.
In conclusion, one thing that surprised me was the amount of light that has to be pumped in, in order to get a good picture, but then the light losses in such a system are quite severe. There appears to be few papers which deal with this subject, and the only recent books I can find are those by Prof. Fred Rost. Excellent works if you can find them. A problem with using the newer 3 watt LED is one of keeping it cooled, since the present lamp housing does not permit much of a heat sink to be installed. Further development is needed probably by replacing the present lamp housing and using a CPU cooler for the LED. so perhaps I had better stop here to get on with that task.
Fig.1a.
Comments to the author are welcomed.
*Beam splitters are often made with special coatings which not only split the beam but may do so at different wavelengths.
References:-
Photography with a Microscope by Rost & Oldfield. Cambridge. ISBN 0 521 77096 3.
Fluorescence Microscopy vol I by F. W. D. Rost. Cambridge.
Microscopy UK Front Page
Micscape Magazine
Article Library
© Microscopy UK or their contributors.
Published in the March 2011 edition of Micscape Magazine.
Please report any Web problems or offer general comments to the Micscape Editor,
via the contact on current Micscape Index.Micscape is the on-line monthly magazine of the Microscopy UK web
site at Microscopy-UK
© Onview.net Ltd, Microscopy-UK, and all contributors 1995 onwards. All rights reserved. Main site is at www.microscopy-uk.org.uk .