| Some months ago
I wrote an article about sea urchins.
So why am I writing again on this topic? Perhaps it's because I always
have an urchin spine in my left forefinger! But the real reason is different:
at that time I didn't use a color still camera and the images were 'hand
colored'. Some features of urchins are so beautiful in their true colors,
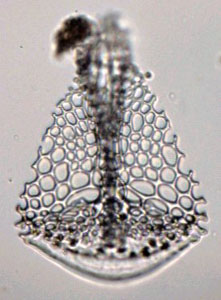
that I have prepared a second article to show some of these features to
Micscape readers; particularly the pedicellariae and their tiny internal
'bones', such as these below: |
|

|
| But to recap
a little: some parts of an urchin are made of calcium carbonate, (calcite,
with magnesium carbonate an important additional component), and these
materials are able to rotate plane polarized light.
Some additional equipment is needed to add polarized
lighting to your microscope. Some methods, including using clip-on Polaroid
sunglasses, have been described in past articles in Micscape, but I have
used a different approach.
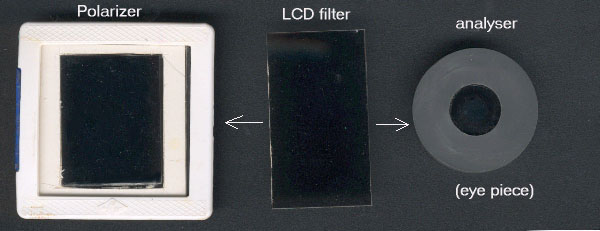
Liquid crystal displays (LCD's) like those used in
handheld calculators, car temperature indicators, low priced watches etc.
include a polarizing filter to increase the display contrast. Some filters
for computer screens are also polarizers. On an LCD this filter is a film
glued onto the glass display, in other cases it's just a removable plastic
grey plate. It's this last type I have used: |
|
| With two pieces
of this film, one in the light train (the polarizer) and the other on the
eyepiece or in front of camera objective (the analyser), it's possible
to obtain a 'dark field' when rotating one piece with respect to the other.
The planes of polarisation are now 'crossed' and normally no light can
pass through. If you introduce into the optical train a birefringent substance
(i.e. having two different refractive indices, RI), multicolours caused
by an interference phenomenon are seen. |
| These colours
will be seen with an anisotropic material (i.e. the RI changes in different
planes), and in our case calcite is precisely such a material. In some
plastic plates, (CD cases etc), strains in the material modify the refractive
index to create beautiful pictures. Note, that depending on the thickness
of the plastic polarizing filter, you can obtain different results when
revolving the polarizer or analyser or both. But coming back to sea urchins: |
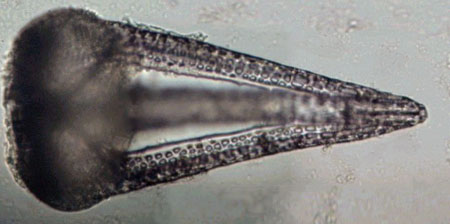
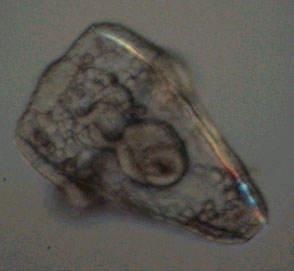
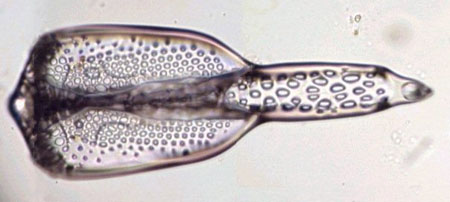
| With
urchin larva, the chalky skeletal rods appear brightly colored under polarized
light, but the image is a little too dark for my camera to capture: |
For the image
below, the polarizer was slightly rotated. |
 |
|
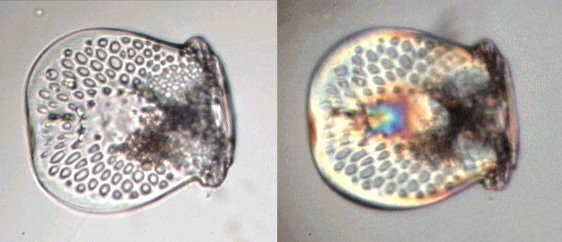
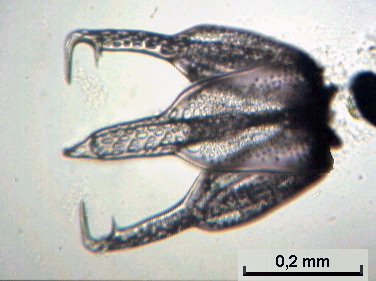
| In adult sea
urchins, the pedicellariae are a sort of small forceps located near the
urchin's mouth and are used to clean the mouth, spines or to dislodge any
kind of parasitic larvae. All of them possess three 'fingers'.
Pedicellaria have different shapes according to their
function: tridactyle forceps, delicate spoon, or the redoubtable venomous
claw. I used the same method described in my first article (chlorine solution)
to dissolve the epidermal tissues to obtain the skeletal structure: |
|
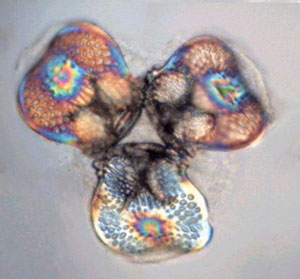
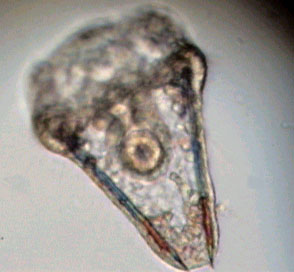
The most impressive: globiferous pedicellaria
which is a venomous claw with three spines. A 40x objective shows the channel
inside the main spine; it's probably to innoculate venom.
|
|
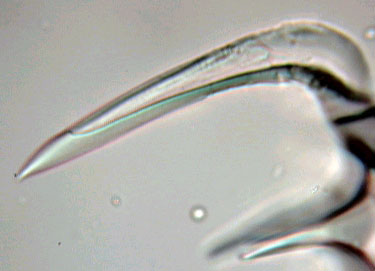 |
Click on the image right to view an animated gif
image (285 kbytes, in real time). On the upper 'finger' the venomous spine
is clearly visible. |
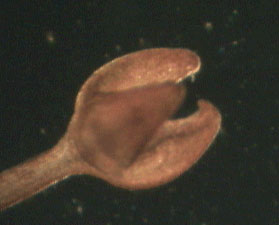
|
|
Skeletal structure of one of the three 'fingers'. |
| Pedicellariae
can continue to move as if they were autonomous, even after they have been
separated from the urchin for many hours. (Or even for up to five or six
days after removal, if they are kept in the refrigerator!) The stalk is
covered with a ciliated epidermis which is probably sensitive to parasitic
larvae.
So how can you remove these interesting features
of an urchin for closer study? The pedicellariae are less than a quarter
the size of the spines: a nail clipper is useless because they are, in
practice, invisible amongst the spines. But here is a simple, efficient
and quick method: I direct a strong seawater jet around the mouth by using
a 50 ml syringe, with the sea urchin placed in a cup. The pedicellariae
which break off look like tiny three leaf clovers in the cup bottom. |
| Note:
It's the first time I have 'mirrored' an article about the same topic with
the French microscopy magazine 'Microscopies.com'.
Many readers of it think Micscape is the best e-zine for microscopy! But
some of them have difficulties reading English and have requested I write
a French translation of my articles. Additional pictures will also be on
this other site. |
All photographs © Jean-Marie Cavanihac 2002
Published in the May 2002 edition of Micscape Magazine.
Please report any Web problems or offer general comments
to the Micscape
Editor,
via the contact on current Micscape Index.
Micscape is the on-line monthly magazine of the Microscopy
UK web
site at Microscopy-UK
WIDTH=1