|
Forams and Oil by Richard L. Howey, Wyoming, USA |
For a number of decades, forams–a.k.a foraminfera, a large group of fascinatingly bizarre marine amoebae with predominately calcareous shells–were of considerable economic importance, since stratigraphically the deposits of these shells were important indicators of oil deposits which are still fueling not only our cars, trucks, and industries, but wars, greed, poverty, and repression. However, here we’re going to talk about some very different kinds of oil. Some years ago, I got rather frustrated when observing some quite splendid foram specimens, because I could get so little sense of their intricate internal structure. I knew that the shells (tests) are perforated with countless tiny pores and I began to wonder what might happen were I to immerse some of the shells in a liquid that would seep into the shell through the pores. The question was, what kind of liquid? The first thing that occurred to me was to use something with a relatively high refractive index such as immersion oil; refractive index 1.515, essentially that of glass. Why should that be important? I’m not sure that it is, but my subconscious “reasoning” suggested to me that with all the glass in microscope systems, this might be a pretty good bet.
However, being a compulsive experimenter, I also tried, Mineral oil, Cedarwood oil, Castor oil, Anise oil, Wintergreen (synthetic), Spearmint, Clove, Cinnamon, Pineapple Flavor extract, and Glycerine–here I am a 19th Century mentality stuck in the 21st Century; otherwise I would have just used immersion oil and let it go at that. As it turns out, there are some subtle and interesting differences, but it’s too early to tell whether or not they will turn out to be significant in the long run. Castor oil, for example, is considerably more viscous than the Type A Cargille Immersion oil and in one trial seems to have penetrated the forams a bit better.
This will inevitably lead me to try out some Cargille Immersion Oil Type B which has a considerably higher viscosity than Type A. My immediate intuition was that the thinner oil would penetrate more readily and more completely, but nature delights in frustrating our intuitions. However, speaking of penetration, that just made me think that perhaps I should go down to the hardware store and buy some penetrating oil–you know, that stuff that’s specially designed for rusted bolts and screws that you can’t get loose. You think I’m kidding? I just may very well try it. You have probably guessed as well that I won’t just limit myself to forams, but will try this out on some bryozoan fragments, an echinoid spine, and some tiny gastropod shells as well.
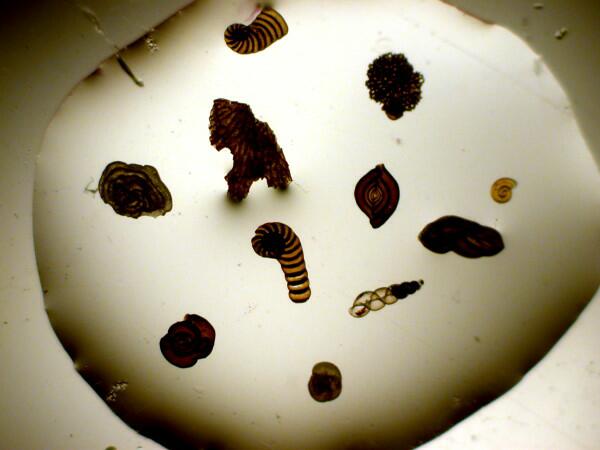
One of the first things I did was to isolate 10 or 15 specimens and put them on a single slide in a drop of oil. Below is one such slide first in brightfield and then with a darkfield.
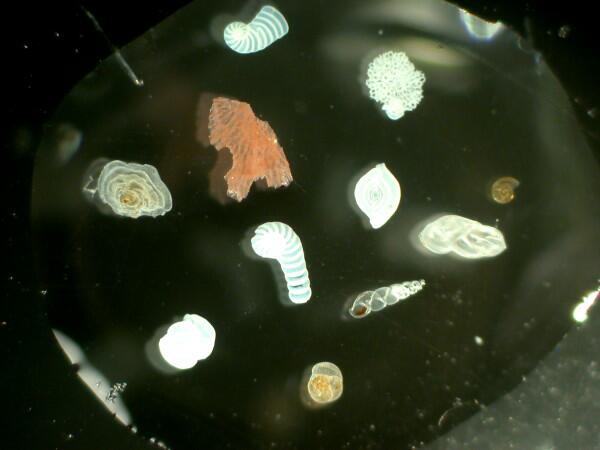
A major problem, as you will discover if you try out this procedure, is air bubbles. The degree to which this is a problem varies with the specimen. In some forams, for example, the oil penetrates in a somewhat erratic manner through the very small pores, but is unable to displace the air in the larger inner chambers. This can produce some interesting optical effects and actually accentuate aspects of the internal structure. However, this is even more noticeable in gastropods and bryozoa.
The sample from which I was extracting specimens for the “oil treatment” contained a variety of bits and pieces of calcareous structures including bryozoan fragments, wee gastropod shells, and some very small sea urchin spines, so, of course, I tossed some of them into the oil as well. This afternoon, I was examining a slide which had one of those little sea urchin spines on it and, I began to wonder what the effect of oils might be on some larger spines of various sorts–after all, they’re largely calcareous like foram shells, so now I have fragments of spines from a rather “thorny” tropical specimen, fragments from a spine of Strongylocentrotus franciscanus, and a bristle fragment from a large marine annelid which is related to the “sea mouse” (Aphrodite) and I have plans to try this out on a lot of other types of such structures. (Now you see why I keep asserting that I need yet another 750 years to complete just my present projects because when I start a “simple” experiment, it almost inevitably turn into 50 projects).
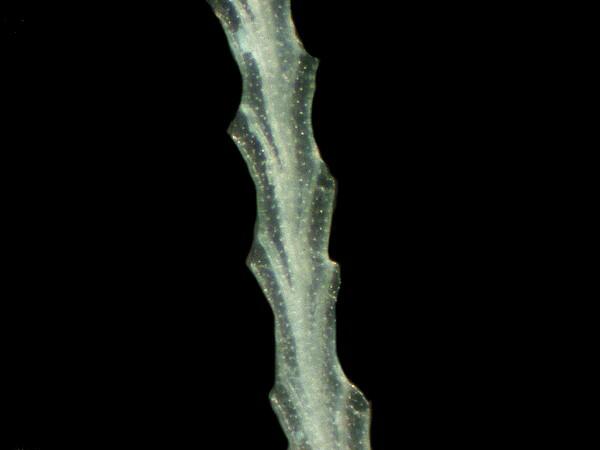
Here in the base part of this echinoid spine, you can see that it is more translucent than it would be without the oil and you can even see the central organic filament that runs up the length of the spine.
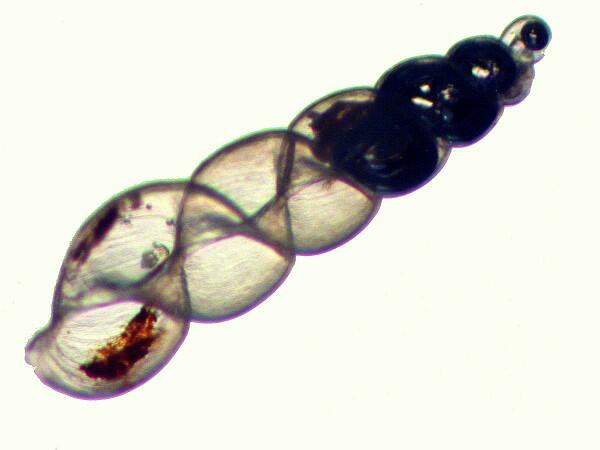
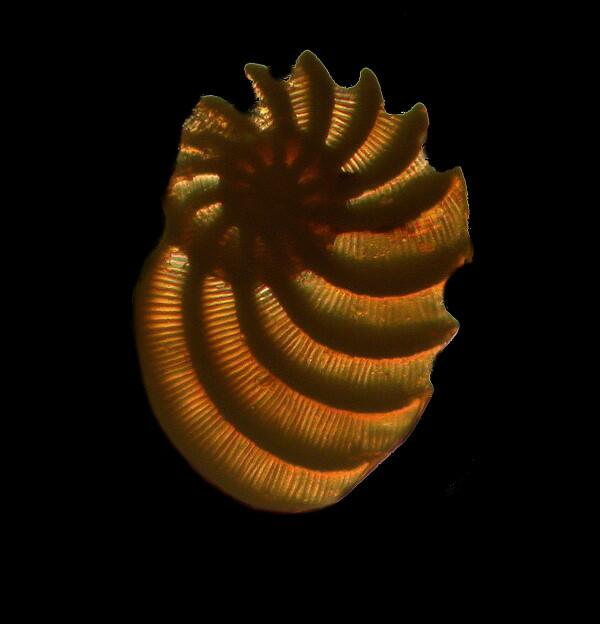
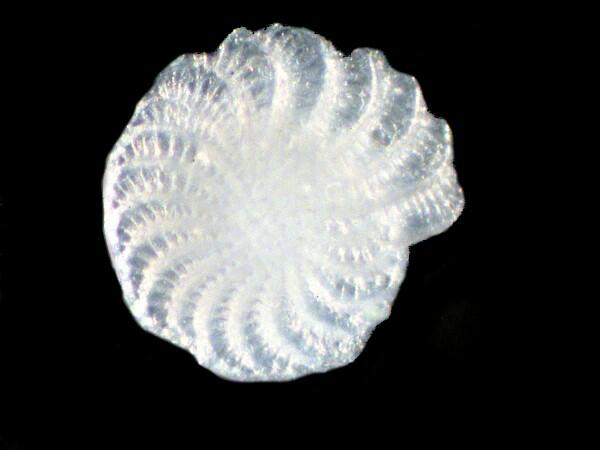
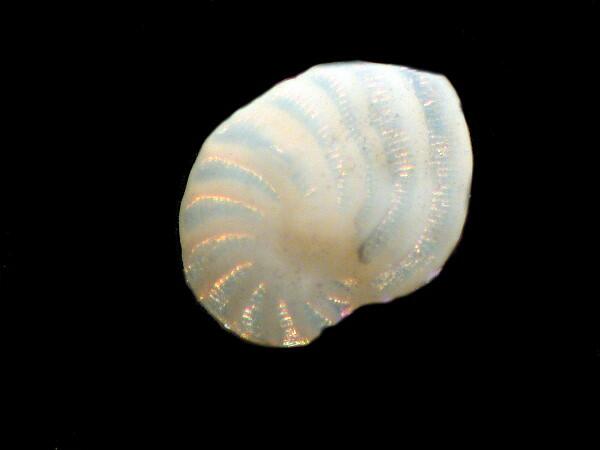
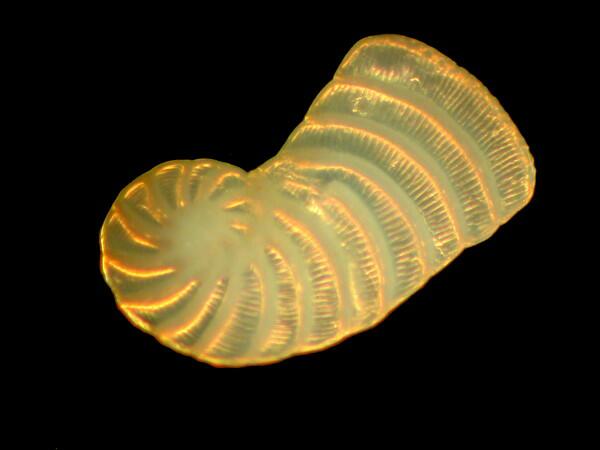
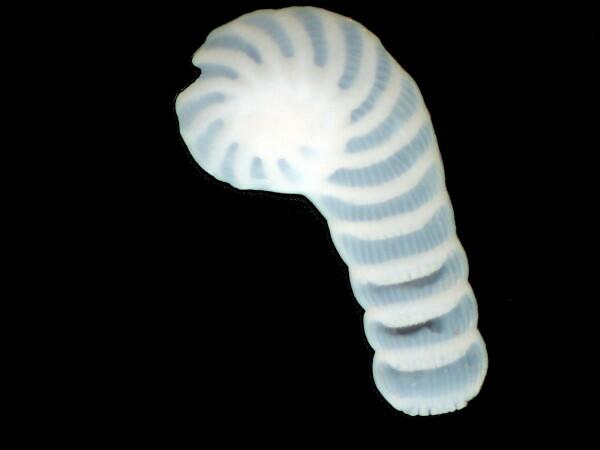
However, for now, back to the forams. There are some shells that have so many chambers that they are sure-fire air traps when placed in a liquid and with certain specimens that can produce a refractive pattern that is quite revealing as in the image below.
The Pre-Socratic Greek philosopher, Heraclitus, wisely pronounced : Nature loves to hide. So, if we wish to unmask even some of her secrets, we must utilize our full intelligence, cleverness, insight, and technological trickery. Micro-paleontologists sometimes use the simple expedient of staining forams with food coloring in order to enhance contrast and reveal additional detail. So, this suggests another whole series of approaches. In fact, there are some stains that have an affinity for, among other things, calcareous material and one of the best known is Alizarin Red S, which unfortunately, unlike food coloring, you can’t buy at your local supermarket. When I start experimenting with stains, my initial inclinations are almost always toward polychromes like Methylene Blue and Crystal Violet. These dyes are never “pure” and thus contain a number of trace substances that produce variation. This can have enormous advantages with certain types of specimens.
Well, it’s been almost a week and a half since I last looked at my foram slides; I got distracted by bat hair among other things. I’ll now give you a brief account of which oils I recommend and also show you some images. Immersion oil is excellent and I did happen across a bottle of Type B, the high viscosity one, and tried it too. In spite of its viscosity, it penetrated well after sitting for a few days. It is even more viscous than Castor oil which produced results that I was very pleased with.
Mineral oil and Cedarwood oil also give good results, however, the mineral oil didn’t show detail quite as sharply and the cedarwood oil has a slightly yellowish cast. If you are going to make more than just a few slides, then the cost of the different oils may become an issue, since one is using much more oil to cover the specimens than one would use in the course of ordinary oil immersion microscopy. Immersion oils and good quality cedarwood oil are not cheap and quite understandably many amateurs need to make their resources extend as far as possible. So, overall, I would recommend using Castor oil, or if you’re willing to spend a bit more, Immersion oil. Clove oil and anise oil give good results, but like Cedarwood oil, they are a bit pricey. I would ignore synthetic oils, such as the Wintergreen, altogether and the extracts, such as the Pineapple, because they contain alcohol which evaporates leaving a little puddle of oil around your individual specimens and, as a result, you have to replenish the extract several times.
Whatever choices you end up making, I think you’ll find that the oil does enhance the detail of the specimens and, in a moment, I’ll show you some comparisons to try to illustrate that point. Remember that all of this work was done with a stereo microscope. If you wish to examine some specimens under a compound microscope, then there are 3 major issues you need to address: 1) the cover glass– the purists insist that we should always (almost) use a 1.5 thickness cover but, in this case we have rather thick specimens and relatively large ones limiting us to relatively low magnifications; 2) You must select specimens which are as flat as possible and use a sizeable oil drop, otherwise you will end up with large air bubbles and/or crush some specimens; 3) you may find it necessary to use very intense illumination to get sufficient light to examine the specimens properly.
I rarely try working with forams using a compound microscope and rely upon my Olympus SZ III using 20x oculars which gives me a magnification range of 14x to 80x which works quite splendidly for almost all of these types of specimens.
I did do as threatened and tried out some Liquid Wrench penetrating oil which the label says contains a Methyl Ester. So, don’t drink it, inhale it, or rub it on your skin and you’ll find that it does some nice things to the forams if you play with the angle of illumination a bit. Whatever this stuff is, I noticed when I added a drop to the slide with the forams, that there was a swarm of tiny, tiny particles floating around in the liquid. As it turns out, they’re not a problem; a little computer graphics editing and, abracadabra, they disappear.
When I am imaging objects such as these, I am never sure how to understand the methodologies in relation to the final results. In this instance, 1) there is the issue of the interaction between the specimens and the oil, 2) the type and balance of illuminations used, and 3) the alterations achieved by the applications in the graphics software processing. In these experiments, it was relatively easy to determine the effectiveness of the different oils and in doing the computer processing, I virtually always kept everything focused on enhancing the image in such a way as to show as clearly and effectively as possible what I was seeing when I observed the specimens directly through the microscope. In this process of direct observation, there is so much more going on than can be captured in a photograph yet, nonetheless, these images are crucial in communicating both general structure and subtle details to someone not directly involved in the process.
For me, the crucial issues are usually the proper preparation of the specimens and the illumination and contrast and what’s great fun is that, within these areas, the variables are virtually infinite.
Here are some comparisons between dry specimens and oiled specimens. The top image in each case is “dry” and the lower image has been treated with oil.
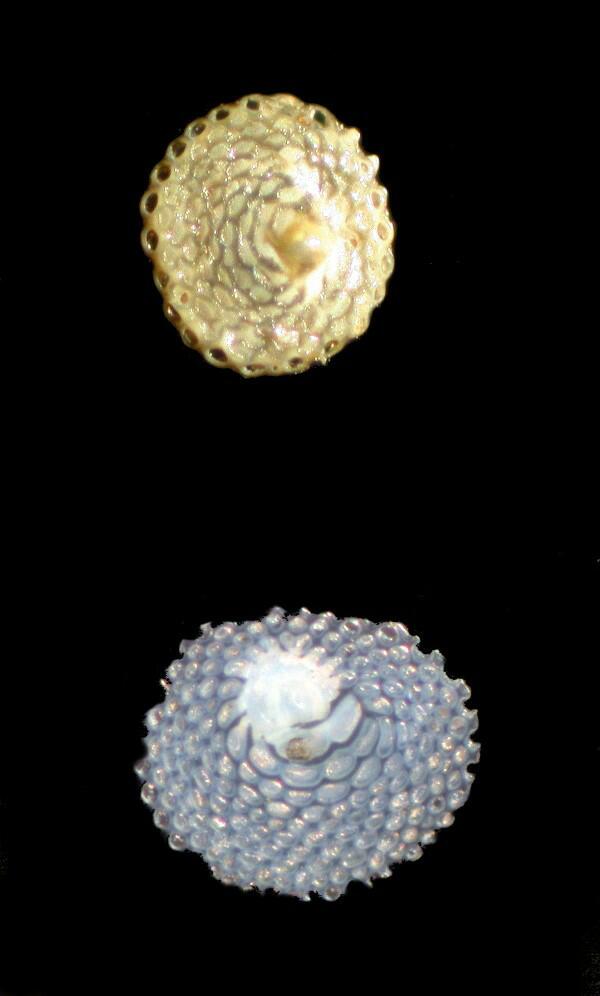
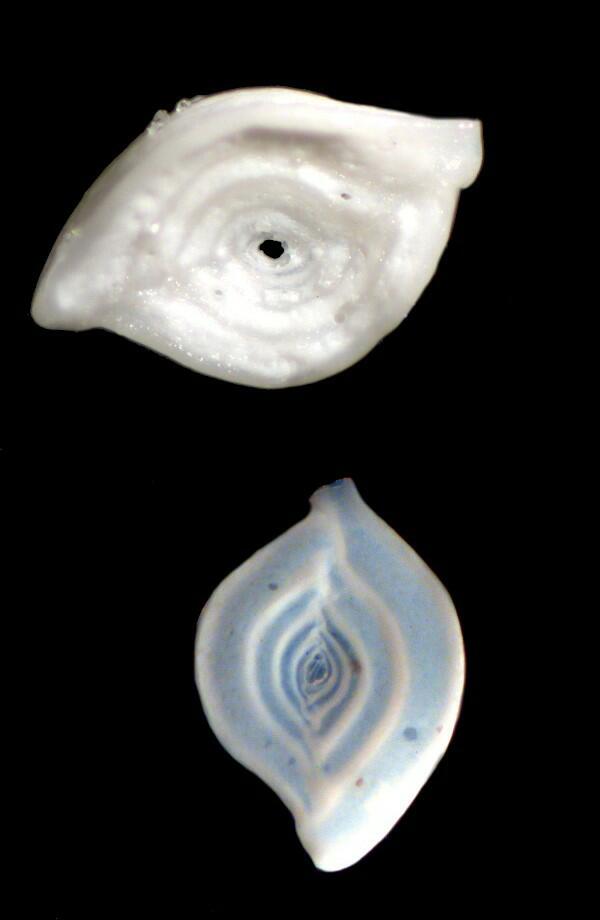
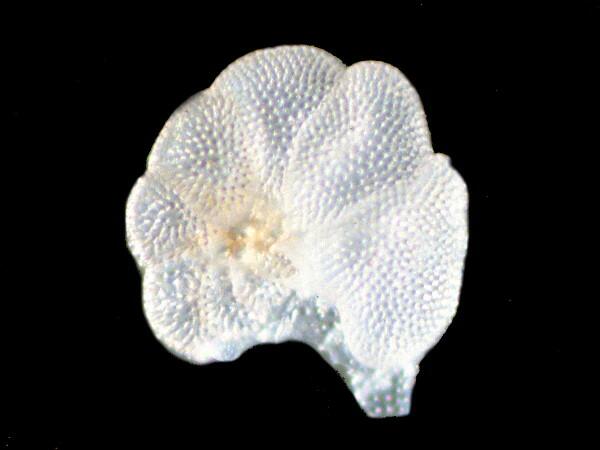
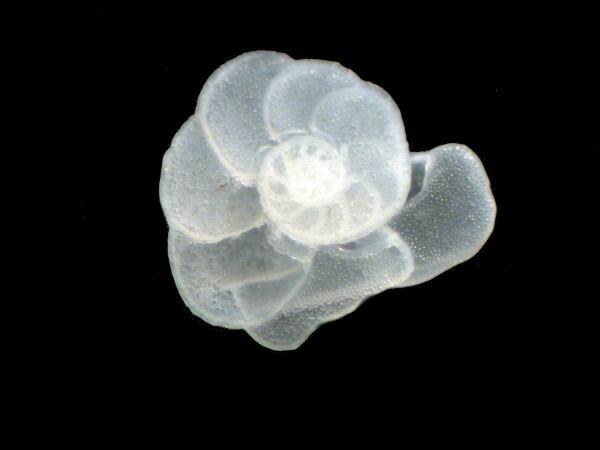
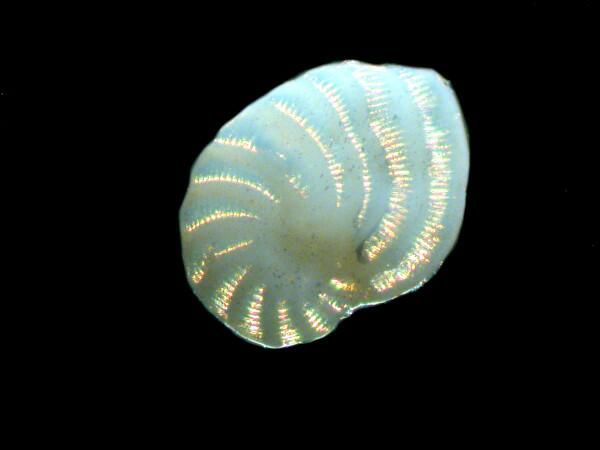
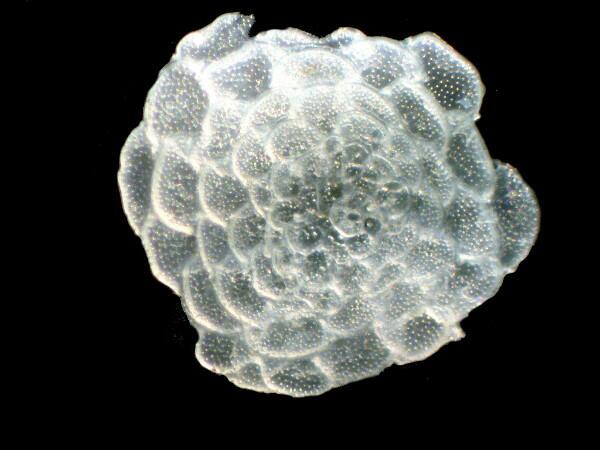
At this point, I would like to present a few single images of forams and bryozoa which have been subjected to oils of various sorts. If you compare these with dry specimens which you yourself are studying, you will quickly see that in many instances, there is a distinct advantage in using the oil treatment.
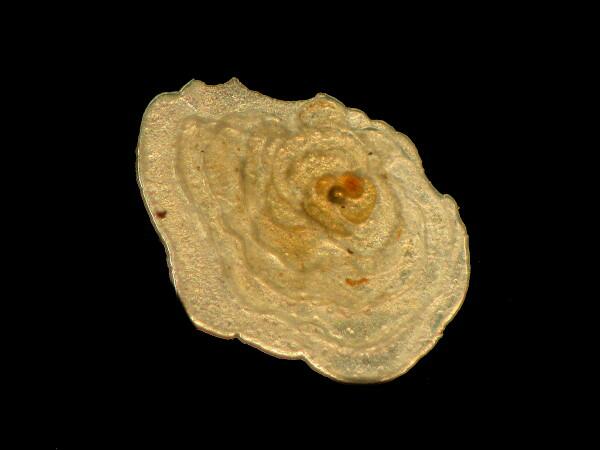
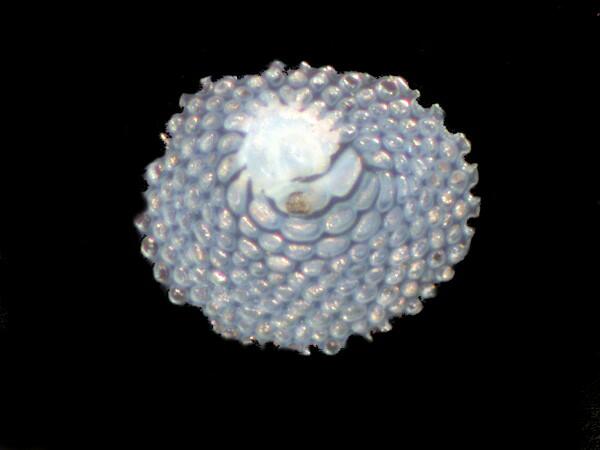
Bryozoan fragment
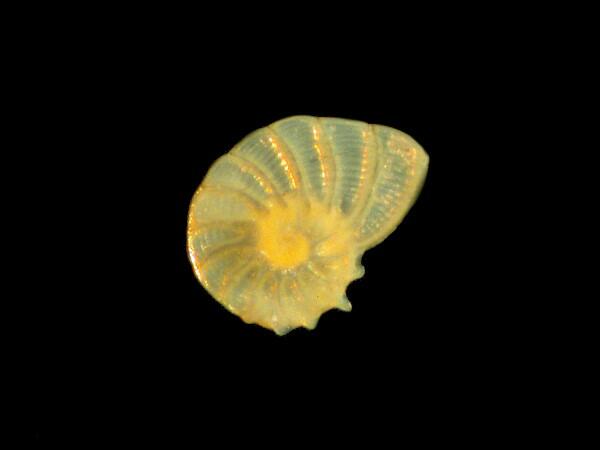
Foram

Bryozoan fragment
Foram
Finally, I tried 2 other eccentric little experiments, the results of which will, I am sure, incline me to try even odder ones.
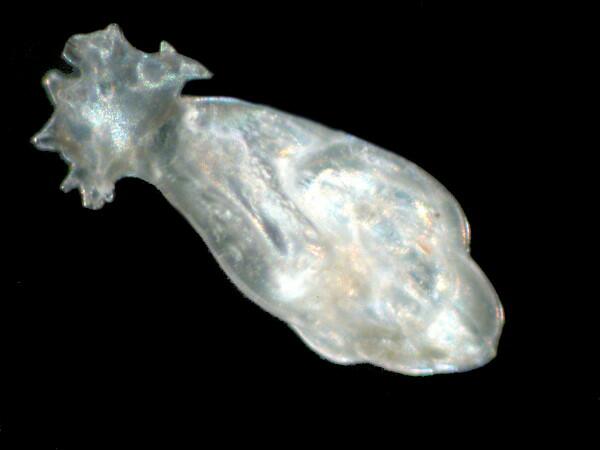
1) I took a sturdy and prickly tropical sea urchin spine, broke off a small section and put it in Type A Immersion oil. This spine is unusual in that it has barbs extending off the main shaft which is covered with what at first appear to be minute hairs but are, in face, tiny, thin spines (or perhaps, it would be more appropriate to call them “spinelets”.) Two things interested me in particular: a) the stouter barbs revealed a bit more of their crystalline structure as a consequence of the oil, and b) the action of the oil caused several forams to float up away from the surface of the spine. These were previously unnoticeable, but now could be separated, isolated, and studied.
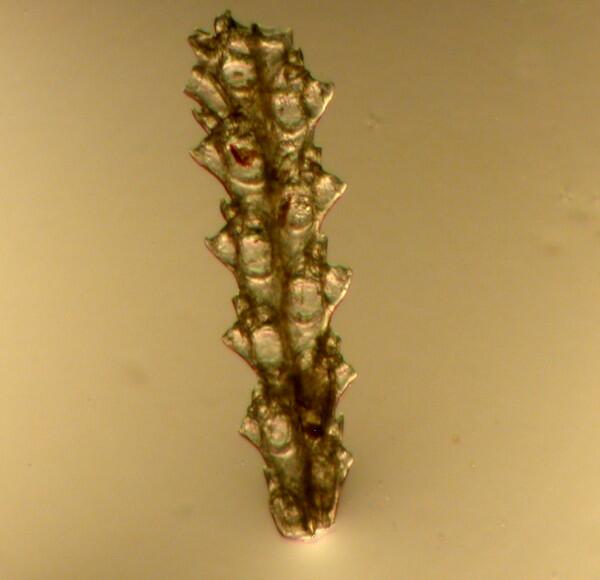
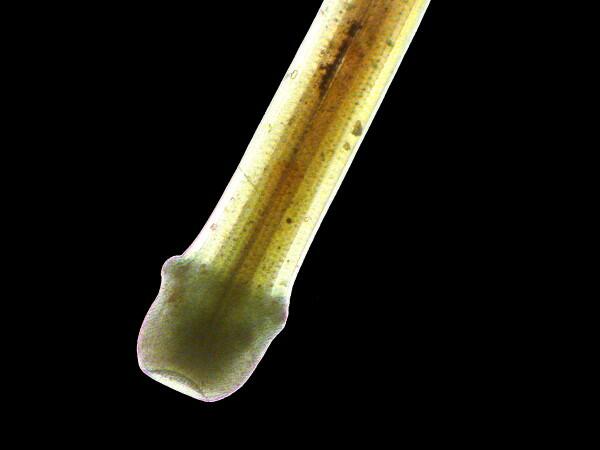
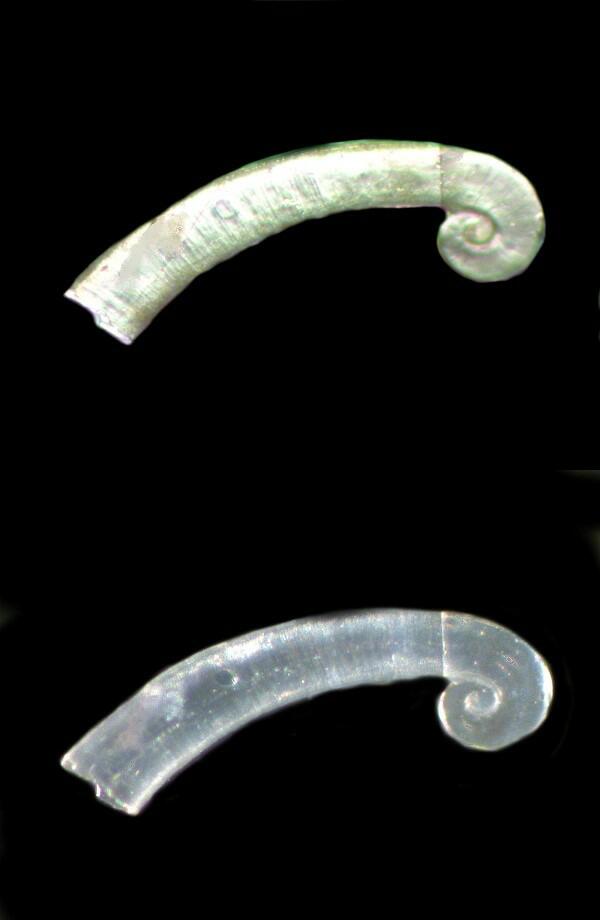
2) I have a dried, flattened bristle worm about 4 inches long and when the light is just right the bristles “glister like gold”.
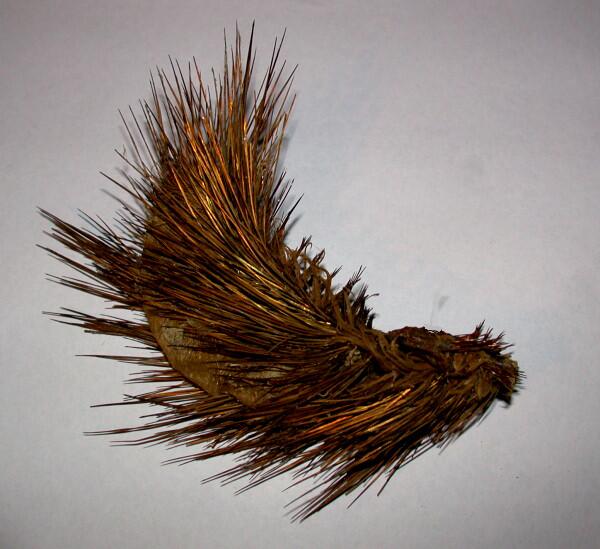
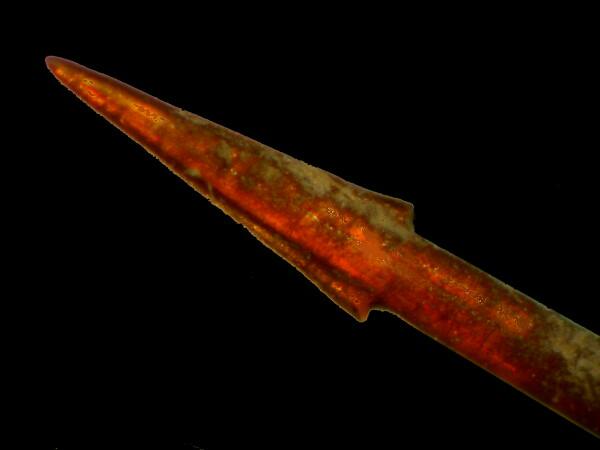
This dried lump is rather pathetic looking from one point of view and surely looks only marginally how it appeared when alive, in which state, it would very likely have been regarded as “gross” by virtually all non-naturalist adults and as a “super gross and wicked” delight to teenage boys. I cut off the tip of a spine, which is not calcareous nor siliceous, but rather composed of complex organic compounds. A drop of immersion oil enhanced the layers of the tip rather nicely which as you can see rather looks like the business-end of a spear, and these bristles are 2 ½ to 3 inches long–flexible and very sharp.
If you have an inclination to experimentation, it is always worth trying to enhance the contrast of different kinds of specimens in order to reveal detail that otherwise would have remained hidden from you.
All comments to the author Richard Howey are welcomed.
Editor's note: Visit Richard Howey's new website at http://rhowey.googlepages.com/home where he plans to share aspects of his wide interests.
Microscopy UK Front
Page
Micscape
Magazine
Article
Library
Please report any Web problems or offer general comments to the Micscape Editor .
Micscape is the on-line monthly magazine of the Microscopy UK website at Microscopy-UK .