Macro attachment for the Fuji FinePix Real 3D W1 camera
By Donald E. Simanek
Various attachments for digital cameras allow stereo macrophotography of small subjects. I have been guilty of building a number of them. Now that the Fuji digital camera has become available, why not use it for that purpose? No, I don't mean slide bar or cha-cha photos. I want to take advantage of the camera's autofocus, auto-exposure and synchronized shutters.This page requires a monitor width of at least 1000 pixels in order to see both images for cross-eyed stereo viewing. Since the photos also have large vertical dimension, it helps to toggle the "full screen" view (F11 in Windows). However, if you haven't mastered that viewing method, these pictures may also be appreciated as 2d flat photos. All are © 2008 by Donald Simanek.
For instructions on free-viewing 3d by the cross eyed method, see the How to View 3D page.
Fuji 3d macro camera?
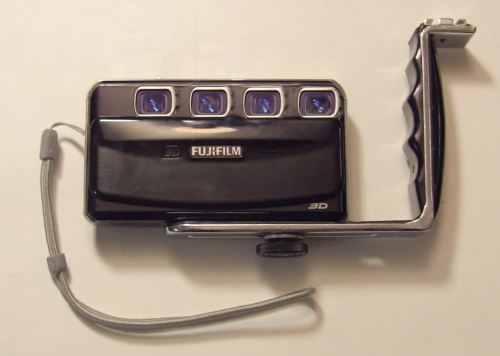 |
| We can dream of what the next digital 3d camera might be like. (Not yet available.) |
|---|
After using the Fuji 3d camera, we begin to imagine how it could have been made more versatile. Such a camera, whether film or digital, is limited to stereo photos at distances greater than about 3 feet. Anything closer introduces depth distortion that is difficult to view. In 3d mode the lenses will focus as close as 6 inches, but there's no way to change the separation of the lenses. What if Fuji had allowed a variable lens separation, for photographing portraits, tabletops and close-ups in stereo? That would entail a rather expensive precision mechanical system to ensure proper lens alignment.
Or perhaps Fuji could have included additional lenses, shutters and sensors, synchronized, something like the old four-lensed Nimslo stereo camera. The photo illustrates this fantasy camera. The options would include the "normal" stereo from lenses 1 and 4, a "medium" stereo from lenses 1 and 3 or 2 and 4 (for portraits and small groups), and lenses 1 and 2 or 3 and 4 (for close-ups of small objects such as flowers). Or all four images could be used to produce lenticular autostereoscopic prints with the same equipment used to process pictures taken with the Nimslo stereo camera. This camera would have it all!
The flash would need to be relocated. Perhaps a pop-up flash could be designed that would rotate, allowing bounce flash from ceilings.
We can dream of such a camera, but it's unlikely any commercial version will appear, for the market for stereo cameras with macro capabilities is a small one, and these capabilities would increase the camera's cost considerably. However, we can brainstorm ideas for achieving the same results with the existing camera, using home-built adapters. It may seem a formidable task, but actually the design of the Fuji 3d camera permits this to be done with very good results.
Some early results.
[October 22, 2009] Fuji designers didn't encourage attachments or add-ons for this camera. That makes life difficult for us tinkerers. Yesterday I put together such an attachment and this morning I tested it in the front yard. Fall foliage is fading now, but a few colorful subjects remain.The Fuji has one advantage. It will auto focus as close as six inches, even in its stereo mode. (Even closer in its macro 2d mode.) One would expect a 2d camera of this type to focus to short distances, but to take a picture that close in stereo with a 77mm stereo interaxial would introduce severe exaggeration of depth, and result in an unviewable 3d picture. The old rule is that the subject should be no nearer than 25 or 30 times the interaxial distance for comfortable viewing. But Fuji's design of the autofocus system plays into the hands of those of us who look for opportunities to exploit existing devices to make something better.
Before revealing the secrets of my design, let's look at some early results. One never expects a hastily-thrown-together prototype to be perfect. Its purpose is to test the concept and reveal problems that need to be corrected. These pictures are tests, not works of art.
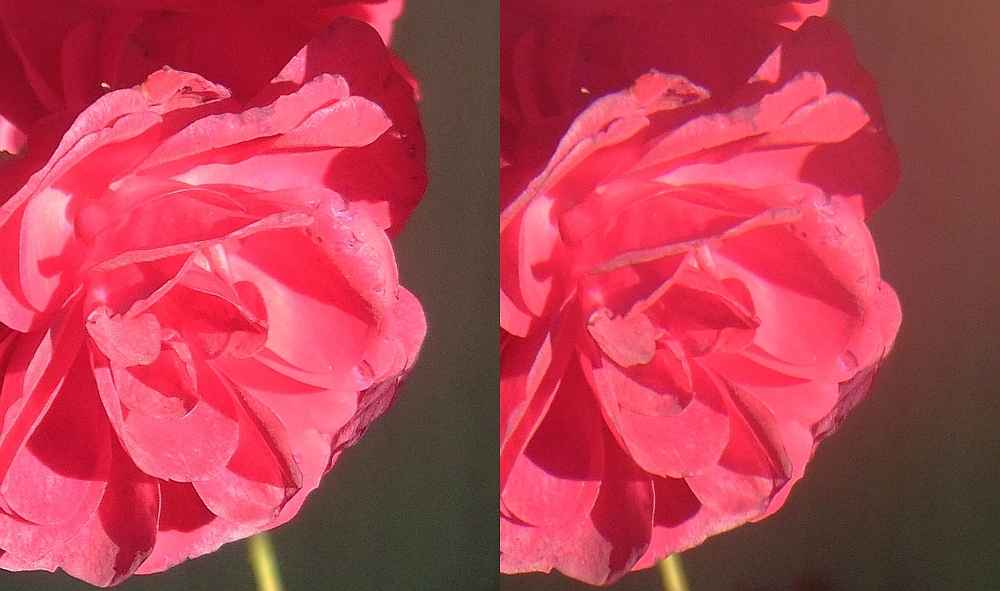
One of the last roses of autumn. It is fading fast. The optics of my adapter were fully exposed to stray light, and the resulting glare and softening of the picture are obvious. This may require an enclosure, a "black-box" to keep out light. The camera was hand-held. Both the camera and the optical adapter were held by hand. The camera settings were on "auto-everything". Clearly auto-focus and auto-exposure are functioning properly, and the stereo depth is about right for this subject. The interaxial is about 1 inch. The rose is about 2 inches in diameter.

After putting a partial enclosure around the adapter, to shield it from stray light, I tried again. I almost stepped on this poor scraggly dandelion. So I took its picture. One nice thing about this system is that I can preview the framing and composition in full depth on the 3d LCD screen on the camera. But in sunlight, reflections from the screen often make this difficult or near impossible.
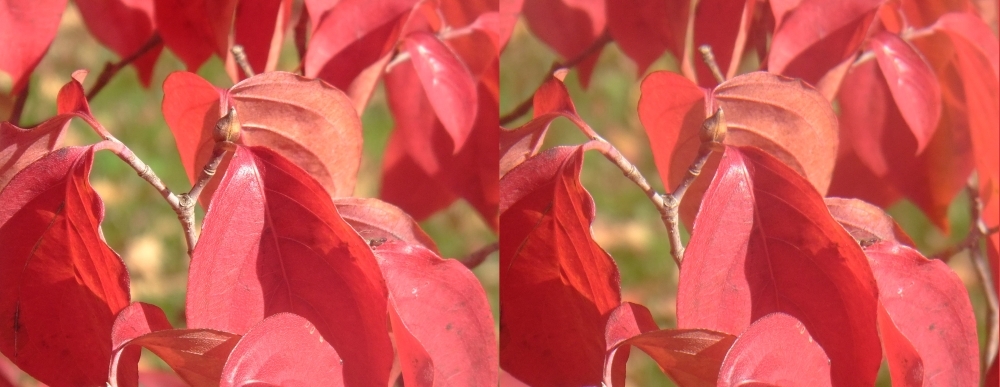
The Euonymus (burning-bush) leaves are brilliant red. This was a good test of the autofocus.

This close-up illustrates that stereo need not have great depth. Here is is used to bring out texture and structure of the flower petals. View it in 2-d and 3-d and compare the effect.
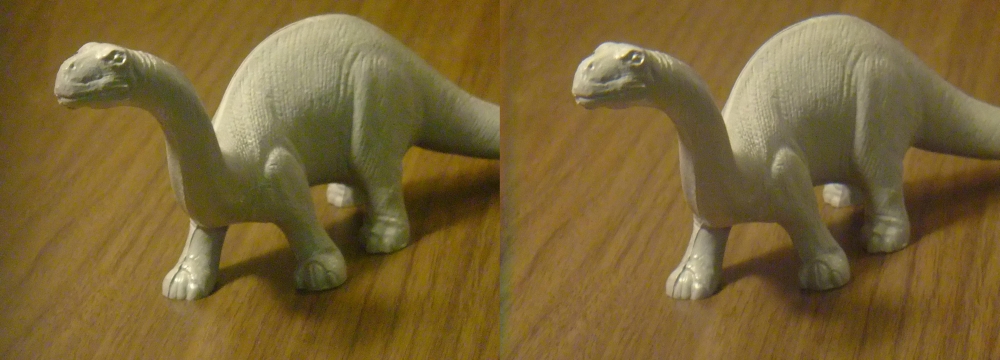
A plastic model dinosaur, 8 inches long, 2 inches high from feet to back. The model is a toy from the 1950s, and not necessarily accurate to the latest scientific knowledge. Hand held, available light indoors.
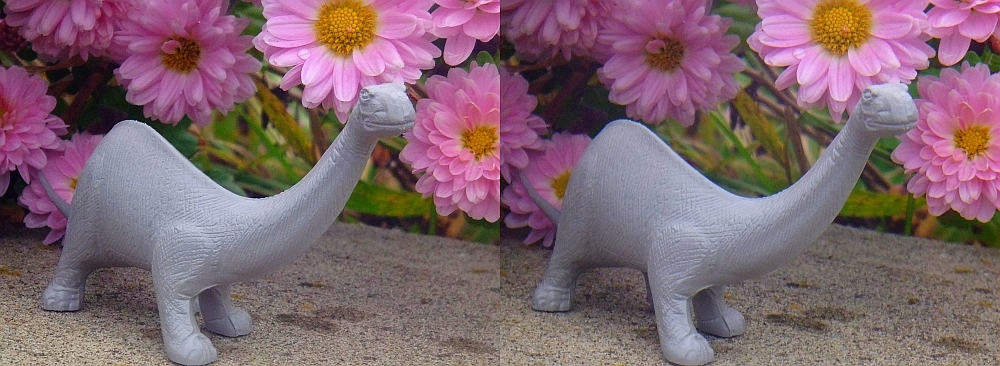
Here he poses in a more natural setting, after munching some giant Jurassic flowers. Cloudy daylight photo. I confess to improving the colors a bit.
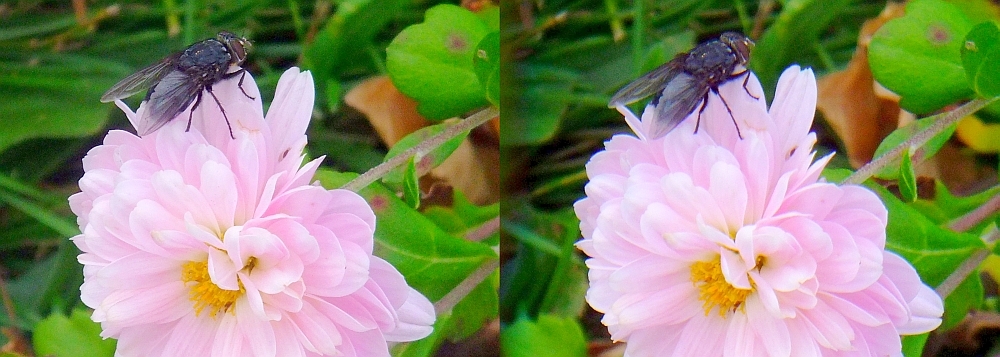
But the real value of this device is that the camera's synchronized shutters allow for action macrophotography of living things and moving objects. There's not much wildlife active in the garden this time of year, but this fly happened to be available on a fading chrysanthemum.
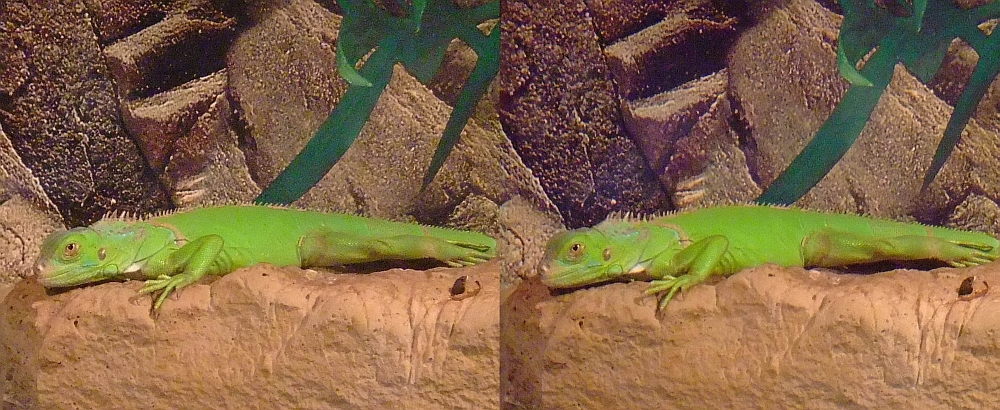
New prisms, slightly larger ones, are now installed, and I took a trip to the Calico Creek Pet Store to test it. This lizard was photographed through the glass of his large cage.
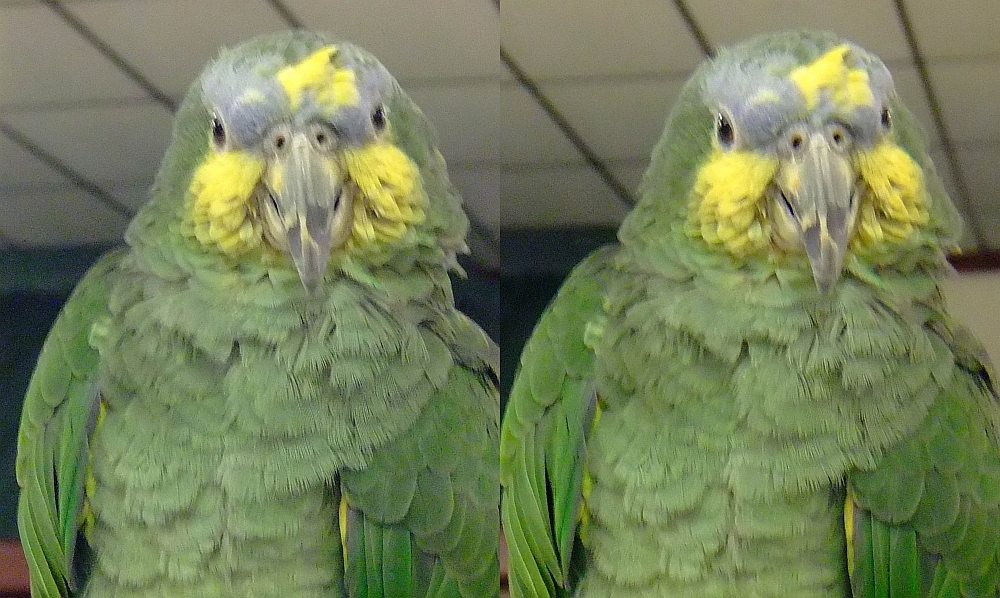
The pet store's resident parrot makes a good subject. This was photographed without the macro attachment, with the Fuji's 77mm stereo base. Notice how the extreme parallax of the ceiling tiles is distracting.
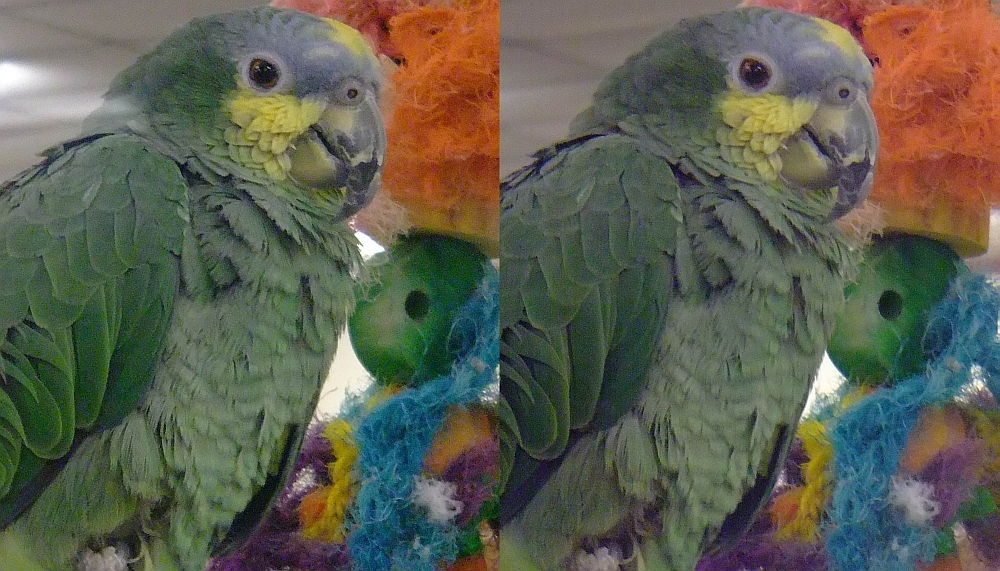
Now, with the adapter and its 1 inch stereo base, the stereo parallax is much reduced and the picture is easier to view, but with just enough parallax to show depth. The ceiling is well beyond the depth of field, but there is a distracting spurious reflection in the right-eye picture. Prisms and mirrors will do that, especially when there are so many bright lights in the environment.
The technical details.
 |
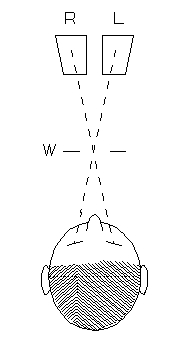
The macro attachment consists of four prisms arranged as shown. The prisms should have faces of no more than 24 x 24 cm, and are held together with metal strips top and bottom. Alignment is important, to ensure that the stereo axes are parallel at both input and output. Such a device limits the angle of view. If you make the prisms larger, they no longer fit within the 77 mm separation of the camera lenses.
In fact, I must thank Fuji for the extra space provided by their choice of 77mm lens separation. Also, the zoom lens magnification at its "Tele" setting is just enough to fill the camera's sensor area, so very little cropping is required.
Ideally the prisms should be enclosed in a box, painted black on the inside, with windows only for the entrance and exit faces of the prisms. The prism faces can be very close to the camera lens frames.
This "telephoto" device produces image geometry comparable to that of the Loreo 3d macro LIAC device. This prism device has a horiontal angle of view of about 20°. For typical macrophotography subjects, this is quite acceptable, even desirable, for it prevents depth exaggeration. But the best thing about this method is that it preserves the Fuji's autofocus, auto-exposure, auto color balance, and synchronized shutters. Only the expensive custom-made macro stereo cameras have all of that. If you care to spend several thousand dollars on one, check out the RBT MACRO Close-Up stereo attachment. See also Macro Lens-Mirror Attachment (RBT). It's a fine camera system, but cumbersome.
Four front surface mirrors could be used instead of the prisms. I happened to have the prisms and plenty of Meccano and Erector parts. See this link for an implementation of this design using acrylic plastic and mirrors, by Paul Turvill.
[Nov 3, 2009] This afternoon, while setting up a picture of my latest prototype, I accidently knocked the camera and adapter off the table, cracking one prism when it hit the floor. Apparently the camera survived. I'm reluctant to spend the money for four more prisms. (You can't usually exactly match the physical size of those you have, so it's best to order four exactly alike. And maybe a spare, just in case.)
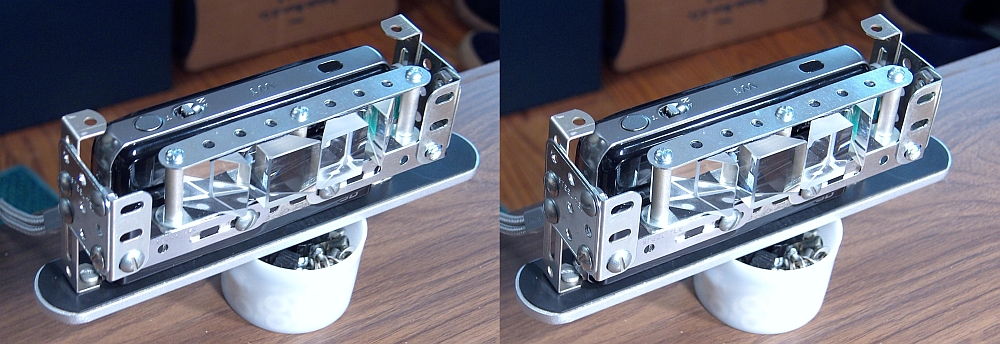
Anyway, here's the picture. The frame is constructed with Meccano and Erector parts on a base from an old flash bracket. Strips of rubber wrap secure the prisms between two metal strips. In use, a flat piece of cardboard is fastened above (bolted to the two protruding metal braces). That was removed for the picture. This one has a stereo interaxial of 24mm, and is the version I used to take the picture of the fly on the chrysanthemum.
To use it, here's the steps:
- Open the front lens cover. The camera turns on.
- Secure the camera onto the attachment with the tripod screw.
- Check the camera's alignment with the adapter. An easy way to do this is to look from the front straight into the center prisms, and position the two lens images equally on either side of the adjoining prism edges.
- Press the shutter button just slightly to let the camera know you intend to take a picture.
- Zoom the lens to its full "tele" position.
- Focus and frame the picture as usual (press the shutter button halfway down).
- Take the picture (press the shutter button all the way down).
- To shut off the camera, do not do it the usual way by closing the lens cover. This could cause the adapter to scratch the cover. Press the toggle at the upper right corner of the camera back. A message will appear telling you to close the lens cover. Ignore it and hold that toggle down. In a couple of seconds the camera will shut off, even though the lens cover remains open.
- To turn the camera back on, press and hold the same toggle you used to shut it off.
- Leave the lens cover open whenever this macro adapter is attached to the camera.
Even closer.
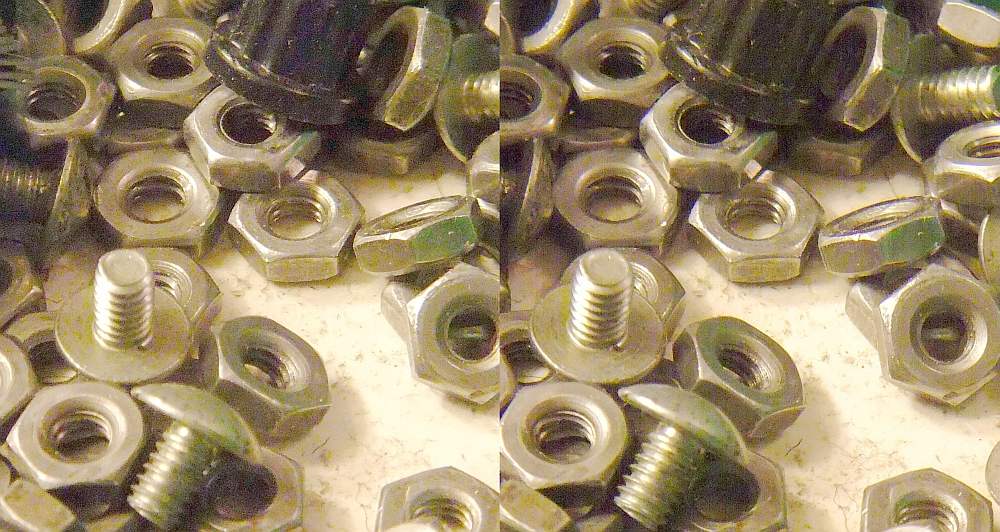
This picture was taken with my latest prototype that has 25.4 mm square face prisms. This adds to 76.2 mm leaving 0.4 mm for spacing between the prism faces. [Surplus Shed had a one week sale on them at $6 each.] I added a +2 diopter lens in front of the front prisms. The nuts and bolts are 6-32 with 1/4 inch threaded portion, the same ones I used in my Meccano/Erector prototypes. On my 13 x 8 inch monitor screen these two 500 x 500 pixel pictures display as 5 by 5 inch pictures side by side, and the 1/4 inch threaded portion of a bolt is enlarged to 1 inch. So the effective magnification is 4.
This has been the best-performing design so far. Rhomboid prisms in this size aren't easy to find, but two of them would make an ideal system.
If you chose to use front surface mirrors, you'd want 35.9 x 25.4 mm size, or close to that.
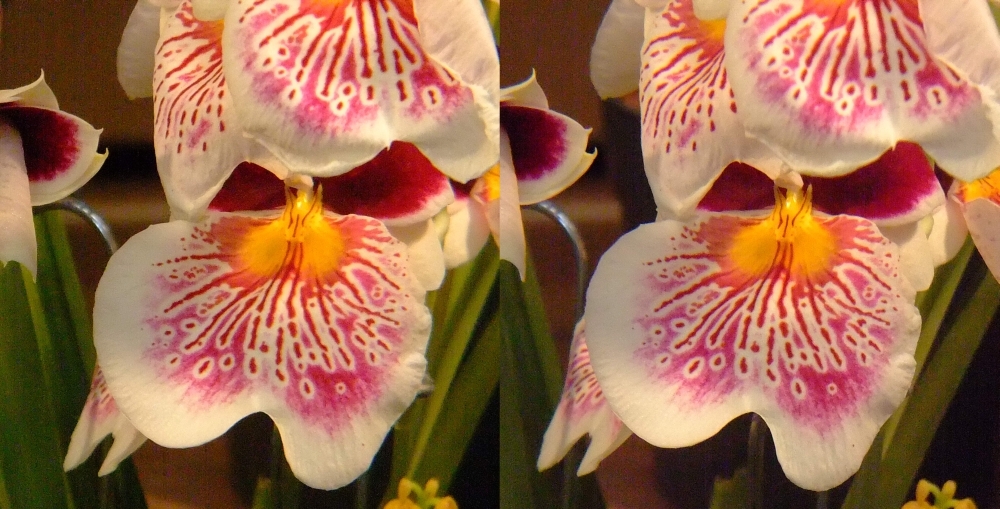
Indoor shot at an orchid show. Available light and a +2 diopter lens.

This wild azalea (pinkster) blossom is only about 2 inches across. This picture was taken with the prismatic adapter and a +2 diopter lens in front of the front prisms. It was a breezy day and the picture was taken handheld with the camera set on "auto-everything". The distance from front lens to subject was about 9 inches. This use of a "close up" lens produces excess convergence and an exaggeration of depth, so the background, even though out of focus is a bit distracting. [If I had used flash the background would be underexposed and black. Another strategy would be to insert a plain background behind the flower. If you take care in subject placement and composition, this method can be useful.
So how far can we take this toward ultra-close-up? Farther than you'd expect. This last example (below) was taken with +6 diopters in front (+1 +2 +3 diopter lenses stacked). The fly was on a Cusa Dogwood in daylight, and the Fuji 3d camera's fill flash was on. Some unwanted reflections are evident. When you stack three lenses there are six extra surfaces to catch reflections. My biologist colleague, Tim Yoho, identifies it as a "Flesh Fly", Family Sarcophagidae, which feeds on dung and carrion.

Conclusions.
[Nov 3, 2009] Fuji advertises that the Fuji 3d camera allows macro 3d photography. But it is only a method for aligning two 2d pictures taken at various baselines—just cha-cha and slidebar methods we've been using for years with 2d cameras. The great drawback of such photos is that nothing in the scene must move between the two exposures.This macro adapter fully utilizes the synchronized shutters of the camera, thus enabling photography of flowers fluttering in the wind, small animals and insects, and flowing water. Autoexposure, autofocus, and auto color balance are all retained, so you aren't likely to end up with stereo pairs with different exposure or color balance. The autofocus works to within a few inches working distance, so you don't have to fiddle with manual measurement of the distance.
However... This device isn't easy to build, nor is it inexpensive. The 22x22 mm face right angle prisms might cost you about $25 each in "experimental" grade. They are frustrating to adjust and align. Making a sturdy mount for them requires some shop skills and good engineering. Mirrors are just as difficult to mount and align. This is not a "one weekend" project. My prototypes, and the pictures taken with them, demonstrate that it can be done, and perhaps some of you will be encouraged to rise to the challenge. I'm not providing detailed instructions for building one, since the form yours might take will depend on your skill and patience level and what parts you have access to. But I'd certainly be glad to hear from anyone who undertakes this, and especially to see pictures of your device and pictures taken with it.
Note 1: Prisms are sold in several grades of quality. Generally those that have the closest tolerance on the angles are the most expensive. For this application, this isn't important, so go for the least expensive ones. All you are after is an internal reflecting surface. I find the most common ones have 20mm or 25mm faces. My latest prototype has the center two prisms with 25 mm faces, and the outermost ones 20 mm. This adds to 25 + 25 + 20 = 70 mm, which easily fits within the Fuji 3d camera's 77 mm lens spacing with space to spare.
Note 2: (Dec 2009) I've received emails from people wondering whether this device was inspired by another one that is now being sold online. It was not. I have quite a collection of lenses, prisms and mirrors since optics has been my hobby since high school, and I taught optics at Lock Haven University. When I got my Fuji W-1 3d camera it dawned on me that it would have been a better camera if its lenses had variable spacing, suitable for close-up photos. I even toyed with the idea of taking it apart, removing the right lens module and reattaching it to the circuit board with longer wires, allowing the lens to be placed to the left of the camera so it was as near as possible to the other lens, with about 1 inch between them. The L/R images could then easily be swapped with StereoPhotoMaker if desired. With this method and longer wires one could even take large baseline stereos. When I hatch a drastic idea like that I mull over it a long while before undertaking something that could have very expensive failure, and might not be easily reversible.
Having done other stereo adapters with prisms and mirrors, I decided to try a non-destructive method first, using some prisms I already had on hand. I made a prototype version using Erector and Meccano parts (I also have many of these just for such projects). It took quite a bit of tinkering over many weeks and many indoor test pictures of no artistic value. On October 21, 2009 it was ready to take outdoors for some real photos. These prisms were a bit smaller than I wanted, so when Surplus Shack had a sale on prisms exactly the 1 inch size that was ideal for this project, I ordered them immediately. A few months later Paul Turvill sent me pictures taken with his implementation of my design, only he used mirrors and made a nicer housing of acrylic. Turvill 3d macro adapter.
Over the winter I did very little with this except to improve the rigidity of the construction set frame. It nagged me that that silly "fill" flash between the stereo lenses was blocked and could not be used as illumination for close objects. It surely was bright enough, but even if not blocked, it would produce unsightly shadowing on the subject. That's when I worked on the flash deflector system, which required more rebuilding of the housing. The results are here. The first pictures outdoors were taken in the Spring of 2010, of the Iris blooms. That's also about the time I experimented with 1, 2, and 3 diopter lenses for even closer subjects, and added a 52mm threaded ring for these in front of the prisms.
The Fuji 3d cameras have no flash shoe or other provision for off-camera flash. That's a serious omission for which I can't forgive Fuji. One can use the camera's flash to trigger a wireless slave flash, if you ensure that the camera's flash doesn't reflect from the housing and back into the camera's lenses. Those lenses are susceptible to picking up stray light that causes flare in one of the pictures. My light deflector prevented that, too. Macro with flash.
Somemtime in the summer of 2010 I first discovered a commercial version of this for sale. It seems to be a case of independent efforts to solve the same problem. It seems to me that this arrangement of optical reflectors is the almost inevitable solution, considering the constraints imposed by the engineering design of the Fuji cameras.
![]() Input and suggestions are welcome at the address shown to the right.
Input and suggestions are welcome at the address shown to the right.
All stereo pictures on this page © 2009 by Donald E. Simanek.
Stereo pictures for cross-eyed viewing 3d Gallery One.
More cross-eyed stereos in 3d Gallery Two.
Stereo view cards in 3d Gallery Three.
Building a digital stereo close-up photography system in 3d Gallery Four.
Review of the Loreo stereo attachment 3d Gallery Five.
Review of the Loreo macro adapter, 3d Gallery Five B
The Loreo macro stereo attachment—improved 3d Gallery Five C.
The Loreo LIAC attachment as a 3d macro device, 3d Gallery Five D.
Wildlife photography in your backyard, 3d Gallery Six.
A home-built digital stereo camera using mirrors 3d Gallery Seven.
Stereo close-up photography in your garden 3d Gallery Eight.
Stereo photography in your aquarium 3d Gallery Nine.
Stereo digital infrared photography 3d Gallery Ten.
Wider angle stereo with the Loreo LIAC 3d Gallery ll. A failed experiment.
Review of the Fuji FinePix Real 3D W1 camera 3d Gallery 12.
Panoramic stereo photography. 3d Gallery 14.
Tips for stereo photography with the Fuji 3d camera. 3d Gallery 15.
Mirror methods for stereo photography. 3d gallery 16.
The Fuji 3d macro adapter using mirrors, by Paul Turvill.
The Fuji 3d macro adapter with flash! 3d gallery 17.
Critters in stereo. 3d gallery 18
Wide angle stereo. 3d gallery 19.
Telephoto Stereo. 3d gallery 20.
2D to 3d Conversion. 3d gallery 21.
Stereos from outer space. 3d gallery 22.
Review of the Panasonic Lumix 3d digital camera. 3d gallery 23.
Digital stereo photography tricks and effects.
Shifty methods for taking stereo pictures.
Stereoscopy with two synchronized cameras by Mike Andrus.
Guidelines for Stereo Composition.
Return to the the 3d and illusions page.
Return to Donald Simanek's front page.
Article mirrored with permission in the May 2016 issue of Micscape magazine from the author Donald Simanek's website.
Microscopy UK Front
Page
Micscape
Magazine
Article
Library
© Microscopy UK or their contributors.
Published in the May 2016 edition of Micscape Magazine.
Please report any Web problems or offer general comments to the Micscape Editor .
Micscape is the on-line monthly magazine of the Microscopy UK website at Microscopy-UK .
©
Onview.net Ltd, Microscopy-UK, and all contributors 1995
onwards. All rights reserved.
Main site is at
www.microscopy-uk.org.uk .