Feeder Mouse-By: Alicia Thresher
Kingdom: Animalia
Phylum: Chordata
Subphylum: Vertebrata
Class: Mammalia
Order: Rodentia
Family: Muridae
Genus: Mus
Species: Rattus norvegicus
Feeder Mouse-By: Alicia Thresher
Other names for Feeder Mice: weaners, jumpers, and hoppers.
Origination: Feeder mice (plural form for mouse) are said to have originated in Asia. They were said to have been in a belt between China and Turkey. Then the mice migrated into Europe. While the new world was being discovered these mice were said to get onto the boats that came to America from Europe and start a population on American soil. These mice are found virtually almost all over the world. The reason for this is that every four hundred and twenty five days there population grows to one million.These numbers result in an over population of mice or in scientific terms-plague proportions. At one point there were eighty two thousand just in California.

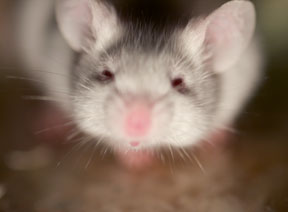
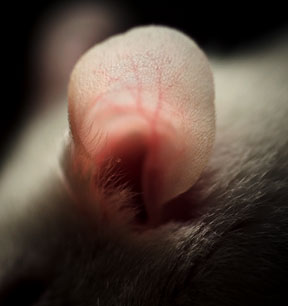
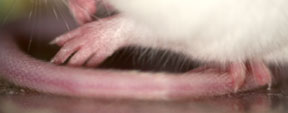
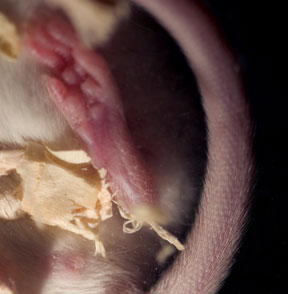
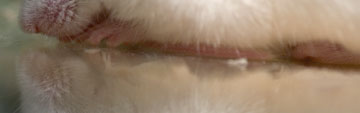
Parts:
1: Ear
2: Eye
3: Nose and whiskers
4: Mouth
5: Fur that circumferences entire body
6: Front feet
Weight: (approximations)
Birth: One gram
"Fuzzies": Six Grams
Adult Male: Twenty to thirty five grams
Adult Female: Twenty five to thirty five grams
Ages:
Life span: Two to three years
First Breed: Fifty to sixty days
Weaning: Three weeks
Estrus Cycle: Five days
Gestation Period: Three weeks
Other Technical Information: These mice can consume up to one hundred grams of food a day or as little as fifteen grams a day. When the females give birth the litter size ranges from eight to fourteen mice. Their respiration rate is approximately one hundred and fifteen per minute. Their heart rate is at six hundred beats per minute approximately. Also they grow fur on their feet except on the bottoms of them...How Cool!!!
![]()
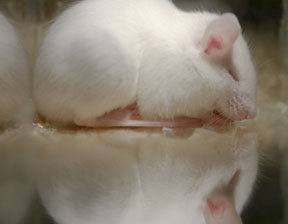
Breeding: If you are looking into breeding mice you need to find healthy mice. When looking for healthy mice you should look for ones with sleek bodies and thick tails. Thick tails mean that they eat well. Also you are looking for mice that have clear eyes and smooth skin. If their skin is not smooth then the mouse most likely has a tumor or several tumors. You should introduce one male to about five female mice. If you notice the mouse running in circles, scratching itself excessively, or with lumps in its skin; then you need to replace this mouse with a healthy one. Keep a clean habitat. Make sure you change the bedding every week and make sure there is plenty of food and water. Use bedding that absorbs moisture and keep the habitat out of direct sunlight. If you are in need of killing mice because there are too many old ones in the colony you can either gas them with carbon dioxide in an enclosed space, or find an object like a pencil and place it between the head and shoulders of the mouse, push down, and yank its tail really fast. That technique will sever its spine quickly.
![]()
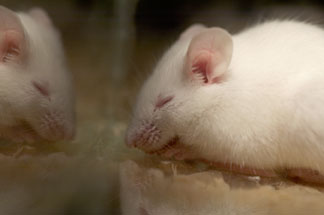
Laboratory Mice: Feeder mice are also used in laboratories. These laboratories usually breed their own mice so there is less likeliness of diseases. These mice are used for testing. Some tests include: hearing tests, antibody testing, cancer, and etc.
![]()
Other Information: Mice will feed on small animal food. This kind of food is for animals like gerbils and hamsters. Make sure the mouse has plenty of food and water at all times. Use bedding of wood chips. If you decide to use cedar chips because they cover the smell of rodents you should know that they leave oils on the mouse and it might not be the best choice of bedding for the mouse.
![]()
They are fabulous little animals and great for kids to have as pets. They are also great for feeding to other animals and for laboratory purposes.
For more information on mice you can refer to this very
resourceful web site I have found.

About Myself: I am currently a third year Biomedical Photographer attending Rochester Institute of Technology (RIT) in Rochester, New York. I came to RIT in hopes of finding a career studying photography. When I got here I learned of this type of photography and fell in love with it. When I graduate in 2006 I plan on joining the police force or going through academy training so I am able to photograph crime scenes. I am very interested in the forensic applications this area of study has to offer. I also enjoy photomicrography. Maybe one day I can go into medical school and do cytology. That way I can diagnose cellular diseases and be able to photograph them. For further information you can contact my at my e-mail address.
Copyrighted by: Alicia Thresher
Return to index of articles by students on the 'Principles and techniques of photomacrography' course, November 2004, Biomedical Photographic Communications (BPC) program at the Rochester Institute of Technology (RIT).
Article hosted on Micscape
Magazine (Microscopy-UK) .