How to
Scientifically Photograph...
Archeological
Remains of
Homo Sapiens
By Jenn Bertelsen
|
How to
Scientifically Photograph...
|
|
|
|
Archeological
Remains of
|
|
|
|
Homo Sapiens By Jenn Bertelsen |
|
Photography of
human bones requires attention to detail. General knowledge of
anatomical positions in relation to structures of the human body is
essential for proper documentation.
|
|
Locate a stable
tabletop to provide for consistency between images. You will possibly
be working with fragile human bones, dedicating a workspace for your
photography eliminates possibilities for disaster. Before shooting you
will need to acquire a variety of tools and accessories:
|
|
|
|
Collect your
specimen and if necessary clean the bone of any dirt, dust, or debris.
To do so, without damaging the bone, use a soft cloth with warm water
and gently rub the effected area. If photographing the skull with
mandible, position the pair in Frankfurt Horizontal. This is
accomplished by lining up the bottom of the orbit with the mastoid
sinus. To check for accuracy, imagine a straight horizontal line
spanning the distance between the two points.
|
|
|
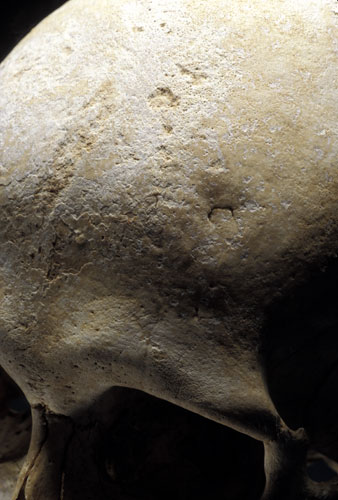
Next, position the skull
so that the specimen is parallel with the camera viewfinder. You will
be shooting a series of images, beginning with a frontal shot
(figure 2a). Basically the camera will be held vertically to allow for
maximum coverage of the specimen.
|
|
|
Next, rotate the skull 90 degrees to the left, in order to photograph the specimen in a position referred to as left lateral (figure 2b). At this stage, the camera will be flipped to shoot in a horizontal format. |
|
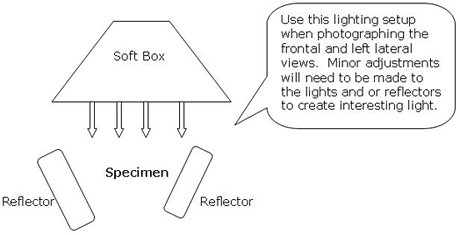
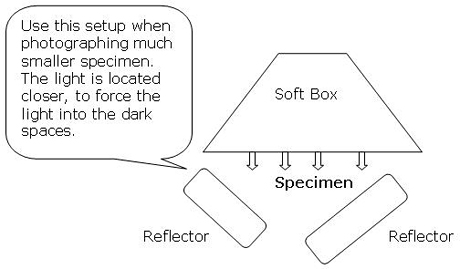
In certain
circumstances you might be compelled to document additional details of
the human remains. Shown here in figure 3, severe decay of the tooth,
is documented. In instances such as these, you will need to adjust your
lighting setup to accent the specific feature. Below please review the
associating diagrams, illustrating the proper lighting setup.
|
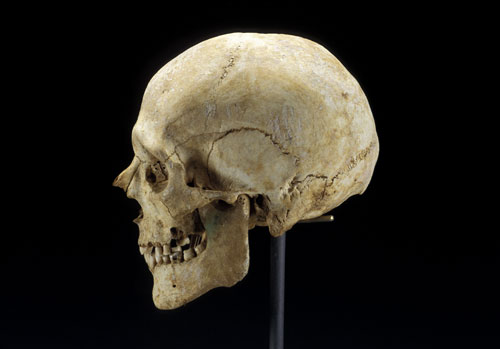 figure 2b figure 2b |
 |
 |
|
|
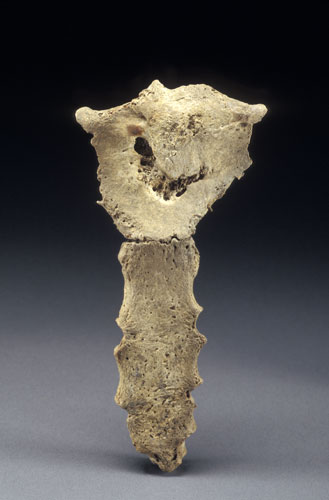
figure 4 Illustrating the effects of a deadly, infectious disease. |
|
|
|
|
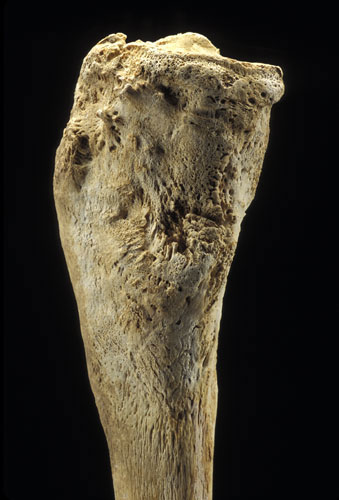
figure 5 Unusual degeneration of the femur, as a result of contracting tuberculosis. |
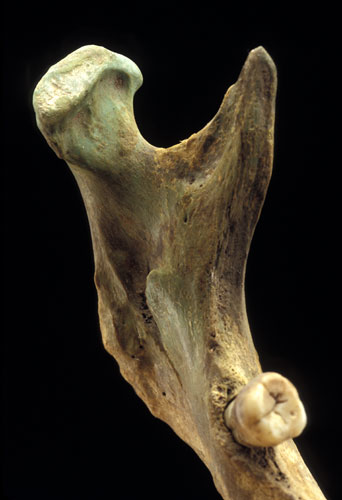
figure 6 Green staining of the mandible by a burial shroud pin, caused by copper oxidization. |
|
Jenn Bertelsen
compiled this article; she is a 4th year graduating student of the
Biomedical Photographic Communications program at Rochester Institute
of Technology. With a minor in Criminal Justice, she plans to pursue a
career with the Federal Bureau of Investigation as a Forensic
Photographer.
|
|
All images were
photographed under copyright of Jenn Bertelsen 2004. These images were
shot for a forensic anthropologist at the Smithsonian Natural History
Museum in Washington, D.C. If you are interested in receiving further
information, or have any questions or comments, please contact her
through email at bertelsen@mail.rit.edu.
|
Return to
index of articles
by students on the 'Principles and techniques of photomacrography'
course, November 2004,
Biomedical Photographic Communications (BPC)
program at the Rochester Institute of Technology (RIT).
Article hosted on Micscape
Magazine (Microscopy-UK).
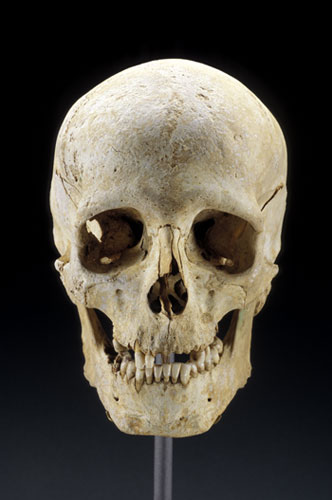 figure 2a
 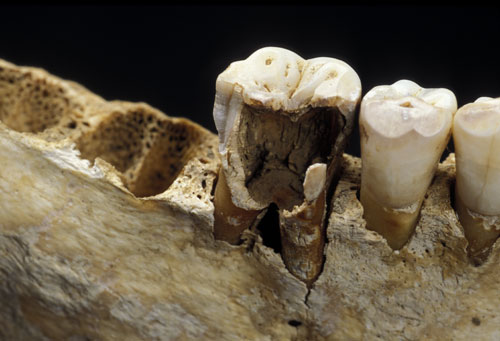 figure 3