|
PHOTOGRAPHING
THE EMBRYO
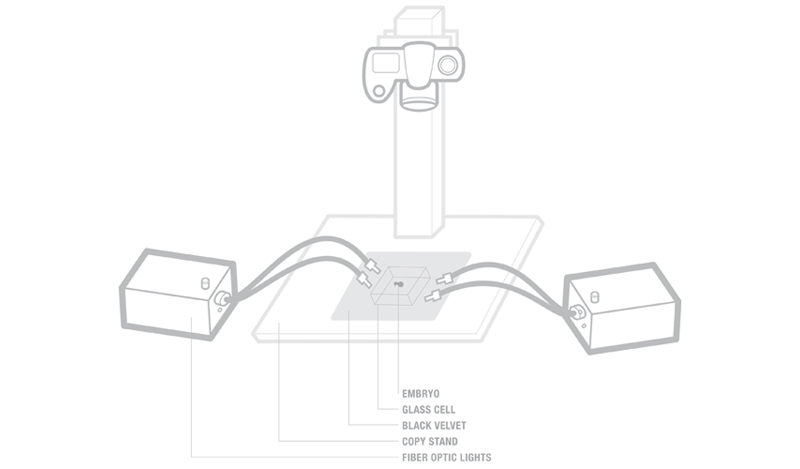
SUPPLIES
camera
two sets of fiber optic lights
glass cell approx. 5"x5"
water that has sat out in the open for 1 day
black velvet fabric large enough to cover the bottom of the glass cell
PROCEDURES
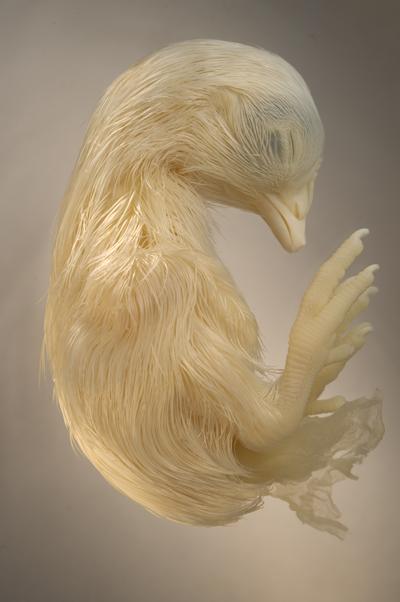
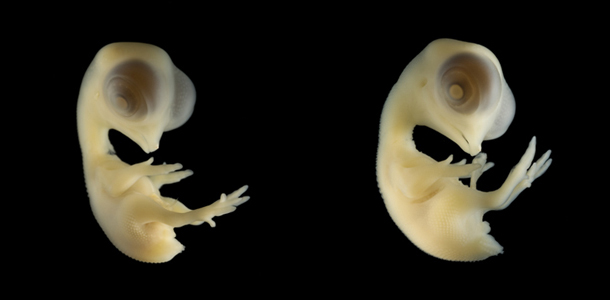
The chicken embryo is a semi-transparent and monotone subject. The
transparent flesh lends itself well to back light, which causes the
skin to appear to glow. The choice of background is a crucial
prop that helps determine the success of the image for its application.
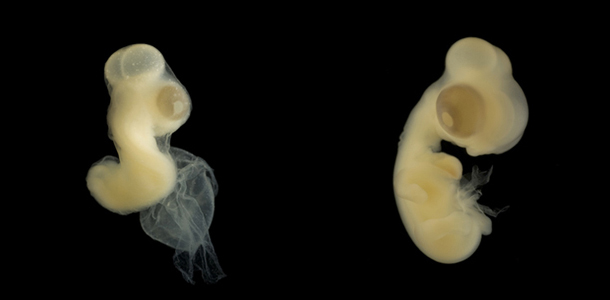
For scientific and documentation purposes, black is the best choice to
contrast the flesh tone embryo and emphasize its subtle details. Using
a white background makes the translucent skin difficult to distinguish
between the subject and its background. However, done correctly, a
white background can produce an aesthetically pleasing photo,
articulating its neutral tones.
The chicken embryo if filled with
fluids. If taken out of the water, its delicate cavities will collapse,
loosing the significance of its bodily form. Photographing the embryo
through water maintains its structure. A second advantage of
photographing the embryo under water removes any specular highlights
while diffusing the light that falls on the subject. However, the
diffusion does reduce the contrast. Bumping up the contrast either
through the lighting technique or through the digital file will be
helpful.
In the same way that air bubbles
form on the sides of an open bottle of water, bubbles will form on the
embryonic body. This produces unpleasant artifacts on your image. To
reduce this issue, let the water sit out for a day so the gas in the
water have a chance to escape. If the bubbles still remain on your
subject, try shaking it off, otherwise as a final attempt, they can be
removed through Photoshop. Fill the cell with water so it just
covers the embryo. Too much water and the embryo will float around
uncontrollably. Too little water and unwanted specular highlights will
show up on its wet surface.
Place the glass cell on top of the
black velvet. Black velvet produces a rich black background. Set the
fiber optic lights at the bottom of the cell on two opposite sides of
the cell. My lighting ratio was at 1:2. One light shining towards the
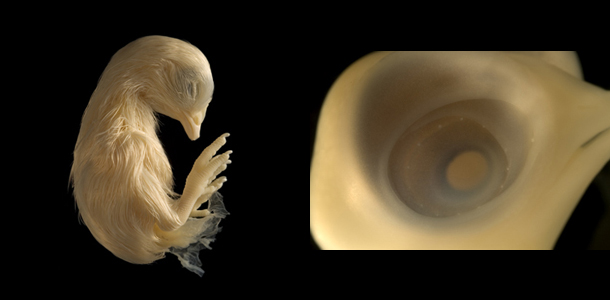
front of the embryo and the other shining on the back. The head of the
chicken is usually the main focus point. Let the brighter light shine
on the anterior body. Placing the lights at the very bottom of the cell
allows the light to shine across and through the transparent embryo,
creating a glow on its edges. The side lighting also forms shadows on
the embryo, emphasizing its bulbous eyes and porous skin.
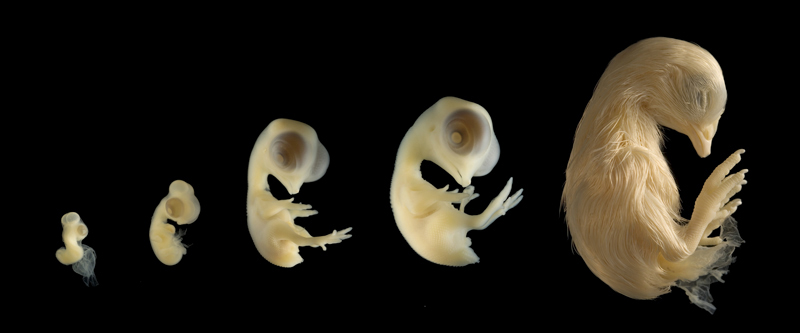
Chicken embryos are a
fascinating subject both on a scientific level and aesthetical level.
The continual observation and documentation of chick embryo helps to
educate the development of organisms generate and are manipulated. |