A Comparison Between Live vs. Preserved Macroinvertebrates
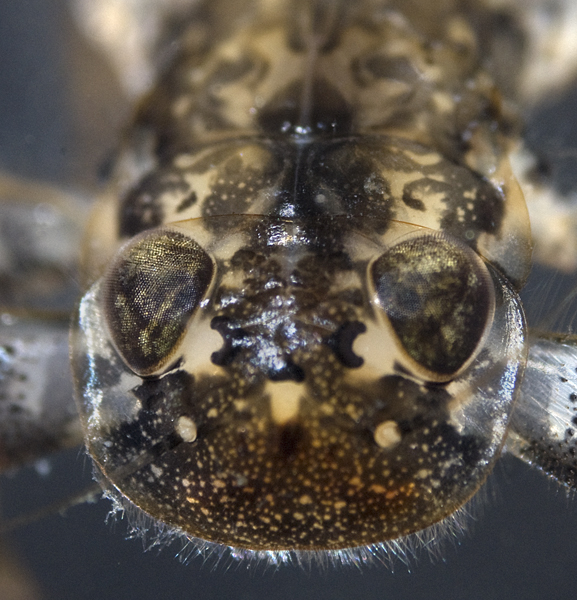
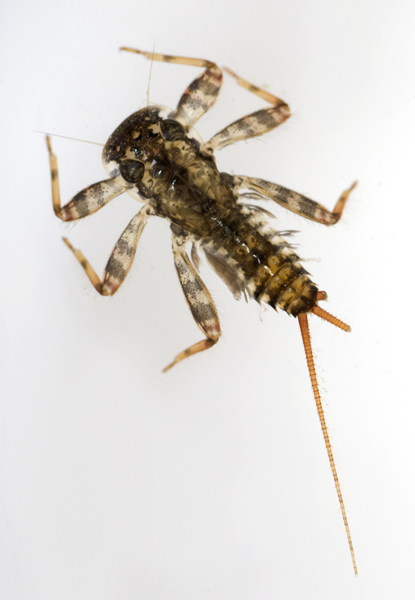
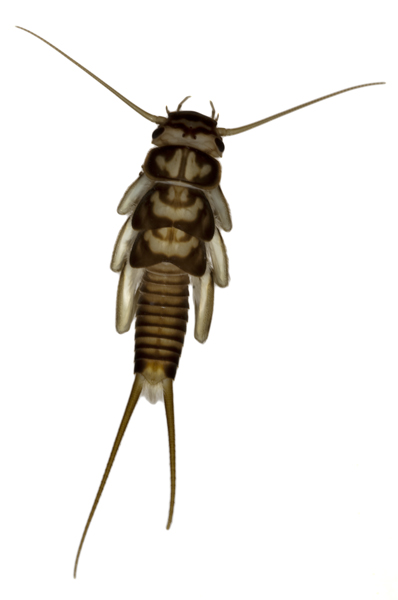
A live instar stage of the order Emphemeroptera (common name-Mayfly)
Article and Photographs by Caitlin Treuting
Introduction
I am currently a student enrolled in Rochester Institute of Technology. I am majoring in Biomedical Communications Photography and Environmental Science. The images and articles of this page were created for a final project for the Photomacrography class. I chose the subject of Live vs. Preserved photographs of macroinvertebrates. I wanted to compare the images to see if one were to make a field guide for environmental scientists whether it would have a big impact on the identification of the specimen, depending on whether or not the specimen was alive or preserved at the time of image capture. This can be very important since the identification of the specimens go towards testing to see the water quality of the stream/creek/water body in question.
Preparation
I first went out to a local creek, Oatka Creek, and did a kick sample, which requires a net, and if you don't want to get wet, waders. One kicks up the debris on the bed of the water body, while holding the net in front of them. One does this across the water body in a given amount of time. Afterwards, I put what I collected in the net into two jugs to transport back to the lab.
Comparison
| Same subphylum of Crustacea however the one on the right is under the genus of Gammarus. |
|
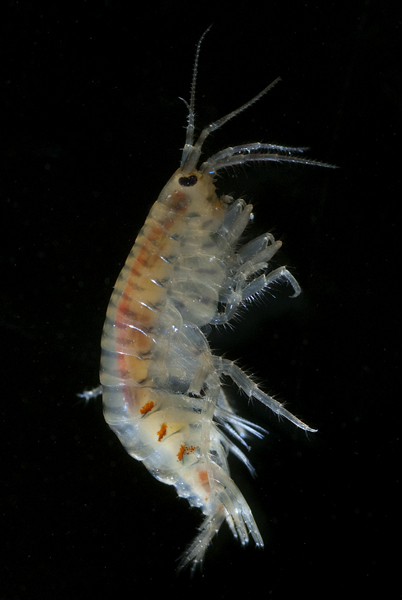 Alive |
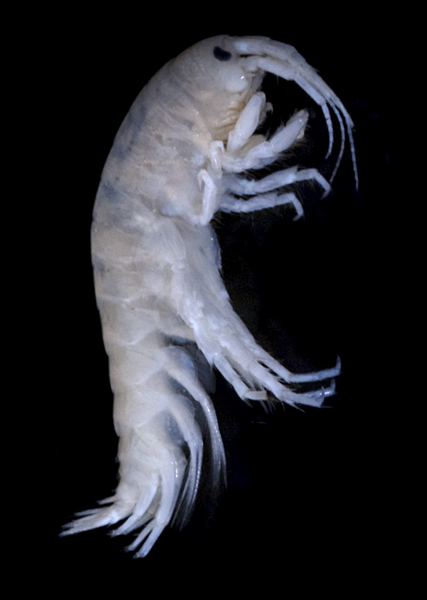 Preserved |
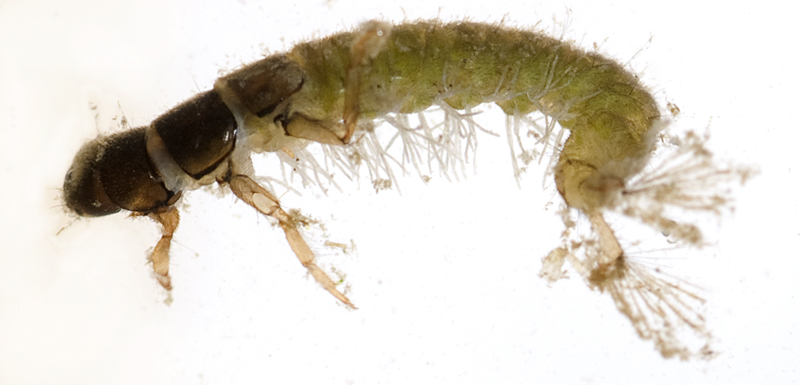
The following macroinvertebrates are under the same order of Trichoptera, (the caddisfly belongs to this order) but the preserved macroinvertebrate is more specifically under the genus of Hydropsyche. |
|
 |
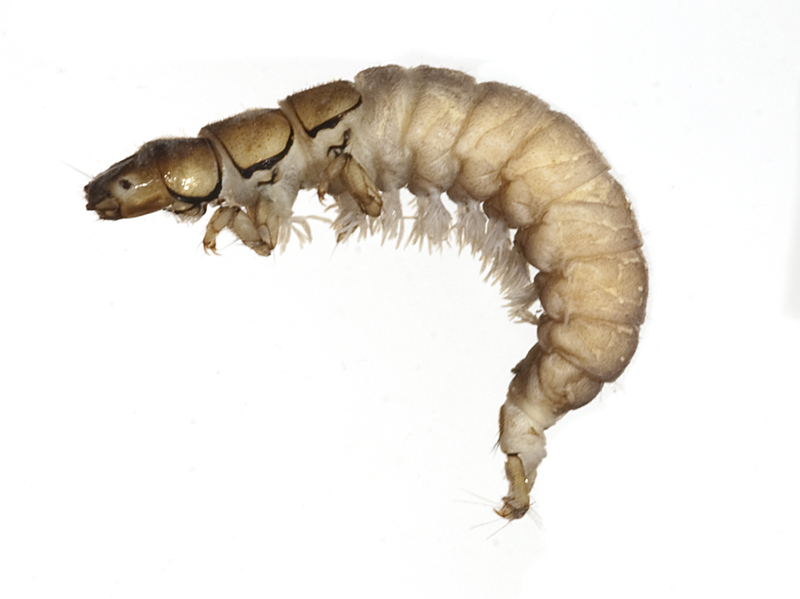 |
| Alive | Preserved |
|
|
 |
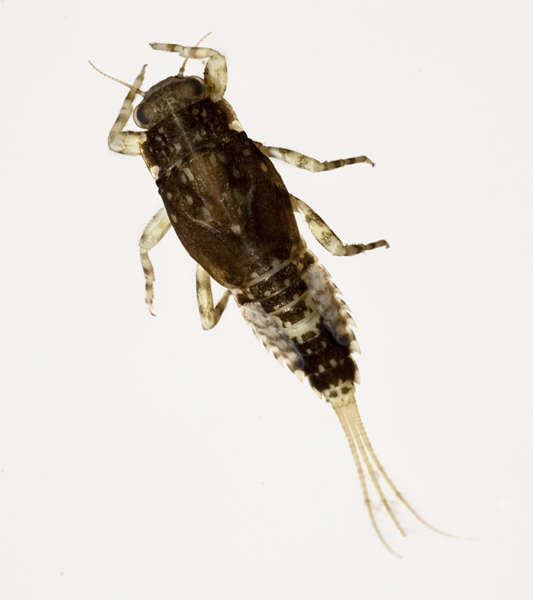 |
| Alive instar stage of Emphemeroptera | Preserved |
|
|
|
|
Overall, one may see that in some of the photographs it is hard to distinguish the differences between the live vs. preserved macroinvertebrates. The preserved macroinvertebrates seem less symmetrical due to the method of death (in this case it was ethanol). For the photograph of the Gammarus, it is seen that the ethanol has taken the color out of the macroinvertebrate. Therefore, one may see that in certain cases taking photographs of the macroinvertebrate whether alive or preserved depends upon why one is taking the photography, if it is to document the natural representation of the macroinvertebrate, then they should be alive, in order to conserve their color and to see the correct orientation of their body (legs cerci etc). However, if one is taking the photographs for a general identification where you would only have to see how many cerci the macroinvertebrate has photographing the macroinvertebrate preserved would be the best way to it.
Set-up
To photograph the live and preserved macroinvertebrates I used a Nikon D200 camera and afiber optic electronic flash. I used a lens that created a 1:1 (life sized) image on the sensor. I put the fiber optics flash on one side of the specimen and only used one out of the three lights, which was elevated above the specimen using a clamp. The specimen was submerged (as best as possible) in water in a petri dish that was elevated by wooden blocks, in order to make the background blurry and to dampen the shadow of the specimen on the background. I used a paper and sometimes a black cloth as a background. The camera was put on a copy stand and moved up and down in order to obtain focus. I also moved the camera horizontally to help find the specimen in my field of view through the camera. The camera was also attached to a computer so when I took an image I could view it immediately afterwards and adjust for such things as shutter speed and f-stop. Below are images of my setup.
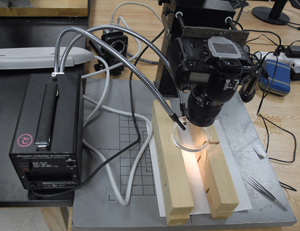
General setup
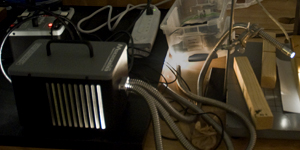
General fiber optic flash
setup
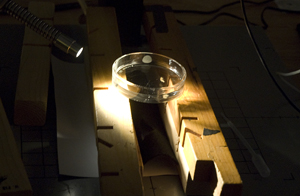
Detailed lighting with the fiber optic flash
Acknowledgements
I would like to thank Kevin Keller in helping with the collection and identification of the macroinvertebrates. Thanks also goes to Michael Peres for teaching me how to use the fiber optic flash, and guidance throughout the project. Steve Diehl should be recognized, since he gave me advice through his personal experience through photographing dragonflies.
Contact
Feel free to contact me or Michael Peres if you have any questions or comments about this project.