Photographing Phaseolus vulgaris (Yellow Wax Beans)
By Casey Murphy
aseyca89@hotmail.com
Rochester Institute of Technology
Biomedical Photographic Communications
____________________________________
| Introduction |
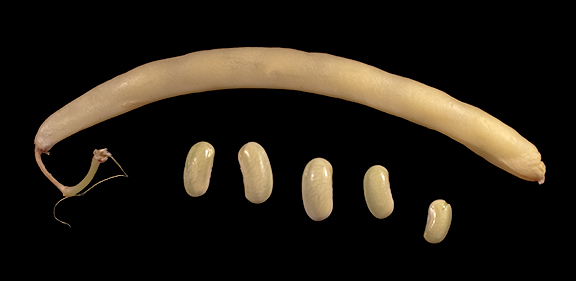
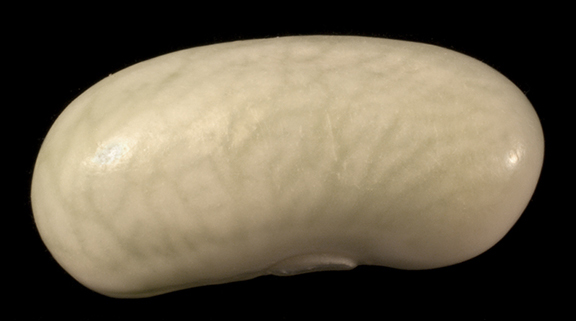
As I perused the produce selection at the local grocery store, I noticed something that I had never seen before on display next to the basket of green beans. They appeared to be green beans, except that they had yellow skin and a sign on their basket called them wax beans. I inspected them further and began to think about their photographic potential. I noticed the textures of the pod and the bean within and decided that I would like to explore it further with macro photography. |
| Subject Information |
Phaseolus vulgaris refers to many different common beans including bush beans, kidney beans, green beans, and wax beans. Yellow wax beans originate from the tropical climates of Central and South America, however they are now grown in temperate climates as well. The beans are available year round, but their peak season lasts from late July to late September. |
| Equipment | |
|
 |
| Lighting |
For all of my images I used some variation of two different lighting techniques. The first technique was a reflected light set up with two lights on opposite sides above the subject. The second technique used was a trans-illumination set up with two lights on opposite sides under the subject. Here are diagrams of these two set-ups respectively: |
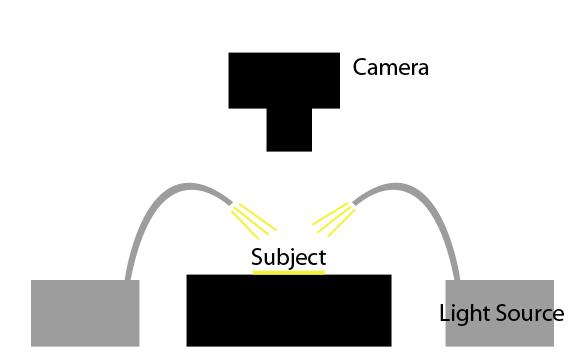
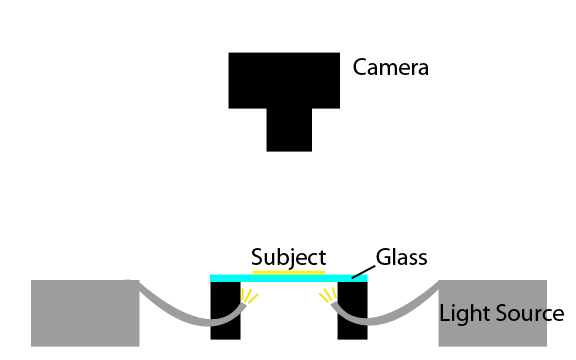
Depending on the feature of the subject that I was trying to photograph, one of the lights may have been further away than the other, or one of the lights might have been turned off to reveal texture or structure that was otherwise hidden. |
| Photographing |
For all of my photographs, the camera was positioned on the copy stand looking straight down on the subject. All of the photographs showing the entire subject were taken with the 50mm macro lens, and all of the close ups were taken with the bellows and the thimble lenses. |
| Problems While Photographing |
Despite using the camera’s vibration reduction feature, I still encountered a lot of blurriness in my images due to vibrations. To help reduce this I used a cable release so that there was no shake when pressing the shutter. Furthermore I made sure to keep any sources of vibration, such as the fans in computers or the fiber optic lights, as far away from the camera and subject as possible. |
| About The Photographer |
I am a fourth year student at the Rochester Institute of Technology in Rochester, New York. I will graduate in May of 2011 with a Bachelors of Science degree in Biomedical Photographic Communications. I am undecided on my goals upon graduation, but I am interested in a career in photography. Contact Information: Casey Murphy aseyca89@hotmail.com 614-323-4329 Sources: |
