Forays into "Consumercam" Photomicroscopy By Paul James, UK |
I'd like to share my thoughts and initial experiments into the relatively new world of digicam photomicroscopy. Fortunately some basic principles that apply to film photography also apply to digicams, so it is not an entirely new field.
It is a fact though that nearly all digicams at present have non-removable lenses, which limits their scope in microscopy etc. Traditionally the aerial image from the microscope would fall directly onto the film with ideally no interference. Our consumer style digicam has to form an image through it's own lens, and that does not auger too well with perfectionists in the field, understandably.
However, a reasonable image can be captured on the CCD as long as certain basic principles are understood.
When we view the microscopic image, our eyes tend to relax, and we alter the focus so we feel comfortable with the image. The plane of the virtual image which we see can extend from approximately a few inches below the eyepiece to infinity, depending on the individual's eyesight and whether parallel or converging eyepiece tubes are being used in binocular forms.
Fortunately most digicams should be able to focus the real projected image on the CCD since their range of focus also varies from a few inches to infinity.
By placing the camera over the eyepiece with care and awareness of concentricity and 'square on' positioning, the full field of view can be recorded on the CCD, (those who have digicams with zooms can alter the image scale easily and conveniently without changing eyepieces). The distance between the camera's lens and the eyepiece is also critical too, and if you have a digicam with recessed lens, you can with care align the camera over the eyepiece by hand to find out if your camera will capture images in a satisfactory manner. This initial step, can provide all the information needed to confirm the suitability of your camera/microscope combination. The LCD is an almost indispensable aid in these initial trials, and an auto focus/exposure camera should romp away with this first test.
Assuming a modicum of success, the next stage is the subject of holding the camera with more permanence and accuracy. In my experience of making many devices in general, and making a few mistakes too, it pays to think very carefully about a 'mechanism' for holding a camera in position. The easiest device to make is a permanent one, but of course this may not be practical, or even desirable. The ideal situation for most users I suspect would be to position the camera easily and accurately when it suits them during observation. Convenience is very important if we are not to tire of the whole business !
Since my Olympus 830L is contoured both front and back, the only suitable method of holding was the tripod socket. After considerable thought I elected to forget about tradition and made a simple wooden 'scaffold' which simply slides up to the back of the microscope and registers with it's base accurately. The camera rests at a suitable angle in an L- shaped bracket custom contoured to support the front together with the tripod screw securing. Much fitting and adjustment was required, but it works, although I'm not at present absolutely convinced about it's design, so I need to think more, but in principle it's quick and easy to use and therefore exactly what I want. The construction details with diagrams and photos plus tips for aligning cameras are provided here.
The following subjects were taken with a variety of objectives and eyepieces, using an old Watson, and Wild M20. The camera an Olympus 830L did all the focusing and exposure control automatically. The image files were resized from 1280 by 960 HQ image mode. In all cases the original image files are more detailed than these small web editions.
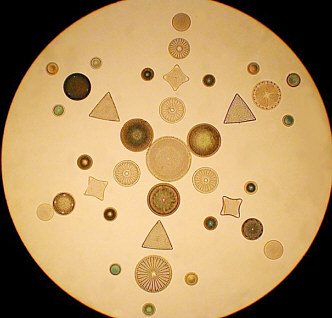
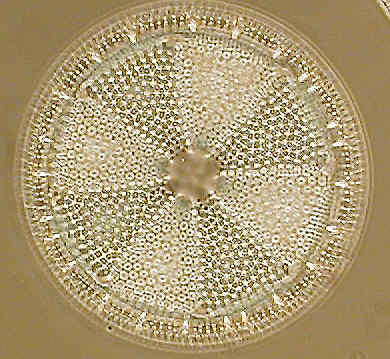
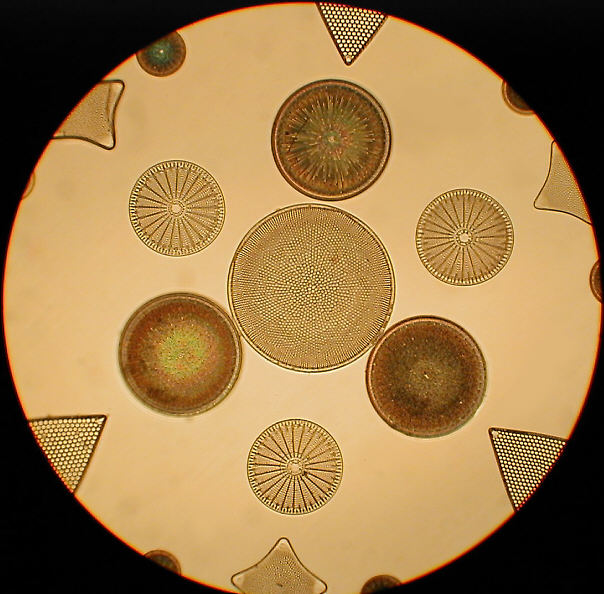
Here the first image used a restricted microscope condenser diaphragm setting to give a little diffraction colour to make the lowish resolution image of more interest. The second is a cropped image from the original unsized 1280 by 960 image of Actinotychus heliopelta, using a times 40 phase flourite objective. Notice the fine dot detail is missing, which is clearly visible with direct vision, and could have been revealed in the CCD image with a higher power eyepiece had I possessed one.
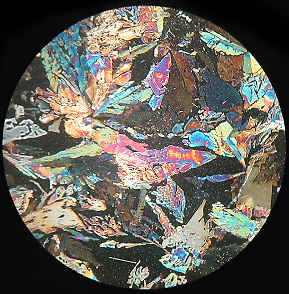
Here, both images are familiar low power types, the polarised
light being very suitable for the digicam.
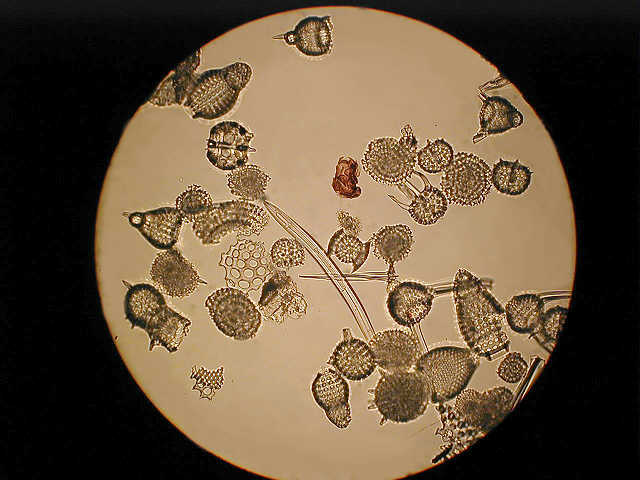
A general assortment of radiolarians low power phase.
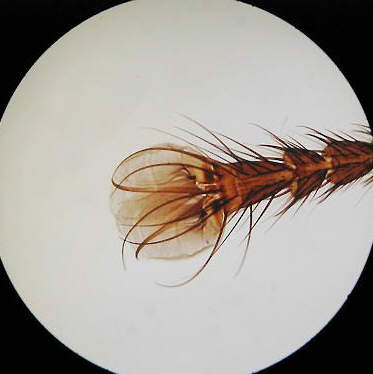
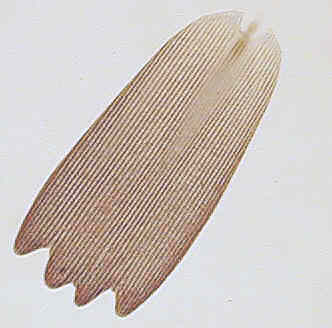
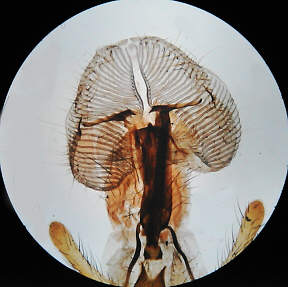
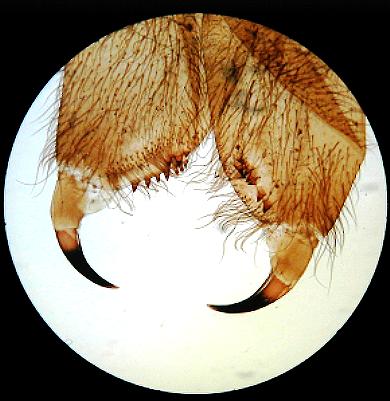
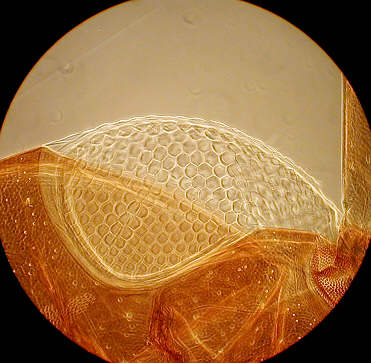
Two well known subjects, the insect's leg in brightfield, and the butterfly's scale from a cropped 1280 by 960 unsized file.
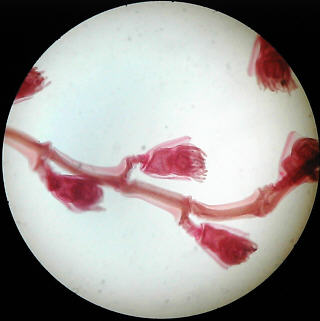
Simple brightfield images of Obelia, and a spider's foot, but showing uneven illumination as a result of slight misalignment.
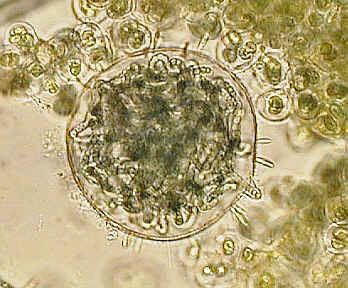
On the left an algae under high power phase cropped from full image file, and an old "Norman" slide of the eye of an earwig with medium power phase.
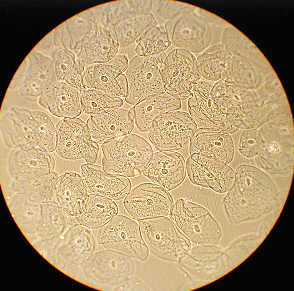
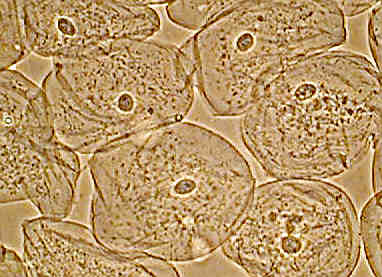
Left shows the entire field of epithelial cheek cells, phase contrast, whilst at right the same image cropped without resizing from 1280 by 960 pixels. A little more detail shown but still slightly 'empty'.
Here's an image using brightfield with only modest substage iris closure, there's better balance between subject and backlighting, making for more critical alignment and is challenging. The focus has been compromised/adjusted to get a "flat" field, but the CCD resolution though better here is still inferior to film, although in my opinion , evoking the feeling of 'live' viewing ?
It appears that the best overall images from the Olympus 830L are taken using lowish illuminant intensity as above, and therefore showing the characteristic 'cool' filament colour. I am quite happy with this.
It is apparent from these photo's that 35mm is the superior recording format. The golden rule I think with a consumer digicam is to use higher magnifications to allow for this, and experiment with different eyepieces to increase magnification.
Last but not least, I found the following :-
1) When assessing the first results you might find that large areas of the circular image are not recorded, or there may be considerable variations of light intensity across the field, despite the preview image looking good on the LCD. I think it is possible that the initial viewing on the LCD is taken at full aperture ( a guess ), but on exposure the iris diaphram of the camera lens closes down depending of course upon the intensity of the image and backlighting. I suspect that if there is still some misalignment or lack of concentricity, whilst being evident in the recorded image, may not be fully realised when inspecting the preliminary image on the LCD. Therefore aligning the optical axises of both takes time, patience and a few trial piccs !
2) As a starting point use lower intensity lighting than you would care to use for direct observation, as the CCD is surprisingly sensitive. It also helps with alignment since a modestly wide camera iris diaphram is more likely to yield fully illuminated images, if the camera is not perfectly centred on the optical axis of the microscope.
3) If you have a fixed focus camera it is almost certain that it's optimum setting is about 5-10 feet, and so the inherent depth of field of the aerial image should produce acceptable results.
Conclusions
I've enjoyed experimenting with the Olympus 830L/microscope, and have found it to be a liberating experience, in as much as I feel able to 'waste' exposures in the pursuit of recording what I was after. I never felt that way with colour slide/film owing to the costs involved, and maybe a sense of guilt about 'waste' in general ?
I have absolutely no doubt that CCD 'photography' is going to move forward and make inroads into our 'film culture'. After 40 or so years of "DIYing filmwise" these little digicams hold much promise. Hopefully larger CCD's will become available in the near future at affordable prices. We'll see !
|
Published in the November 1999 edition of Micscape Magazine.
Please report any Web problems
or offer general comments to the Micscape Editor,
via the contact on current Micscape Index.
Micscape is the on-line monthly
magazine of the Microscopy UK web
site at Microscopy-UK