|
|
|
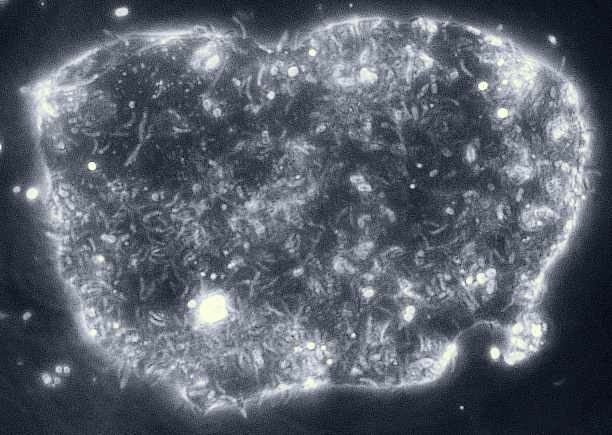
Bacterial infestation of living cell. Diffusion screen inserted prior to shutter firing and giving about 2.5 stops of attenuation. Zeiss achromat x40 objective.Pixel for pixel image taken using an old Nikon CP 800 2.1 megapixel digicam |
| Coaxing Your Digicam to
Capture Darkfield
A very simple method of getting a correctly exposed image By Paul James |
Despite the inexorable wave of advancement in the field of digital consumer cameras, the rigmarole of exposure and focusing hasn't altered from the earliest models: most automatically setting the shutter speed, iris aperture and focus when the shutter is half pressed. The speed with which each camera performs this automated task varies of course, and as you can imagine the more expensive models tend to do this pre exposure assessment rather more quickly than the cheaper models.
Ideally to reproduce the classic darkfield image as best we can requires a spot metering approach to the problem, otherwise the automated digicam will invariably over expose the image simply because its metering is designed to take into consideration most of the light from an average terrestial scene. The darkfield image usually has a central specimen highlighted strongly against a backcloth of darkness. Thus the average digicam will not be able to ignore this dark background so the final image the ccd captures will show an over exposed specimen: grossly so as often as not.
|
|
|
Bacterial infestation of living cell. Diffusion screen inserted prior to shutter firing and giving about 2.5 stops of attenuation. Zeiss achromat x40 objective.Pixel for pixel image taken using an old Nikon CP 800 2.1 megapixel digicam |
Spot metering is rarely found on a consumer digicam, but if your camera sports an exposure compensation feature, in which you can reduce the automated exposure by up to 2 or3 stops, then success can be achieved for many if a not all DF subjects. But this feature is not necessarily present on all cameras suitable for photomicroscopy, so if yours does not possess this feature then you still have a chance of capturing good DF images, but you will have to coax your camera with a little bit of deception. The principal of the technique is very easy to understand, though its implementation requires a little thought and practice.
The principle involved is to reduce the light intensity of the source immediately AFTER the camera has gone through its automated pre exposure sequence. In practice this is easily achieved by inserting a neutral density filter or diffusion screen into the light path below stage before the shutter fires. Timing is the essence of course, and practice makes perfect. Whether you use diffusion screens or neutral density filters, or other means is not important, save that it suits your situation and type of equipment. The actual method of introducing the neutral density/diffusion screen is unimportant too so long as it blocks the light path just after the camera's auto assessment of focus and exposure, but before the shutter actually opens of course.
|
|
|
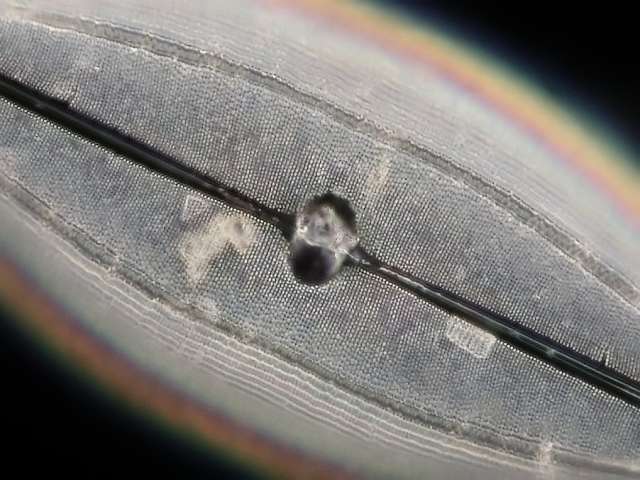
Air cell mounted diatom Imaged by an aging Minolta F300 5 megapixel digicam with the help of a finely ground glass diffuser to suppress the light intensity by about 1.5 stops. It was rapidly brought into the light path above the field lens after the pre exposure sequencing. (DF slightly offset using lateral displacement of field lens on M20. X40 Fluorite objective.) |
I realise that there are many types of digicam out there with various exposure/focussing/firing sequences, but you might therefore like me have a fairly old digicam which is still yielding quality imagery, and one that can image from an eyepiece without vignetting etc..
The only potential difficulty stems from having just one pair of hands, because whether you fire the camera using the shutter release button, or the infra red remote controller, or the delayed action timer, both hands will be engaged in one way or another. So the rapid crossing into the light path of the 'filter' needs a little rehearsing. Fortunately the pre focussing and artificial shutter sounds from the camera help us to judge that vital period ot time in which to place the filter in situ below stage. Since one of the great advantages of digital photography is the ability to examine the image immediately after exposure, checking the result of this simple 'deception' technique takes just a few seconds. Use of the delayed action facility which is almost always present on digicams will allow the hands to be free and allow the camera to function without vibration, though I think you will find that no pre focussing or exposure valuation occurs until the period of delayed action comes to its end, and only then will you hear the familiar pre-assessment sounds before the shutter fires.
A Refinement
Getting even more accurate control of exposure can be brought about by the use of 'crossed polars' because of course the amount of light this combination lets through can be fine tuned. The initial expense of obtaining the polar material required is soon rewarded with more speedy efficiency to successful imaging. The polar technique favours those who have large wattage outputs from their lamphouses, since coupled polars will at best let only about 50% of light through.
Some Final Points
Remember that the smaller the specimen is in comparison with the dark background, the more the need to reduce exposure time by introducing a denser filter to block a little more light. This is because the camera 'sees' less light overall and automatically lengthens its own exposure to compensate. Thus the specimen will be grossly over exposed if no light attenuation is exercised prior to the shutter firing.
Conversely in certain situations, especially if the specimen fills the entire field of view, the camera will image successfully without any compensation of light intensity for rather obvious reasons.
| All comments welcome by the author Paul James |
Microscopy UK Front Page
Micscape
Magazine
Article
Library
Published in the October 2009 edition of Micscape.
Please report any Web problems or offer general comments to the Micscape Editor.
Micscape is the on-line monthly
magazine of the Microscopy UK web
site at
Microscopy-UK