A Scanning Electron Microscope in the Dining Room
By Ted Kinsman, Rochester,
NY
A Scanning Electron Microscope in the Dining Room By Ted Kinsman, Rochester,
NY |
|
This short
article outlines my adventures and gives the reader an overview of the
procedures involved with running a scanning electron microscope. For more
serious reading I have suggested a text at the end of this article.
I
have been interested in microscopes since a very young age, even as a child I
was shown images from a scanning electron microscope and told how complicated
the equipment was. I think many fellow microscope enthusiasts have had a similar
experience.
In college I was trained in scanning electron microscope
(SEM) use during a summer internship. This introduced me to the equipment and
gave me the confidence that the equipment was not pure magic. Now as a teacher
and photographer my mind once again turned to scanning microscopes and I
started asking around if there were any surplus machines for sale. It turned out
that an acquaintance of mine was shutting down his lab and was getting ready to
scrap his older model microscope a Cambridge Stereoscan 200. This was a very
nice machine when it was built around 1982.
The problem was the machine
is approximately 2,000 pounds and I wanted to put it on my back porch. The back
porch is made on a large slab of cement on the ground and would be the perfect
place for a vibration sensitive microscope. My wife basically said no - she
would not put up with a microscope on the back porch, since you could not
decorate around it. So I thought there was no way I could get the machine. A few
weeks later I was having coffee with an old friend and was talking about the
SEM, and how I had no place for it – my friend Roger thought about it for a few
minutes then suggested his dining room would be an ideal place. Since he is a
bachelor, he does not have to worry about decorating around a large industrial
looking microscope. I called back the seller and made a deal to pick up the
equipment.
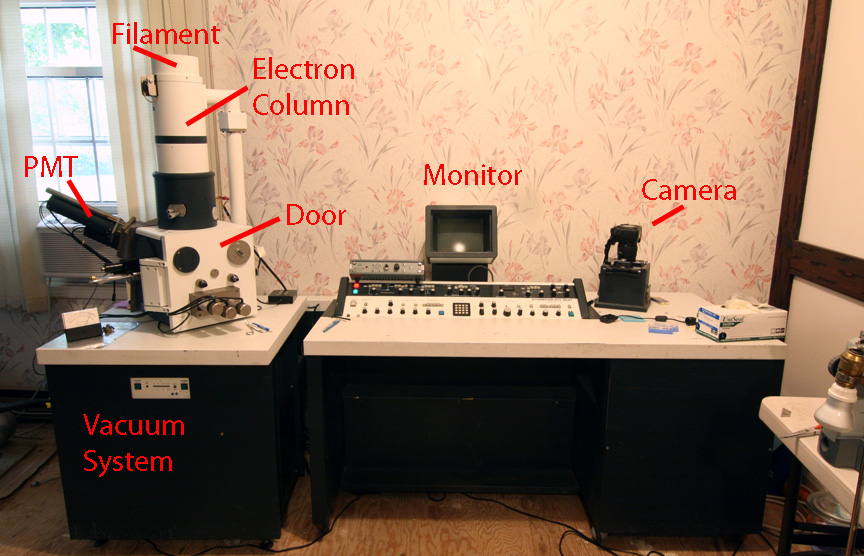
Moving
a large SEM is not easy. The machine is in two basic parts - the microscope and
the control console that contains all the electronics. The first step in moving
the machine is a process of de-cabling. This involves disconnecting about 30
cables and grounding wires that run between the two parts of the equipment. This
process takes about three hours including pictures, notes, and labeling all
cables and connections. Once the cables are disconnected the vacuum pumps need
shipping blocks placed to keep them from moving during shipping.
The
following weekend Roger and I loaded the equipment into a rented truck with a
hydraulic lift gate for the 30 mile trip to Roger's house. We had a few extra
friends help us unload the equipment. The microscope was now resting on a
wooden floor (rug removed) that used to be a dining room. After all the hard
work of moving the machine, we took comfort in knowing if we could not get the
machine running, we could now use a cutting torch to reduce it to movable
pieces.
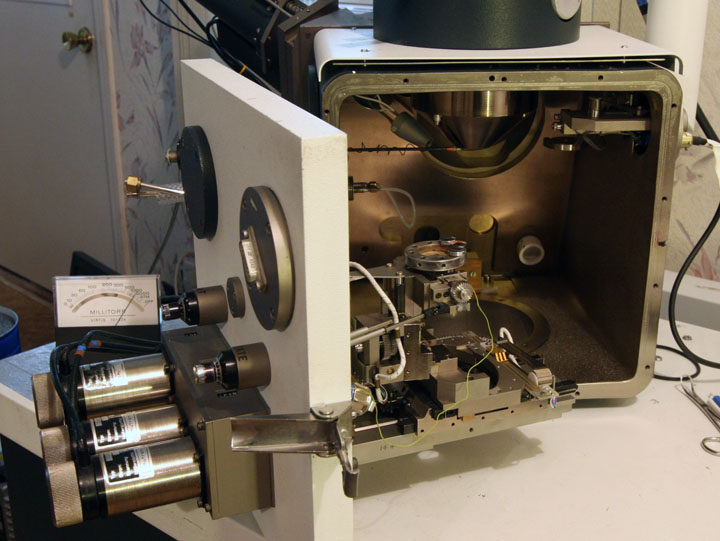
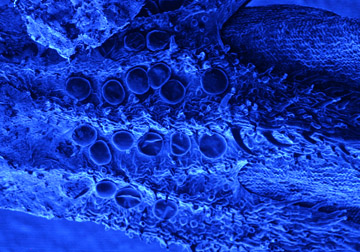
The inside of the vacuum chamber - the specimen stage is in the center.
The process of attaching the cables took several hours, only to discover the equipment was not working. We were lucky to have full schematics and manual for the machine, without this it would be near impossible to bring the machine back to life. It turned out the vacuum system had a burned out control board. We were able to remove the damaged components and return the board to its original state. At the end of the week we had a working vacuum system, but the electronics to control the electron detectors were not working. I suspected it was a problem with the cables and carefully removed and reattached all the cables from the re-cabling process. The machine came to life!
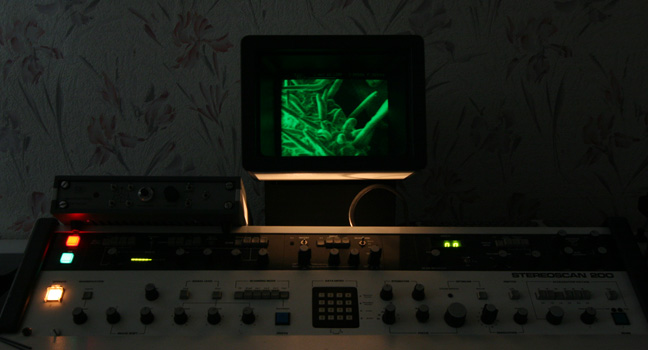
The machine running. Looking at peach fuzz.
I like to compare keeping an SEM running as being similar to
keeping an old classic car running. There is always upkeep, and repair work to
do. In this case the SEM uses fine tungsten filaments as the source of the
electrons. These filaments last about 40 hours, and to change one takes an hour
to physically change, and an hour to adjust the electronics for the best image.
The main vacuum pumps on this machine are a mechanical vacuum pump that removes
most of the air and a turbo molecular pump that achieves the high vacuum. The
molecular pump is similar to a the front of a jet engine with very fast spinning
blades. The bearings on this pump need to be rebuilt every few years, and the
mechanical pump needs an oil change every 6 months.
This SEM was built
in 1982 which makes it an antique (older than 25 years) and was just about the
last machine designed around the European PAL video format. This is the highest
size of a file recorded on the Polaroid film unit. The PAL format yields a very
small image compared to modern electron microscopes.
To make an image, a beam of electrons is focused on a very small spot on the sample. The beam is scanned across the sample much like the pattern in an old style glass TV. When the electron beam hits the sample there are a number of physical phenomena that happen – x-rays, light, secondary electrons, and back scattered electrons are given off. Each of these effects can give different information and requires a unique detector. This machine has a secondary electron detector which is a phosphor coating on a plastic light pipe that leads to a photomultiplier tube (PMT). It is important to check that the machine does not give off any detectable x-rays when running at its highest voltage.
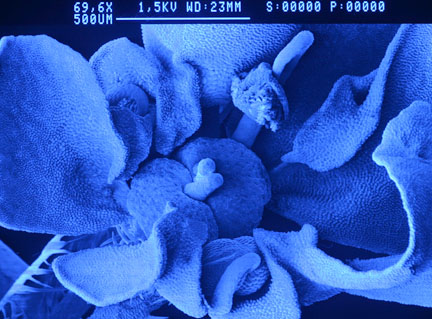
When the beam tracks across the sample the electronics detect the signal form the backscattered electrons and an image is made on the TV tube where the brightness on the screen is in proportion to the strength of the secondary electrons at that point. Thus as the beam is swept across the sample an image is created. To collect a simple image without using a lot of very expensive Polaroid film (almost impossible to find now – and is a special order at $5.00 an exposure) I replaced the Polaroid camera with a digital camera focused on the phosphor screen. The resulting digital files are blue, to make the images look like any other SEM shot, the images can be converted to black and white. I like the blue color, so I leave it.

Grape galls 231x
The electrons are accelerated by a potential of 14,000 volts from the filament. To take an image of a specimen the specimen has to have all the liquids removed. This is typically done with solvents and can lead to some quite complicated procedures. To increase the flow of electrons off a specimen and achieve the highest magnification and resolution specimens also need to be coated with a conductive metal after drying, but prior to entering the vacuum chamber of the SEM.
When I collect insects or plant material I first place the sample in 20% solution of ethyl alcohol. I like to use drinking gin for collecting samples, it is readily available and cheaper than alcohol from chemical supply houses. After a few days, I move the sample through a series of alcohol solutions 40%, 60%, 75%, and 95% ethanol with 5% acetone to remove the last bit of water. After the final step, the sample is placed in a critical point dryer. The dryer first cools the sample to 8C, so that when the carbon dioxide enters the sample container at 900 PSI it becomes liquid. Alcohol is soluble in the liquid CO2. After several times filling and emptying the sample container, the container is filled for the last time and the temperature is increased to 44C. At this temperature and very high pressure the CO2 is both a gas and a liquid at its critical point. This particular place on the gas phase diagram is important due to there being no difference in pressure between liquid and gas. As the pressure in the container (called a BOMB - can you guess why?) is released the remaining liquids all leave as a gas. The resulting sample has very dry and is ready for the next step.
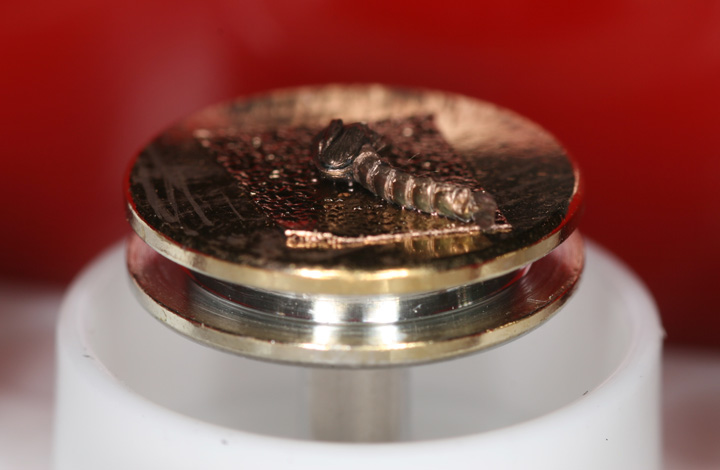
Gold sputter coated mosquito larva.
From the dryer the sample is placed in a sputter coater. This machine uses radio frequency high voltage to rip metal atoms off a target in an argon atmosphere at low pressure. It also sounds like a complicated machine, but they have been built for many years. The sputter coater also has a vacuum pump, but it does not have to get to a very good vacuum. Whereas an SEM can be outdated, a sputter system will run forever. The price of a used sputter system is often more than the whole SEM! Sputter systems can use gold, platinum, palladium, carbon or combinations of them all. The sheets of metal used in a sputter system can be very thin, and since a typical specimen can have a fraction of a micron of metal coated on it, the gold targets can last many years.
One of the keys to high resolution images is to tune the machine for the best spot. This is a bit like playing a musical instrument, it takes time and lots of practice. There are a number of variables to consider to get the best image. A few variables are, the distance between the final lens and the specimen, the accelerating voltage of the filament, the size of the beam aperture, the aperture adjustment, focus, resolution, and magnification. By the end of the summer I could get the machine up to 50,000x , but this was dependent on nobody moving on the wooden floor. The machine really needs to be on a cement slab. The majority of biological work is below 10,000x so even in its current location, lots of things can be studied.
I mainly use the machine to get better with sample preparation and hunt for interesting subjects. This machine is a great learning platform and a wonderful way to try out various techniques and procedures. The true key to a great image is a great specimen – and specimen preparation is an art.
The science and art of scanning electron microscopy can be a whole lifetime learning process. I still have a lot to learn.
I hope that there is a reader who realizes that running an electron microscope is not so complex and decides to give it a try.
Comments to the author Ted Kinsman are welcomed.
Resources:
'Scanning Electron Microscopy and X-ray Microanalysis' by J. Goldstein Etc. ISBN 978-0-306-47292-3
Image Gallery
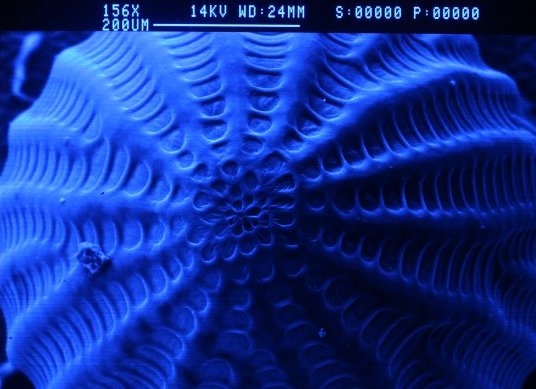
Monarch Caterpillar egg 156x |
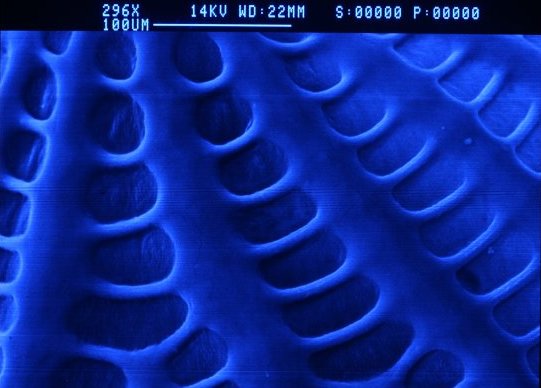
Monarch Caterpillar egg 296x |
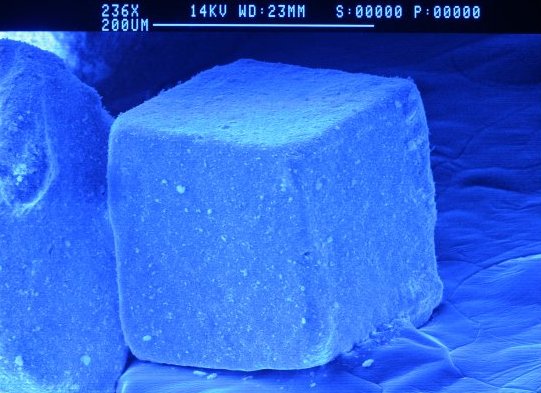
A salt grain at 236x. It is only 0.2mm but the depth of field is great. |
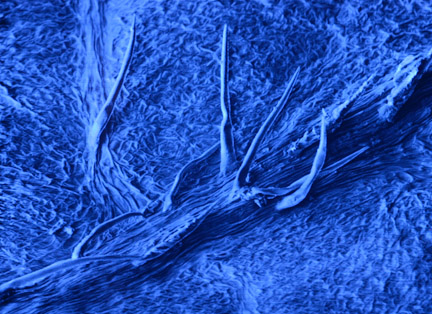
Hooks between the wings of a Honeybee 518x |
|
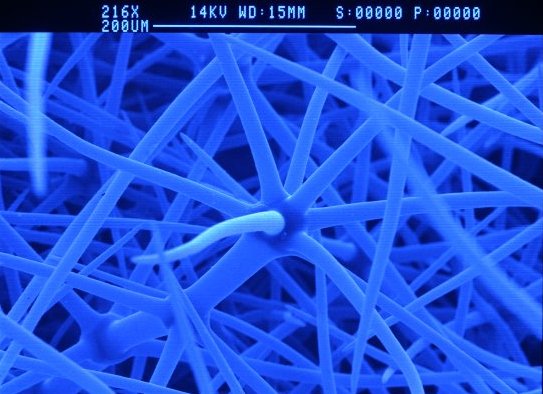
Fuzzy Lamb's Ear (Common Mullein) (Verbascum thapsus) |
Hibiscus flower and pollen |
Poison ivy leaf |
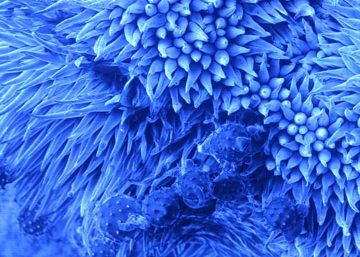
The scent sacks on a mint flower |
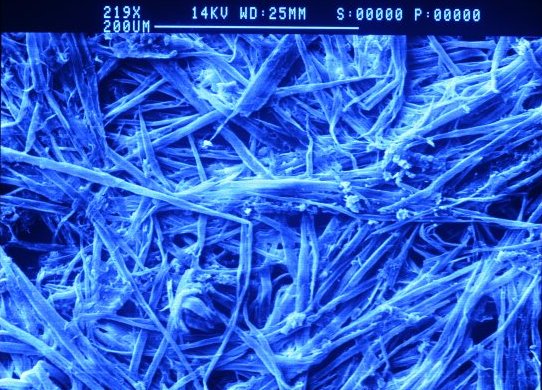
The paper in a paper wasp nest. |
Queen Ann's lace flower
Published in the September 2008 edition of Micscape.
Please report any Web problems or offer general comments to the Micscape Editor .
Micscape is the on-line monthly magazine of the Microscopy UK web site at Microscopy-UK
© Onview.net Ltd, Microscopy-UK, and all contributors 1995
onwards. All rights reserved.
Main site is
at www.microscopy-uk.org.uk
with full mirror
at www.microscopy-uk.net
.