Macro photography in the field using a mini-Dobsonian short- tube reflecting telescope.
By Michael Gibson
Northampton, U.K.
Let me say at the outset that my prime interest is microscopy, but as a member of the Northamptonshire Natural History Society I also attend different section meetings throughout the year on a variety of topics, including Astronomy, Botany, Geology, and Photography. It was at one of these meetings that I recently developed an interest in Astronomy and was encouraged to do a bit of moon watching and star gazing which naturally led me into the purchase of a suitable telescope.
As a complete beginner in this subject, I was recommended to get a relatively low cost, unsophisticated starter scope that would be easy to set up and use. Having given the matter some considerable thought and reviewed a number of telescopes currently available on the market, I eventually decided to buy the Skywatcher 76 Heritage mini-Dobsonian reflecting telescope at just under £50. I had read some good reviews about this scope and wanted something that I could use straight from the box, and also enjoy with my grandchildren. The Skywatcher 76 seemed the ideal “first scope” and did not disappoint!
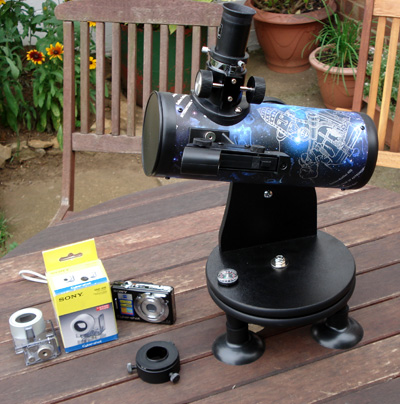
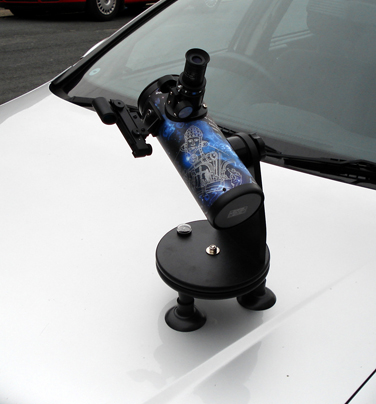
The instrument is a compact 76mm diameter reflecting telescope with a focal length of 300mm. It is attached to a mini- Dobsonian mount, and comes with two remarkably good modified achromat eyepieces (25mm and 10mm) giving magnifications of x16 and x30, respectively. There is also a separate finder scope which is attached to the side of the optical tube assembly by means of two screws. I made two modifications to this set as shown in figure 1. First I added three large rubber suction cups to the base feet which not only increased stability, but also enabled me to attach the scope to inclined surfaces, such as the bonnet of my car whilst out and about (Figure 1a). Second, I replaced the relatively simple optical finderscope with a little electronic device known as a red dot finder which made locating objects in the night sky a lot easier to do.
Figure 1 and Figure 1a
Of course, one of the problems of using an astronomical telescope is that, more often than not, the night skies are clouded over, which limits its use to only certain times when viewing conditions are suitable. Although the scope performed well on these rare occasions, all too often it would be sitting on the shelf, unused. I therefore decided to try the little scope out during the day as an aid to macro photography. However, straightaway there was a problem, as the image produced in all astronomical scopes is upside down. This is alright for the night sky, but for ordinary terrestrial viewing it is somewhat of a handicap! For me, though, it was not a problem since I was more interested in using the scope with my compact Sony Cybershot digital camera (Fig 2: showing camera with supplementary lens adapter fitted); and anyway, photographs produced with the aid of the scope could easily be turned the right way round by using image processing software back on the computer.
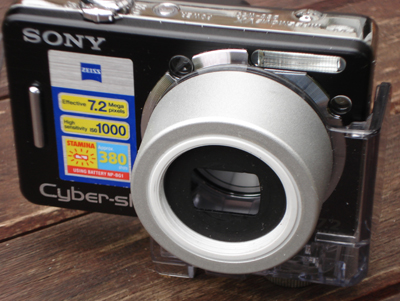
Fig 2
The complete setup for macro photography is shown in Fig 3. The 1.25” 25mm eyepiece is being used here and is secured by means of three screws to a camera adaptor which in turn is attached to the camera’s supplementary lens holder. Camera, adaptor and eyepiece are then secured by a further two screws into the optical tube assembly of the telescope.
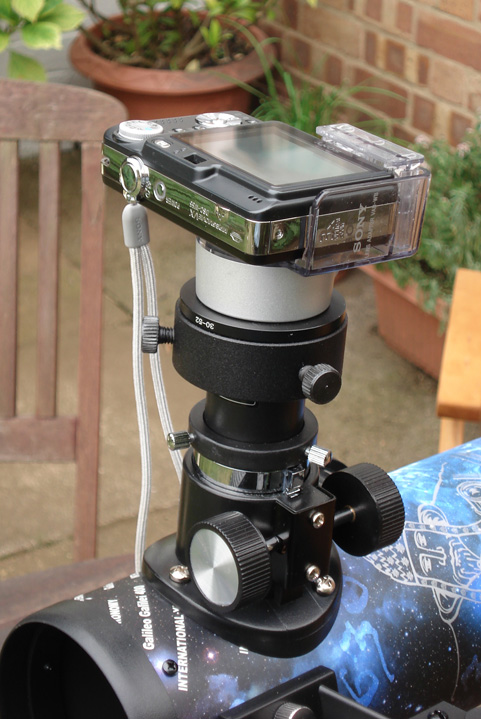
Fig 3
Focussing is done by way of the telescope’s two large adjuster wheels located near the base of the eyepiece assembly. To avoid vignetting of the image as seen in the camera’s backscreen, it is necessary to zoom in a little. Whenever possible, I also used the camera’s two second delay timer feature which avoided camera shake when pressing the exposure button to take the picture.
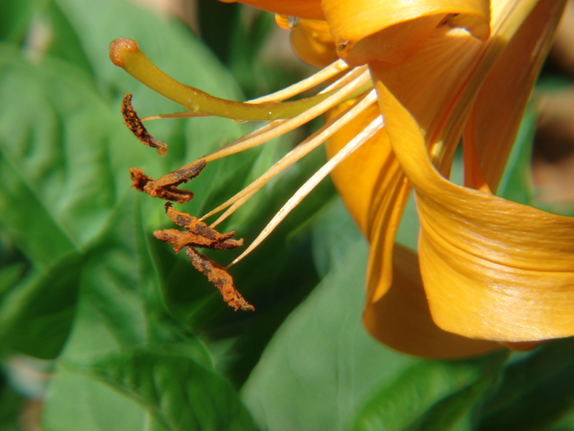
Here are some pictures taken with the Skywatcher Heritage 76 scope and camera setup. The only post-imaging processing I’ve done in Adobe Photoshop is to invert the pictures and crop where necessary. The distances from scope to subject in all photos are in the region of two to three metres.


To summarise, I thought it might be useful to list some of the advantages and disadvantages of using the Skywatcher Heritage 76mm telescope for macro photography in the field:
|
Advantages |
Disadvantages |
|
Portable & lightweight (Easily carried in a rucksack) |
Not suitable for bulky DSLR cameras |
|
No assembly required – ready for instant use in the field |
Produces an inverted image |
|
Uses standard 1.25” astronomical eyepieces. (Will also accept 30mm fit microscope eyepieces) |
Timer delay needs to be used to avoid camera shake |
|
Suitable for use with most lightweight compact digital cameras with suitable adaptors for attachment to eyepiece |
Cannot be used with a tripod without some further adaptation to the base of the scope |
|
Can be placed on the ground for low level views. |
|
All
comments
to the author Mike Gibson are welcomed.
Published in the
September 2011 edition of Micscape.
Please report any Web problems or
offer general comments to the Micscape
Editor.
Micscape is the on-line monthly magazine
of the Microscopy UK web
site at Microscopy-UK
© Onview.net Ltd, Microscopy-UK, and all contributors 1995 onwards. All rights reserved. Main site is at www.microscopy-uk.org.uk.