A DIY Tilting Stage - that anyone can make
by Ian MacGregor, Canada
In a previous article I described a handy little tilting stage ( table ) that I had designed for my stereo microscope. It was easy for me to make because I have all the tools and skills needed. What is presented here is a totally re-designed unit, with optional table surfaces that ANYONE can build with simple tools, at your kitchen table in one evening.
A building material supplier ( hardware store ) is close to my home so I set myself the following challenge:
(1) Other than the ping-pong ( table tennis ) ball and cork mat, I would find all of the materials I needed to build a tilting table at the building supplier.
(2) I would build this tilting table on a desk top, without ever setting foot in my shop using household utensils and items from my microscope lab bench.
(3) I would use methods that required no special skills other than following directions carefully.... basically; " no experience required "
My purchases from the building supplier included:
- 1/2 inch fender washers
- a box of small machine screw nuts ( these provide an internal counterweight ; lead shot or tiny steel bearing balls would be better )
- 11/2 to 11/4 ABS plastic reducing couplings from the plumbing section
- a sheet of 80 grit sandpaper
- 12 minute epoxy glue
- a roll of 1/2 inch masking tape
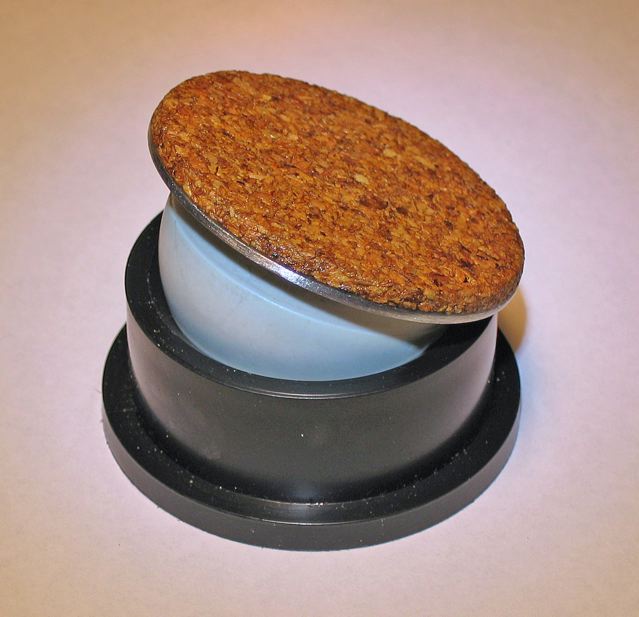
In a single afternoon I made two prototype tilting stages: one with a cork surface ( for pinning small specimens )( Photo 1) and the other with an hard epoxy plastic surface, but a greater tilt angle. ( Photo 2 )
Photo 1: Prototype I - 2 inches in diameter with about 20 degrees maximum tilt from the horizontal and a covered with cork surface.... great for pinning specimens to the table!
Photo 2: Prototype II - 2 inches in diameter with approximately 30 degrees maximum tilt and an smooth epoxy plastic surface. I use modelling clay to hold specimens on this style of table.
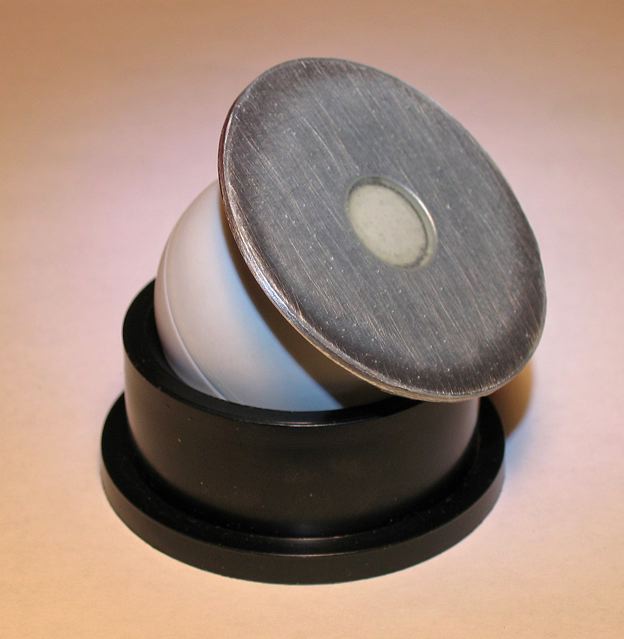
Photo 3: Step 1 - Layout the cork cover using the fender washer as a template.
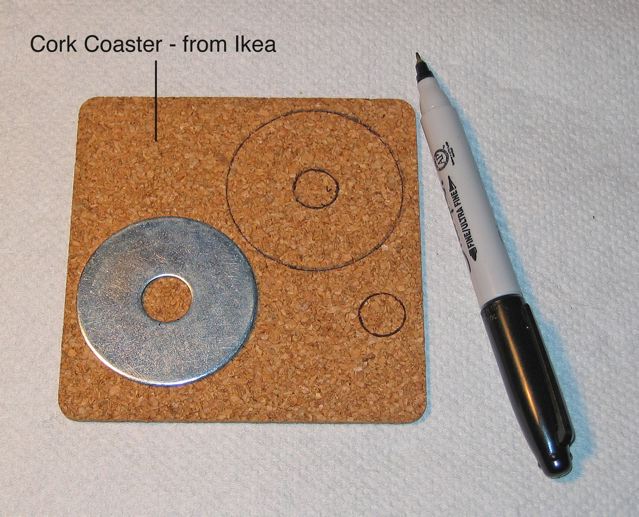
Photo 4: Step 2 - Cut out the cork pieces with sharp scissors and epoxy glue the central piece in place. Set this aside for now.
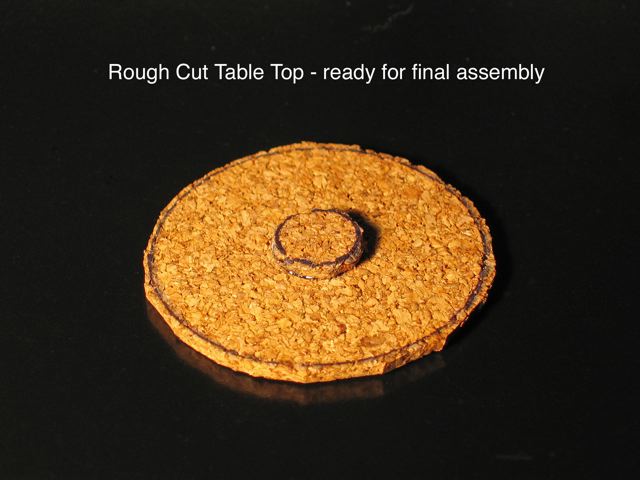
Photo 5: Step 3 - Sand the ABS plastic base flat on 80 grit sandpaper
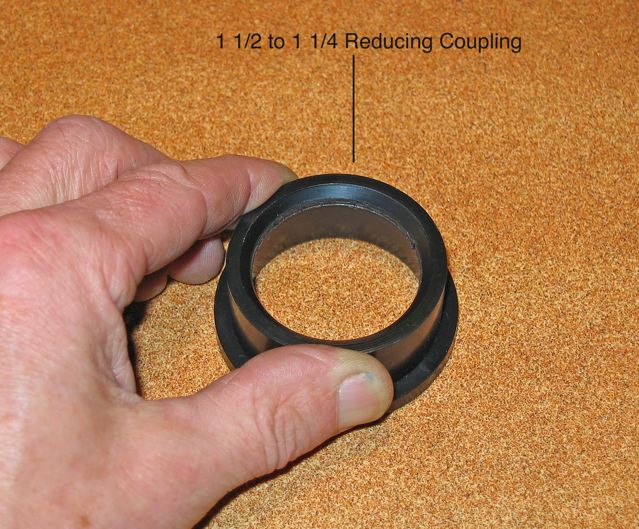
Photo 6: Step 4 - Sand off the zinc plating on one face of the fender washer ( for better epoxy glue adhesion )
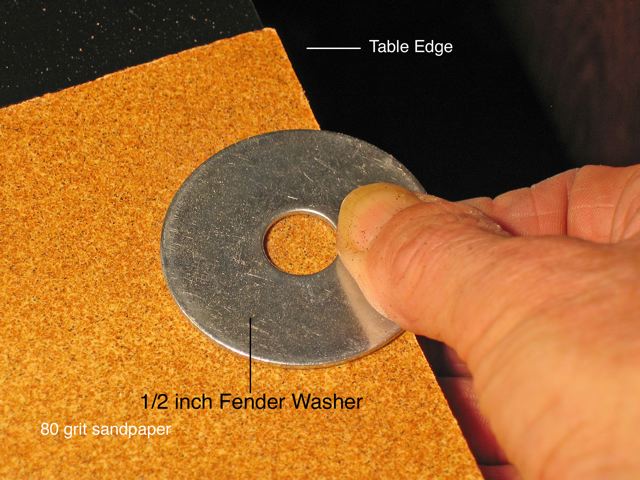
Photo 7: Steps 5 & 6 - Use masking tape to provide a cutting guide for the ping-pong ball. Use a needle and make a closely spaced series of perforations along the cutting line and then, and only then use a sharp knife to cut off the top of the ball. Glue the cut ball to the sanded side of the fender washer with epoxy glue. Let the epoxy glue set.
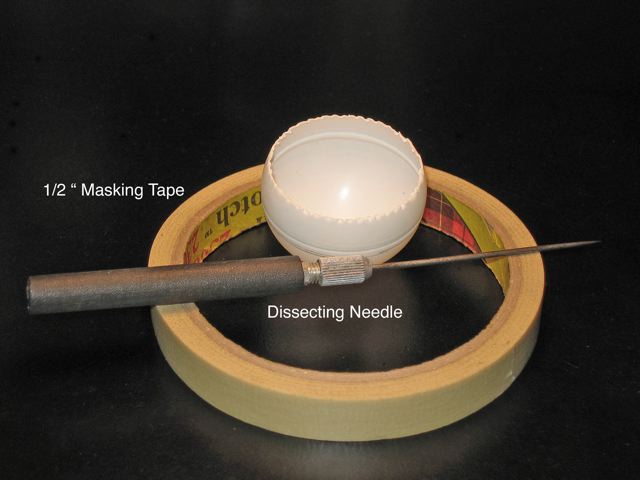
Photo 8: Step 7 - After the glue has set solidly sand the other face of the fender washer on 80 grit sandpaper to remove the zinc plating.
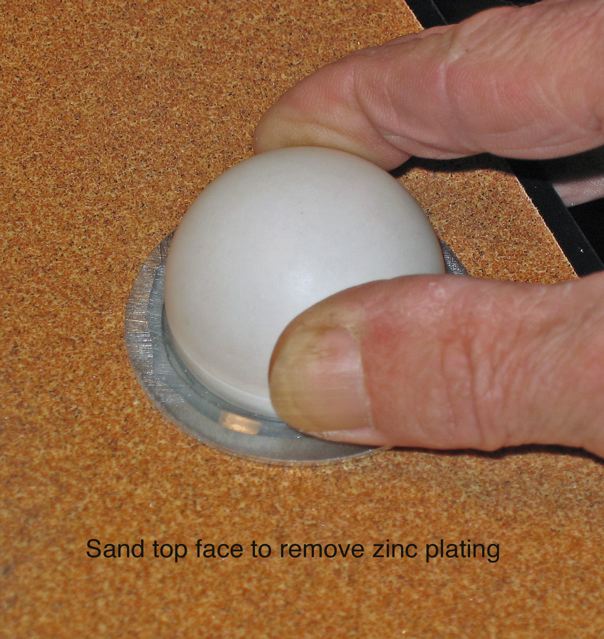
Photo 9: Step 8 - Set the ball washer side up in the plastic base ( reducing coupling - see Photo 5 ); fill the ball about 1/3 to 1/2 full with the small nuts and epoxy glue on the cork top ( see Photo 4 ). The nuts act as a sliding internal counterweight, automatically shifting to maintain the lowest centre of gravity, as the table is tilted. I used lead shot in my original design, which gives superior stability, but finding lead shot will be difficult for the average person.
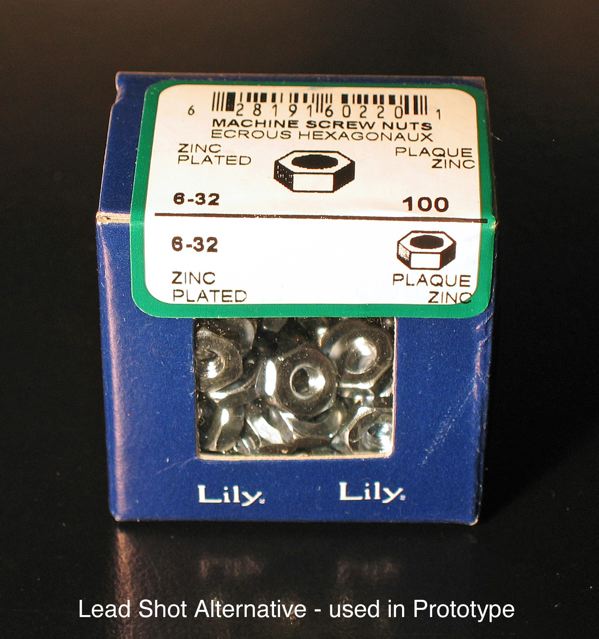
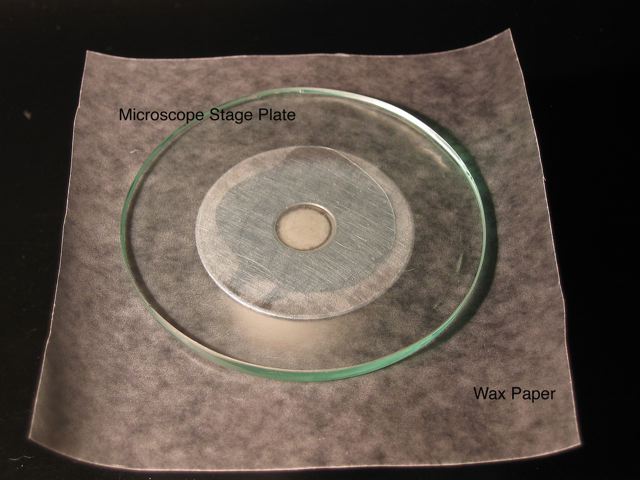
Photo 10: Alternate Top ( see Photo 2 )- Surfacing the top with a smooth layer of epoxy glue. The wax paper prevents the glue from sticking to the smooth flat surface weight you use to flatten and spread the glue evenly over the top of the tilting stage. I used a glass stage plate which was ideal for this job.
This is a one-day job from start to finish and most people should be able
to make a very useful microscope accessory. If your first attempt is a small
disaster ... discard it and make another one. They don't cost much to make....
less than a pint of beer.... and it's only an embarrassment if someone else sees
it.
I welcome all enquiries about this project. I'm an e-mail away and would be glad to guide you through the procedures if you feel the need for assistance.
Comments to the author Ian MacGregor are welcomed.
Published in the April 2010 edition of Micscape Magazine.
Please report any Web problems or offer general comments to the Micscape Editor .
Micscape is the on-line monthly magazine of the Microscopy UK website at Microscopy-UK .
© Onview.net Ltd, Microscopy-UK, and all contributors 1995 onwards. All rights reserved. Main site is at www.microscopy-uk.org.uk .Published in the March 2010 edition of Micscape Magazine.