|
Restoring
an American Optical Cycloptic stereo
microscope. by Ian MacGregor, Burnaby, BC, Canada |
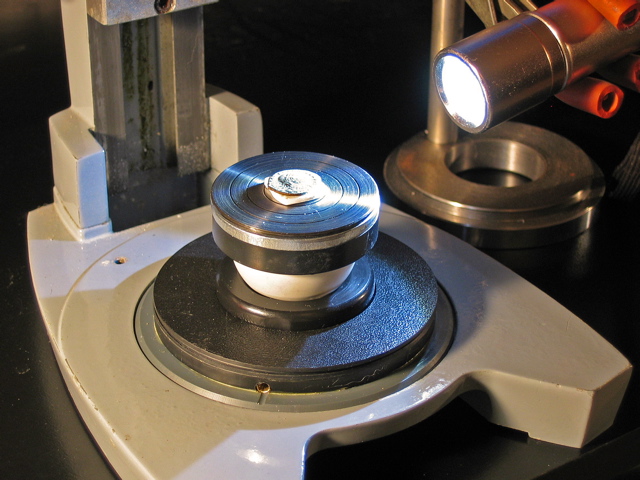
In my last article on the restoration of a stereo microscope there was a hidden feature specifically designed for my coin collecting friend. If you turn the white stage plate over you will find the base assembly for a tilt table. Photo 1 shows the complete tilt table in use with a 2000 year old Roman coin under examination. A 1 Watt LED flashlight provides high contrast oblique illumination. Photo 2 is a close -up of the table and coin. A piece of removable adhesive putty, which is available at any office supply outlet, holds the coin in place.
Photo 1: The tilt table in the vertical position.
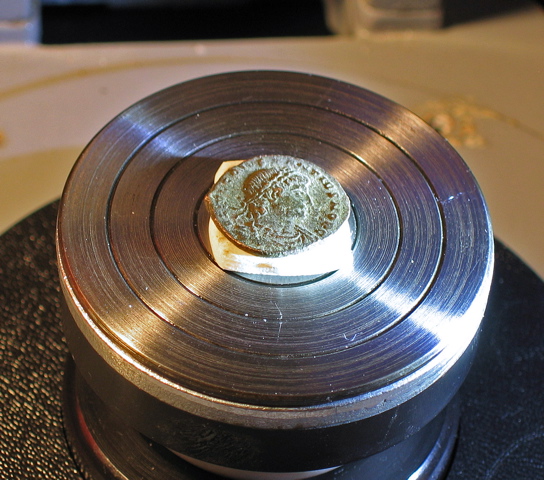
Photo 2: Table close-up photo.
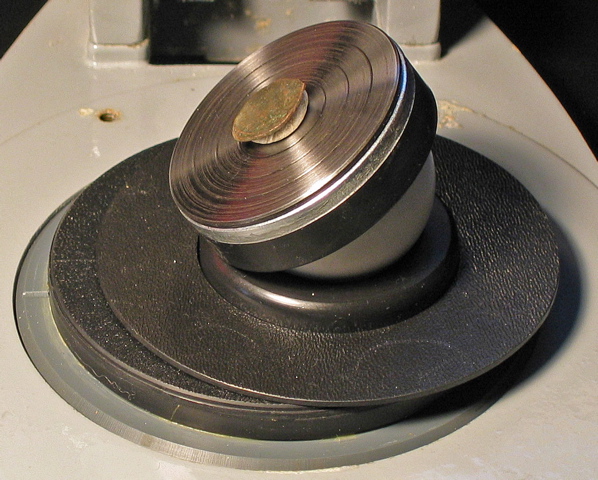
Photo 3: Shows maximum tilt ( 24 degrees ) and at the maximum offset. The coin is still centred in the microscopic view.
The table can tilt in any direction and the base can slide off-centre ( Photo 3 ) so that your specimen still remains within your microscope's field of view. A ping pong ( table tennis ) ball, half filled with lead shot is the secret to the table's stability at any angle. The tiny lead balls roll inside the ball to maintain the low centre of gravity as the table is tilted.
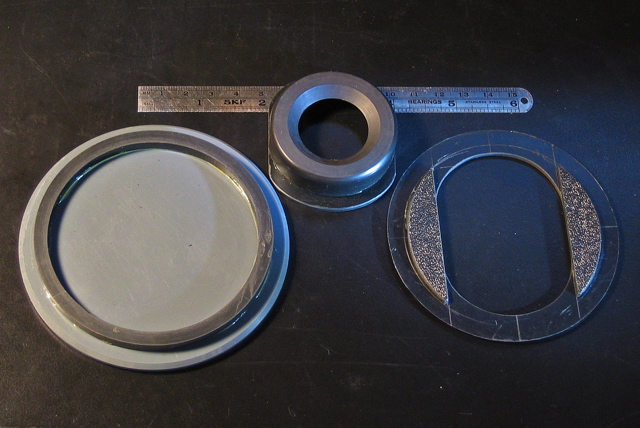
Photo 4: The parts of the sliding base. A slot was milled in the sliding base piece after this photo was taken and is not shown here.
The base assembly is an integral part of the underside of the microscope's stage plate ( itself a laminated piece of white and grey ABS plastic ). The rest of the parts ( Photo 4 ) are also made of easily obtained ABS plastic: ( 3 " pipe section, 1 1/4 " pipe union, 1 1/4 " pipe cap and 2 mm sheet ).
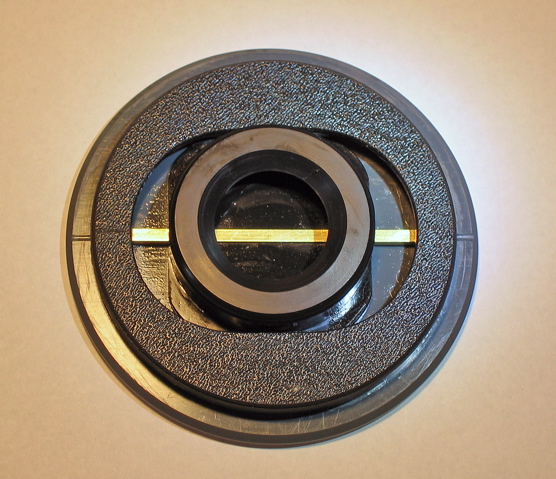
Photo 5: The completed sliding base assembly.
The guide rail was an added modification after the gluing and trimming operations and is a piece of 1/8th inch square brass tubing purchased from a local hobby shop ( Photo 5 ). The ends of the brass tube were expanded to permanently fix it in position. You can see this if you carefully re-examine the first photo in this sequence.

Photo 6: Ready to glue on the cap which is also the table top. The cap's concentric rings are a visual aid for centring the specimen.
Photo 6 shows the the tilt table before the the machined steel cap is epoxy glued onto a modified standard 3/4 inch washer. The ABS collar beneath the washer was cut from a 1 1/4 " ABS pipe union and serves both as a finger grip and tilt limiter. The remaining portion of the union is used as a desk top storage holder ( Photo 7 ) for the heavy lead shot filled table. A slip-on dust shield made from thin ABS sheet prevents debris from fouling the sliding surfaces.
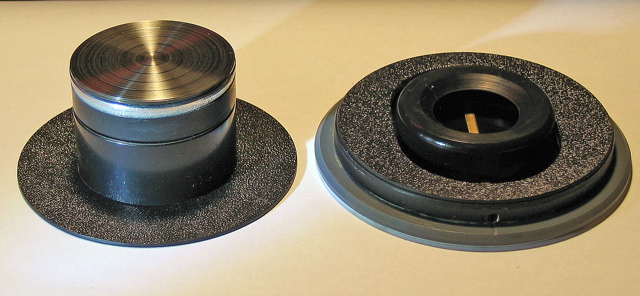
Photo 7: The dust shield, table holder and table all fit in a neat stack next to the microscope when the tilt table is not in use.
The table base is stored upside-down ( white side up ) on the microscope base so dust will not accumulate on the exposed sliding surfaces. It is, after all, a stage plate ........ with a very special hidden feature.
All comments to the author Ian MacGregor are welcomed.
Microscopy UK Front
Page
Micscape
Magazine
Article
Library
© Microscopy UK or their contributors.
Please report any Web problems or offer general comments to the Micscape Editor .
Micscape is the on-line monthly magazine of the Microscopy UK website at Microscopy-UK .
© Onview.net Ltd, Microscopy-UK, and all contributors 1995 onwards. All rights reserved. Main site is at www.microscopy-uk.org.uk with full mirror at www.microscopy-uk.net .