Several recent name-brand consumer cameras (Nikon, Olympus, Fuji, and Minolta) have a >3 megapixel CCD and are capable of high-resolution photography. They also have a host of other features which makes them ideal for photomicroscopy. Many of these cameras can be easily adapted to take good quality pictures through a microscope. The following is a discussion of ideal features of the Coolpix 990 camera and the author's adapter design for photomicroscopy.
The CP990, with its small lens diameter,
(< 30 mm filter size,) makes an excellent choice as the filter size
matches the outer diameter of most eyepiece lenses. Additional features
that help photomicroscopy include close focusing zoom lenses, remote shutter,
manual/measured white balance adjustment, high resolution LCD focusing
screen, USB support, built-in image processing, video outputs for larger
(optional) LCD/CRT monitor for real time critical focusing of low magnification
images and EXIF (exposure information) data storage.
Digicam Microscope Adapter
All current Coolpix models have fixed lenses and are not capable of accepting a projected image from microscope objective lenses. However, a secondary lens system, such as relay lens/eyepiece optics, is necessary to properly focus and project image on to the camera CCD.
Theoretically, any eyepiece works inside the adapter. However, a wide field, high point ocular lens WHK 10X20, (standard on most recent microscopes,) works best inside the adapter and yield distortion free high quality images. The CP990 lens size, (filter size 28 mm,) matches the outer diameter of most microscope eyepieces and makes this an ideal camera for photomicroscopy. To avoid image vignetting, distance between the camera lens and relay lens/eyepiece should be kept to minimum, (ideally under 3 mm.) The adapter is designed to hold the relay lens/eyepiece at 2 mm in front of the camera lens.
Most digicam cameras, including the
CP990, have delicate filter threads and are not designed for supporting
camera body weight and therefore can be a source of camera vibrations.
The adapter horizontal plate with tripod screw attachment bears the camera
body weight, provides stability, and eliminates vibrations. The adapter
can be connected to the ocular tube on the binocular head; however, for
optimal comfort and stability, a trinocular tube (phototube) is preferred.
Parfocality between LCD screen and microscope oculars is achieved by adjusting
the adapter height on the phototube.
Camera Setting and Image Capture
The following camera settings are
ideal to use with the CP990 camera mounted on Olympus BX-50 microscope.
1. Microscope Illumination Adjust for adequate brightness at all magnifications, (objective lens 2x 100x oil.)
2. White Balance - Manual preset, an actual reading is taken through the clear part of the microscope slide. (Avoid tissue and smear areas when measuring white balance.) Once this is done, the cameras color balance or color temperature is set according to the existing microscope illumination setting.
3. Lens Settings - Set camera lens in macro or infinity mode at slightly telephoto zoom range.
4. Flash - disable internal flash.
5. Metering Set camera on M-REC, P matrix mode.
6. Image Adjustment Auto or Normal mode. Contrast setting according to the type of slides being photographed. Hematoxylin-eosin stained slides need slightly higher contrast, and Wright-Giemsa stain may need low contrast setting.
7. Image Sharpening Set on auto or normal.
8. Image quality and size - 3:2 image size (aspect ratio) and quality at normal or fine setting.
9. Exposure Compensation 0.3+ 0.7+ steps, depending on the type of slide (Wright stain vs. Hematoxylin-eosin stain.)
10. Optical Axis Alignment Field diaphragm is closed until it is reduced to a small circle and is centered on the LCD screen and oculars by adjusting substage condenser or by repositioning camera body on the adapter. After the field diaphragm is centered, it is completely opened.
11. Framing and Focusing Oculars are used for finding the appropriate area on the slide and same if framed on the on LCD screen. (Slight zoom adjustment may be needed for proper framing of the image.) For low power images critical focusing can also be achieved by digital zooming feature and resetting zoom back to 1x before the final exposure. Large (optional) LCD/CRT monitor may facilitate in focusing the low power images.
12. Remote Release Cable (MC-EU1) A very useful accessory in
photomicroscopy, it not only eliminates camera vibrations, but also helps in framing the image through remote zoom control.
13. Post Exposure Processing Minimal image processing, such as image sharpening (unsharp mask), brightness, and contrast adjustments may be needed for some images. Many imaging programs such as PhotoShop or Paint Shop Pro, etc. are capable of accomplishing this.
Adapter design and microscope setup
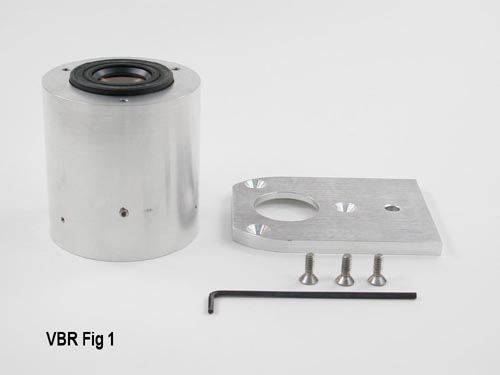 The adapter is home designed, and made from aluminum stock at the research machine shop located in the University Alabama Medical Center campus. The machine shop is a non-commercial operation, and supports only the research activity at the University Medical center. |
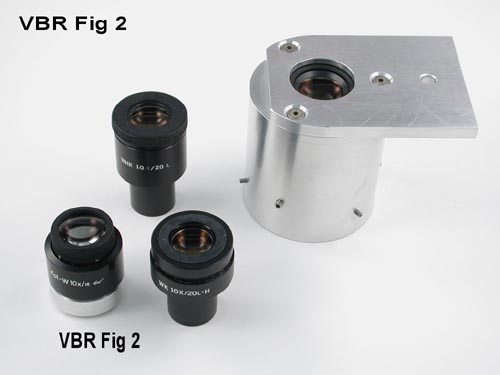
Fig 2. Microscope adapter and various eyepieces tested with this setup. Best results are obtained with high point wide field eyepieces. |
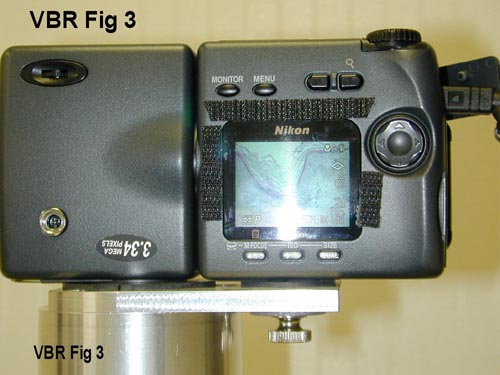
Fig 3. Nikon CP990 secured by tripod screw on the adapter plate. |
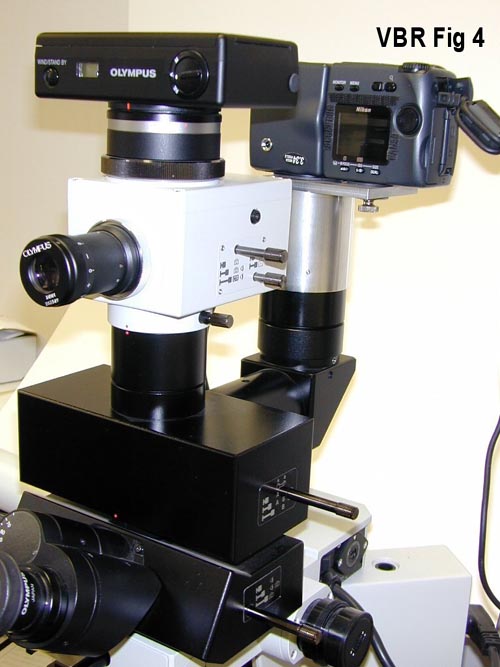
Fig 4. Nikon CP990 mounted on Olympus BX-50 series microscope. Film based system (foreground) used for more critical photography! |
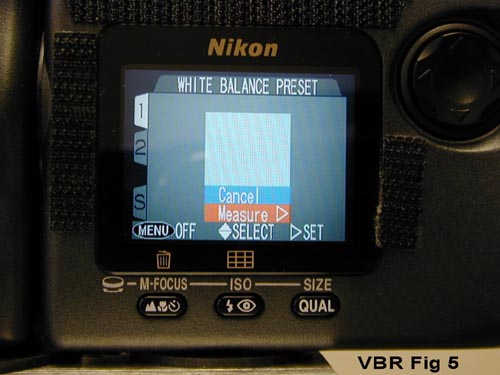
Fig 5. CP990 white balance adjustment Reading is taken on the clear area of the slide. |
Results from this setup are shown on page two.
All comments to the author Vishnu Reddy are welcomed.
Vishnu V. B Reddy, MD.
University of Alabama Medical Center
Birmingham, AL
USA
References:
1. Tse CC. Anatomic pathology image
capture using consumer-type digital camera. Am J Surgical Pathology.
23(12):1555-8, 1999.
2. Wunsam S, Bowman JC. Economical
digital photomicroscopy. J. Paleolimnology. 25:399-403, 2001.
3. Corr P et al. A simple telemedicine
system using a digital camera. J. Telemedicine & Telecare. 6(4):233-6,
2000.
4. Walker D. Quick trials of a two
megapixel digital camera for photomicrography. Micscape Magazine, March
2000 (http://www.microscopy-uk.net/mag/artmar00/cp700trials.html)
5. James P. Forays into consumercam
Photomicroscopy. Micscape Magazine, November 1999 (http://www.microscopy-uk.net/mag/artnov99/pjforays.html)
Web resources:
1. Photomicroscopy discussion thread
at Digital Photography Review (Phil
Askey) site. (Select 'Forums'/'Nikon Talk' in menu and type 'photomicroscopy'
in keyword search).
2. University Alberta site on imaging
http://www.math.ualberta.ca/imaging/
3. Short
Courses (Dennis Curtin)