Turning a 2D image into 3D by mol smith August 2013                 {PAGE 2}

The coloured image layer should be duplicated twice. The upper one should be desaturated {see my layers palette in the screen shot below}. We need to remove the background from the grey (desaturated image for now so we can just work on the target specimen. 1) Select the magic wand. 2) Select an appropriate tolerance level. Mine here is 12, but trial and error will dictate this value. 2a) Select background. 3) Hold down the shift key and select other elements of the background. {
oops -  uh-oh... no (5)} ok... 6) cut it away.   In fact I worked on one of the color images and after selecting the background, I inverted the selection then copied and pasted it to a new layer above to create my greyscale image. Both methods will work ok. Note: pay no attention to layer ll in my screenshot. I got ahead of myself and then went back to create this information graphic. Also pay no attention -  in respect of this tutorial - to the words in the image. I merely added these here to protect the image owner's interests.


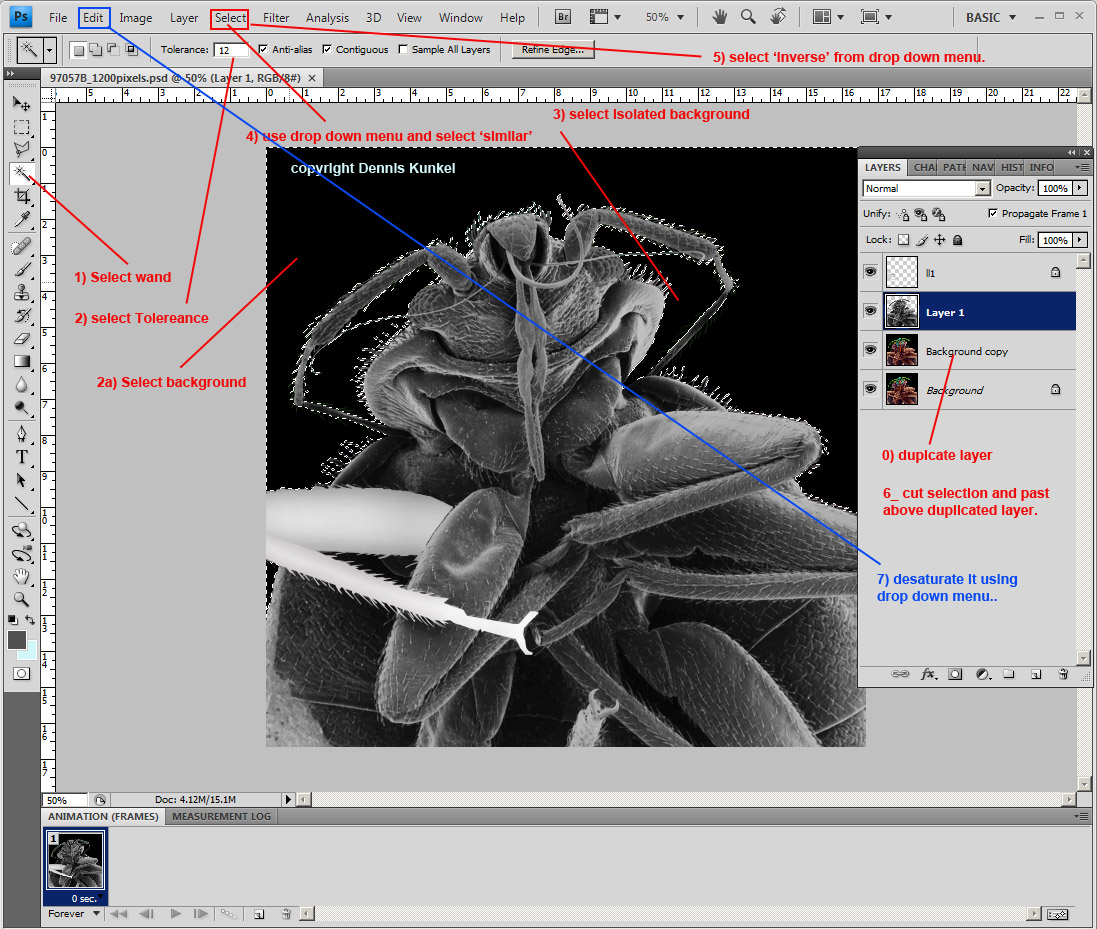
Now the long part of selecting various parts of the desaturated grey image and copying and pasting them one at a time into higher layers. You can sort out their order a bit later to ensure the right bits overlap other bits. Each sectioned grey image layer needs to be turned into a representation of depth by lightening the nearest most details and darkening the back. Use the lasso tool to gently walk around the edge of a section and copy and paste it. Lock the selection in the layers window such that only the parts of the layer with real content in can be worked on without affecting the transparent parts. Use the dodge, burn and paintbrush tools to paint the section. I have done one of the legs to demonstrate. Notice how I keep the centre of the cylindrical leg brighter. {see below}.


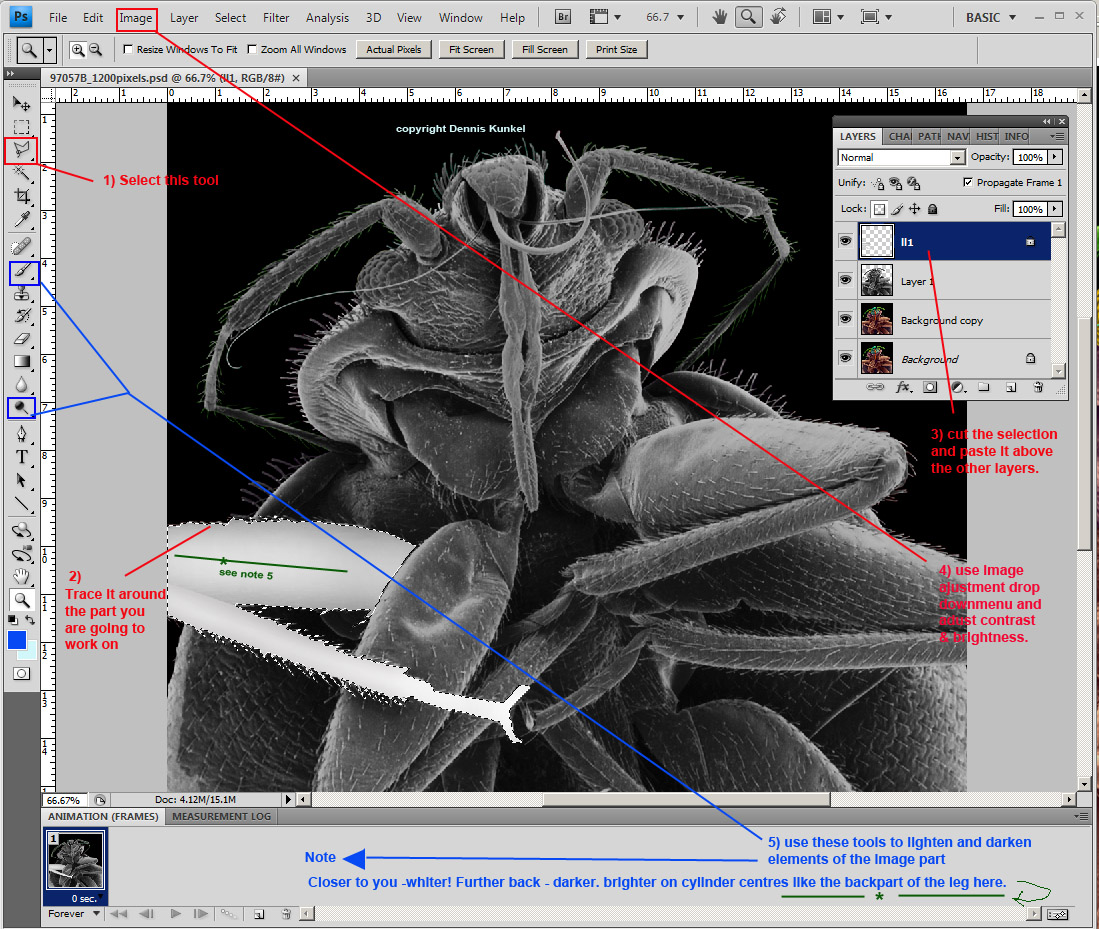
You can understand now what I meant about needing patience to do this. Each hair and those fine antenna all need very special attention to select them properly. If you don't select them accurately, the final 3D will show it. I need to put in several hours work now to get all the selections copied, pasted and painted.
 
  <   PREVIOUS                NEXT >                      

Microscopy UK Front Page
Micscape Magazine
Article Library


© Microscopy UK or their contributors.

Published in the August 2013 edition of Micscape.
Please report any Web problems or offer general comments to the Micscape Editor.
Micscape is the on-line monthly magazine of the Microscopy UK web
site at Microscopy-UK  


© Onview.net Ltd, Microscopy-UK, and all contributors 1995 onwards. All rights reserved. Main site is at www.microscopy-uk.org.uk