 |
|
Page 1
With Microscopy being essentially a visual pursuit, it should come as no surprise that many different devices are used to capture images from the microscope. Ordinary photographic cameras, specialist photographic cameras, closed circuit TV cameras, family video cameras, digital electronic cameras all compete with each other to win a place in the microscopist's or educator's tool kit.
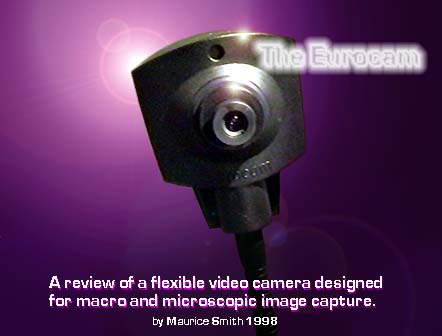
For several years now I have used a camcorder (the family one) to hover over the eyepiece of my old Vickers Microscope and capture video sequence or still images for later use in Micscape Magazine or Microscopy-UK. When I recently got an opportunity to borrow a camera, made for the job, from Meta Scientific Ltd, I jumped at the chance to put it through its paces and see what it could do. The camera in question is the Eurocam - a neat multifunctional video camera which is sold in several versions and further supported by a range of extras and accessories to extend its functionality.
Full specifications and further description of the unit itself can be found through following links from this page but I am more interested here with a 'hands-on' approach, and detailing how I found its performance, especially when compared to my normal practice of using my camcorder for image capture. The model lent to me was the VC5500 which sports a 1/3 inch CCD with 450 lines digital / 440,000 pixels and retails for around 550.00 UK pounds excluding V.A.T. as distributed by Meta Scientific in the UK.
The first impressive feature was the sturdy but lightweight
carry case the camera is supplied in.  The camera, 3 sets of
leads, and a microscope adapter are neatly housed in
tailored-made cut-outs within protective foam inside the case.
Some careful thought had gone into the overall design of the case
to ensure items could be taken out and put back in quickly
without fuss. Once inside the case, the camera was excellently
protected against shock, vibration, knocks, and the English
weather - making it a perfect package for transportation from
place to place.
The camera, 3 sets of
leads, and a microscope adapter are neatly housed in
tailored-made cut-outs within protective foam inside the case.
Some careful thought had gone into the overall design of the case
to ensure items could be taken out and put back in quickly
without fuss. Once inside the case, the camera was excellently
protected against shock, vibration, knocks, and the English
weather - making it a perfect package for transportation from
place to place.
The camera seems to have been designed with the same kind of care and thought. The camera itself is housed in a swivel head atop a long flexible neck extending from a well-balanced heavier base, which obviously housed the power supply and socket connects for the mains lead and video cables. Two video outputs were available - one being VHS coaxial and the other - a SVHS / PAL (Super VHS). I decided I would test the better quality output likely from the SVHS output.
I quickly plugged in the cables and connected the camera to my computer's video capture card. I was delighted to see an image up on the computer monitor and the auxiliary TV monitor I use as soon as I switched the camera on.
My first and only disappointment came next - and I must stress this was not a blame on the camera but more on my microscope and its old design: the microscope adapter was designed for a modern tube length and alas my old Vickers is designed with a much longer eyepiece tube than modern microscopes. This meant I would be unable to use the adapter effectively. No worry though. After a few quick experiments, I discovered the gooseneck design of the camera allowed me to easily position the camera lens over the microscope's eyepiece so that both lenses were parallel. I began to realize the importance of the gooseneck design which was further proven to be a boon later in the testing and review I carried out, as you will shortly see.
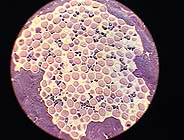
I put a specimen slide under the microscope and took a quick 'snap' without making any real adjustments to the light source.
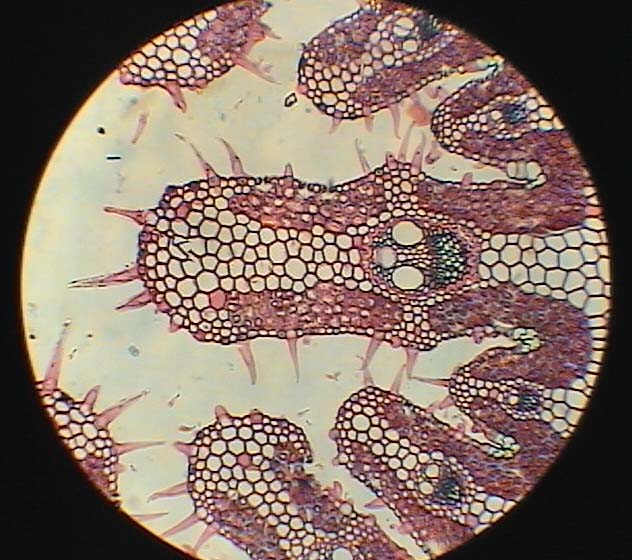
And here it is, Marram Grass x125 but greatly reduced in resolution and quality due to the image conversion to JPEG format required for the web. I believe it's important to point out here that you will not be able to define the quality of the images taken with the camera through looking at pictures presented here. They are all subject to quite a lot of degradation due to the poor optics of my microscope and the reduction to lossey JPEG for web presentation.
Two things I noticed immediately when taking this picture was that the quality of the resolved image was far superior to the those I normally obtain with my VHS camcorder, and the second - the camera's automatic shutter was stunningly fast and accurate when balancing out the levels of light. You could completely forget about having to adjust the microscope's light source for different specimens and let the camera manage it all for you. This was great! All I had to do was put a specimen slide under the microscope, refocus, and press the computer keyboard button to sample the image.
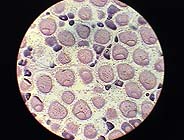
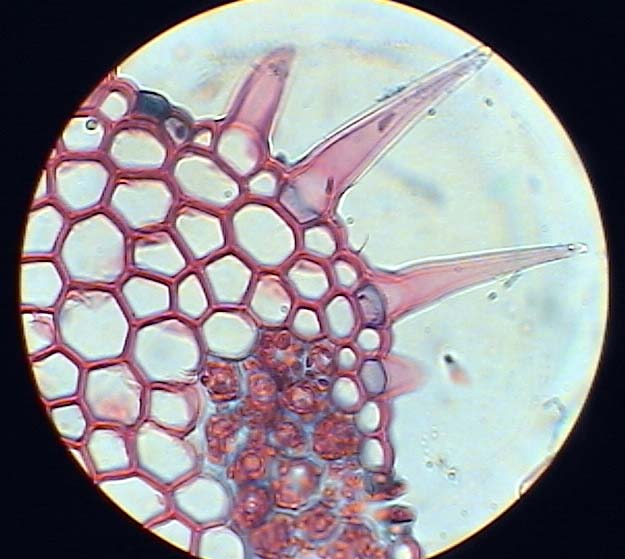
Here's another shot of the Marram Grass,
this time at 200x magnification.
If you've ever used your home camcorder for recording images at the microscope, you will probably have seen ccd-fatigue. This happens on my home video camera after only being left on for 10 or 15 minutes continuously. What happens is that surely but slowly the image quality drops as faint lines (the cdd array pattern) start to reveal themselves in the image. Now here is the remarkable thing about the Eurocam: although I left it turned on for most of the day, there was no noticeable deterioration in the quality of the image - and certainly no sign of ccd-fatigue!
Please select:- Continue Review | Specifications | Inquiries | Meta Scientific | Email | Mic-UK | Micscape Index Pages: 1 | 2 | 3 | 4 |
Top of page Review by Maurice Smith
Page and images copyright Micscape Magazine 1998 All rights reserved.
WIDTH=1