Most illumination forms tend to be used legitimately, and by that I mean used alone and not in combination with other techniques and illumination types. I have written about oblique and diffuse lighting before and stressed in both articles the advantages of experimenting with illumination.
In this article I illustrate the use of two well known illumination techniques and show how to use them together to advantage. I must point out that the technique is purely for improving visual observation and I do not make any claims that any advances in interpretational observations can be made. If the visual presentation of the specimen can be improved in any way, then I think this is legitimate practise regardless of convention.
Methodology
The technique is very simple and consists of standard polarised lighting, but also having partially obstructed light masked in the condenser zone using the traditional off-axis stop. Thus the specimen is illuminated with polarised light from an oblique source, which is then imaged and analysed in the usual way.
The degree of obliqueness, and extent of crossing of the polarisers is left to the observer, and these two combinations promise a wide variation of image enhancement.
 |
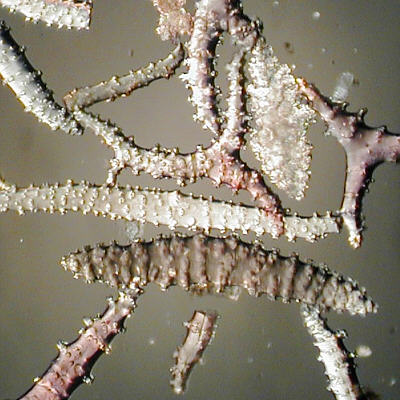 |
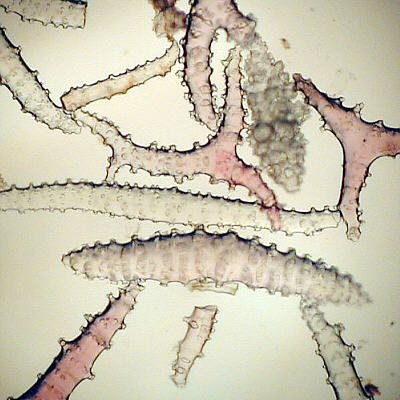
| Sponge Spicules. x150 Achromats. Brightfield. | As left, partially crossed polarising filters plus oblique. |
The photo right shows how colour
enhancement from the polarised lighting using semi-crossed polarising filters,
and bass relief using oblique lighting helps to produce more attractive
images. The degree to which either of these techniques can be adjusted
is infinite, so observers can adjust to their hearts content. I prefer
a darkish background, but not black as when the polarising filters are
crossed at 90 deg. The darkened background helps provide lower contrast
and so the surface features of these interesting spicules can be seen more
comfortably.
 |
|
|
 |
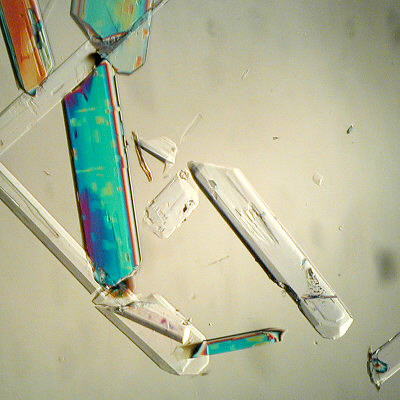 |
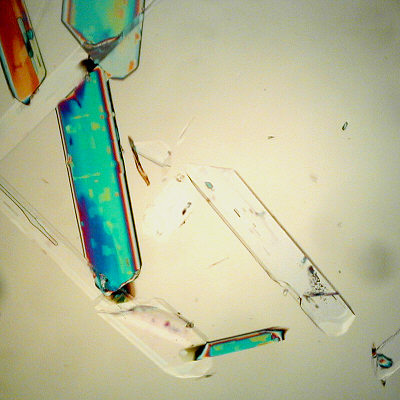
| Boric acid crystals x125 achromatic. Plain polar. | As left, with oblique lighting. |
Technique
There are a number of ways of accomplishing this technique, and those observers who already have polarising facilities present on their 'scopes can easily introduce oblique in the normal way by inserting an off-axis patch stop. Those who like to use polarised lighting techniques can refer to the Micscape Article Library (lighting techniques section).
For best results the patch stop for the oblique lighting needs to be as high up the substage as possible, in the filter tray preferably, otherwise the side lighting is only partially effective.
Summary
Two simple benefits can arise from the use of the two lighting techniques. The first is to visually enhance the original polarised image using oblique lighting. The second is using the variable light intensity effects of crossing polarising filters to aid both visual and photographic observations, using specimens not responsive to polarised light.
Pro's
1) Simple to setup using standard existing sundries and apparatus.
2) Can be very effective, enhancing subject viewing and showing specimen's form more clearly.
3) Useful for certain photographic situations too.
Con's
1) None ??
All photo's taken with Olympus C830-L digicam using Zeiss Photomicroscope I with in-built polarising facilities.