 |
The Dicotyledon Stem for the beginner botanist from a beginner botanist |
|
|
|
|
The Dicotyledon Stem for the beginner botanist from a beginner botanist |
|
|
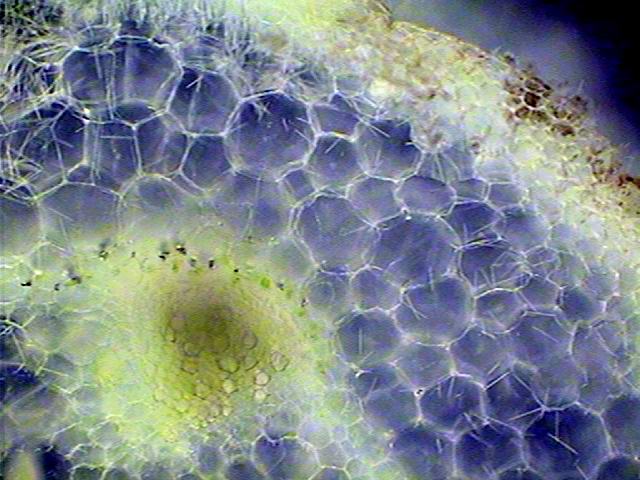
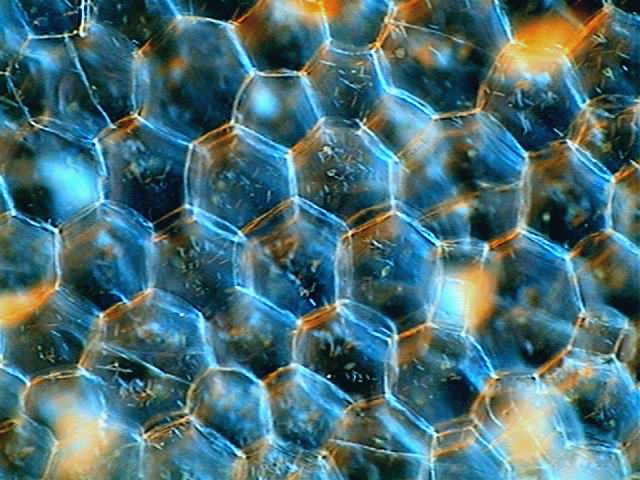
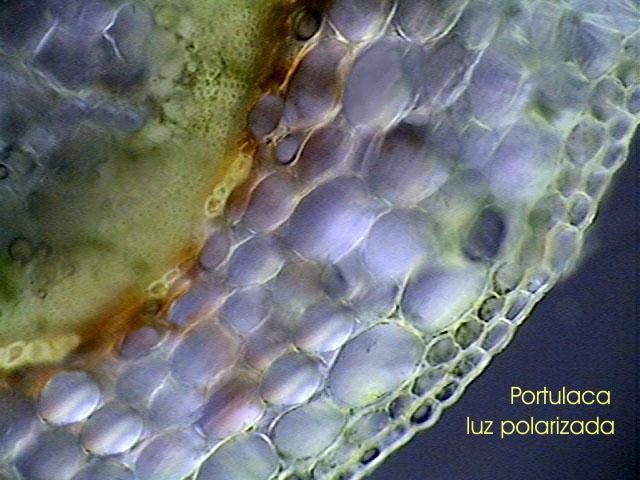
Title image: a usable portion of an otherwise badly cut Portulaca stem. Note the two cell thick epidermis and the continuous ring of xylem. Click the image to view a larger version
The pictures were taken at a
resolution of 640 X 480 px. and reduced to be inserted in this article. Some pictures are clickable. The width of the
field with each objective is as following: 4x = 3400, 10x = 1333, 40x = 340 and
100x = 133 microns. The equipment and the filters used were described in a previous article.
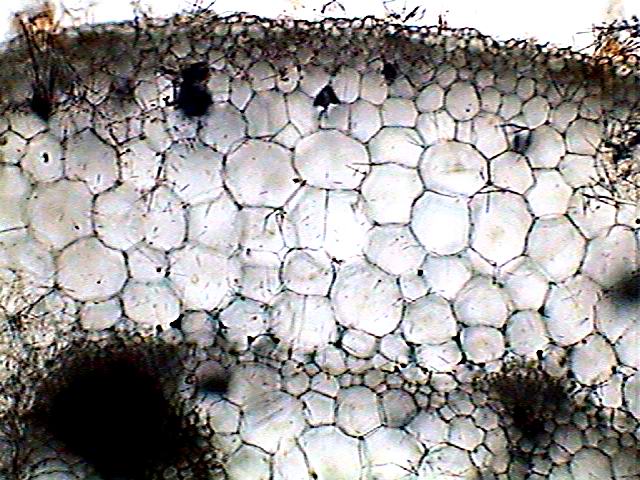
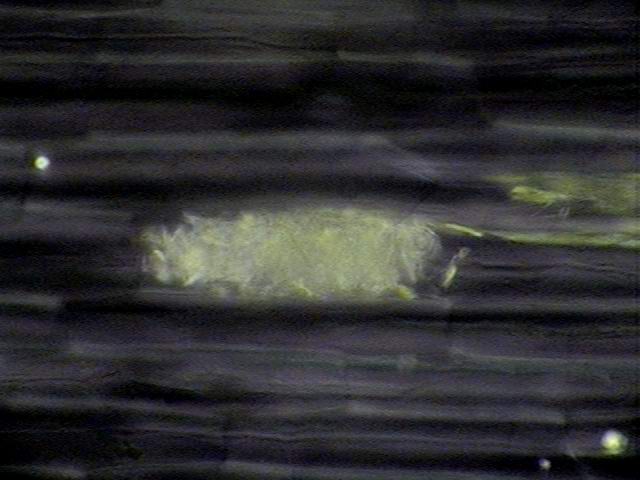
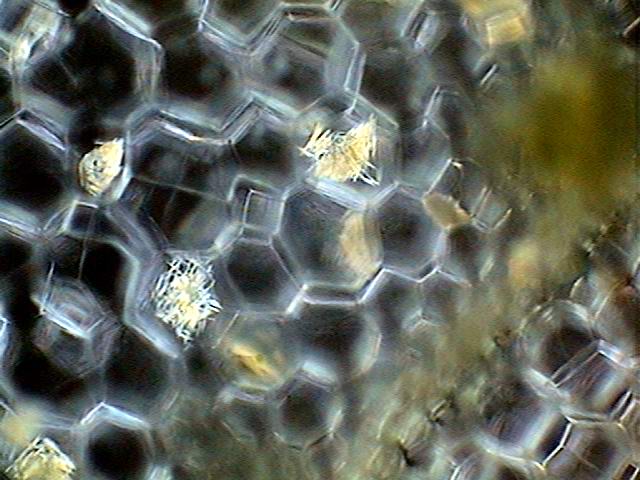
Objective x10:
due to thickness of the section, in brightfield
the vascular bundles are opaque.
|
Obviously there are many resources devoted to this subject. Many of them are beautifully
illustrated with excellent photographs of microscopic preparations made by
observing all the rules of the art: sections made in a professional microtome
after paraffin embedding, probably with less than 10 microns of thickness, stained
with differential stains for the various tissues, and so on. If I, a dedicated zoologist, dare to add a new page, it is only to show
how a simple tool (a "microtome of a double razor blade")
described by Michel Neuberg in the French MICROSCOPIES Magazine, can help an amateur equipped with a
microscope and some contrast filters to carry out some investigations and
to learn first hand about dicotyledon anatomy
and to support (at almost no cost) the
passing of some days without access to biological water samples.
The material used is the stem of a small ornamental dicotyledon,
soft and flexible. I made transverse sections, and took some additional peels
of the stems epithelium. The microtome was prepared by modifying a little the instructions of
Neuberg by covering two double edged razor blades with very thin
"Scotch tape" separators. The new blades must be degreased with
alcohol before being used. As Neuberg advises I used only the central part of
the instrument to obtain thin sections of the stem. The cut must be made
by sliding down the blades diagonally. Before cutting, dip the closed
instrument in water to wet it. Several perfectly cylindrical cuts, with a
neatly cut surface, were possible, but the cutting edge of the blades disappeared
quickly, making further attempts useless.
Any cut carried out with blunt blades will prove deformed and
unusable, because the cells would not present a plane face, but one inclined
by the action of the defective edge. I have succeeded to sharpen the blunt blades by passing their edge tilted
approx. 30º along the edge of a sharpening stone, three or four times on each
face, and then I refined the cutting edge using like a razor strop the palm of my hand. It's
up to you to
consider if the effort is cost-effective.
The sections
obtained were collected in water, and the thinnest one was
chosen and mounted, without any additional
treatment, in a 50% glycerin solution, between coverslip and slide. Dont
leave the sections to dry at any time or your wet mount will be full of air
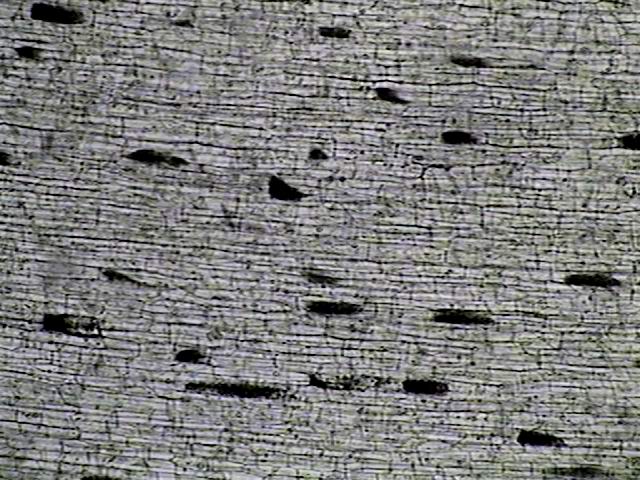
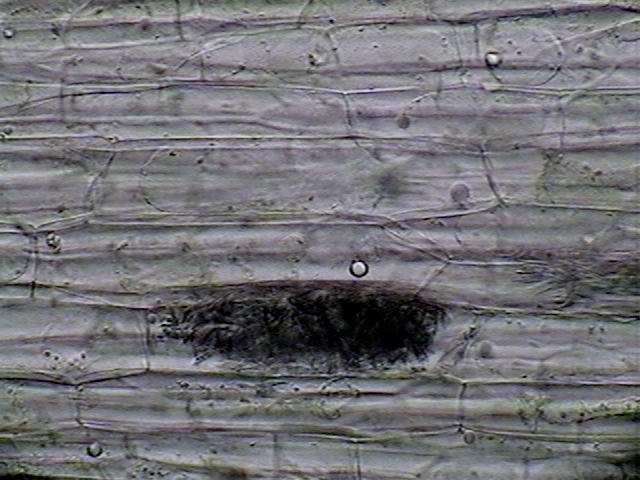
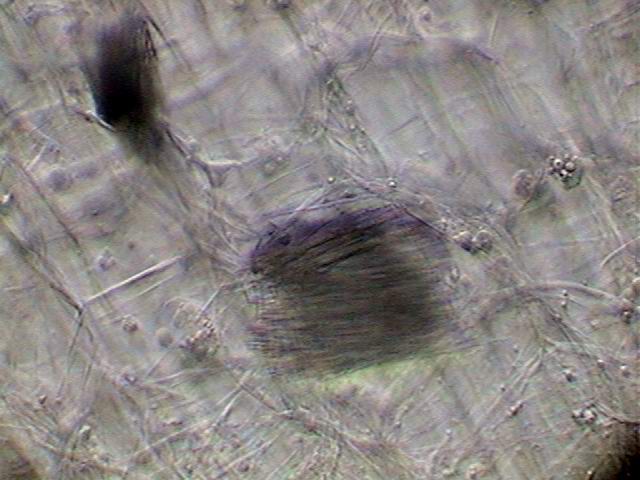
bubbles. Once the photographic studies were finished, I crushed the cut with two
intentions: one, to see the longitudinal aspect of the xylem (see image 20),
and another, to be able to measure the thickness of the stem. The flattened stem
epithelium showed that the cut had a thickness of around 250 microns!! Similar cuts and even thinner can be made freehand, but the
thicknesses will be more variable, even from one side of the cut to the other,
and in my experience it is more dangerous (for the thumb of the potential
botanist) than to use the small instrument. The differences in thickness do not
matter for the visual study of the materials; this is why the freehand cuts are
traditional in the teaching of botany. But for photography they
result in a catastrophe. On the Web J.A. Kiernan states that, by
trying hard,
sections one cell thick can be cut. Using the parenchyma cells of my sample as
a rule this implies sections of 150-200 microns. So my cut was not so bad. It was only 1.3 to 1.6 cells deep.
Theoretically the cuts must be the thickness of the adhesive tapes used as separators. It could be that my razor blades were too flexible, or that I have failed to use an adequate amount of pressure. Because the blades become blunt, I cannot prove any of these assumptions.
One can buy old double edge razor blades at With the harder stems of Portulaca one can obtain thinner cuts
(probably finer than 100 microns) but generally they are incomplete. The visible anatomical details in my preparations, and the filters and
objectives used, are detailed for each image as it is required.
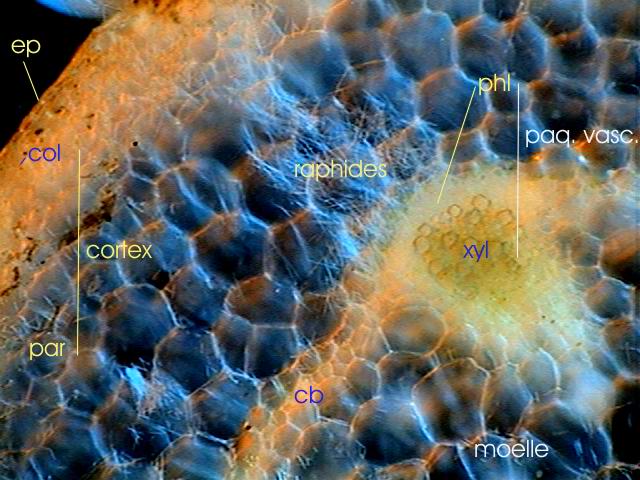
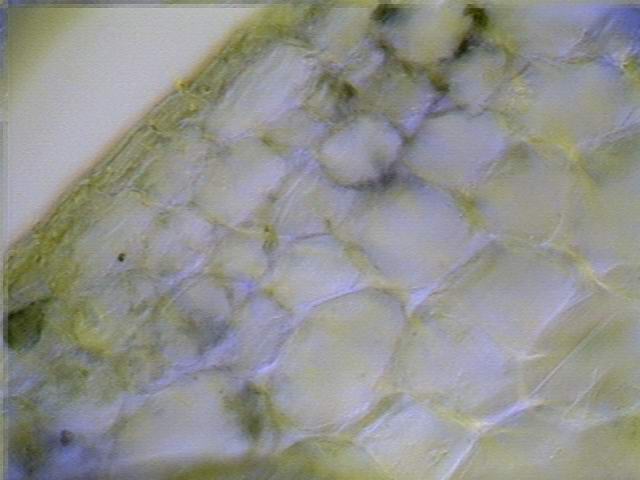
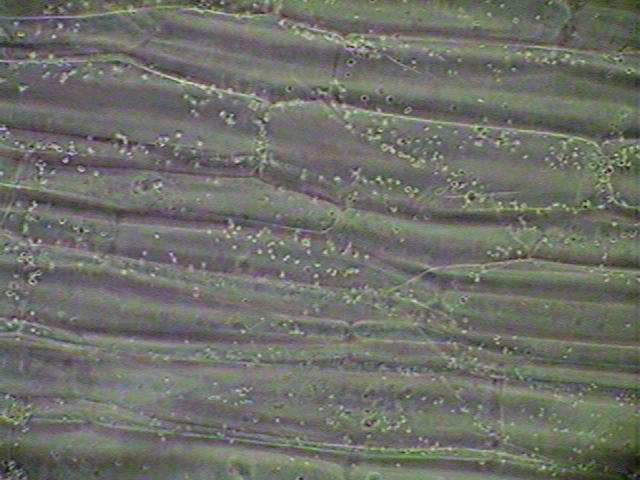
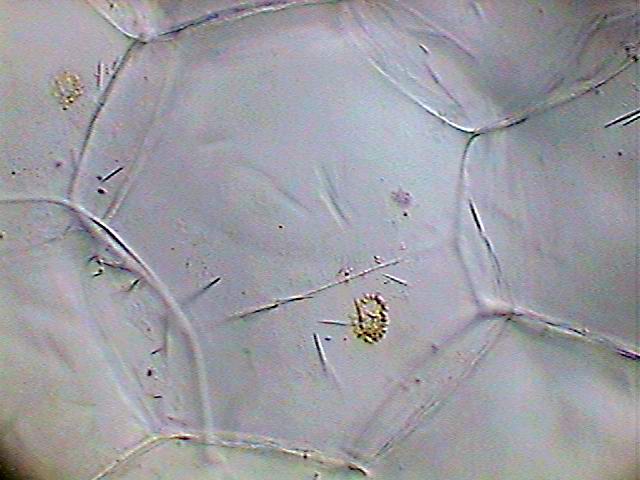
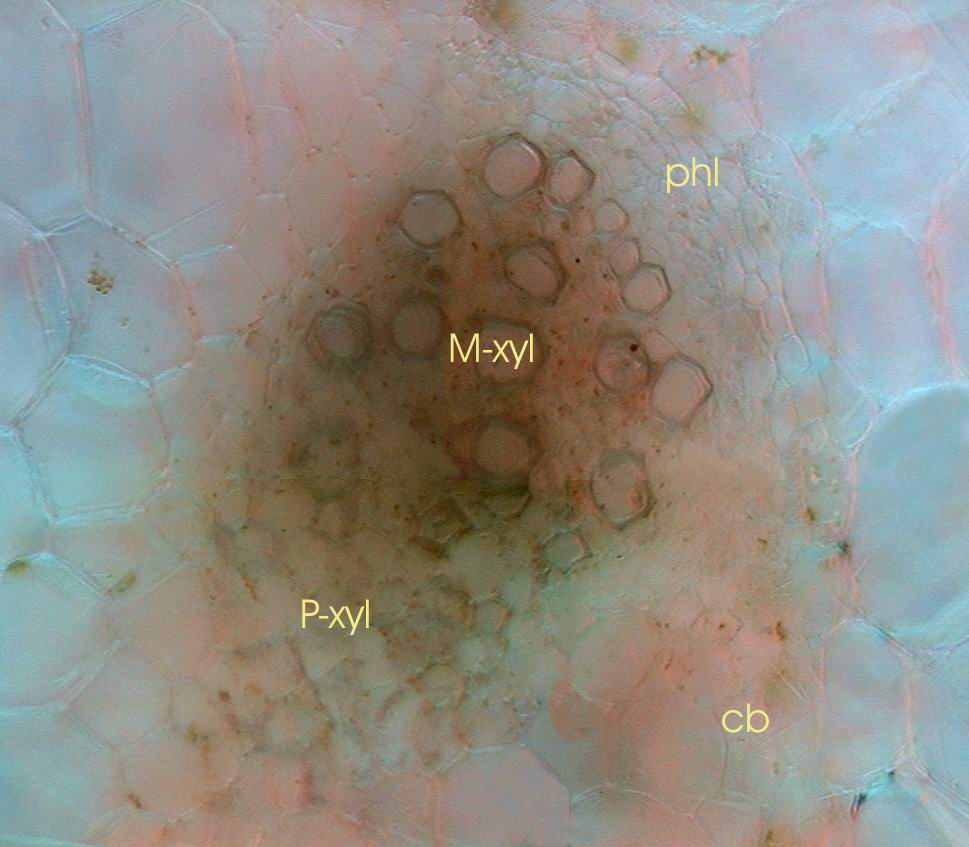
The studied section had a diameter of 4.356 mm. The stem has an
epithelium of only one layer of cells, 17 to 20 microns thick (but
200 microns long, see fig 7), and a cortical area (that between the skin and
the interior cylinder of cambium) of 0.535 mm. Cortical cells are ca. 100
microns in diameter. The pith has a uniform parenchyma, has a diameter of
3.700 mm, and its cells have a mean diameter of 180 microns. All measurements were made from
screen images using the
software supplied with the microscope.
After this
experience I think that especially if Kiernan's statement is true, the use of a
single edged razor blade, or (to protect fingers) a better skilled use of the
Neuberg double razor blade can open up to the amateur a fascinating research area. Now, of
course, I want to use, one of these days, and to leave testimony of the results,
what is generally known as a "nut-and-bolt microtome". It is very
simple and a not expensive approximation to the Ranvier botanical microtome. Who knows? Perhaps I can acquire a second
hand old but good Minot
rotary microtome, absolute alcohol, xylene, paraffin and embedding oven,
to finish my life as a botanist! |
||||||||||||||||||||||||||||||||||||||
Please report any Web problems or offer general comments to the Micscape Editor.
Micscape is the on-line monthly magazine of the Microscopy
UK web
site at Microscopy-UK