TOPICAL TIPS
IMAGE AMALGAMATION
WALTER DIONI CANCÚN, MÉXICO
Many times inadvertently, or by a technical error, a photomicrograph of an
interesting subject can be spoiled by the presence of "junk" or
"dust" in the background, or even superimposed on parts of the image,
that you notice when it is impossible to repeat the shot.
One
technique that can be used in such cases to produce photos with a cleaner background
is the amalgamation of two complementary images.
** Amalgamate, is a technical term indicating the fusion of two superimposed
images, producing a synthesis of both images. To do this, an image that has background defects produced by shading due
to dust or other impurities in the light system, is digitally merged
(amalgamated) with a second picture
taken from the same field of view having first withdrawn the object
photographed.
For the procedure to be
effective the last image must be subsequently inverted. Thus, in the third image (the correction screen) the dark spots of the background
will be now represented by light spots of corresponding density. By merging digitally the original image and the correction screen image with clear
spots, neutralises the corresponding
dark spots of the first. Usually the result is
spectacular, producing a much cleaner background than the original photo. Of course junk included into the preparation (not at the background) are
not removed by this method.
The existence of this technique
makes it sensible to routinely take an image of the background, by displacing the slide with
the subject, before photographing
interesting subjects. If you do not need it, it is easy to discard. But often to the more
careful photographer will escape details that are discovered later. The
technique also helps, and it is not a less important feature, to remove or
conceal the existence of unwanted light gradients, many times present in images
captured with the low power objectives.
This
function of an important utility, doesn't seem to be widely used by most microscopists.
Let me therefore briefly present here its application in Motic (as well as Photoshop
or Photopaint).
Incidentally
the example that I present shouldn't be "normal". Such dust abundance
would be only explained by a lot of laxity in the care of the microscope. In
this case the dust was intentional.
MOTIC
SOFTWARE
I often use this program because it is an
integral part of the processing software of the DC-3 camera included
in my
microscope. A click on the appropriate icon opens the amalgamation box.
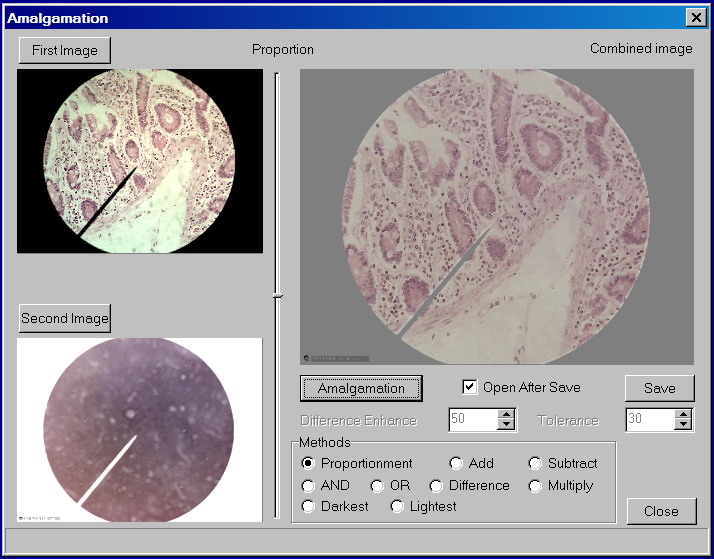
A
click on First image, opens the
directory tree, allowing the user to select the corresponding image. The "Second Image" button allows selection of the correction screen. The only method that allows the
amalgamation is the Proportionment
method. It is selected by default. By clicking "Amalgamation" the operation is performed. It may be that the
first attempt is not entirely satisfactory and could be appropriate to reopen
the correction screen and increase or decrease its contrast or exposure, before
retrying. But generally no more than two attempts are required to get the
desired result.
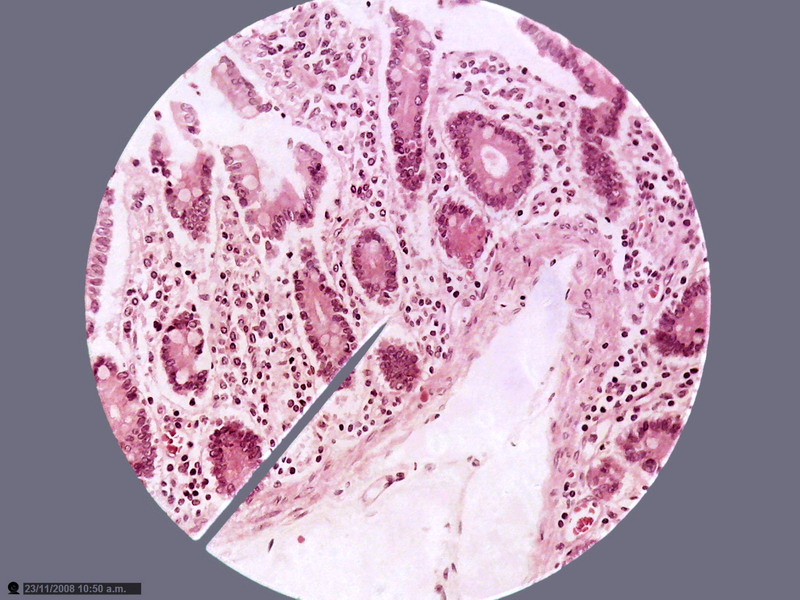
The
final image is almost always something light in tone and low in contrast, but the Autocorrect Tools of any image editor, or
simply the "gamma"
correction can retrieve a good image.
I detail the technique applicable with the Motic software so that anyone who wants to experiment with another image processor has an initial guide.
Photoshop and PhotoPaint
Both Photoshop and PhotoPaint have amalgamation software in their Images menu.
But offer many more options than the Motic, and the interested microscopist
should try some (especially the Superposition
commands, which in turn have options that offer various possibilities). In either
program you should open simultaneously the already inverted correction screen image, and the image
to correct.
Then open the menu
IMAGES, and select Calculations, or Calculate, which opens the job
options. Select first and second images in the dialog box, and apply Overlay. The degree of intensity of the overlay can be graduated, and this will depend on the photographed subject and the
density of the correction screen. I got good results using 90 %.