The chemical industry makes excellent paraffin wax for microtechnique: Stemcowax, Paraplast, Histosec, Tissuemat, Paramat, Polyfin, Paraclean, Variwax, Histowax, UltraPar… But these are difficult to obtain by individuals as the companies selling chemicals are almost without exception working “B 2 B” only.
When you read older text books on microtechnique, you can read between the lines that those pioneers, always on the look out for “a good grade wax”, were using what tight-on-the-budget-microscopy-enthusiasts as you and I use to make paraffin blocks: “upgraded” household paraffin wax.
Household paraffin wax is used to put a solid layer on home made fruit jams and jelly’s and to make candles. It’s sold in supermarkets during the jam making season. A popular brand here is “Spaas”. Spaas paraffin is sold in 250gm packages, costing about €1,20/package. It has a melting point of about 54°C. I suppose it’s not that different from other brands of wax sold in other countries. At first sight some brands of this paraffin don’t look very promising: granular, sometimes even containing a drop or two of water, but when treated the right way you will obtain a good wax for section cutting. This is how I proceed:
First melt the wax in an incubator at a temperature just one or two degrees above the melting point of the wax. I always use those larger cans of about 800 ml from peeled tomatoes for that. As the paraffin usually is in larger blocks, this will take some time. You’ll see that the water content of the paraffin (if any) will collect at the bottom of the can. Decant the paraffin into a new can leaving the water behind in the first one. Keep the paraffin molten for at least a few days. You’ll notice that the melting point of the wax slightly increases due to evaporation of the more volatile fractions.
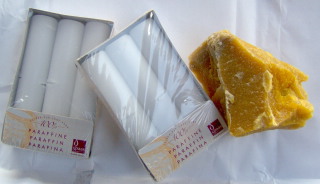
Ingredients for your own paraffin: household paraffin and purified beeswax
Adding some purified beeswax (2,5% – 5% by weight) to the molten paraffin (mix thoroughly), will improve its cutting qualities: the paraffin wax will become less hard, thus its tendency to crack due to hardness and brittleness will decrease. This is especially noticeable on sections thicker than 10 – 20 µm. The beeswax also helps in the formation of ribbons by making the paraffin somewhat more sticky. Last but not least, it helps to let the paraffin wax adhere much better to plant samples with a very smooth cuticle. Purified beeswax can be bought in shops where they sell products to make your own furniture polish.
Make a test block after a couple of days by pouring some wax in a suitable mould (ice cube moulds made from rubber are excellent) and cool down quickly in some cold water. Try to cut or shave it in the thinnest possible (partial) sections using a razorblade: the sections should be smooth and not too much wrinkled or compressed. When cutting thicker sections the paraffin shouldn’t crack. If that’s okay you can try to cut it on a rotary microtome, preferably using a razor blade holder and some kind of thicker razorblade. It would be a shame to ruin your microtome knife in a first trial. Try sections of 2, 3, 4, 5, 10, 15 and 20 µm. I’ll describe in detail the ins and outs of knife/blade geometry, sectioning - and clearance angle and the correlation between temperature, section thickness and ribboning properties of the paraffin wax in parts 2 and 3 of this series, but for now just use your common sense and some gut feeling and try to cut the best sections you can.
These (or at least some of them) should be smooth and not to much wrinkled or compressed as well. The side of the sections facing the microtome knife/blade should have a shiny appearance. Perhaps you will obtain ribbons if conditions are favorable but that’s not the goal of the test. If you want to try it anyway, this should be a good starting point: paraffin with 5% (w/w) beeswax added, melting point 56°C, section thickness 2 – 3 – 4 µm, room temperature 15°C, clearance angle 5°, 30 –40 sections per minute.
A section viewed under a microscope in incident light at about 200x magnification should show only small paraffin crystals as in the picture below.
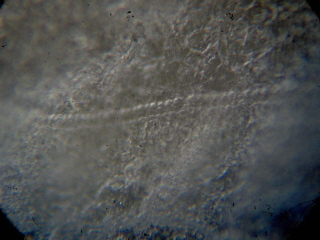
Section of an onion leaf, 6 µm thick cut on a rotary microtome using a disposable blade Feather N35. Embedded in paraffin wax “Spaas” with 5% by weight purified beeswax added. The wax has been kept molten for several days prior to use.
Zeiss (West) planachromat 25x, eyepiece KPL8x,HP Photosmart M417 camera
If the paraffin wax seems okay, it’s time to make a large stock of it. That way you have a supply of wax with constant properties. You can use ice cube forms to produce your own stock of “pelleted” paraffin wax. I always have a large stock of 2 different kinds of paraffin: the one with 5% beeswax added, the other without it. That way it’s possible to prepare different mixtures of paraffin and beeswax by just counting the pellets of wax with and without beeswax added.