A couple of months back I described a method of recording microscope images using large format aerial film. In response to that article Gordon Couger suggested using darkroom photo printing paper to record the image, and therefore produce a paper negative as opposed to a conventional film negative. Having had experience with paper negatives I realised immediately that this could be a successful proposition. One great advantage over film is that the paper 'negative' can be scanned directly by an ordinary document scanner, obviating the need for any further darkroom processing, and the paper itself is readily obtainable in all sorts of sizes and grades. Such a method requires less rigorous conditions than film and can be achieved with virtually no photographic equipment other than the basic processing tools such as developer, fixer, a PC and document scanner and a safelight !
Why Paper ?
Printing paper is much less sensitive to light than most films, and an advantage is that it can be handled safely in dim red light. This lack of sensitivity means that a camera type shutter is not required, for the exposure times will be in seconds rather than fractions of seconds, and so the 'scope's illumination can be switched on and off at source.
Being able to buy large sheets or rolls of printing paper cheaply and then to cut to any size with consumate ease furthers the convenience factor, as anyone who has experienced cutting film to size in the darkroom knows that it's not an easy task.
The grain structure is larger in printing papers, but it is still small enough for images to have smooth tonality, and have sufficient tonal range to cope easily with images from the 'scope. This depends to some extent on the original size of the aerial image on the paper in the first instant, and is adequate at 5" by 4" and up. Contact prints are perfectly feasible with paper negatives too, but the emphasis in this article is to scan the negatives directly to the PC.
In short, printing paper's slow speed can be used to our advantage, because it simplifies the whole process of capturing images. We do not require a normal shutter since the exposure will be several seconds at the minimum, and we can see the image when developed within 1-2 minutes, and hence can make corrections for another exposure if necessary. Delays incurred whilst having to wait to expose all the frames in a roll of film is conveniently dispensed with.
Getting Started ( for those with no darkroom experience)
Since this paper negative process is a simple one, it might appeal to those not experienced in DIY B&W processing as well as some who have the latter. Therefore the following paragraphs have been written with this in mind.
Printing paper can be bought from most photo shops. Try a small packet of say 5" by 7" or 6" by 4" glossy Black & White Resin Coated paper ( RC Multigrade or grade 2 or 3, but avoid fibre based paper as this will take a long time to dry). Ask also for paper developer and suitable fixer; take care with them as although they are not acutely poisonous in the normal sense, people with sensitive skin should take care to keep their hands away from the reagents using 'tongs' when transfering the exposed paper from one dish to another. Follow the instructions as regards handling and dilution and familiarise yourself with the process:-
Essentially the paper is handled in the dark or more easily under a safe light so we don't fall over things! Having given the sensitive glossy side of the paper a few seconds exposure to the light from the aerial image of the microscope, it is slipped into a tray of diluted developer and gently agitated for about 1-2 minutes, then placed into a tray of clean water for a rinse, and finally left in the fixer solution for about 2 minutes. Washing in clean running water comes next (minimum 1 minute) and it can then be left to dry resting on edge on some old towelling against a suitable support such as a jar.
That's it in a nutshell.
Supporting the Paper Negative
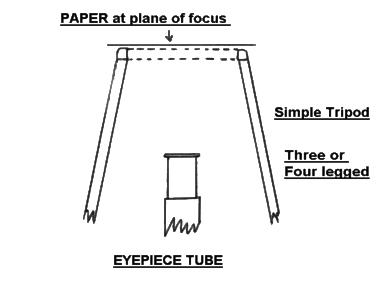
In it's simplest form the support need only be a tripod like that used in the school chemistry lab, but a little larger and placed over the eyepiece of the 'scope like thus :-
 |
|
|
In order to use this open tripod to support the paper it is essential that no extraneous light reaches the paper, which means having to work in red safe light conditions, and importantly having no light leakage from your 'scope. Most modern electrically illuminated 'scopes emit little or no light from under the foot and elsewhere to fog the paper, but if you illuminate from a separate light source then the paper will have to be shielded in either a more conventional camera housing, or the tripod and frame will need a bag " bellows " :-
 |
|
|
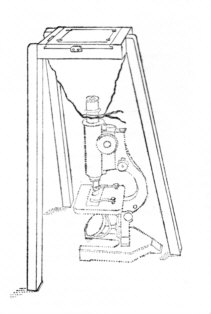
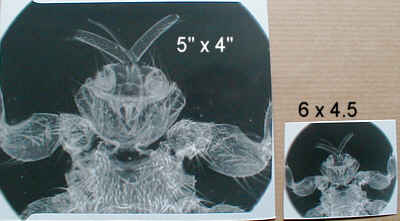
Conventional cameras can be used, and for the following trials I used a 5" x 4" large format camera poised over the 'scope in the darkroom supported by my universal enlarging column. I have also taken photo's using a Mamiya 6x4.5cm SLR by cutting down the printing paper to suit the film frame, the results were decidedly inferior to 5" x 4", which is the minimum I'd recommend for good results.
 |
OK it's evening, your electric light bulb is replaced with a safe light (see below), and the 'scope has been set-up with a suitable subject etc. In the comfort of this gentle lighting the tripod can be seen in place over the eyepiece and with the ground glass focussing screen resting on top, the image can be composed and focussed readily. The next step is to remember to switch off the illumination to the 'scope! followed by taking out a piece of printing paper from its packet and placing it where the ground glass has been with the glossy surface face down*. Switch on the illumination to the 'scope for a trial period of say 15 seconds, then develop and fix the the print. For this initial exposure evaluation use narrow strips of paper to save money, so that once the exposure has been estimated by trial and error a full sheet can be used. Exposure times can vary from a few seconds to a minute or more depending on the light output intensity from the 'scope.
*.....If in doubt about which side is the sensitive side, nip the corner of the paper between the lips ......the sensitive coated face will have a 'tacky' feel. Most emulsions have a glossy sheen which can be easily detected by way of reflection of the safe light.
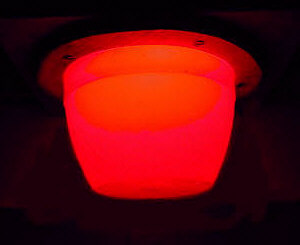
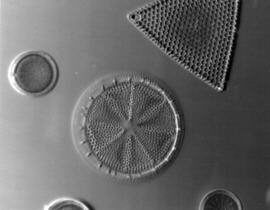
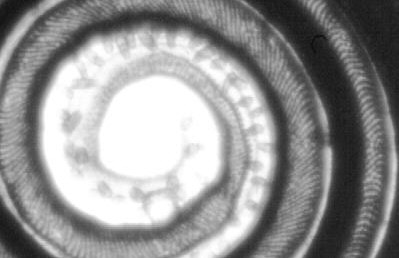
A bench mark for assessing the correct appearance of the negative is to expose the paper so that the background is fairly dark but certainly not black . A successful negative is the one where the detail in most of the tonal areas of the subject can be seen :-
 |
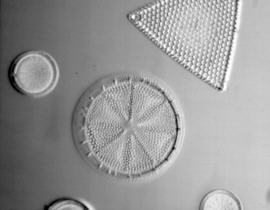 |
| Diatoms...... Oblique illumination
(5" x 4" paper size ) negative |
Inverted (ie made positive in graphics) |
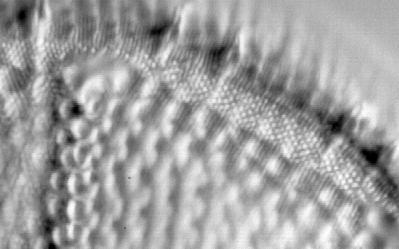 |
| detail in photograph above
This is an untouched portion of the image as it appears straight off the document scanner at 300 dpi. Note the very fine horizontal lines and granularity which are artefacts from the scanner. |
Scanning and pitfalls
The scanning process is essential if we are to save these images to disk, but there are some points we have to consider to try to preserve the inherent quality of the negative image.
Scanner quality is an obvious point, but more important than this is how we scan in the first place. In one sense the constraints imposed by the dpi (dots per inch) range of the scanner, and the monitor screen remove some of the control we have. It is in fact a sort of 'catch 22' situation really, as we have on the one hand the possibility of scanning at high resolution, resulting in larger detailed images than the screen can show completely without resizing down, compared with scanning at lower resolutions so the image fits nicely onto the screen, but does not show as much of the detail present. A quandary indeed !
Depending on your monitor screen size and array ( 1024 by 768 or 1280 by 1024 etc.), a paper negative image scanned at 100 dpi will appear a little larger on screen. If then our chosen subject is projected from the eyepiece onto the negative printing paper with a diameter of say 2" (50mm), it will appear to be about 3" (75mm) on screen using 100 dpi scanning resolution. At 200 dpi the subject would be twice as large on screen ie, about 6" (150mm) but will contain more detail. Increasing the resolution beyond 300 dpi when scanning a negative is rather pointless, unless your images are small in the first instance and are highly detailed. Briefly, if you wish to print the image in your bubble jet printer, scanning at 300 dpi is the minimum requirement, but would be better at 600 dpi or more if an enlargement is involved
Basic Graphic Enhancements
In all probability your first images might look a little 'lifeless' or 'bland'. Inaccuracies of exposure, variations in illumination set-ups, and also the document scanner's limited ability to cope with the reverse tonalities of a negative image all play their part in the process. Providing there is detail and evidence of shades ranging from dark to lightish tones and that it is fairly sharp, the chances are that a decent image can be created.
The simplest graphic software packages can invert the negative images to positive ones, but we also need to make sure that the tonal scale of the B&W image is as wide as possible. If you have graphic software such as Photoshop, Picture Publisher or Paintshop etc., this can be achieved easily using the 'Tone Balance', or 'Levels' feature. These show in graphic form the distribution of tones in the photo from black to white in 255 grades.
The example below shows an image inverted from a typical negative :-
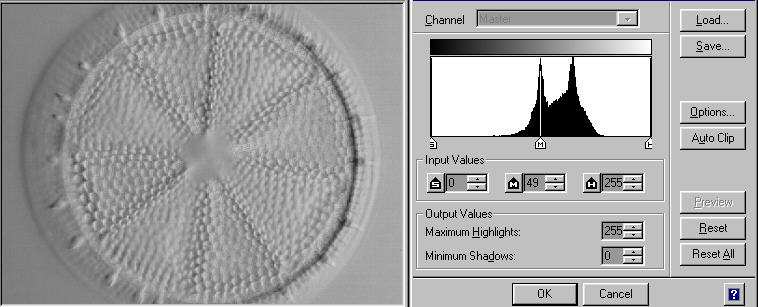
Diatom. Typical example of under exposed image showing limited tonal range. Image lacks density owing to under exposure of negative and also limitations of scanner. |
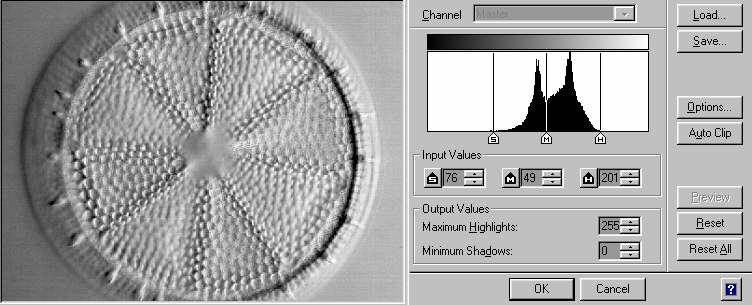
Drag the 'shadow' and 'highlight' cursors to the extremities of the curves and click 'ok' to expand the tonal range. The central midband cursor can be moved slightly if required. The result shows the expansion of the tonal range to a more normal distribution of 255 points and provide a more faithful and realistic image. |
Sharpening should be unecessary if no resizing (resampling) has taken place, which can be avoided if the original image scale on the negative, and the dpi resolution on the scanner have been considered carefully as described above.
Gallery
The following images are my first attempts and represent an average selection of results obtained using the simple methods described above.
 |
 |
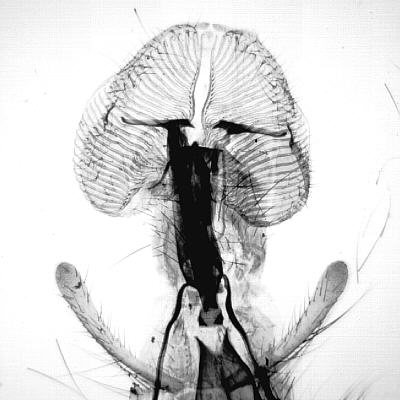
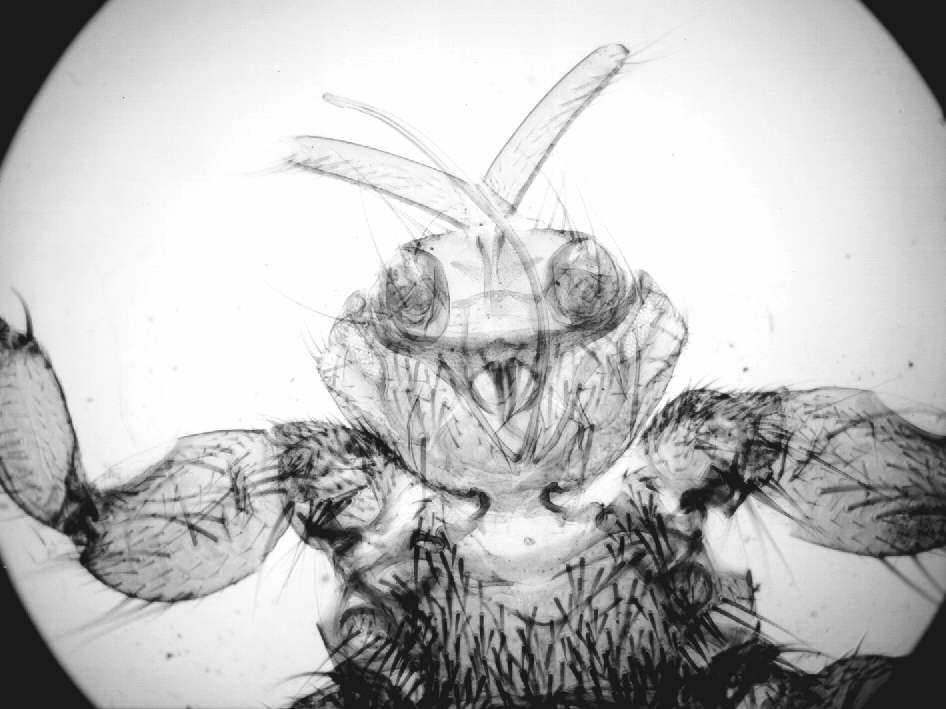
| Blowfly's Proboscis. x 2.5 Achro objt. brightfield Illumination
Scanned at 100dpi . Approximately equal to original negative size of 5" x 4". |
Straight from scanner plus 'levels' adjustment only. |
 |
 |
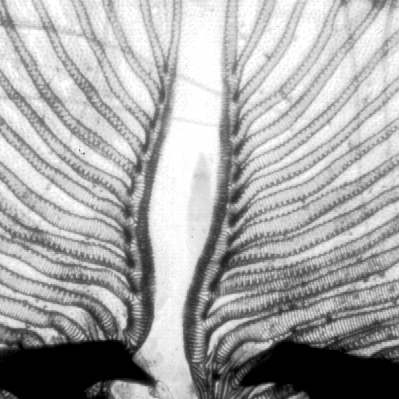
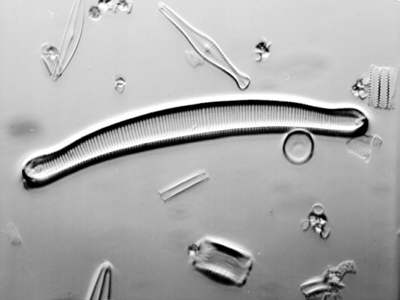
| Moth Tongue. ............Details as above | Details as above |
 |
 |
|
|
|
 |
 |
|
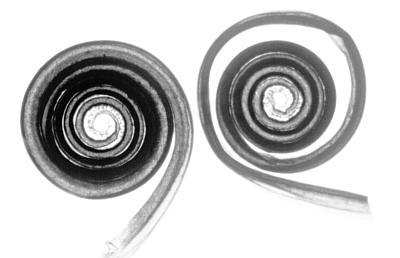
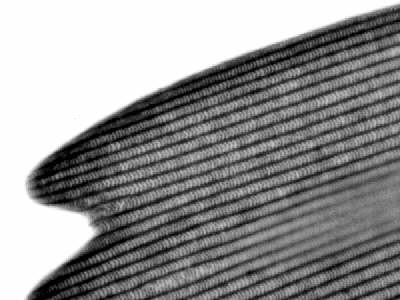
0.8m extension between paper and eyepiece. |
Approx x 2600 on screen. Horizontal 'mini bars' revealed which the eye could only perceive with great difficulty with oblique lighting at 90 deg. to 'bars' scanned at 600dpi. Tonal adjustment only. |
 |
|
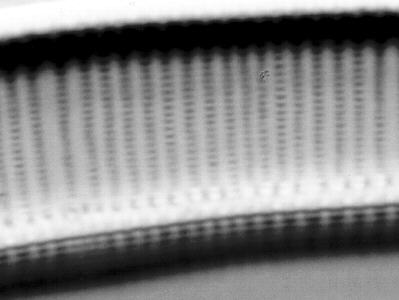
Tonal adjustment only, .................... detail and smoothness of tonality is lost in scanning and compressing 15:1 |