Fluorescence microscopy with super leds.
by Laurent Delvoye, The Netherlands
The articles on fluorescence microscopy by David Walker in this magazine prompted me to write this contribution about my experiments with super leds as a replacement for the high pressure mercury lamps in microscope epi-fluorescence setups. These lamps are very expensive, are spent after 200-300 hours and generate a lot of heat.
In 2005 I saw white super leds for the first time and immediately I realized the potential they have for microscope illumination. In the course of 2006 some attempts in that direction were made, that resulted in a fully functional white led illumination for my Leitz Orthoplan. Later that year, a Leitz Diavert was obtained, with a defective lamp. With the fitting of this lamp, some epoxy resin, a coin and a white super led a new light source was sculpted, that is still in use today.
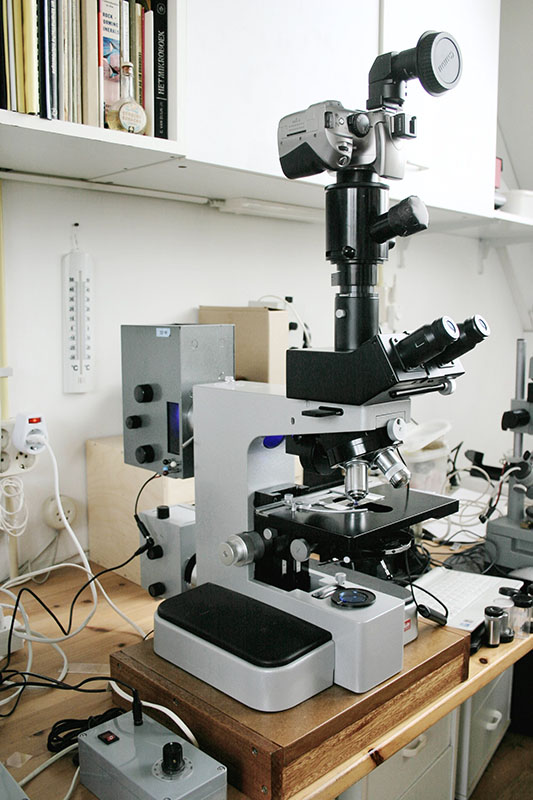
Leitz Orthoplan with Lampenhaus 250 and Ploemopak, Canon EOS 300D body on Leica attachment.
In 2007 Pieter Houpt and I brainstormed about the application of the new super UV-led (365 nm peak value) from Nichia in an Orthoplan I-type Ploemopak fluorescence attachment. Pieter is mainly interested in plankton and wanted to view it in fluorescence with vital staining. Indeed we succeeded in mounting a UV-super led within a Ploemopak. But the results were disappointing. Pieter is now experimenting with a Fraen-like setup with good results. However, my purpose is to apply epi-fluorescence microscopy to living coral samples. I did that during research trips to the Curacao reefs from 1992 on. And being opaque, coral samples can only be investigated by epi-illumination.

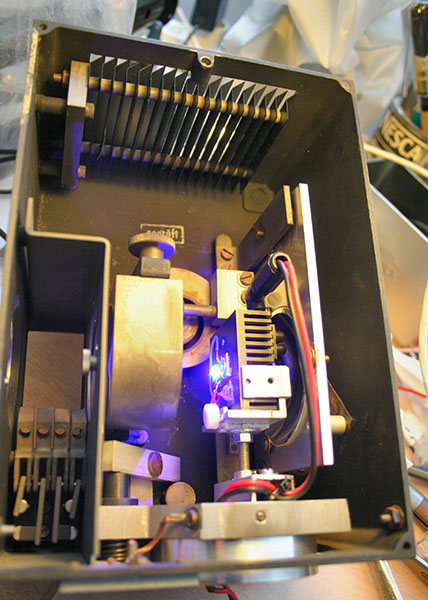
Left: This is the led unit holder mounted on the lamp base.
Right: Opened Lampenhaus 250 with burning royal blue unit.
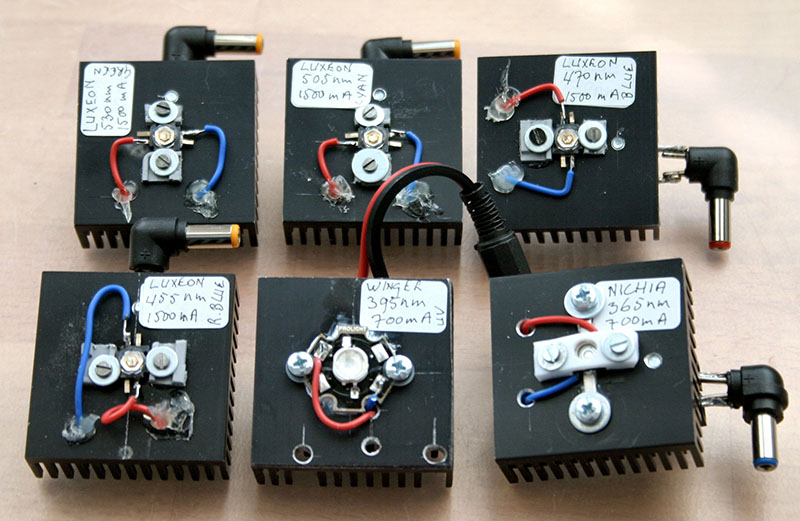
Leds mounted on cooling units.
So far, an Orthoplan epi-fluorescence setup was used for that. Given the weight and the security regulations in aviation, it's not easy taking the complete set aboard an airplane as hand luggage.
In my student days I used a LOMO MBD-1 microscope, a predecessor of the later Biolam series. I still had a lot of technical information about LOMO microscope parts. By chance an OI-17 'luminiscence-exciting arrangement' was found on eBay. Apparently nobody recognized it as such, so it was easy to obtain it for a reasonable price. This part is mounted between the stand and the trinocular tube. It contains a fixed dichroic mirror, that reflects all wavelengths in the range from 365 nm to 440 nm. A Biolam stand was also found on eBay, a trinocular with 1x magnification, a 5-hole Aus Jena objective turret and some optics that were already present completed the microscope.
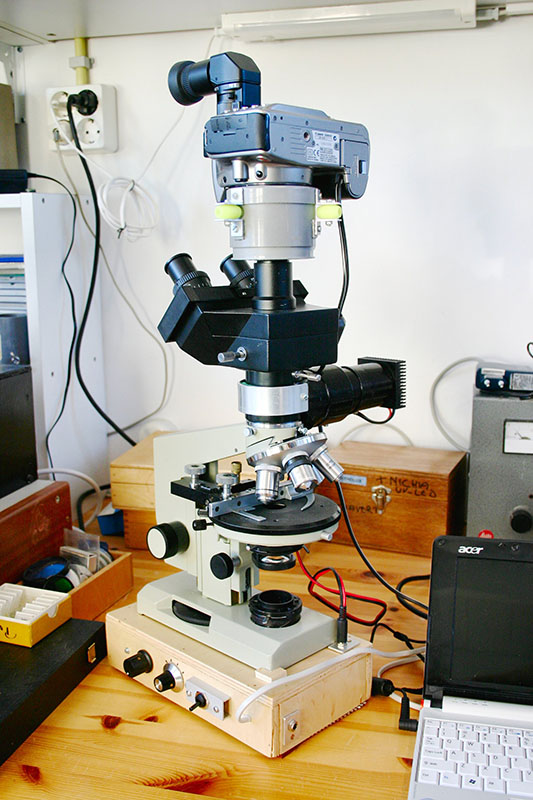
Biolam stand with modified OI-17 epi-fluorescence attachment.
With some PVC plumbing parts, a collector lens, a 440nm barrier filter, some parts from my scrap box, and a 395nm Winger UV-led, the OI-17 part was transformed into a functional epi-fluorescence attachment for the Biolam stand. See the photographs for details. About half way along the tube is the collector lens. It should be put in such a position, that it forms a sharp image of the led in the back focal plane of the microscope objective. It is easy to approach this position by screwing out the objective in the revolver and project the image on a piece of paper held to the empty hole. Then the position must be fixed. In my setup this is accomplished by tightening the screws, that fix the the inner PVC rings holding the collector. Making it black with a felt tip marker gives it a nice finish. For photography, also from PVC plumbing parts a vibration free adapter was made to accomodate a Canon EOS 300D body. It performs well, as photograph ... shows. In fact, I copied the Leitz Leica microscope adapter. In principle this is an afocal attachment, the internal objective for the Leica is mounted on three rubber pieces, that dampen the vibrations of the shutter. In my version,I used a LOMO Industar-50 camera objective and a Canon EOS 300D body, and placed the rubber pieces on the outside. A LOMO K7 eyepiece serves as a photo ocular. In the photograph the stand is put on a pedestal, made of birch plywood and containing white led illumination with a regulated power supply. The OI-17 Winger UV-led can also be connected to this power supply, with the switch in the middle one can choose between normal or epi-illumination. To the right is the on/off switch and to the left is the dimmer.
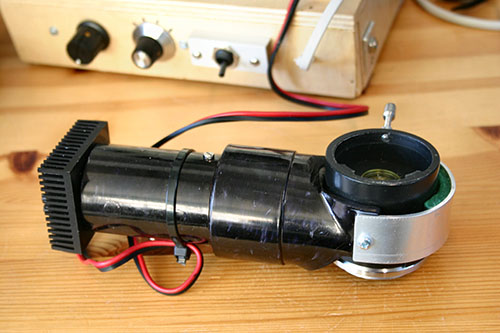
Modified OI-17 attachment, with Winger 395 nm UV-led.
Encouraged by this success, I decided to adapt a Leitz Lampenhaus 250 for super led illumination. The original mercury lamp had been already replaced by a 100W halogen lamp, mounted on a new lamp base. This was turned on a lathe from aluminum stock. The halogen lamp was replaced by an unit holder made from aluminum angle profile. As can be seen in the photographs, there are six units, each with a super led giving a distinct peak wavelength: Nichia UV 365 nm, Winger UV 395 nm, royal blue 455 nm, blue 470 nm, cyan 505 nm and green 530 nm, all Luxeon 1500mA leds. The first two are 700mA leds.To ensure accurate positioning while mounting the leds, first a cross through the centre of each base was scratched with a sharp tool. Parts of plastic slide frames were glued on the cooling bases around their centres to accomodate the leds. After setting of the glue, 1.5 mm holes were drilled through the plastic into the base and M2-threads were tapped. With M2 screws and M3 washers the leds were fastened in the centre of their bases between the plastic parts. Each cooling base measures 43 x 43 x 16 mm. There are two different connector types in use: One for 700mA leds and another for 1500mA leds. Because there is plenty of room in the Lampenhaus, changing units is easy. Two power supplies are employed: a provisional 4.5V DC 2500 Ma adapter with an extra 2 Ohm/1 W resistor to protect the 1500mA leds and a regulated power supply for the 700mA leds. Because the power supply connectors are different, they cannot be interchanged.
The modified Lampenhaus is used in an Orthoplan stand, in combination with a Ploemopak epi-fluorescence attachment and the appropriate barrier filters. A build-in lens in this stand can swing in and out of the beam and this helps in centering the beam. When out, the focussing knob of the Lampenhaus can be turned to obtain a faint but sharp image of the burning led. After centering, the lens is swung into the beam and then a fully illuminated field is obtained. Once centered, when changing a led only minor adjustments have to be made, depending on the mounting accuracy of the unit it question. The condensor should be lowered, to avoid reflections on the top lens. An alternative is to use the Lampenhaus in the normal lamp position, and change the condensor for a 0.8 N.A. darkfield condensor. In this case the usual objective turret can be used. Either way, the results are very satisfying as can be seen in the examples. It leaves a lot to explore in a safe and easy way!
Because of the low light levels, work in a room with curtains closed and employ high N.A. objectives with low magnification. Special objectives are made with 'Fluoreszenz' (Leitz) or 'L' in Cyrillic (LOMO) engraved on them. These have a low fluorescence of themselves and are much more expensive than objectives for general use. A last word about the photographic technique. A dedicated Canon EOS 300D body is employed. It is updated with hacked EOS 10D firmware. This enables to flip up the mirror 1.5 seconds before the exposure is made. This is enough to avoid unsharpness caused by mirror vibrations.
Comments to the author Laurent Delvoye are welcomed.
Example Images
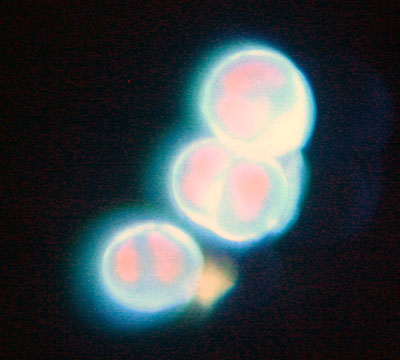
Left: Luxeon led 505 nm (cyan). Orthoplan, Ploemopak, Leitz objective 25x 0.75N.A., Canon EOS 300D body on Leica attachment. Guinea pig ovary H.E. slide.
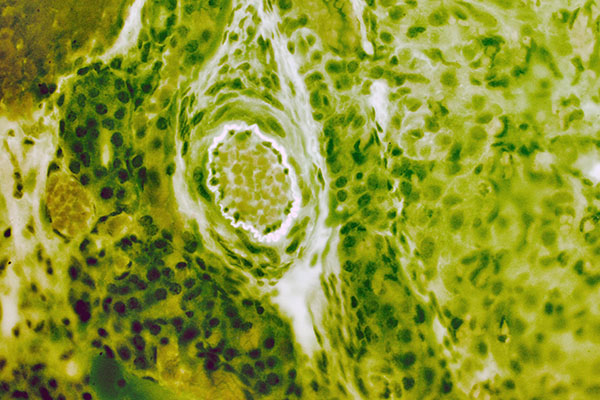
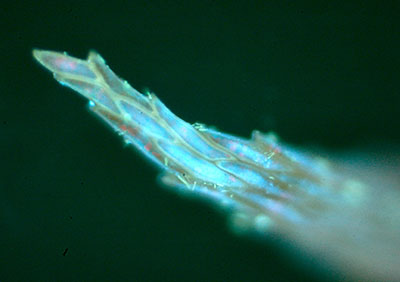
Right: Winger 395 nm led. Coccal algae, the green slime on damp places outside. LOMO Biolam with simplified epi-fluorescence attachment, 30x 0.90N.A. water immersion objective, Canon EOS 300D body. Cell walls vitally stained with Sigma Fluorescent Brightener, chloroplasts glowing red.
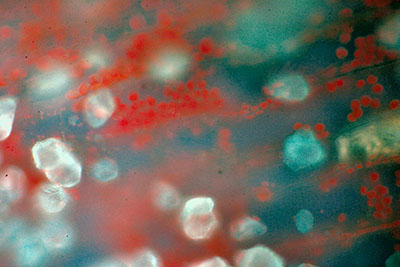
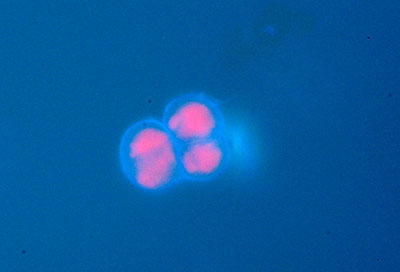
Right: Nichia led 365 nm. Setup as for first image above. Coccal algae. Chloroplasts red.
Footnote, additional technical aspects:
LED bandwidth: According to available information the spread in wavelength is about 10 to 20 nm, depending on voltage, age, etc. This is generally smaller than that achieved in prefiltering the beam of a halogen or mercury lamp. The latter has sharp emission lines on a more or less continuous background (because of the high pressure).
Filters: I don't use filters, except BG12 and of course the heat barrier filters. Also the dichroic mirrors in Ploemopaks and filter cubes have some spread in the wavelengths they reflect.
LED power supply: For the 1500mA leds something provisional is used, for the 700mA leds a separate, indeed well regulated power supply is in use.
LED supply: Most leds were ordered from a German based online firm: www.led1.de. They offer a range of types with a lot of technical information for reasonable prices and a fast delivery time. The Nichia UV-led is described on their website: www.nichia.com, and ordered from the Dutch branch of the company. It costs about 70 Euros. Because of the unusual build, soldering and mounting is not easy.
Indeed most of the energy is put in the particular wavelength, although on the spot they generate enough heat to make cooling necessary. They were all mounted on obsolete 486 Intel processor cooling bodies, that were obtained at a very low price.
When designing or adapting illumination systems for epi-fluorescence, the most important property of the condensor system should be that it forms an image of the led in the backward focal plane of the microscope objective. Then an evenly illuminated field is achieved.
Published in the June 2009 edition of Micscape.
Please report any Web problems or offer general comments to the Micscape Editor .
Micscape is the on-line monthly magazine of the Microscopy UK web site at Microscopy-UK
©
Onview.net Ltd, Microscopy-UK, and all contributors 1995
onwards. All rights reserved.
Main site is at
www.microscopy-uk.org.uk
with full mirror
at
www.microscopy-uk.net
.