 |
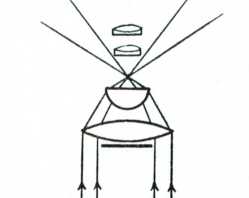
| Dark ground stop
unfortunately only
allows peripheral aberrated light through this Abbe designated condenser. |
| Darkfield Lighting With Phase Annuli |
|
By Paul James (UK) |
One of the major problems with darkfield illumination is contrast. Traditionally setup darkfield using a stop in the filter tray often provides too much light intensity, and results in dramatically lit specimens which at first glance may appear to be spectacular, but the truth is that the contrast or light intensity range between the darkfield 'backcloth' and the highlighted specimen can be gross, and certainly beyond the eye's capabilities to cope.
Interestingly, an autoexposure camera when used to take photo's of darkfield imagery invariably produces grossly overexposed results in which subtle detail is entirely lost. This is due to the fact that most of the field is dark and so the meter 'thinks' that the average light intensity is low too. Thus what light there is in the image floods the film or CCD, leaving the impression of thicker boundaries to specimen and tissue alike. Reducing the light input is obviously the logical solution.
The degree of light intensity for a given power in normal darkground illumination very largely depends upon the amount of ascending light from around the darkfield stop. If we reduce this somewhat by increasing the diameter of the stop, we will have accomplished our goal, and despite increasing the obliqueness or NA of the cone of light we will have dimmed the intensity and satisfied ourselves by producing a more pleasing and useful image that the eye is better coping with.
However, it is an unfortunate fact that quite a proportion of this outer band of light passing up through our condenser contains more colour aberrations, particularly with the widely distributed Abbe design . This manifests itself as highlighting the specimen in coloured light, which is not at all satisfactory. Achromatic condensers are better, but not so commonly supplied with microscopes owing to their intrinsically higher costs.
|
| Dark ground stop
unfortunately only
allows peripheral aberrated light through this Abbe designated condenser. |
It so happens that in all standard phase microscopes this 'ring' stop is already present, and usually in three sizes too, to cope with x10, x20 & 40, and x 100 phase objectives. Very importantly these rings lie within the peripheral zone of the aperture of the condenser, and therefore less aberrated light passes through.
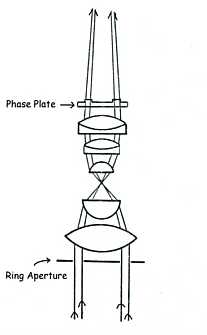 |
| Light paths of
phase contrast,
showing the ring aperture and phase plate usually placed within the phase objective. |
I have used this method using two different phase microscopes and it works well with both, but the range of objectives capable of providing the desired results is limited by the annulus in use, so I can use a x 2.5, x 4, and x 7 objectives with the x 10 phase annulus, and the x 10 objective with the x 40 annulus. Of course all these objectives can be used with the x 40 annulus, but the EFFECTS produced are quite different with the two annuli, and this makes for more interesting observations.
 |
| A Zernicke phase
disc showing 3 annuli of which that marked 'a'
is the one producing the most oblique rays. Note the smaller annulus on its left has thinner wall thickness allowing a more delicate cone of light to illuminate the slide. The specific characteristics of the lighting differ between the annuli, suiting different specimens. |
All phase microscopes require the use of focussing telescopes to centre the substage annuli in order to maximise the phase effects, and this method also requires that the annuli be centred too.
So with a centred phase annuli to be used with for example, a x 40 phase objective, we observe our specimen with a low power non-phase objective such as a x 10 or less. The top element of the condenser must be left in place whether it is of the flip up variety or screw on form, since we need the same conditions of illumination as we would require for the x 40 phase objective.
With the specimen in place only two more adjustments should be made. The first is that of lowering or raising the phase condenser to provide us with even illumination across the field, and also we might need to reduce the light intensity from the lamphouse. This is very important *, for we are trying to illuminate the specimen in a delicate manner, and I find that ground glass ideal for this as it reduces intensity by diffusion, but does not impart any colouring or tainting of the light. I find that several layers of groundglass are sometimes required, placed over the field lens in the base of the 'scope. Partially crossed polarising filters work, but I find the light reduction can be too severe at best, though a neutral density filter of the type used in photography might work well?
An image so illuminated should display more detail to the eye than standard DF, and may well provide interesting diffraction effects which enhance diatoms & butterfly scales etc., under low power.
*NB. Experimenting
without excercising control over the light sources' intensity is rather
pointless, and any cursory observation without such control may well disappoint.
Some combinations of annuli and non phase objectives can produce strange
or worthless imagery, so it is wise to try all combinations before coming
to any conclusions. The ability to centre the annuli is absolutely essential
in order to get the best imaging.
Gallery
The following photo's are not truely representative
of the actual images seen 'live', because of the limiting qualities of
my digicam. They nevertheless demonstrate that this principle works and
hopefully encourage those interested to experiment. They were all taken
using either x 7 or x 10 Wild Achromat and x8 Spencer achromatic eyepieces
with the x 40 phase annulus in a Zeiss Photomic 1. With appropriate use
of its internal 'Optivar' magnification changer.
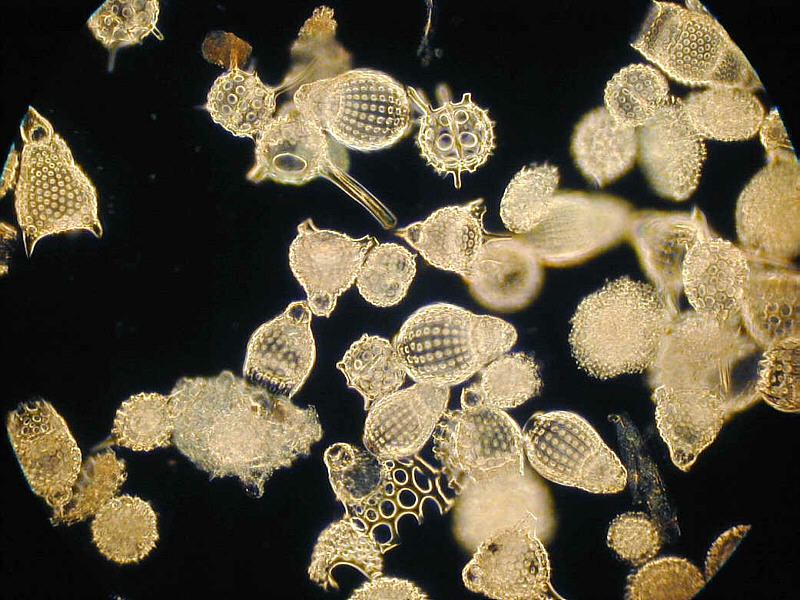 |
| Radiolarians. |
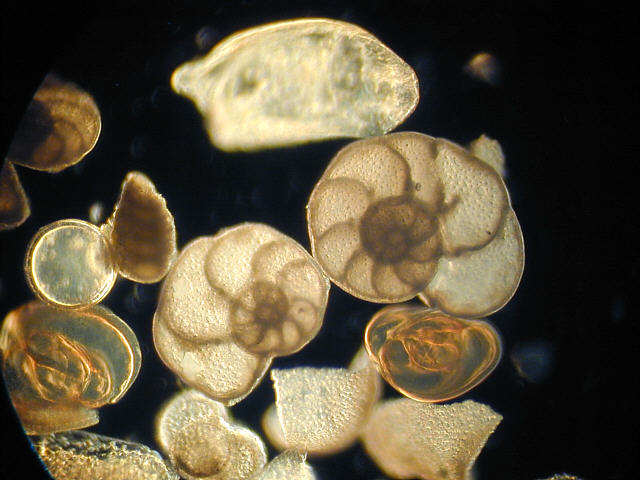 |
| Foraminifera.
Note surface detail on two central specimens which have not been lost through glare |
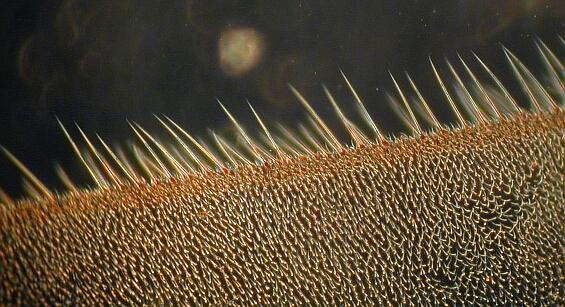 |
| Trailing edge of insect wing. |
 |
| Drone Fly's eye detail. |
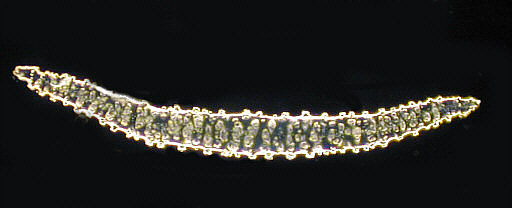 |
| Spicule of Alcyonium |
There is insufficient obliqueness (na) in the angular cone from the highest power annulus ( widest ) to provide DG for the x20 and x40 objectives, BUT the effects in this situation are very interesting nonetheless, albeit subtle, and can produce imaging with added detail more clearly revealed than in brightfield.The causes of this phenomenon remain to be seen, but nevertheless the effects are most certainly real, and have become a regular part of my observation repertoire. The results resemble brightfield but can display remarkable clarity with certain specimens.
|
 |
 |
|
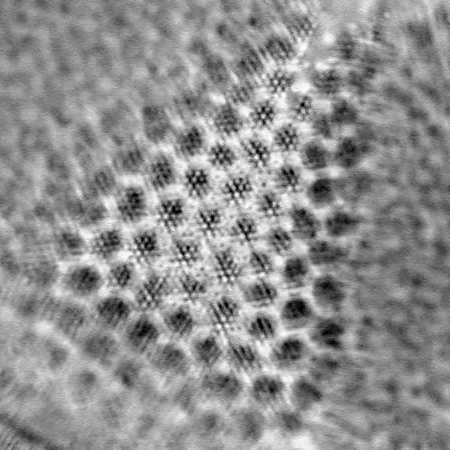
|
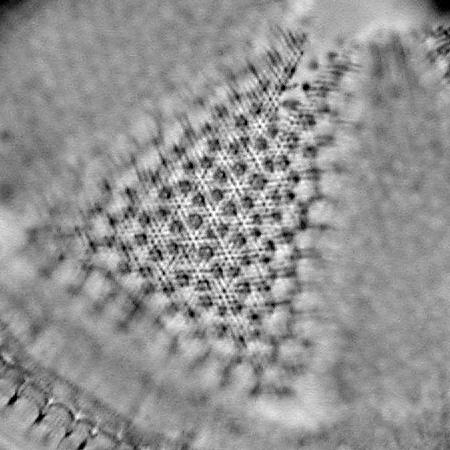
White dotting appears to be below geometrical surface structure? |
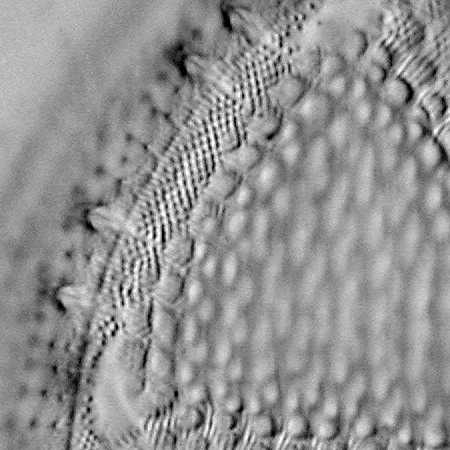 |
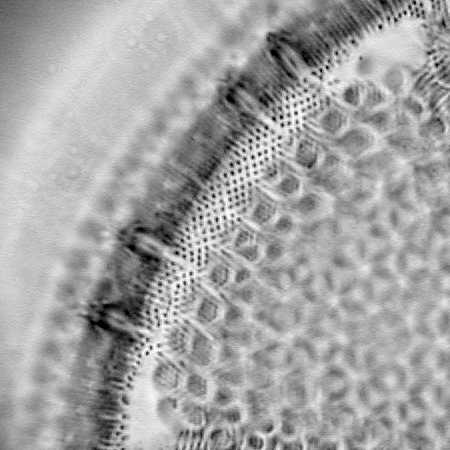 |
| Brightfield/oblique. | Phase ring illuminated
Quite a different appearance. Well defined dotting clearly revealed. |
Simulating this effect without a phase microscope
Those folk without phase equipment need not despair, because we can simulate the same effects by making a similar 'ring' aperture beneath the standard brightfield condenser, but be prepared to experiment. Make sure that the 'ring' is not too wide as to only allow light from the edges of the condenser's cone to be used as this is usually full of chromatic artefacts. Thus a condenser with a full aplanatic aperture of about 1.0na will furnish useful light from a slightly reduced 'ring' diameter which yields a cone of about 0.8-0.9na. Hence objectives up to about 0.65na (x 40) might be used successfully.
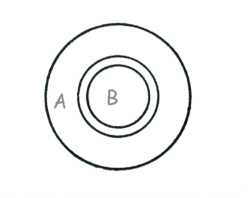 |
| A ring aperture
similar to this should
provide delicate imagery for low to medium powers. Zones A & B are of course opaque. |
Pro's
1) Very simple technique for those possessing phase condensers.
2) Very effective, yielding delicately lit well defined detail of specimens, so long as illumination intensity is controlled.
3) Little or no cost.
Con's
1) Limited to low and medium power objectives
, otherwise none.
| Photo's taken using Nikon cp 800 digicam. |
| Comments welcome to Paul James. |
Microscopy UK Front Page
Micscape Magazine
Article Library
Please report any Web problems
or offer general comments to the
Micscape
Editor,
via the contact on current
Micscape Index.
Micscape is the on-line monthly
magazine of the Microscopy UK web
site at Microscopy-UK