TOPICAL TIPS
an annotated list of on-line links
and bibliography on...
MINI-AQUARIUMS, MICRO-AQUARIUMS, HANGING
DROPS, WET CHAMBERS, AND
ELEMENTARY COMPRESSORS
Second part
Walter Dioni Cancun,
Mexico
NOTE: The pictures without a credit, were made for this publication by Axel Quarchioni, using C4D. I am grateful for his generous contribution of personal time away from his family.
WET CHAMBERS
Remember what the Wet Chambers are: Wet chambers are closed preparations, in which a drop of
liquid is supported in a cavity full of air, which ensures a much more
prolonged observation time, allowing a free exchange of gases between the drop
and the surrounding air.
Even
if the principle is the same there are a number of different implementations,
and as was the case with micro-aquariums, the physical construction can go from
the simplest to more elaborate designs. Fantasy, ingenuity, available tools
and materials, and handicrafts skills, determine the chamber a microscopist can use.
HANGING DROP WET CHAMBERS
This is a technique that has inspired a lot of
variants from the time of its invention, which Simon Stricker in his Manual of Histology of 1872
assign to Recklinghausen
(no date, but obviously before 1872).
Wet Chambers in all its forms are small closed spaces in which a drop
of media is placed, surrounded by air, to assure a free interchange of
respiratory gases.
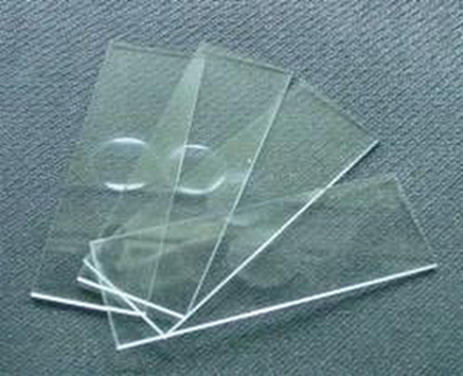
EXCAVATED SLIDES - (well slides, excavated slides,
concave slides)
There are professional slides with a concave excavation at its center, or even
with multiple excavations, which can directly receive a "Hanging
drop".
To
use them a small and thin drop of fluid containing the observable
subjects, is placed at the center of a coverslip bigger than the diameter of
the excavation, of course. A thin ring of Vaseline is drawn around the
concavity, one mm out of their boundary. The coverslip is swiftly but carefully
overturned so the drop hangs from its underside and is lowered and applied to
the Vaseline seal. The drop now hangs over an air supply that assures a more or
less long term observation. If you plan to use an immersion objective, the four corners of
the coverslip should be fixed with a drop of nail polish. This geometry allows
for large powers to be used on mobile organisms that adhere to the underside of
the coverslip (to count the toes of bdelloids, for example). The preferred point
of observation is the peripheral boundary of the drop, where it is thinner and
can be explored using the highest powers.
In
the 20th century someone suggested to personally create the concavities
using a dentists drill for that task. Those that have one at their disposal
can do a trial.
The commercial "excavated slides" are expensive! To apply the useful technique
of the "Hanging drop" several microscopists have developed
substitutes equally or even more useful, and many of them very cheap.
THE SIMPLEST MOIST CHAMBER (cardboard)
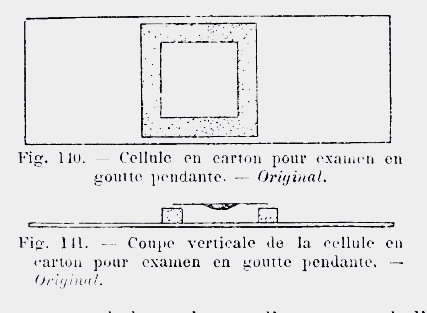 In 1913, in his Précis
de Microscopie, (available free on-line) Langeron proposed
to cut a square sheet of cardboard, of the desired thickness, perforated with a
punch, or cut with a scalpel, soaked in water and simply attached to the slide
by capillary action.
In 1913, in his Précis
de Microscopie, (available free on-line) Langeron proposed
to cut a square sheet of cardboard, of the desired thickness, perforated with a
punch, or cut with a scalpel, soaked in water and simply attached to the slide
by capillary action.
So it was not only permeable to oxygen, but the chamber
kept saturated with water vapor. An occasional drop of water added in the
periphery can keep the chamber running for hours. Saving them in humid chambers
with the atmosphere saturated with water, ( see Part 1) when not at the microscope, can last
for days.
The most important problem in long lasting observations over some days is the possible contamination of the cardboard frame with bacteria or moulds.
MORE PERMANENT WET CHAMBERS
A modern and comprehensive article on the subject,
full of creative ideas is that of Jean-Marie Cavanihac (published in
English and French) at:
http://www.microscopies.com/DOSSIERS/Magazine/Articles/JMC-LAMES% 20A%
20PUITS/lamepuits.htm
http://www.microscopy-uk.org.uk/mag/artmar02/jmcwells.html
 DEEP
CELLS - There are however, some preferred common
structures. The commonest is a ring (in various thicknesses and depth) cut off any waterproof material (PVC, glass,
aluminium, plexiglass, etc).
DEEP
CELLS - There are however, some preferred common
structures. The commonest is a ring (in various thicknesses and depth) cut off any waterproof material (PVC, glass,
aluminium, plexiglass, etc).
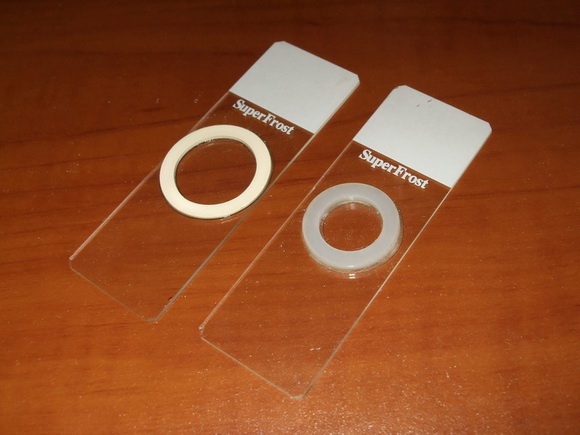
The one at
left is the 1913 proposal of Langeron.
Below there is a picture of two deep cells donated to the author by J.M. Cavanihac
O-RING CHAMBERS - O-rings have even be proposed (the circular rings which are used
as compressible washers in mechanics, which are available in various diameters
and thicknesses - see a good description of this in G. Cougers reference at
the end of this paragraph) cemented to slides with Vaseline, or balsam,
turpentine, cyanoacrylate, epoxy cements, or any other acceptable glue, deposited
on the out side of the ring. Any of
these cements are dissolved in solvents, toxic to our organisms, but they are
very volatile and after a couple of hours in the air the chambers can be used
with little danger.
|
|
|
|
This is the simplest " for every day" version. To see much more elaborated designs, search the messages of the "Yahoo microscope" group |
|
Dont yield to the temptation to use
PVA, (polyvinyl acetate, white
multipurpose cement used in houses and schools, because it is soluble in water
and will cause a disaster).
A verbal discussion of most of the anterior deep wells, specially the O-Rings
was made in 2006, at the Yahoo Group Microscope, with an appropriate summary
by Gordon Couger
http://tech.groups.yahoo.com/group/Microscope/message/31110
OPTICAL DEFECTS
OF THE "HANGUING DROP" - Any hanging drop technique, with either
excavated slides or humid chambers of any material, have a major flaw. The
highest powers can be implemented only at the periphery of the drop, and even
with the lowest powers the refraction and
reflection of light on the convex surface of the drop leads to
marked differences of illumination as the observer moves the slide under the objective.
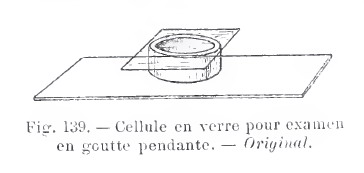
To remedy this defect Ranvier designed in the 19th century the glass chamber that bears
his name.
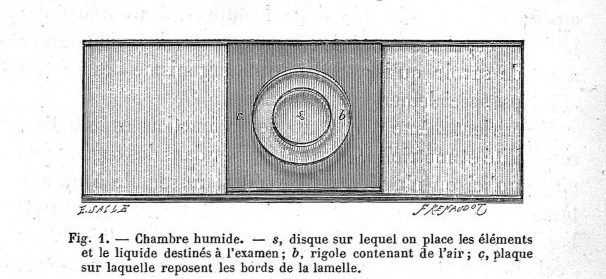
c, glass chamber, perforated, s, central
disc, b circular excavation. (taken from Langeron, 1918)
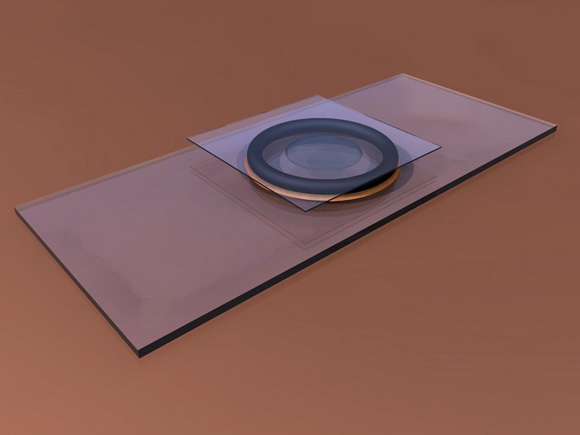
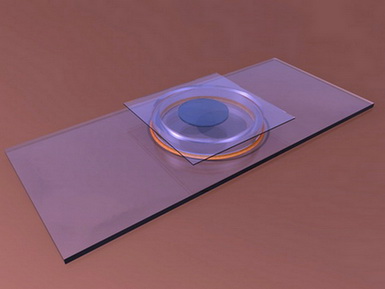
** FLAT HANGING DROP - lucky microscopists that own some of
the expensive circular COVERSLIPS of approximately 1 cm in diameter, may resort
to them for the next trick. Place on the table a coverslip greater than the
diameter of the wet chamber. If you are working with caution, never mind if this
is circular or square, except for aesthetic reasons. Deposit a sufficiently
small drop in the centre.
With
a tweezer take a circular coverslip and deposit it very carefully on the drop.
If this was well calculated this is sufficient, if not, liquid must be absorbed
with a long and narrow paper filter triangle until you get the desired
thickness of the drop. Set the small cover with 3 or 4 small drops of Vaseline
or Valap. Deposit a water drop in the bottom, at the internal chamber edge.
Capillarity acts to stick it on the periphery. Spread the top edge of the
chamber with a thin layer of Vaseline. Quickly reverse the ready pair of
coverslips, and carefully adhere it to the chamber.
|
|
|
|
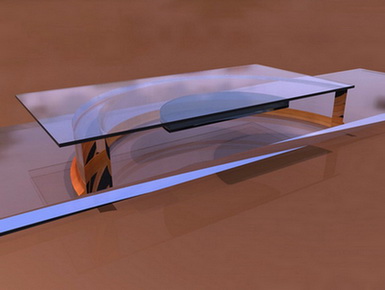
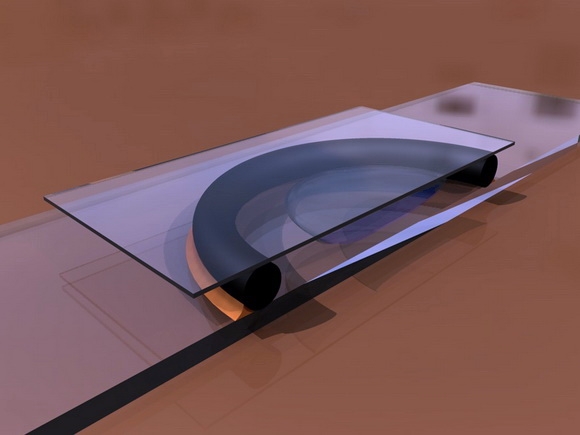
In
the best case (experience facilitates it) the circular coverslip and a flat
culture drop shall be suspended in the center of the chamber. The chamber can
have the height you want. The drop does not evaporate because it is in a
saturated atmosphere, and observation may be maintained for a long time, with
the material distributed in a thin, uniform layer of water, which avoids the
illumination problems of the hanging drop. If you have suitable sizes (10x10 or
12 x 12 mm) you can also use square coverslips, of course.
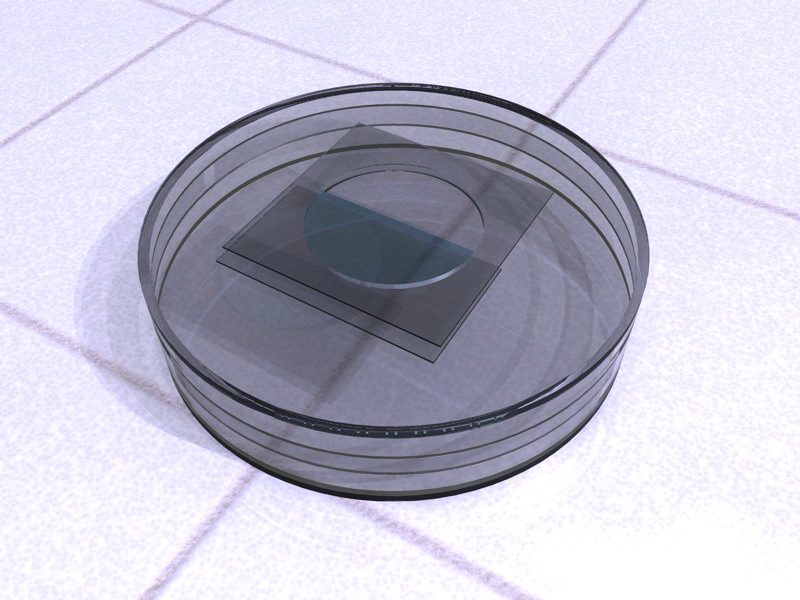
** Thick MICRO-AQUARIUM
FOR LONG TIME OBSERVATIONS - Another micro-aquarium, more elaborate, but also relatively simple,
suitable for somewhat larger organisms, observable at medium and low powers,
can be prepared with circular plastic boxes, about 5 cm in diameter which are
often sold in stores providing articles for children. In the center of
the lid of the box a hole whose diameter must be smaller than the width of a
coverslip (15 or 20 mm in diameter is good) is carefully made.
The outside of the hole is plugged with a
coverslip carefully cemented. The inside is plugged with another coverslip, but
cemented covering only half or just more, the diameter of the hole. Once the
adhesive dry, it remains formed between the two coverslips a semicircular
microacuaria, with a depth equivalent to the thickness of the plastic cap used.
The interior coverslip can be adhered with Vaseline, reinforcing its corners
with nail varnish, or paraffin to have an easier to clean aquaria.
To use this aquarium a ring of filter
paper is placed at the bottom of the box (the center is left open for the
passage of microscope light) which is saturated with water. Fill the cell with
the sample containing the organisms to observe and cover the box. In this cell
atmosphere, saturated with water vapor, the cell will host organisms for days,
allowing a continued study of development, cycles, and various
physiological phenomena.
As the external aquarium wall is a coverslip, this chamber could be used even with an inverted microscope. Cut a disc of thin plastic, or even paper, make a hole in the center similar to the aquarium hole, and stick this separator to the external wall of the box. This would protect the external coverslip from accidents over the inverted microscope stage. In this case, the interior coverslip wall can be dispensed, and the entire surface of the hole would be the research field. This wet-box is the only one that offer this opportunity.
Of course, uncovering the box, food can be
added to micro-aquarium, or the medium can be changed in whole or in part. The
box should be open up periodically to allow for a renewal of the indoor air, or
to change the ring of moist paper if there are bacteria, algae or fungi growing
on it.
COIN'S BOX MICRO-AQUARIUM
- Martin Mach suggested the use of plastic boxes used to display
coins, which are about 3.5 mm deep, allowing a cylindrical drop, that thick, to
be centered inside the box. This big wet chamber was suggested to facilitate
the observation of Tardigrada in the stereoscope. But it is clear that has many
other possibilities. See
Review
items # 29 and # 30 of his "Tardigrades
Magazine"
CONCLUSIONS
Therefore, if the microscopist is in need
for a micro-aquarium (To answer for exmple: How long does the development of a Rotaria embryo last? Can I
see the hatching of a rotifer egg? How often does Adineta lay an egg? How many
times a day does a Coleps, or Euplotes divide? At which rate does an Aeolosoma produce
its paratomic offspring?) it would be able to find easily in their home environment,
or nearby, materials to convert
their normal slides and coverslips into one or more versions of the instruments
described in this two part article.
And ... is there still room for invention
and discovery?
Probably in terms of materials, but, as we have seen, the concepts are stable
for much more than a century, as this advanced growing slide published in 1905, demonstrates:
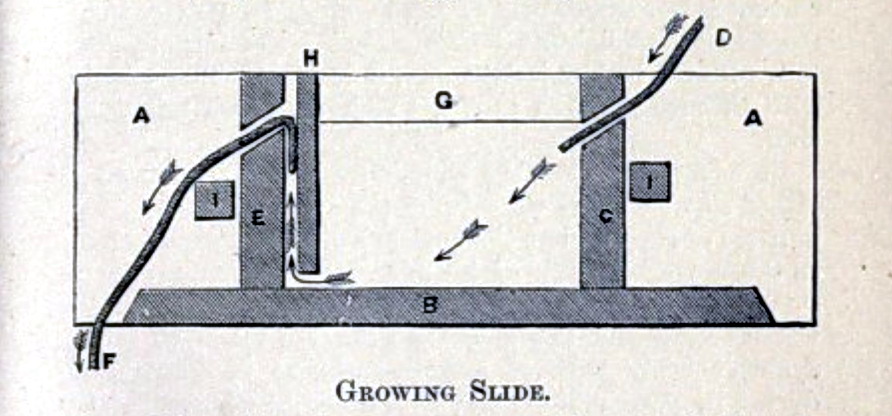
http://www.archive.org/details/elementsapplied01winsgoog
Charles-Edward Amory Winslow Elements of Applied
Microscopy: A Text-boook for Beginners (1905)
There
is even an electrically warmed slide which could be possibly imitated and
adapted to modern electronics, by some of the many amateurs (who dont live
in Cancún of course, where such accessories are absolutely useless) described in
the above cited book of S. Stricker.
I
have left out many specialized wet chambers, designed from the end of the
19th century to now, to warm the samples (parasitological ones for ex.), to study
thermotaxis, or galvanotaxis, or phototaxis, etc. The interested microscopist
can find them in the above linked Strikers and Amorys and Davis's books, and others,
explore the list of titles in Internet Archives. Even if many materials are now outdated, or
if there are new techniques to apply with advantages, their descriptions are
inspiring.
I
think that the opportunity open by INTERNET ARCHIVES publishing very old, but much interesting
and fertile books on microscopy and related disciplines like histology, or
parasitology, must be profited by amateur microscopists to know the published
versions of useful techniques and devices. So they can devote his efforts to
adapt them to our modern times.
You
could discover that by 1882 ALL the most useful instruments used as auxiliaries
for the bright field microscope were invented and were commercially produced.
Read on line Microscopy by George Edward Davis, published that year.
WELL! A lot is published here. Read it. Refer
to the cited sources. Remember it. Use it. We have reviewed over a century of
descriptions of microaquaria, wet chambers for hanging drops and flat hanging
drops, humid chambers to hold the wet chambers, and microaquaria, etc. And I am
sure that the story doesnt end here...
APPENDIX
I
would also draw attention to this revolutionary and highly specialized wet
chamber, which those amateurs who like to explore the bacteria they found in
their studied media would appreciate. As described in
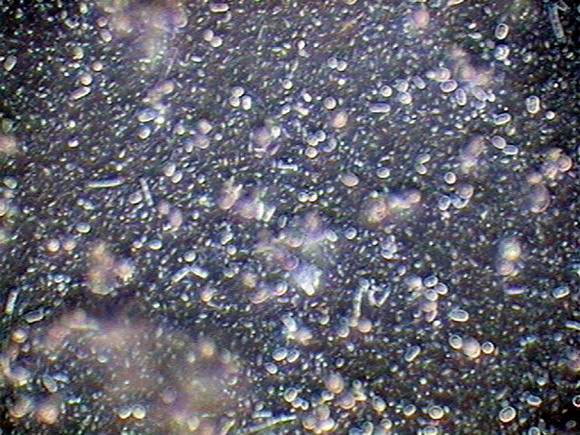
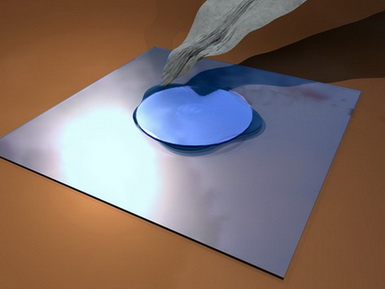
If
you study one of the very common mobile bacteria, the usual picture
you can take without recourse to the techniques of stained smears, is like the
upper half of the illustration below.
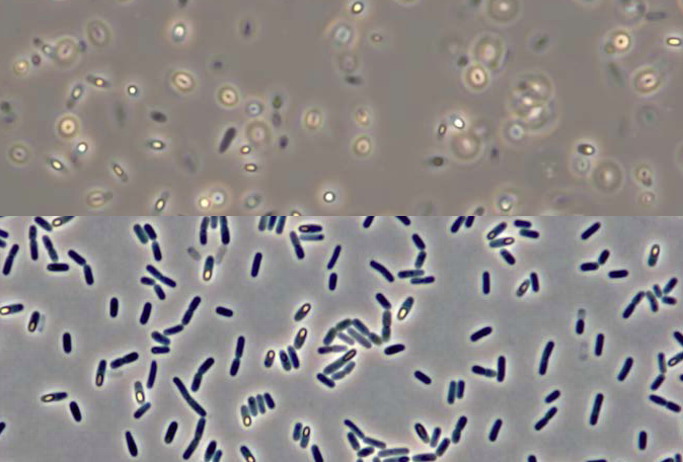
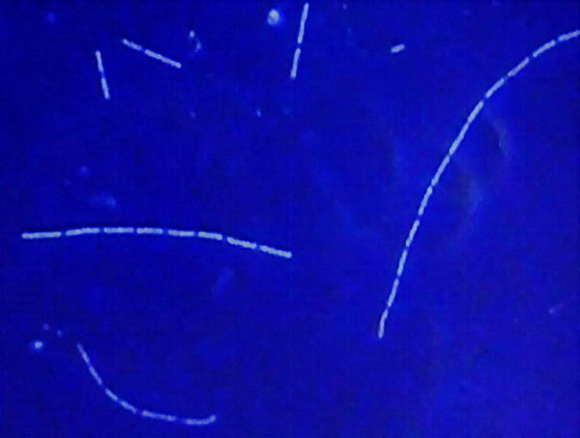
But if you use an agar bed laid over the slide, the liquid around the bacteria will be absorbed, the bacteria stop over the surface of the gel and the pictures you can take will be similar to the second half, which I like more than the common Gram stained smear technique. (Picture modified from the original paper.)
**It is possible to lay an agar film over the slide in more simple ways than the standardized methods the authors use. Make a two storey adhesive tape cell (100 microns deep). Fill it with 0.5 - 1% melted agar. Take a very cold and humid slide and apply to the surface. After a few seconds slip the upper slide away. You must have a good field of experimentation between the tapes.
Here the authors use Phase Contrast, but you can see by the following two pictures, one
of which I took from my review of the Book of Betsey Dexter Dyer A field Guide to Bacteria (http://www.microscopy-uk.org.uk/mag/artjan04/wdbacteria.html) that
you can see the bacteria without it.
|
|
|
|
A film of bacteria and yeast over
a water surface. |
Chains of bacili, in a bacterial film over water. Motic DC3 |