|
by Jim Harper, Spartanburg, SC, USA |
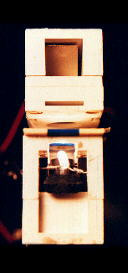
I had the good fortune to purchase several McArthur microscopes from Mr. Brian Adams of the UK and later from Onview.net Ltd On-line Microscopy Shop before they were all sold. In all, I purchased five pairs of microscopes and was able to bring each one to good working condition.WIDTH=1After cleaning the microscope following instructions provided by Guido Santacana of Puerto Rico, I discovered several simple additions to the microscope that enhance its operation. All of the additions can easily be removed so that the original microscope can be carried in one's pocket.
Internal Lighting
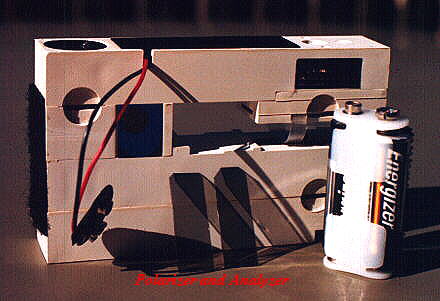
I quickly discovered that 2 AA batteries would not fit into the internal battery compartment--and I got them back out with great difficulty! I decided to externally mount the batteries in such a way that they could easily be attached and easily removed. I obtained a two-AA battery holder with a 9V battery type of connector as shown in the photos. The battery holder is attached with Velcro tape. I used the soft, "fuzzy" half of the tape on the body of the microscope so that when the battery holder is removed the bare tape won't "grab" the fabric of my shirt pocket.
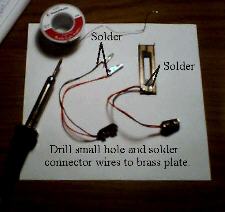
The 9V connector was soldered to the coverplate as shown. After drilling a 1/16th inch hole into the brass plate of each conductor (trying not to penetrate the plastic) I exposed the metal leads of the connector and soldered into the holes drilled into the brass. Polarity is not important as long as there is sufficient length to reach the battery holder.
After connecting the battery to the leads I tested the operation of the internal light. Cleaning and adjusting contacts was necessary to make the light work. I have not found a burned-out light bulb yet.
After using the microscope I discovered that it was excellent for examining objects suitable for transmitted light, but opaque objects were not easily examined. I decided to add an additional light source to provide top lighting to the specimen.
Adding Top Lighting to the Microscope
The first step was to obtain a small bulb and mount it so that it would not interfere with the movement of the objective microscope slider. I used a halogen replacement bulb for a high intensity penlight flashlight (EverReady T1-2). This bulb is about 10 mm length with two metal leads at its base.
I bent the leads to a 45° angle away from each other and soldered an 8 inch length of fine gauge wire to each lead.
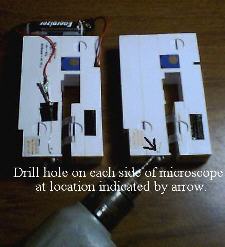
Next, I drilled a small (1/16th inch) hole through the microscope plastic near the objective slider on both sides of the microscope as shown in the photo.
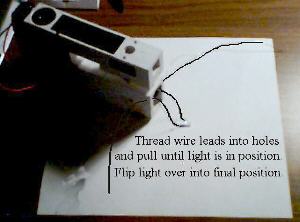
Once the holes were drilled, I simply threaded the bulb leads into the holes and carefully worked the bulb toward the objective slider, while pulling the leads through the holes to the outside of the microscope. When the light was nearly all of the way in, I flipped it over so that it points at an angle aimed at where the sample would be when a slide is in place. (Remember that the "top" light is actually under the slide since the objective lens is also under the slide.) I pulled the wires as tight as possible and using a piece of electrical tape, I secured the wires on each side of the microscope. I trimmed excess wire leaving a short length of wire exposed to attach alligator clip connectors.
Rotating the microscope shows the added light source:
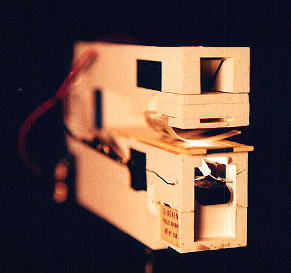
Soldering an alligator clip to each lead of a 9V battery connector provided an easy connection to the battery pack already installed on the microscope. When complete, the incident, oblique light source gives something like a dark field image. If the objective slider ever needs to be removed from the microscope, the electrical tape can be peeled away and the wires gently pulled back through the holes to remove the bulb.
Images
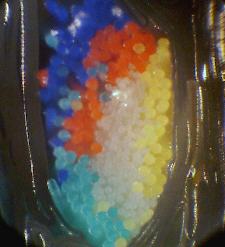
The first image that illustrates the oblique lighting is a cross-section device containing opaque fibers. The image is formed by the light reflecting off the cut ends of the fiber cross-sections. The yarn is a blend of four different colors of solution-dyed polypropylene and undyed polyester.
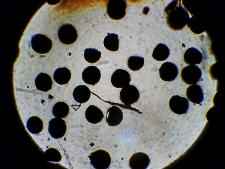
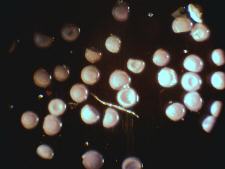
The second images shows shrimp eggs using transmitted and reflected light. The transmitted light image is not very satisfying, whereas, the reflected light image clearly has more information. The concavity of some of the eggs is visible.
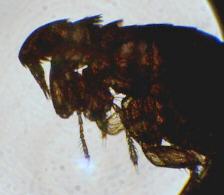
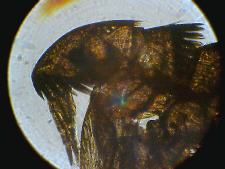
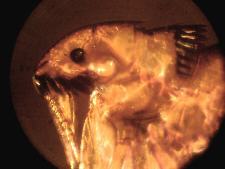
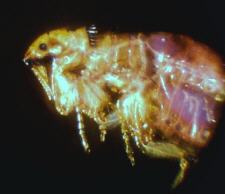
Finally the following images were of a guest that was bouncing around on my son just before his Sunday afternoon nap and after playing with the dog. Fortunately, my Sunday afternoon leisure allowed me the opportunity to mount one of the microscopist's favorite subjects: the flea. Again, the top lighting for this type of specimen provides a much more interesting photo.
Author's note:
The micrographs in this article were taken using a Polaroid Fun Flash digital camera (640x480 pixel resolution) resting on the eyepiece of a Leitz microscope. They were transferred to Aldus Photostyler and resampled to 75 pixel/in resolution for faster loading. While the images were not created using the McArthur microscope, they are representative of what is seen using transmitted or incident top lighting. The Polaroid Fun Flash was marginal in quality and photographs were seen to have a hot spot and some mottling of the image. The use of the digital Polaroid was performed as an experiment which was only partially successful. Removal of the camera's lens and using only the optics of the microscope may improve the results.
The mounting of the flea was accomplished by using a tip from Micscape by Alan Brinkworth and Maurice Smith. After drowning the flea in water, it was removed and immersed in isopropanol. It was then transferred to a slide where a drop of Duro 8DZ1086A UV curable glass adhesive was added. The coverslip was placed on the preparation and left in direct sunshine for two hours.
Comments to the author Jim Harper are welcomed.
© Microscopy UK or their contributors.
Published in the September 2000 edition of Micscape Magazine.
Please report any Web problems or offer general comments to the Micscape Editor,
via the contact on current Micscape Index.Micscape is the on-line monthly magazine of the Microscopy UK web
site at Microscopy-UK