High magnification macrophotography with film based single lens reflex (SLR) 35 mm cameras was a constant challenge, especially, one has to contend with problems of dim focusing screens and exposure compensation/white balance etc. However, the SLR era has introduced several camera attachments, gear and gadgets (macro lenses, bellows, focusing rails, focusing stages and macro-ring flash etc.), that have enhanced the art of macrophotography.
Digital cameras (CP990/995 etc.)
with built-in macro capability, LCD focus screen, white balance compensation,
matrix metering etc., to some extent have simplified the "art" of macrophotography.
In addition, many of the 35 mm SLR macro gear could be easily adapted/modified
to work with the Coolpix 990, and yielding even higher magnification images,
more than 15x (subject size magnification). On the Coolpix 990/995-body,
both LCD and lens angle can be rotated 180 degrees independently, which
allows even more flexibility with the macro attachments. Modification of
35 mm macro equipment and lighting techniques are discussed below.
With this set-up it is possible to do both low power macrophotography (using
Coolpix 990/995 built in macro mode) and higher magnification macro imaging
using 35 mm SLR macro and microscope objective lenses.
Macro Equipment used with the Coolpix 990/995
Most of the equipment and attachments are from the Olympus 35 mm camera system. However, any SLR macro equipment with proper adapters can be used.
Extension Tubes - 1.4 and 2.0 cm Olympus telescopic extension tube (Fig. 18) Bellows and macro stand (Olympus and Pentax) Focusing rails and slide copy attachment Macro lenses - 135 mm, 80 mm, 50 mm, 38 mm (all Olympus), 12.5 mm (Minolta) Microscope objective lenses - 2x and 4x objective lens connected through RMS adapter Dissecting microscope base, rack and pinion focusing rails
Low power macrophotography
The Coolpix 990/995 body is mounted
on a modified Pentax bellows rear standard (see the fig. 20 & 21,)
and the bellows focusing rail itself is attached to the Olympus macro-stand
(fig. 19 far right). This set-up allows independent movements of subject
and/or camera body, and movements of either front or rear bellow standard
achieve focusing/framing of the subject. A close-up lens attachment (28
mm filter size) may be used to further increase the magnification. This
flexibility is especially useful during 35 mm slide copying, macro imaging
of pathology microscope slides and small object/mineral photography.
Higher magnification macrophotography (more than 10x)
Macrophotography gear is connected
to the Coolpix 990/995 through the microscope adapter (see part
one of this article for details). The extension tube inside the microscope
adapter connects the Olympus macro equipment (macro lenses & microscope
low power objective lens), see the figures 22 and 24. Image optimization
is done through the same relay lens/eyepiece combination. Excellent table
top and field macrophotography is possible. The dissecting microscope base
provides stability and fine focusing capability. A stable base is essential
for avoiding camera movements, as slight camera shake can spoil images
at high magnification. With these macro attachments, the built in macro
capability of CP990/995 is enhanced and magnifications in the range of
15x - 20x, (subject life-size magnification), are possible.
Lighting
Lighting is very critical for obtaining
good macro images. For even transmission lighting a slim light box
(Visual Plus, Inc) is used. This type of lighting is suited for Kodachrome
slide copying and microscope slides (figure 20). For reflected light macrophotography,
a tungsten light source, flash (slave and ring flash,) are utilized. For
smaller objects, and to depict surface texture (relief) fiber optic light
guides (figure 25a - 25c) come in very handy. An inexpensive fiber
optic light source is constructed using a Vivitar 283 system flash (figure
25b). The electric utility box is drilled to accept fiber optic guides
(Edmund Scientific company, USA,) and is attached to the flash head. Flash
output is controlled through the Vivitar variable power module (fractions
of f-stop adjustment are possible). Additional light modeling, directional
lighting are achieved through movement of the subject (bellows front standard)
and angle of fiber optic guide placement.
Results
Magnification calibration is done on prints and calculated based on the image ratio and included scale, e.g. fig. 28 is a blow up "one millimeter" filling the entire LCD frame.
Note: I have included only a few images taken with this set-up; however, one can easily see the infinite imaging possibilities with this system.
All comments to the author Vishnu Reddy are welcomed.
Vishnu V. B Reddy, MD.
University of Alabama Medical Center
Birmingham, AL
USA
Equipment details

Fig 18. Microscope adapter and various macro lenses and telescopic extension tube (foreground). |
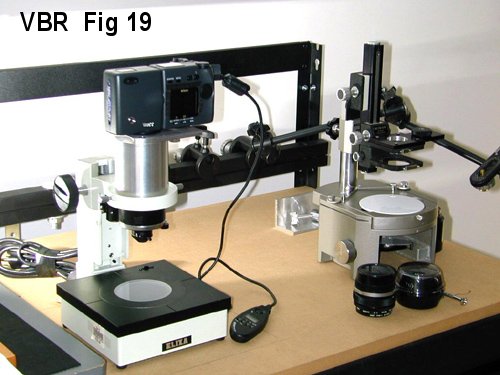
Fig 19. CP990 is mounted on the dissecting microscope base (left). Olympus macro stand with modified Pentax bellows rail and camera mounting base plate (far right). |
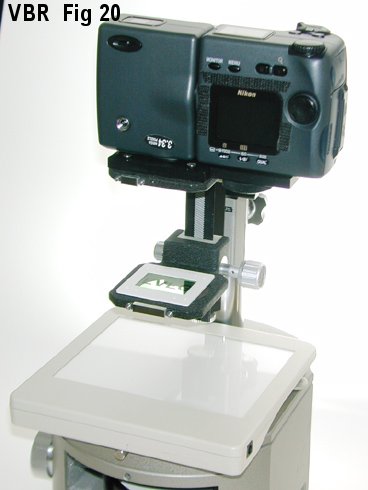
Fig 20. Slide copy set-up with bellow standard and rails. Illumination is provided by a slim light box (5000K illumination, Visual Plus, Inc, USA). |
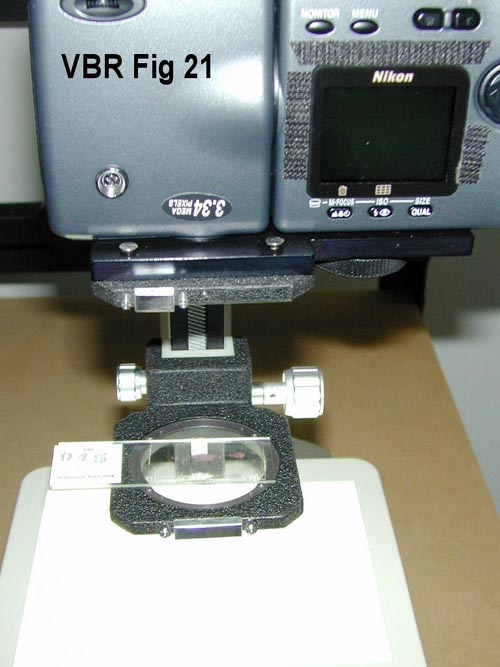
Fig 21. Slide copy set-up with bellow rails. Illumination is provided by a thin light box (5000K, Visual Plus Inc). |
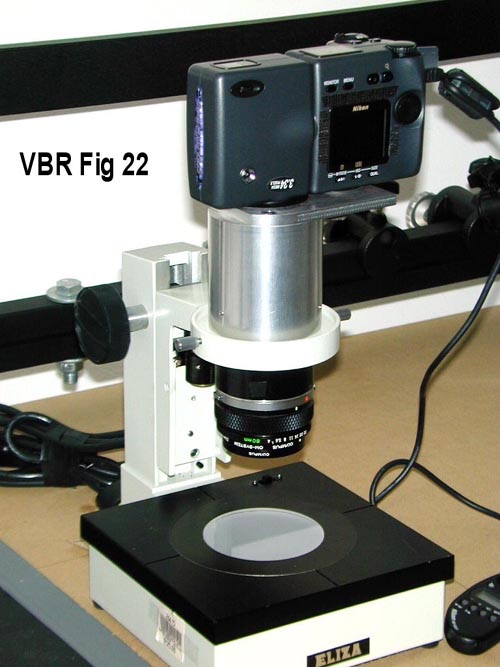
Fig 22. Adapter mounted on dissecting microscope base for higher magnification imaging (20 mm macro lens). |

Fig 23. Adapter mounted on dissecting microscope base for higher magnification imaging (12.5 mm macro lens). |
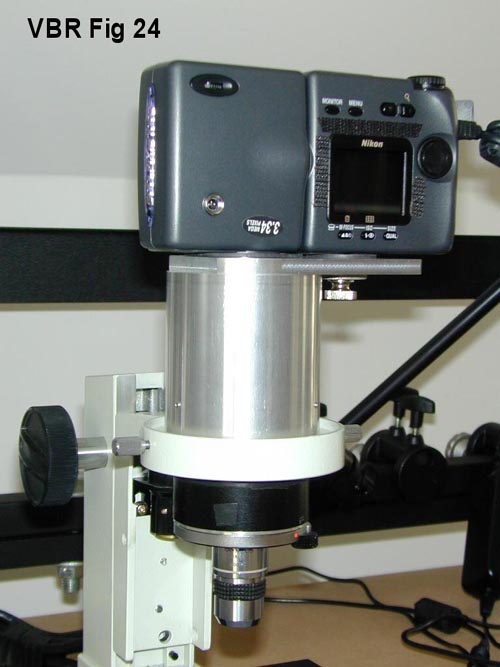
Fig 24. Adapter mounted on dissecting microscope base for higher magnification imaging (2x Olympus objective lens mounted through RMS thread adapter). |
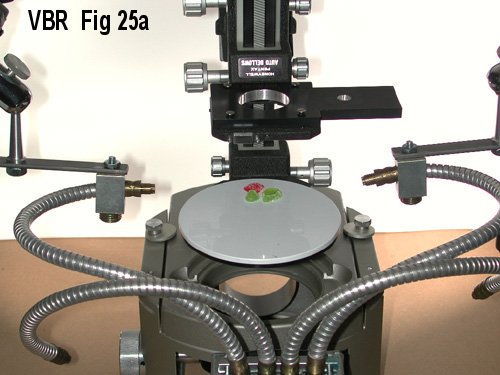
Fig 25a. Fiber optic guides illuminate small objects on the focusing stage. The two side fiber optic guides siphon Vivitar 283 flash and provide precise directional lighting. The extra fiber optic guides may be used for additional modelling and fill flash effect. |
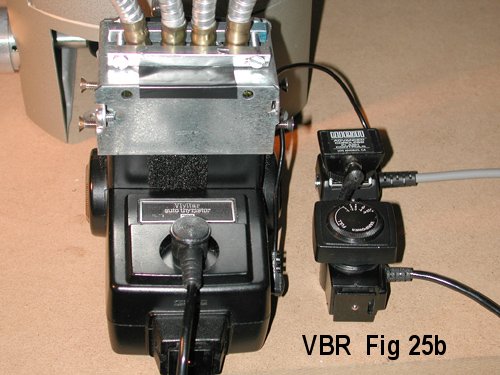
Fig 25b. Four fiber optic guides are inserted into electrical utility box, and the box itself is attached to the Vivitar 283 flash head. Close proximity to the flash head assures maximum light capture. A variable power module (lower right) is used for controlling flash duration. An in-line sync voltage regulator located above variable power module (Wein, Inc, USA) is needed to protect the Coolpix camera, (most old flash units have high sync voltages that can damage current digital camera circuits). |
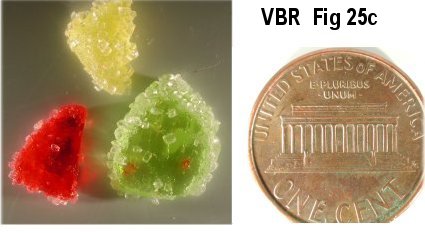
Fig 25c. Directional lighting highlights sugar crystals in candy and copper coin texture. |
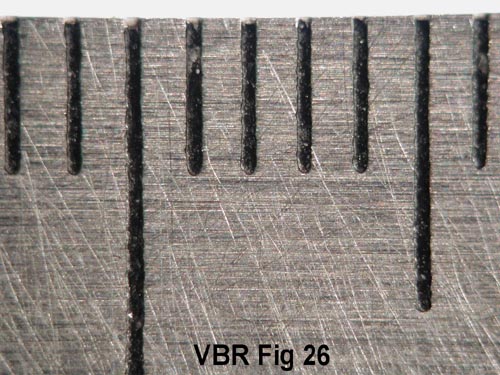
Fig 26. Size calibration Full frame image of millimeter scale photographed through 50 mm Olympus macro lens. |
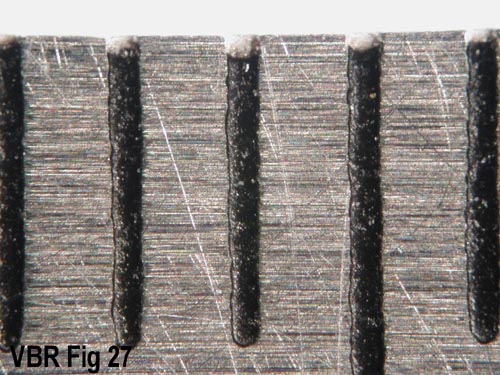
Fig 27. Size calibration Full frame image of millimeter scale potographed through 38mm Olympus macro lens. |
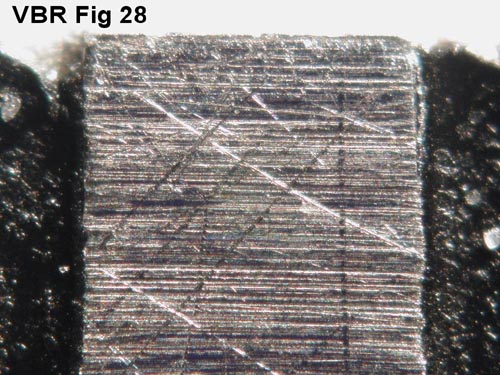
Fig 28. Size calibration Full frame image of millimeter scale photographed through 12.5 Minolta macro lens. |
Page
two shows some results from the above equipment.