Simple macro experiments using crossed-polarizers.
Table-top experiments with or without a digital camera and two polarizers.
By Ian Walker. UK.
The beautiful shapes and colours from everyday plastic objects seen using a simple light source and two pieces of polarizing material can be an excellent introduction to young children gaining an interest for the first time in the magical world of light and colour. Although the way light interacts with the object using crossed-polars is beyond what most youngsters need to know for the present it doesn't detract from the ever changing vivid hues they can see when you turn the most basic plastic object like a ruler between two sheets of polarizing material set so their polarizing effect is at right angles to each other. The quickest way to achieve this is to rotate one polarizer against the other until very little light is passing through when say looking at the sky or a light box. For just artistic purposes it is not essential to have the polarizing materials with their orientation at right angles since you will still see colours from your subject but the contrast may not be as good. Not all clear plastic objects will create colours when viewed between the polarizers but this is part of the fun that children can have going round the house and trying them out [in general it is the hard brittle plastics which have some of the best effects]. You don't even need a camera or tripod if you just wish to look at the effect and remember the colours will change dramatically when you turn the object round.
Some time ago my brother wrote two articles about everyday objects seen under crossed-polars without using anything more than a couple of sheets of polarization material, a light source and a video camera using the small image grabber 'Snappy' to get the images onto the PC in the first article and a Sony S75 digicam in the second. I thought it would be interesting to write an update using my Canon Ixus 400 camera. His original articles were Multi-coloured Macro and the follow up article Micscape Image Gallery.
The equipment is as follows:
The light unit is a Jessops light box used for viewing photographic slides having an illuminating area of 12cm by 10cm, it can be run off 4X AA 1.2-1.5V batteries or an optional dedicated mains adapter and costs about Ł20. But any even light source could be used as long as it is not too bright, remember though that the glass envelope of a typical mains voltage 60 watt bulb runs extremely hot and can easily burn your fingers, can damage filters and possibly melt plastic if too close. The light boxes for slides use small fluorescent lamps, run cold and are much safer.
The polarizing material sitting on the light source can be a polarizing filter from a camera [preferably at least 49mm diameter] or polarizing sheets of various sizes can be bought from e.g. Knight Optical in the UK and cut to suit your requirements. Their code number OTW100100 100mm square piece for Ł11.75 could be a good place to start being large enough to cut into smaller pieces if required but it may need a cardboard mounting frame being quite thin. Most digital cameras will work with linear polarizer sheet which is more common but a few may need circular polarizer due to the way they focus, check your digicam manual.
The second polarizer can be a small piece of polarizing material fixed temporarily to your digicam lens barrel using Blu-Tak keeping this well clear of the lens and remember a lot of the modern digicams use retracting lens sections so make sure you remove any temporary fixing material before you turn off the camera. A larger piece hand held above the subject can be used if you just want to look at the effect, see also my other article this month about attaching polarizers to small digicams, or you may be lucky enough to own one of the digicams that can have polarizers fitted either by special adapter or using a threaded lens barrel like several new and older models from Canon and Olympus.
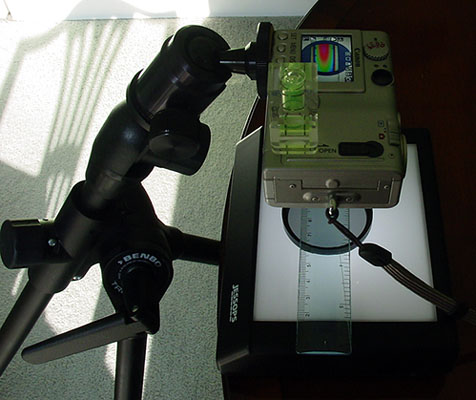
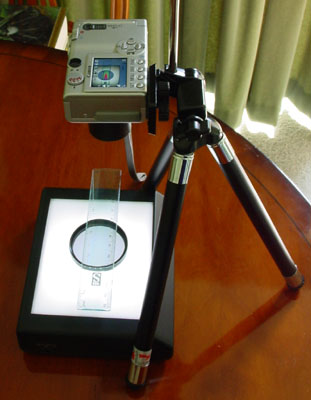
A small table top tripod or a larger floor standing version and preferably a spirit level designed to fit into the hot shoe which I have just balanced on the back of the Canon, this prevents parallax errors when taking the pictures. A cheap alternative is to find a large tube to support the body of the camera with the other end resting on the light box, this will fix the distance and prevent camera shake but you will have to cut it long enough for the camera to focus properly. However, it may get in the way of moving your subject about easily.
My early photographic experiments were carried out without any accessories by hand holding the camera, resting my fingertips on the table to prevent excessive movement with quite good results.
|
|
|
Details of the set-up with the left image showing a full size tripod in use and on the right a mini table-top tripod, you can see my polarizing filter from a camera sitting on the Jessops light box and in this case a plastic ruler is on top of the filter being the subject under investigation. The other polarizer fitted to the camera is attached by means of my home made filter adapter to the Canon and can be seen in the right picture protruding below the camera. If you look closely at the left image you can see the polarizing effect on the Camera LCD panel. Setting the self timer on the camera reduces the possibility of camera shake and remember to set the camera to macro mode, not all digicams have a good macro mode with some of the older ones have a fixed minimum focusing distance of around 20-30cm so you may need to measure this accurately with a ruler, this will limit the size of image you can retrieve for small objects.
Some images taken with the Canon using self timer to prevent camera shake.
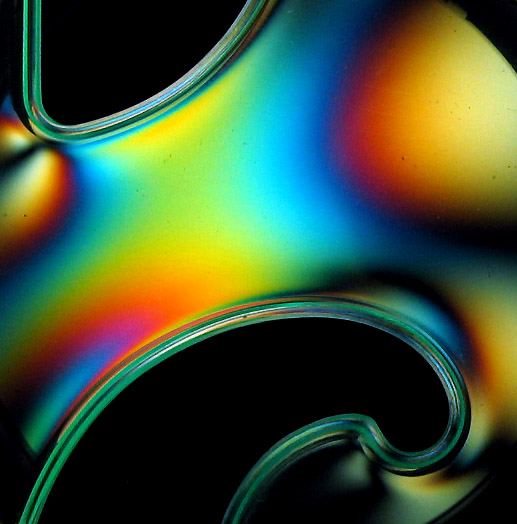
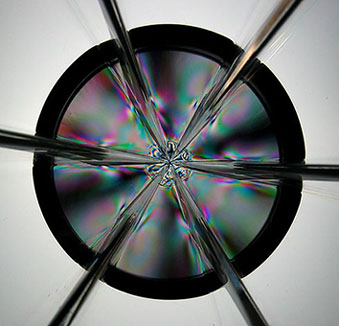
French Curves, engineering drawing aids before CAD, turning the curves produces a brilliant effect.

Part of an engineering drawing aid showing stress points, flexing the plastic will change the colours.
|
|
|
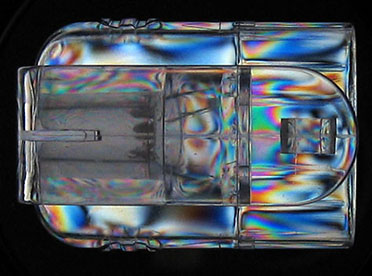
Even thick objects like the cap from a Pentel correction fluid dispenser can look interesting.
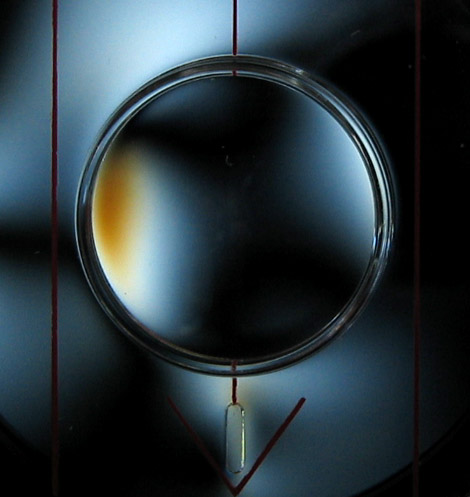
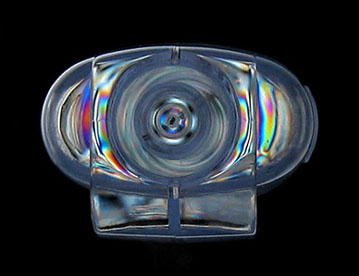
Close-up of a Silva compass magnifier.
|
|
|
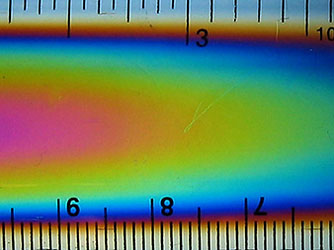
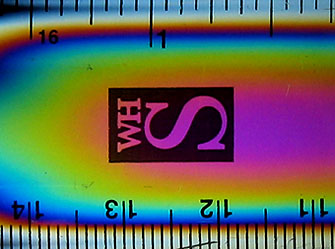
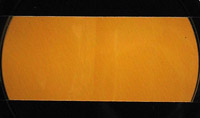
Two parts of a 15 cm ruler.
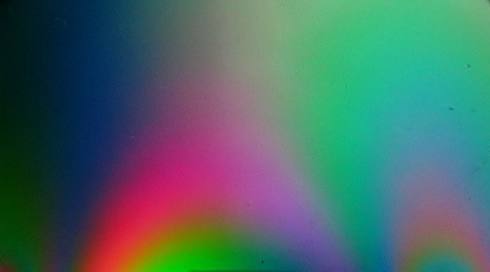
Sheet of plastic showing stress areas.
Modern Hoya linear polarizer case.
|
|
|
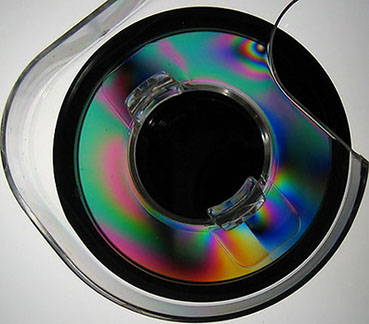
Plastic support for a moon globe with the inner section only under crossed-polars and Sellotape dispenser with tape removed.
Whole preparations of microscope slides.
Although the definition from the Canon Ixus 400 in macro mode when looking at microscope slides is by no means exceptional it can provide images that would be very difficult to obtain using a microscope even with the lowest power objectives since it can cover a wide area. This can be particularly useful for slides like Gabbro where several minerals make up the rock, looking at the whole preparation gives you a good overview of the percentages of the different minerals.
See my Brother's article for comparison using a Nikon slide scanner to scan microscope slides including a similar section of Gabbro: Trials on scanning microscope slides, the slide scanner provides much better sharpness and resolution but if a modern digicam like the new 7 or 8 megapixel designs were used with much improved macro performance over the Ixus I think the images would become more comparable.
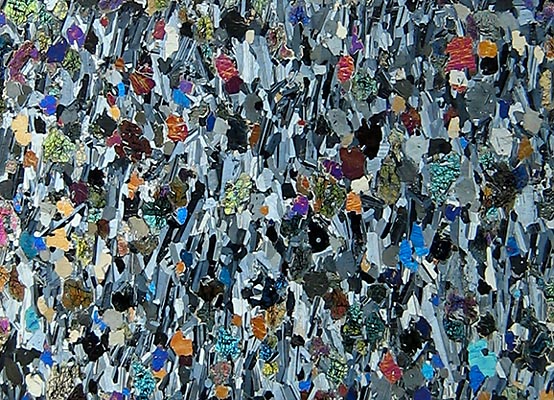
Complete section of Gabbro, Open University S260 set, Canon at minimum macro focus distance of 10cm.
|
|
|
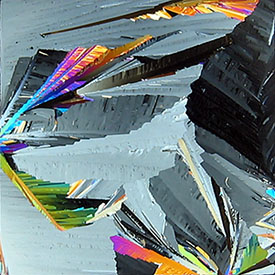
Two views of resorcinol covering the complete area of the coverslip, slide prepared by the late Eric Marson, NBS.
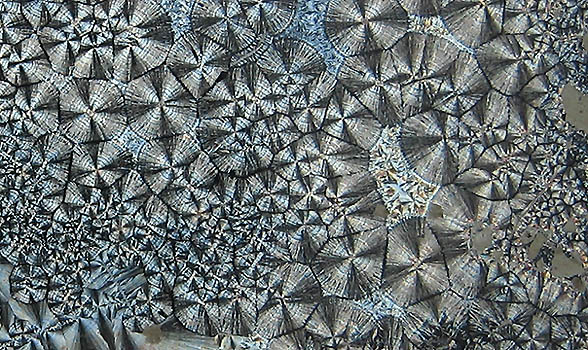
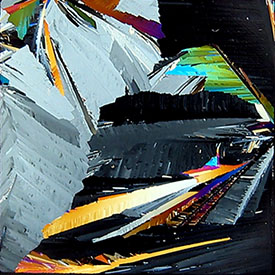
A large preparation of crystals covering an area of about 25mm by 16mm.
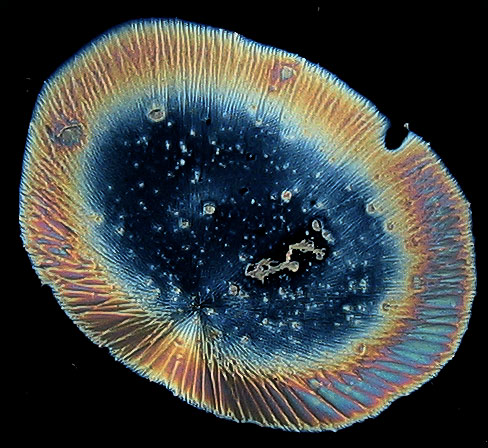
Ascorbic acid, unknown mounter.
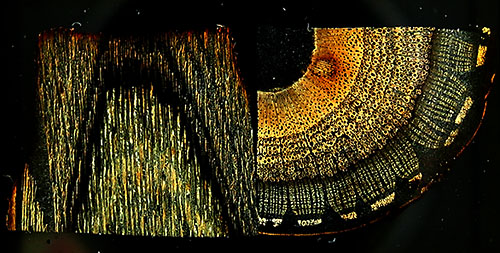
Indian Wood, a large preparation mounted by Norman.
Simple Sellotape Experiments.
|
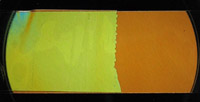
One strip of Sellotape. |
|
|
Two strips of Sellotape partly overlaid. |
|
|
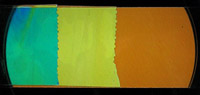
Three strips of Sellotape partly overlaid. |
|
the end.
Comments to the author, Ian Walker, are welcomed.
Published in the September 2004 edition of Micscape.
Please report any Web problems or offer general comments to the Micscape Editor.
Micscape is the on-line
monthly magazine of the Microscopy UK web
site at
Microscopy-UK
© Onview.net Ltd, Microscopy-UK, and all contributors 1995 onwards. All rights reserved. Main site is at www.microscopy-uk.org.uk with full mirror at www.microscopy-uk.net .