Carl Zeiss Axiostar Image Gallery using the 5x CP-Achromat.
By Ian Walker. UK.
Note due to the large file sizes this article is best viewed using a broadband Internet connection.
All images taken with the Canon G6 digital camera, you will need a 1600x1200 resolution screen for the larger versions of some of the images to be seen in their entirety.
Introduction.
The images in the gallery were all taken with the Zeiss 5x NA 0.12 CP-Achromat their introductory low priced objective plus the Zeiss universal digital camera adapter reviewed in detail this month, see the links at the end of the gallery. All the images were taken using a novel contrast technique comprising variable oblique Rheinberg illumination enhanced with crossed-polars but to add an extra 'twist' the materials used for the Rheinberg filter are in themselves acting like a retardation plate changing the contrast of the colours introduced by the red and blue Rheinberg filter and the brightness of the background depending on its rotational position. This technique would be very difficult with a normal swing-in filter tray like a LOMO but it is possible with the Zeiss because of its large slot designed for phase and dark-field sliders allowing experimentation by the end user for their own contrast techniques. All the subjects on the slides are crossed-polar active.
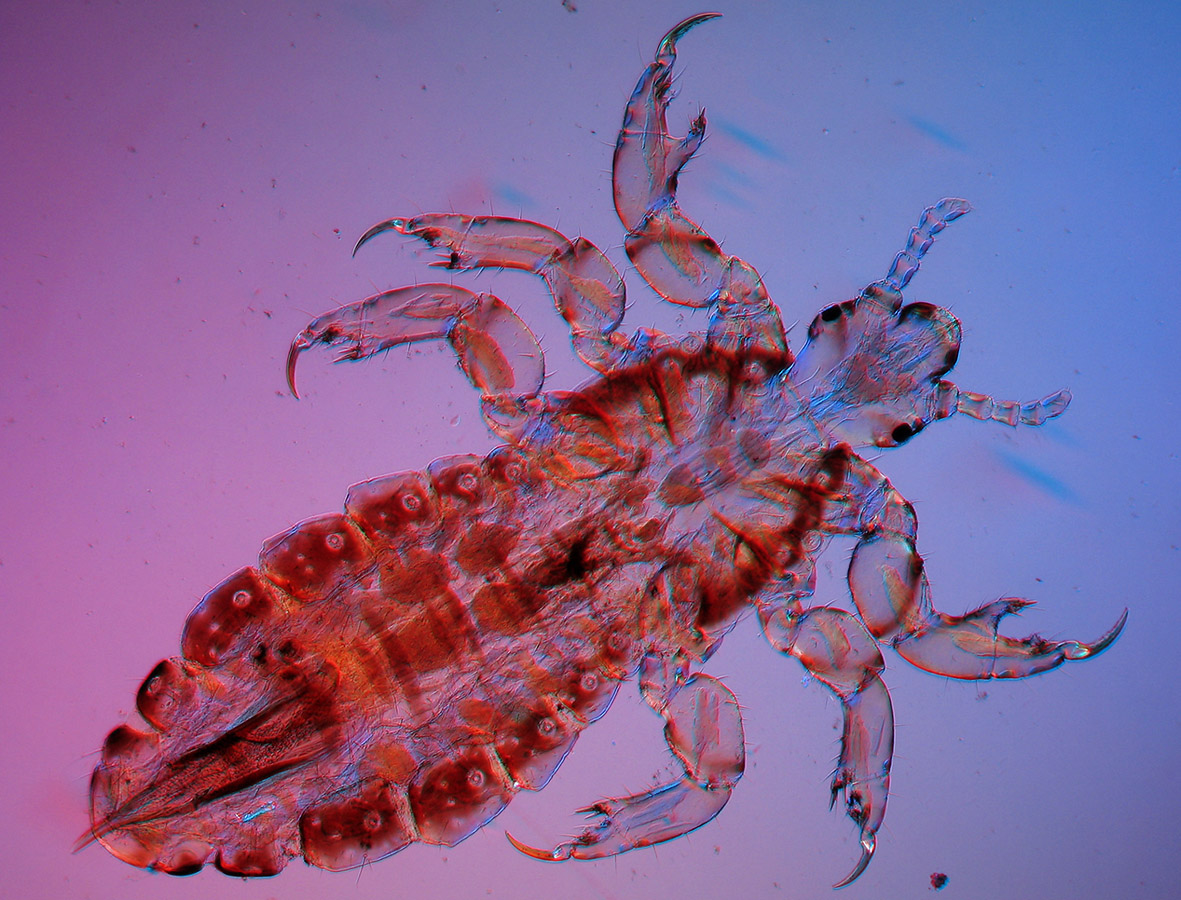
Fig 1a. Human Louse mounted by C. M. Topping, click on the image for a larger version [approx 300Kb download].
Here there is a nice graduation of colour from pink to light blue, note the transparency of the legs and connecting tissue inside which has taken on blue and orange colours highlighting their structure. The claws appear to catch the light aided by the crossed-polars.
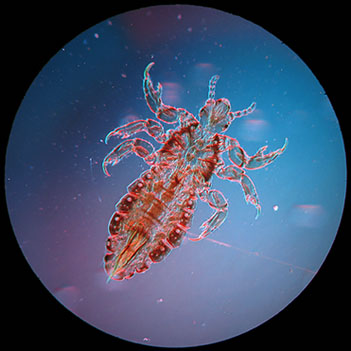
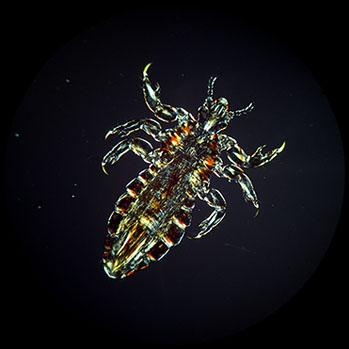
Figs 1b-1c.
For comparison, standard Rheinberg illumination using red and blue quadrants and crossed-polars. The Rheinberg image lacks subtlety and is harder to pick up finer detail whilst the crossed-polar image appears rather dense.
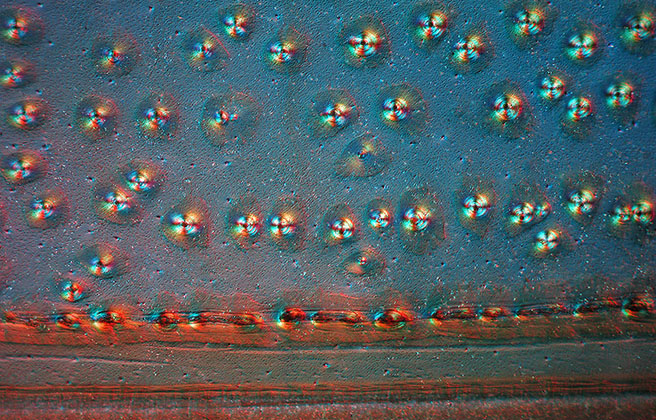
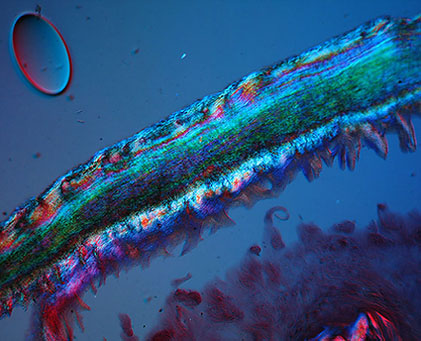
Fig 2a. Wing case of Water Beetle mounted by H. Ebbage.
A large amount of oblique lighting was used in capturing this image to provide relief to the various structures.
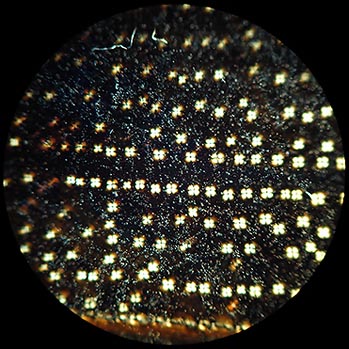
Fig 2b. For comparison, using crossed-polars only.
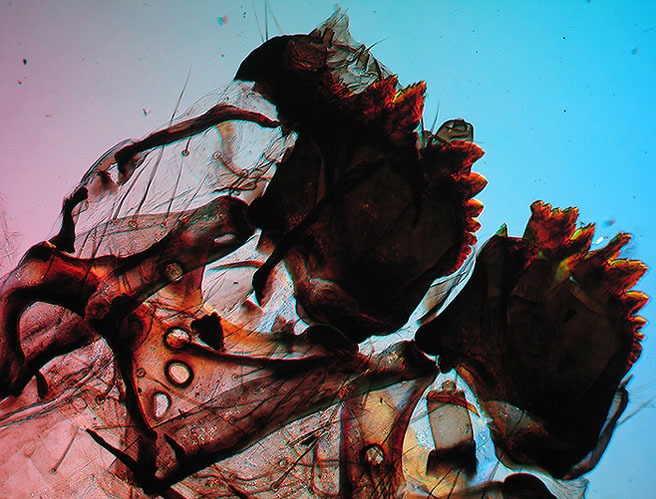
Fig 3. Mouthparts of a Silkworm, this is part of a whole Silkworm beautifully mounted by an unknown mounter.
An almost 3-dimensional effect has been obtained by careful alignment of the various contrast techniques, again a nice change of colour from pink to turquoise in the background.
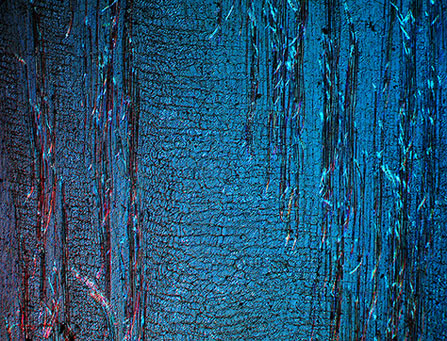
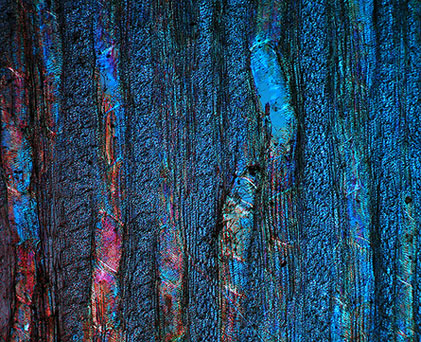
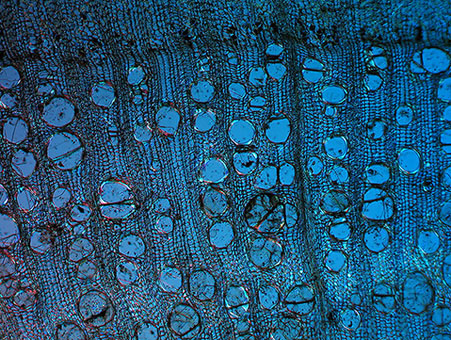
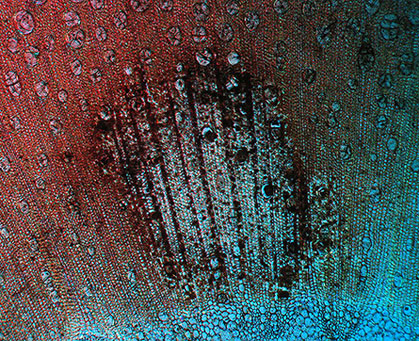
Figs 4-7. Four images of Indian Wood [Pechee luit], a slide mounted by Norman.
This set gives an idea of the colour variations that are possible from one slide using this imaging technique.
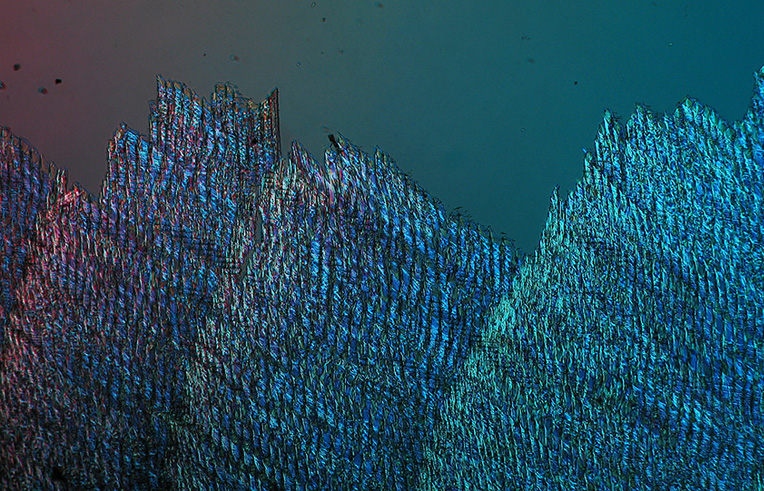
Fig 8. Section of Yew, mounted by an unknown mounter the 'depth effect' is better if you move much further away from your monitor.

Click on the image for a larger version [585Kb download].
Fig 9a. Foot pad of an Elephant mounted by S.L. [J. C. Tempere]. Normally I would always like full field flatness but the modest plan characteristic of the CP-Achromat actually draws the eye to the centre of the image where the main interest lies, a technique I think that Leica purposely used in designing the lenses of their roof prism binoculars, in this image the effect is much more pronounced in the full size version.
Fig 9b. For comparison, using crossed-polars only.
Figs 10-11. Section of human finger with nail, unknown mounter, pity about the dirty mount.
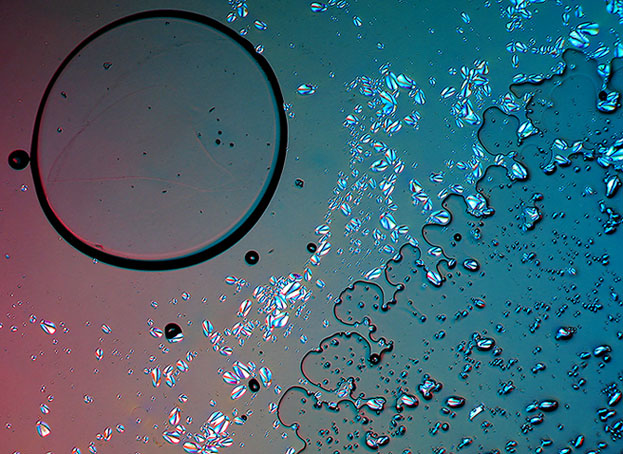
Fig 12. Potato starch with bubbles, unknown mounter.
Nice relief giving a 'stepped' appearance between the different parts of the subject.
Image stitching.
Photoshop Elements provides an extremely powerful image stitching solution called Photomerge and can be found in Version 3 by opening File/New/Photomerge or File/Photomerge in the original Elements. It is best if you open all the images you wish to process first in Version 3 you will then see the files in the process box within the Photomerge menu. Processing several large images can take some time on a modern computer so it is worthwhile deciding how big you wish the final picture size to be and then adjust either the camera for a relevant image format or use a batch command in Photoshop to downsize all your images. The best use for this technique is either when you cannot fit all the subject in the field of view as in the case of Fig 13. and Fig 14. and you haven't a lower powered objective or for artistic merit which can also include the possibility that you may wish to have an image printed to a large size. Using Photomerge it is not too difficult to achieve sizes of 8000 x 5000 pixels using a modest digicam but remember manipulating, viewing and processing images this large requires a lot of PC power and memory, an 'out of memory' message came up on my laptop which has 512Mb of RAM when I first tried to process about 17 images which made up the Silkworm image Fig 15. The image at the end of the article, I had to resize them all before I could process them again. The interesting thing about the algorithm used to process several images into a composite is that they can be vertical rows, horizontal rows or a combination. The scale of the sole fish image in Fig 14. combines 2 rows of 3 images and is of much larger size than Fig 13. comprising the minimum 2 images needed when using the 5x objective without vignetting.
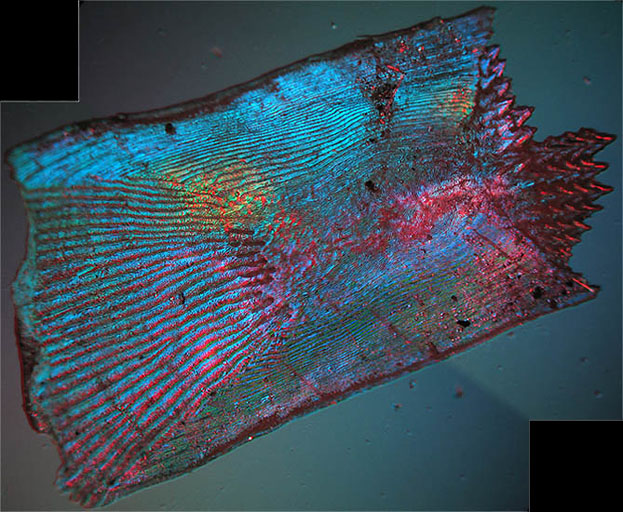
Fig 13. Scale of the Sole fish, very old paper covered slide, unknown mounter, recently cleaned and remounted.
The above image shows some beautiful hues, this capture has been left in its 'raw' state to show in this case the join of the two separate components making up the final picture, also the background has been left untouched.
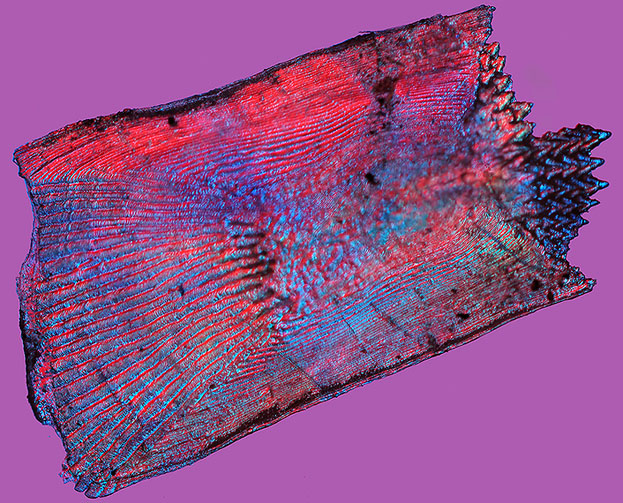
Fig 14.
A completed picture.
Scale of the Sole fish. Six images make up the above image, the original composite being 5836x4708 pixels, locked exposures to prevent obvious joins in the subject and in this case adding a vibrant background colour accurately based on the original tint provides an alternative appearance. Note the completely different colours on the scale due to manipulation of the various contrast elements compared to Fig 13.

Fig 15.
A complex task, click on the image for a larger view [133Kb download].
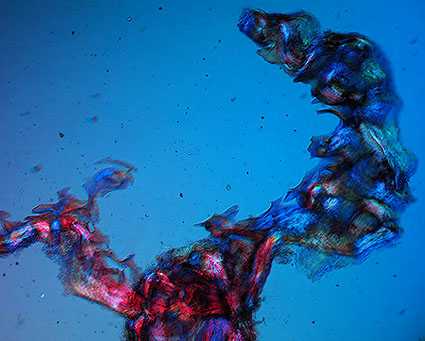
Part of the breathing tube network of a Silkworm. A very complex task for the Photomerge function, this crop from an even larger composite image contains around 9 images from a longer version of 17 images! Again, I purposely didn't lock the exposure throughout to show how the images connect together, the 5x objective is not providing sufficient field of view with respect to remembering where one image is with respect to the next but soon I hope to photograph the whole Silkworm providing a complete picture of the whole specimen allowing a detailed view of much of its internal structure.
Links.
Carl Zeiss Axiostar - A personal review.
Carl Zeiss universal digital camera adapter- A personal review.
the end.
Comments to the author, Ian Walker, are welcomed.
Published in the December 2004 edition of Micscape.
Please report any Web problems or offer general comments to the Micscape Editor.
Micscape is the on-line
monthly magazine of the Microscopy UK web
site at
Microscopy-UK
© Onview.net Ltd, Microscopy-UK, and all contributors 1995 onwards. All rights reserved. Main site is at www.microscopy-uk.org.uk with full mirror at www.microscopy-uk.net .