|
A Mystery About Micro-Technique: Part 1 by Richard L. Howey, Wyoming, USA |
In a box of old slides which I acquired recently, I am finding a number of puzzles, since only a few of the slides are labeled. There is a list on the sheet glued inside the lid, but no correlation to the numbers on the slides which appear to have been applied in paint. There are 68 slides and an additional 6 blank ones. It is indeed a miscellany of botanical sections, animal histological sections, some tapeworm segments, a mount of the frontal segments of a tapeworm including the scolex and suckers, a fairly nice whole mount of a tiny specimen of the jellyfish medusa of Obelia, and a marine hydroid. All of the specimens have been stained using a variety of undescribed materials and techniques.
There are no specific identifiers regarding age; however, my intuition tells me that they are at least 50 years old and very likely considerably older. Many of them have round cover glasses which are ringed with a brownish-black varnish. At the very bottom of the inside of the lid is a printed strip which says “Made In England”. I tend to trust that description and judging from the wear on the case I know that it certainly belongs to the “pre-Made In China” era.
However, these are not the mysteries that I want to address in this essay. There are 21 of these slides that are quite different from anything I have encountered before and one of them doesn’t have a specimen on it, so it will be the one I vandalize. I have already scraped the ringing varnish off and chipped away the small vestiges of balsam that have extruded out from under the cover glass. I tried prying a bit at the cover glass itself, but the balsam has set up quite hard–another indication that these slides are very likely quite old. I have encountered dated slides, much older than 50 years, in which some of the balsam had still not fully hardened. However a fully hardened balsam is by no means in itself a definitive determination of age, since the quality of the balsam, the type and amount of solvent, and temperature can all play a role in the process. I want this cover glass removed, so I am going to have to resort to immersing it in a powerful solvent and I’ll probably end up using xylene in a Petri dish placed in a shady spot outside, since I don’t have a fume hood. (Bear with me; we’re almost at a the point of the revelation of the mystery.) Xylene is highly volatile, highly toxic (even the vapors), and highly flammable (and it makes terrible martinis!). Because it is a powerful solvent, the process shouldn’t take long. “But what the devil are we looking for” you bellow in exasperation. Strangely, the answer is a small, thin rectangle of what at this point I am assuming is mica. That is the reason that I wish to remove the cover glass from the slide without a specimen to examine more closely the rectangular strip.
So, what’s the big deal? Well, actually, there are several aspects that are quite unusual.
1) In the 19th and early 20th Centuries, mica was often used as a compensator for polarization. It was easy to obtain and relatively inexpensive since it had a variety of uses including making a small insulated “window” in Franklin stoves. If one places a thin sheet of mica in the light path between the polarizer and a nice, highly birefringent specimen one can get some spectacularly colorful results.
I have a couple of slabs, about 3 by 5 inches, which are almost an inch thick. I acquired them in a rock shop in a small town about 30 miles north of Laramie. Mica occurs, as I’m sure you know, in layers and consists of a variety of elements usually embedded in silicates. You can take the blade of a thin knife and separate out very thin slices of uneven thickness and when used as compensators these differences in the layers quickly become evident and can produce some nice effects. At one point, I purchased a small compass of a design that allows me to replace the pencil lead with a small knife blade permitting me to cut circular pieces of mica to the precise size I need for the condenser filter holder.
2)When a birefringent specimen is examined and the polars are crossed one has elements which stand out dramatically against a black background.
Actually, there are a considerable number of different sorts of mica, most of which are silicate minerals, as mentioned before, but which contain a surprising number of possible combinations with other elements including aluminum, iron, potassium, sodium, calcium, barium, cesium, manganese, chromium, titanium, lithium and yet others. Virtually all of these are formed of layers of crystals that allow the minerals to be rather easily sliced into sheets of varying thinness. As you can image, historically a wide variety of types have been used in optical experimentation and especially in microscopy. Such differences in composition were bound to produce differences in results producing disputes between researchers and, I would like to imagine, even the occasional duel or two.
All of the images for this article were taken using my trusty old Nikon CoolPix 995 through my Olympus SZ-Tr (only appropriate that an old curmudgeon should use old equipment. Were I to use “cutting-edge” equipment, I might hurt myself.) For polarization with this equipment, I use my handy little stage polarizer. I’ll provide you here with a picture of it and later also a link to an earlier article in which I discuss some of the characteristics of this highly convenient device.
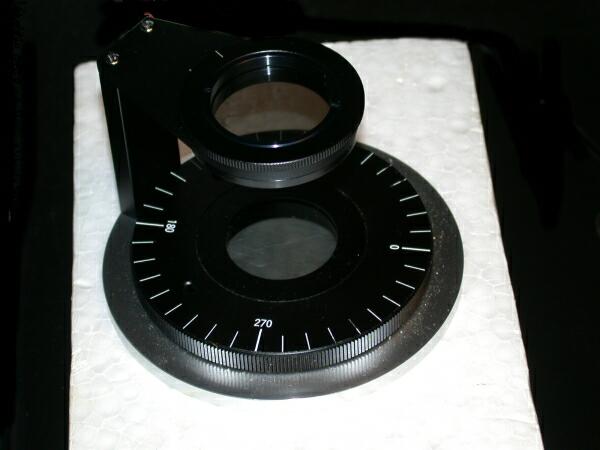
The base is calibrated showing the positions of 0, 90, 180, and 270 degrees with marking for 10 degree intervals between each of these positions. The analyzer has a single marking to tell us its orientation relative to the polarizer. When the base is set at 0 (360) degrees and the line of the analyzer is aligned with it then, we can describe this as a situation where the polarizers are crossed or we have produced extinction, that is a black background. Earlier I wrote an article about using this device and there I mention that I did finally find a manufacturer, but that the price was an outrageous $575 plus shipping from Japan. However, just 2 days ago, I found what appears to be the same handy accessory, manufactured by Motic, and listed on the Ted Pella website (which specializes in a wide variety of microscopic supplies, especially for electron microscopy) for the quite reasonable price of $85. Their item # is 2282-412.
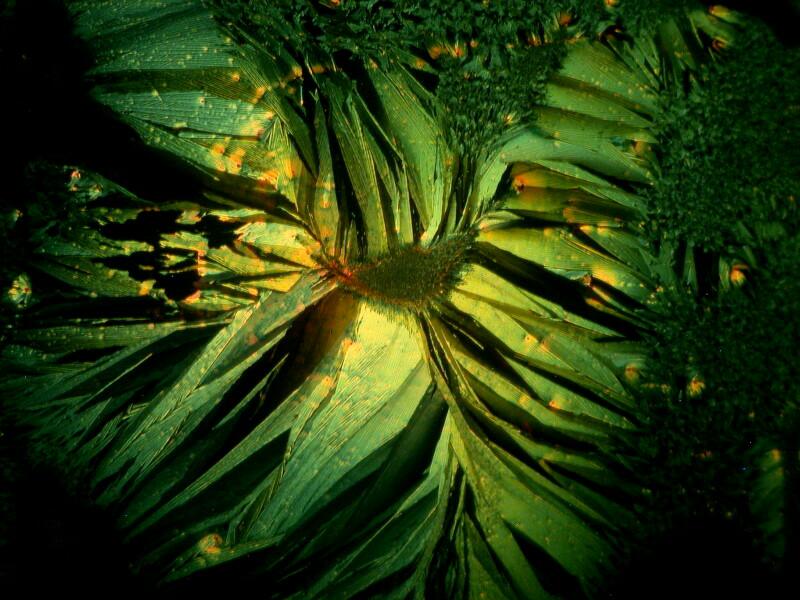
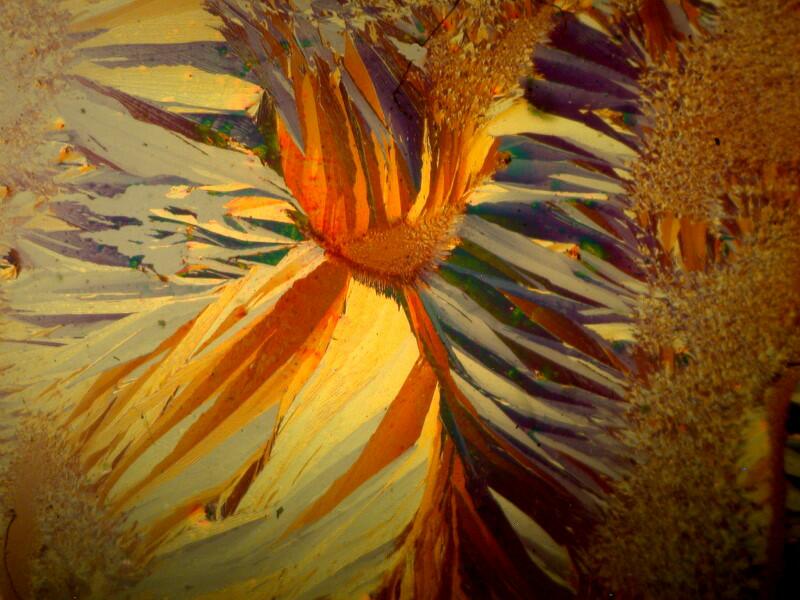
If we now insert a slide with birefringent crystals into the light path, the resulting scattering and refraction phenomena produce colorful results.
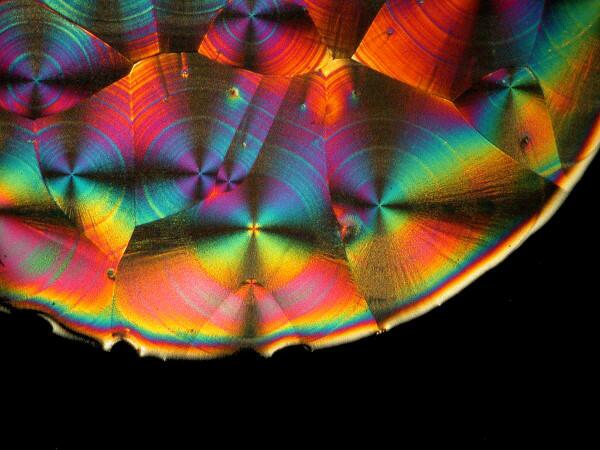
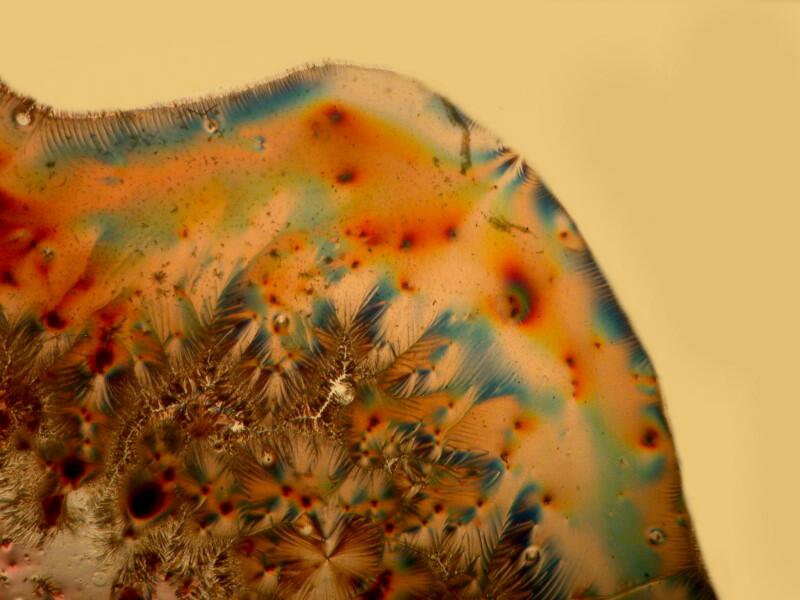
Now, we can further alter the result by introducing a compensator into the light path and we have a variety of choices. We could cut (or buy) a mica filter, a gypsum filter, a calcium filter, or we could cut a plastic filter from a Petri dish. Yet another possibility is to buy 2 inch squares of plastic material from suppliers who provide both full wave length and 1/4 wave length filters. The crystals below are a mixture of Ascorbic acid, tincture of iodine, and Metformin (a diabetes medication). The first image is with the polars uncrossed but, as you can see, some birefringence is still evident.
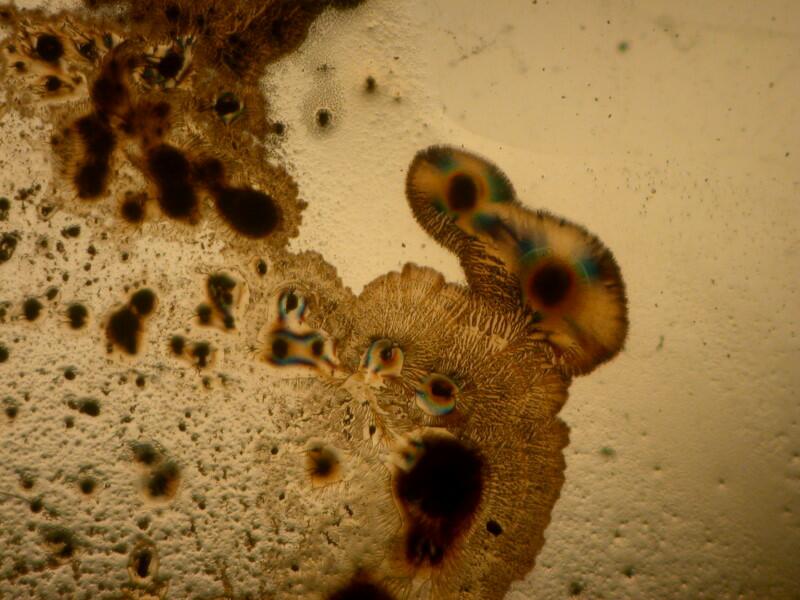
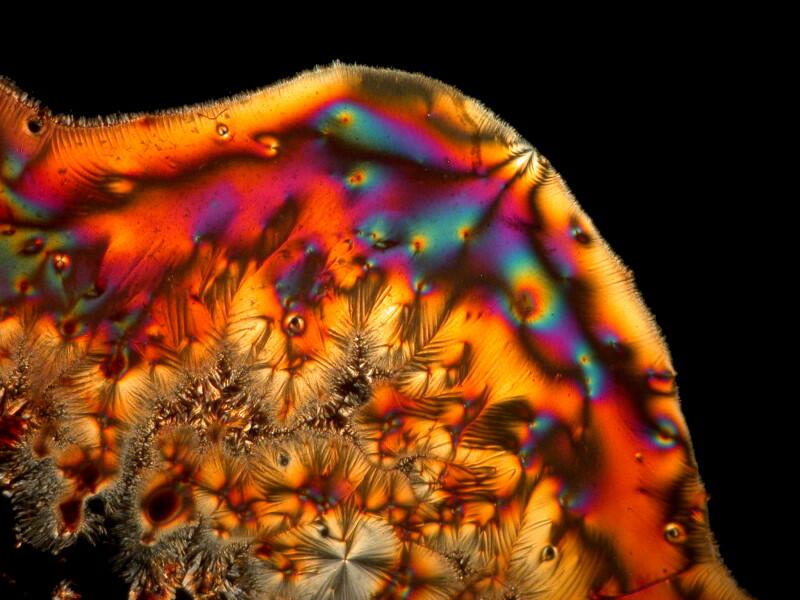
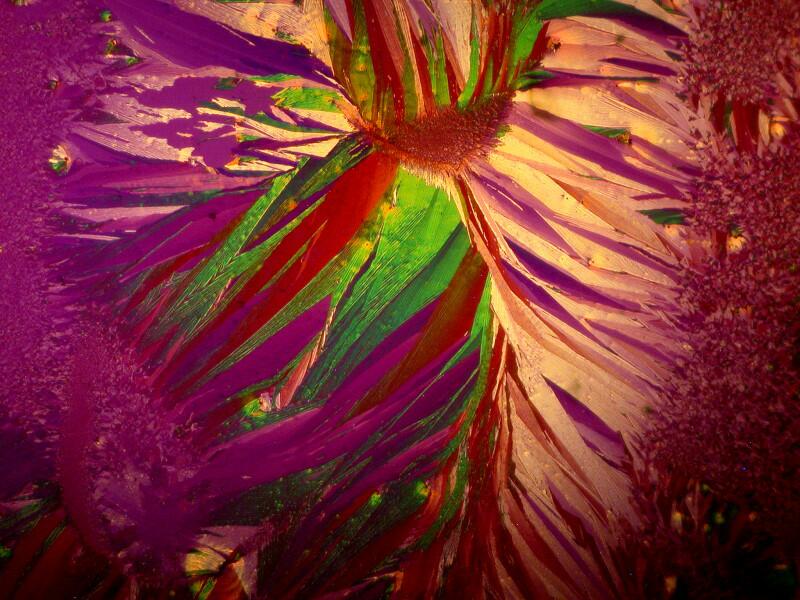
In the image below, the polars are fully crossed.
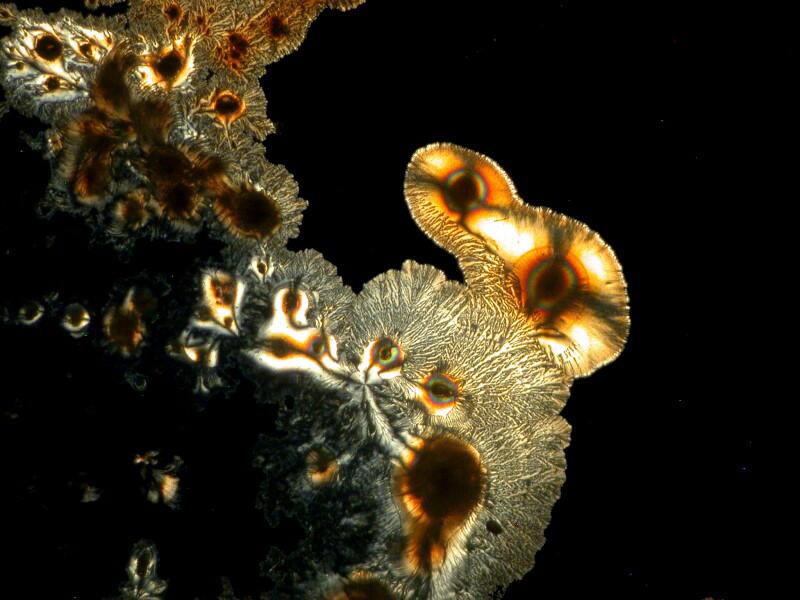
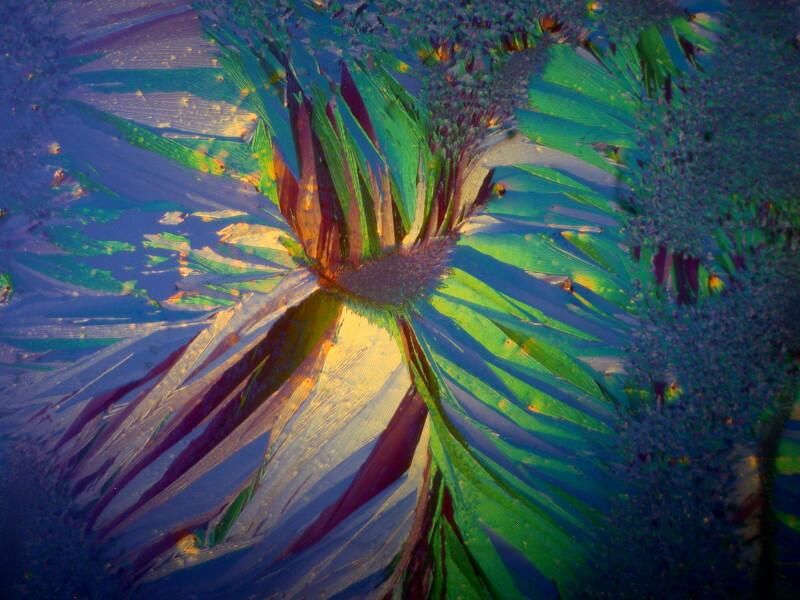
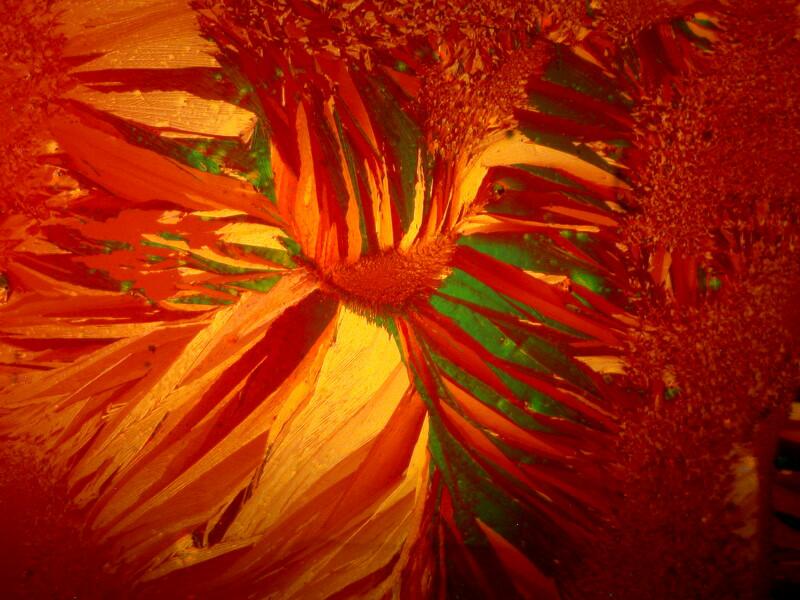
Here, the polars are fully crossed and a full wave compensator has been introduced into the light path.

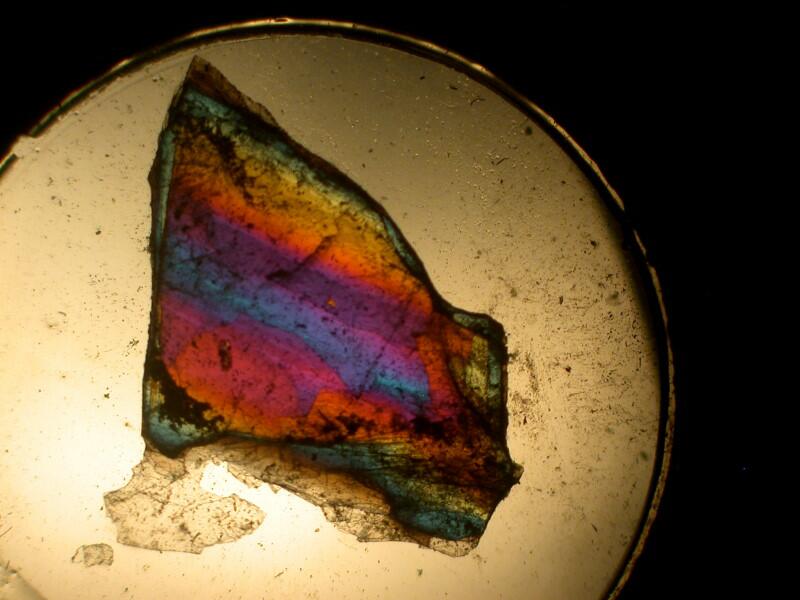
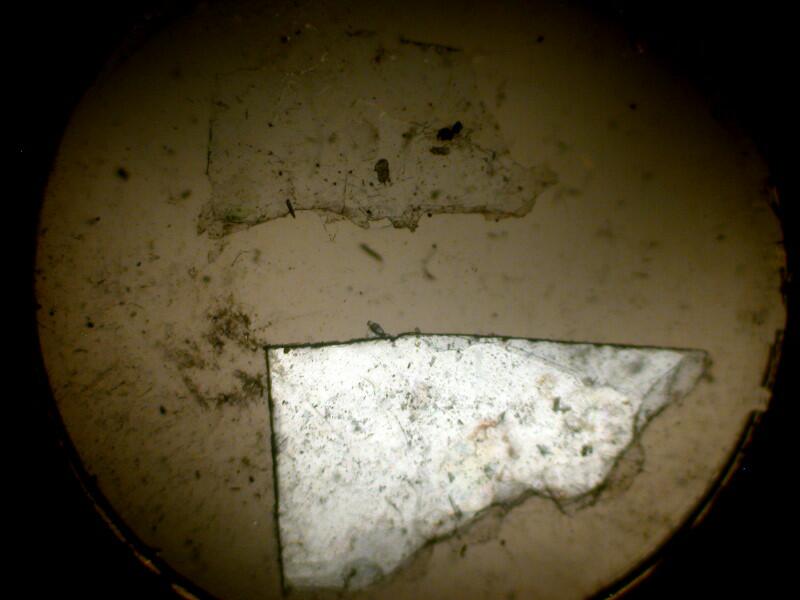
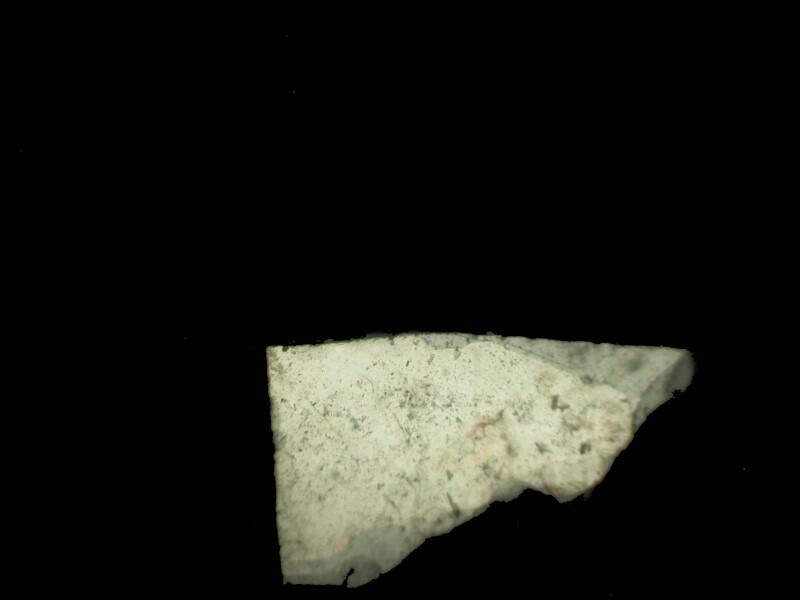
The majority of suitable specimens which you examine will show birefringence only when the polars are crossed. Some specimens may show some birefringence even when the polars are not crossed as you can see below; the first image shows a fragment of gypsum when the polars are crossed and the second, when they are not.
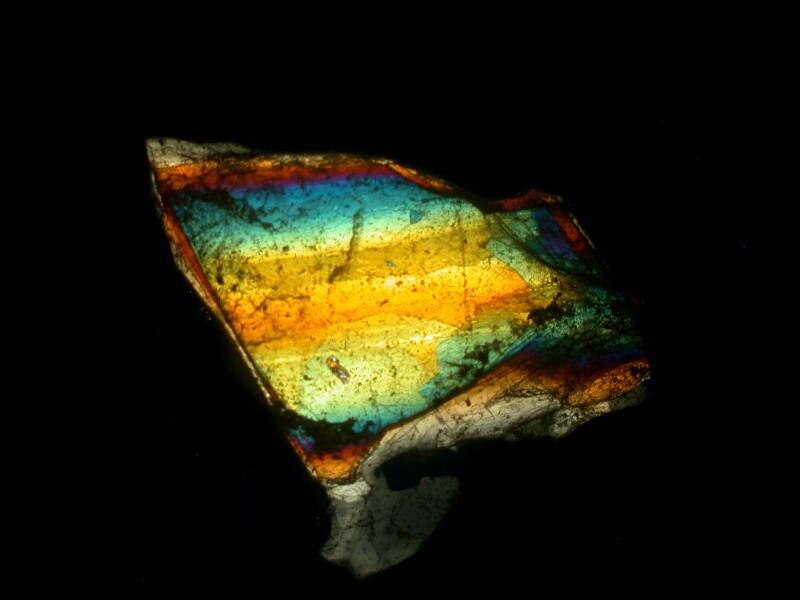
Sometimes, a determining factor can be the thickness of the specimen. I put 2 fragments of mica on a slide, the top one being very thin. In the first image below, you can clearly see both fragments and the thicker bottom one is already displaying birefringence.
However, when we cross the polars, the top thin fragment completely disappears from view.

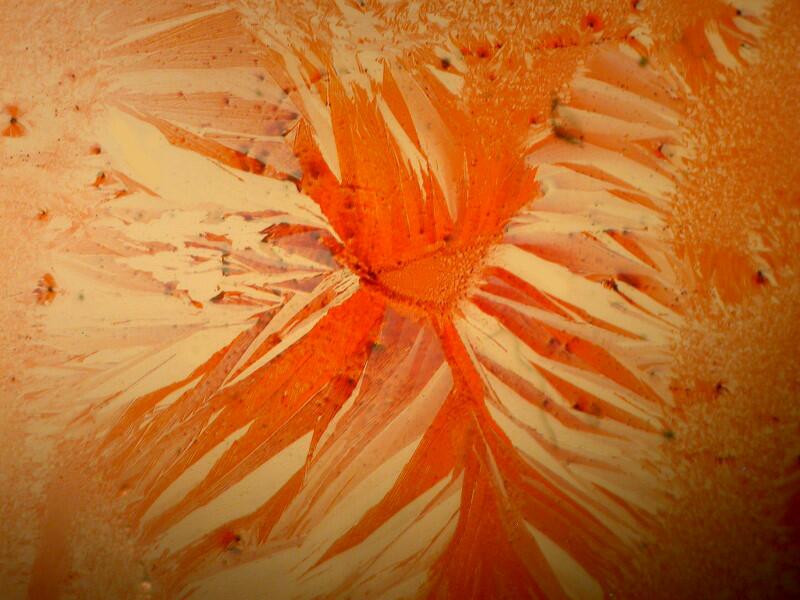
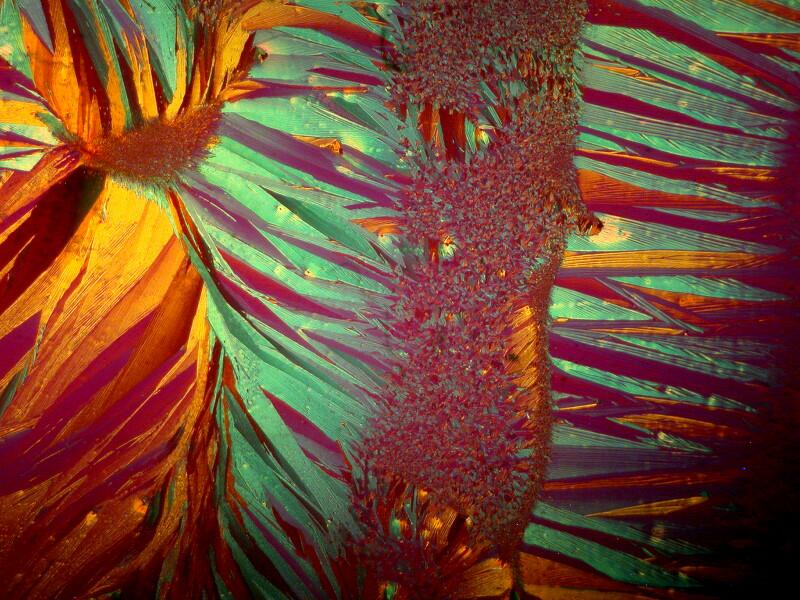
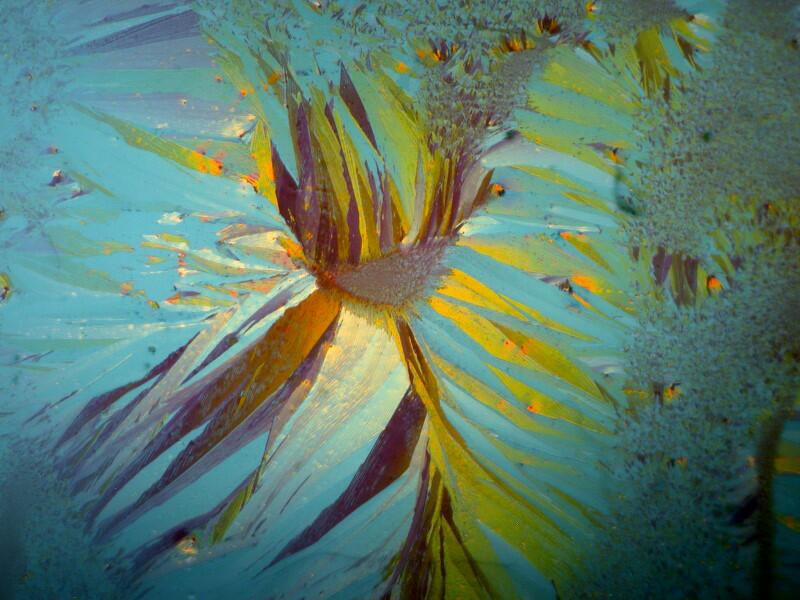
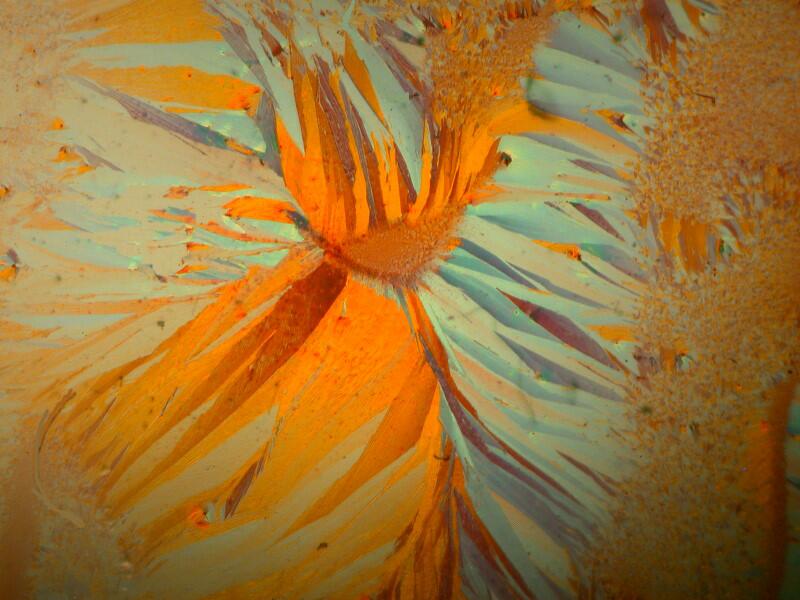
In addition, there are a few substances that are birefringent through the entire 360 degree rotation of the analyzer. For me, one of the most striking examples of this is the biological stain Orange G. I’ll show you 2 examples with polars crossed, uncrossed, and at 4 other angles which I can’t reveal to you because the Pentagon has classified them as “Cosmic Top Secret”.
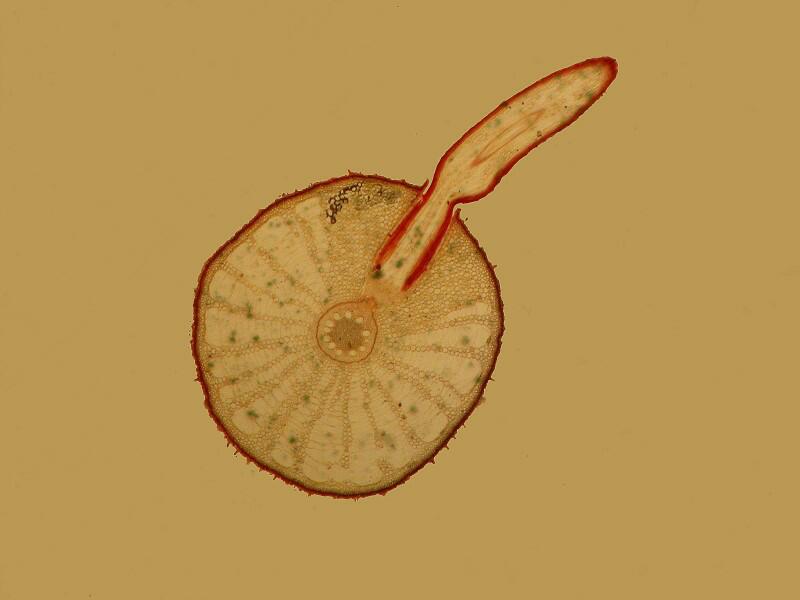
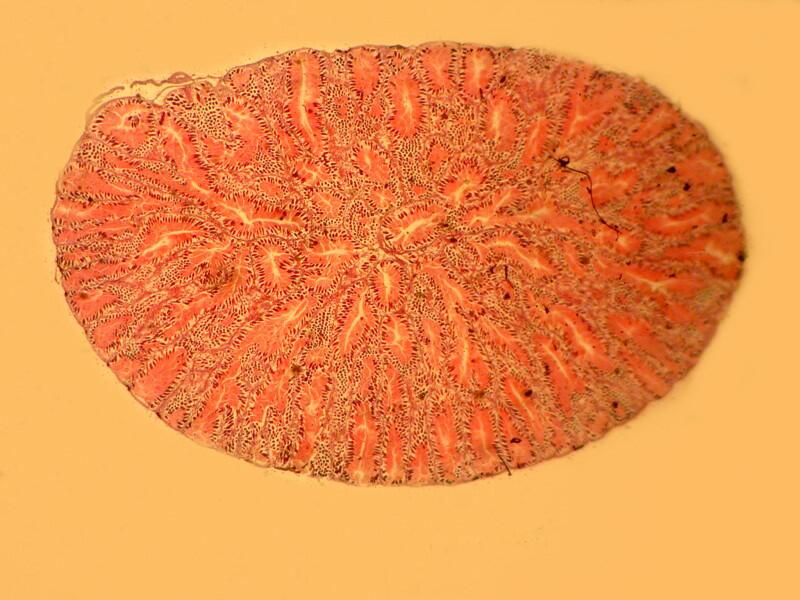
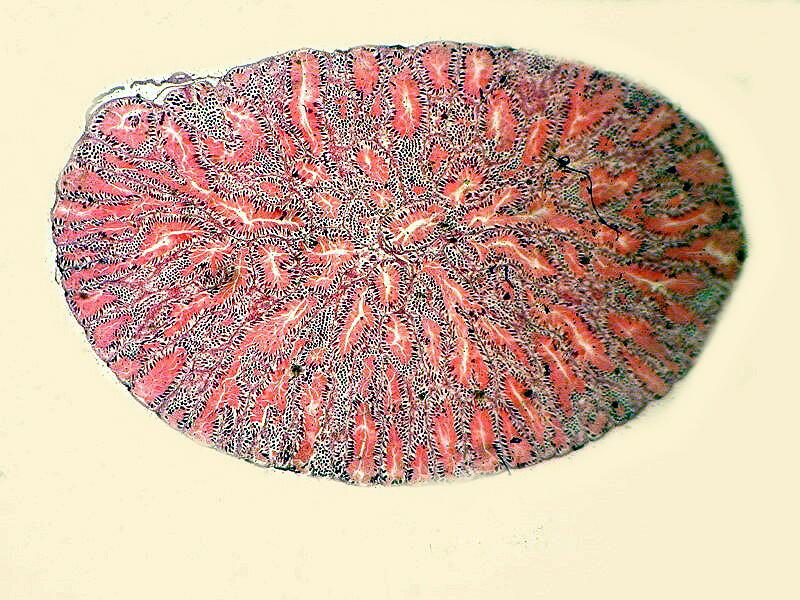
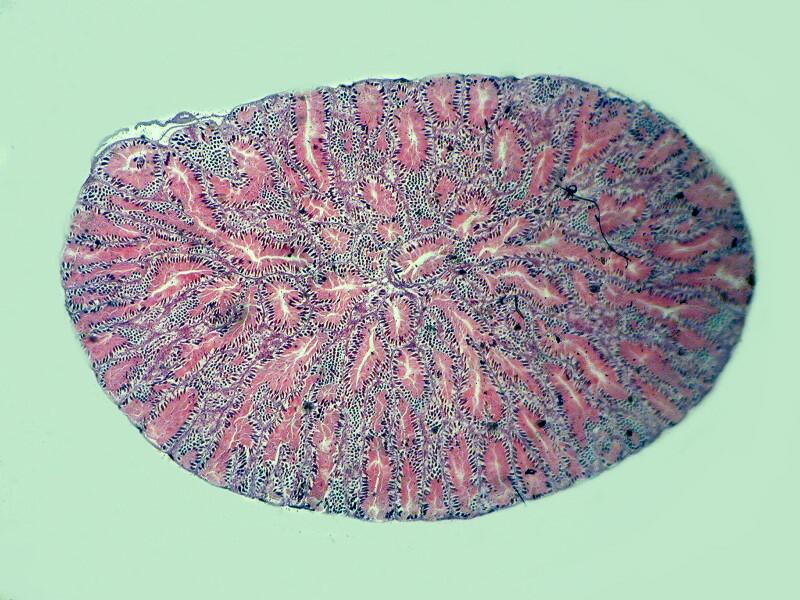
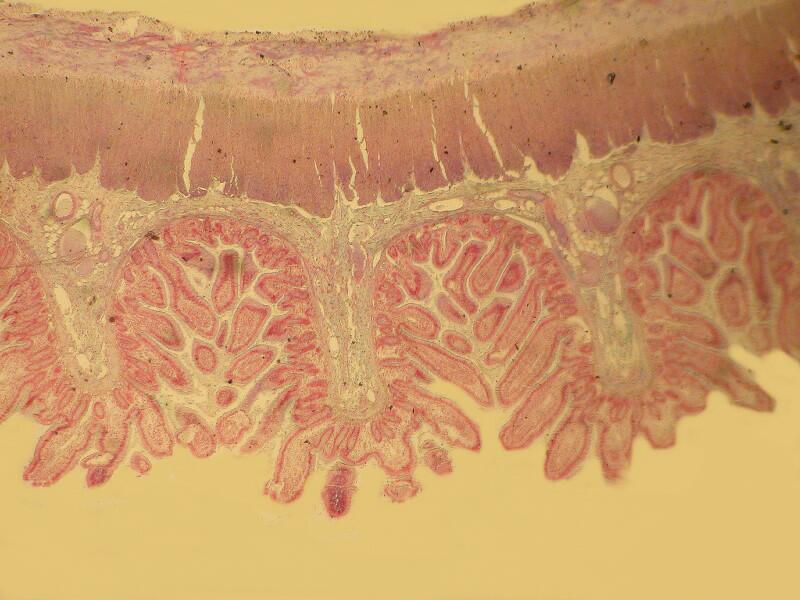
However, when a specimen, birefringent or not, is mounted on a thin strip of mica, the results are quite different. First, let’s look at a quite good specimen which I am guessing is a cross section of an earthworm. The list in the box does record such a section as being somewhere in this collection.
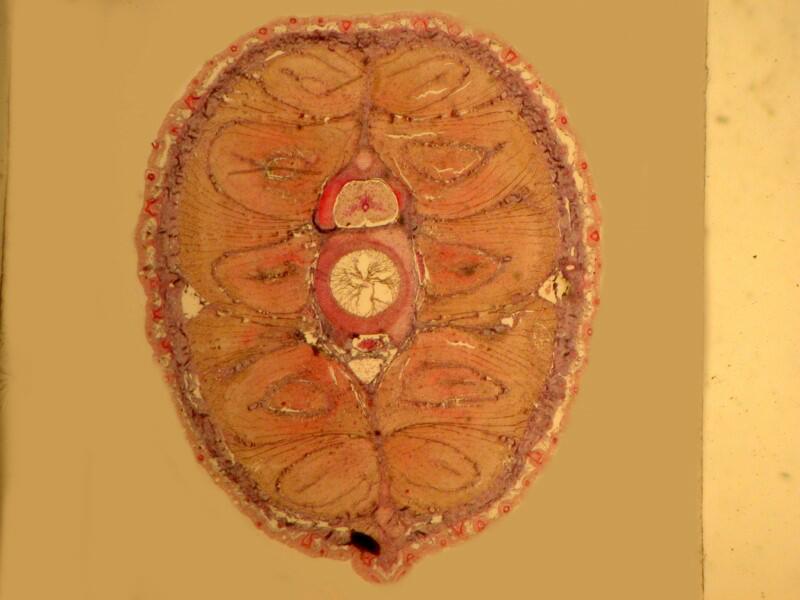
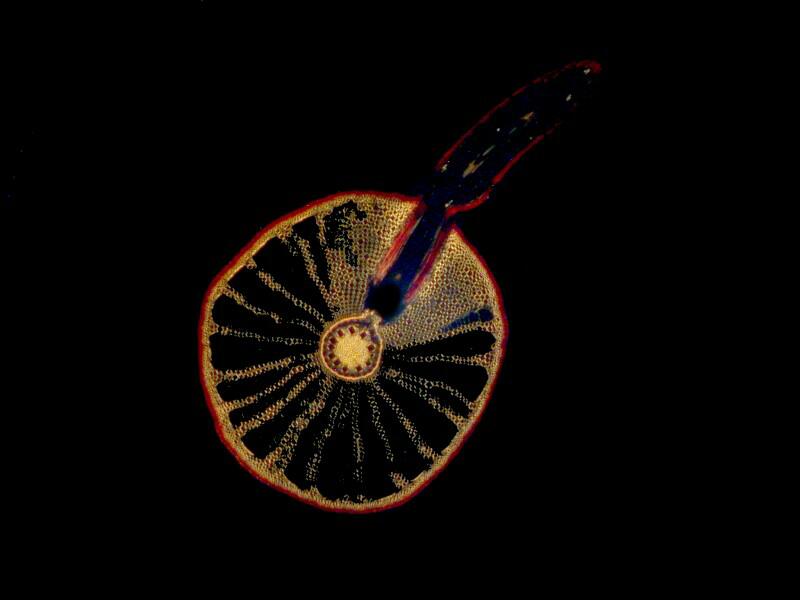
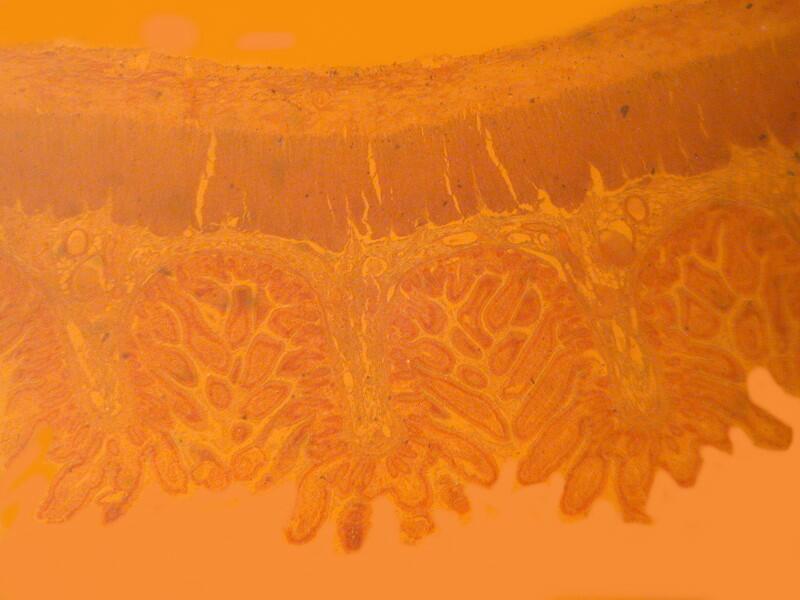
Now, let’s look at the same section under polarized light
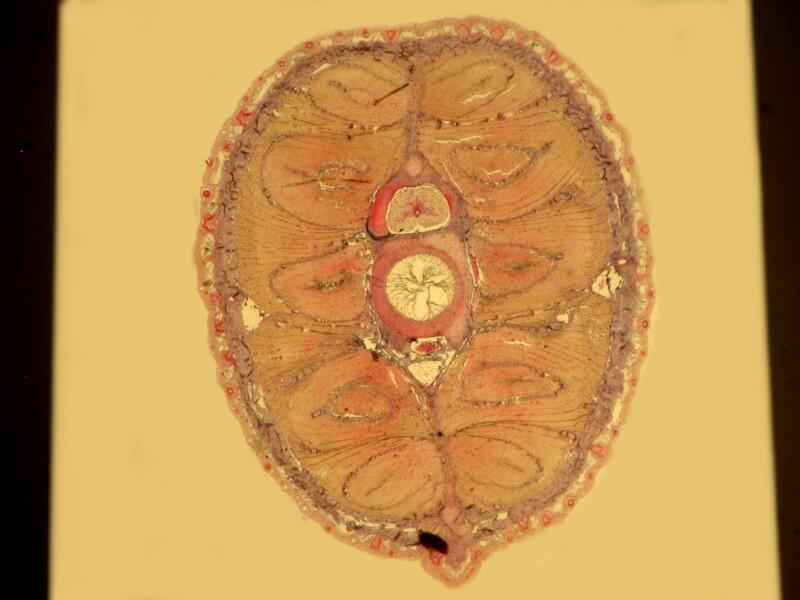
Beyond the edges of the mica strip , the background is black, however, the background of the specimen on the mica strip itself is white, providing a very different backdrop than what one expects with polarization. This is because the mica strip is acting as a compensator. You can also alter the background by rotating the slide and leaving the polarizer and analyzer in position. As you can see below the same extinction of the thin piece of mica, with the same slide that we looked at earlier when we rotated the analyzer, can be achieved simply by rotation of the slide itself.

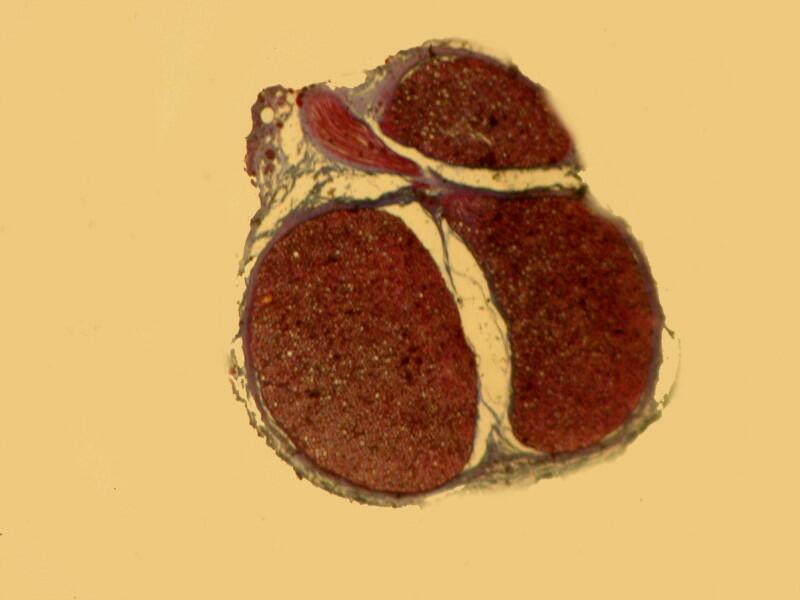
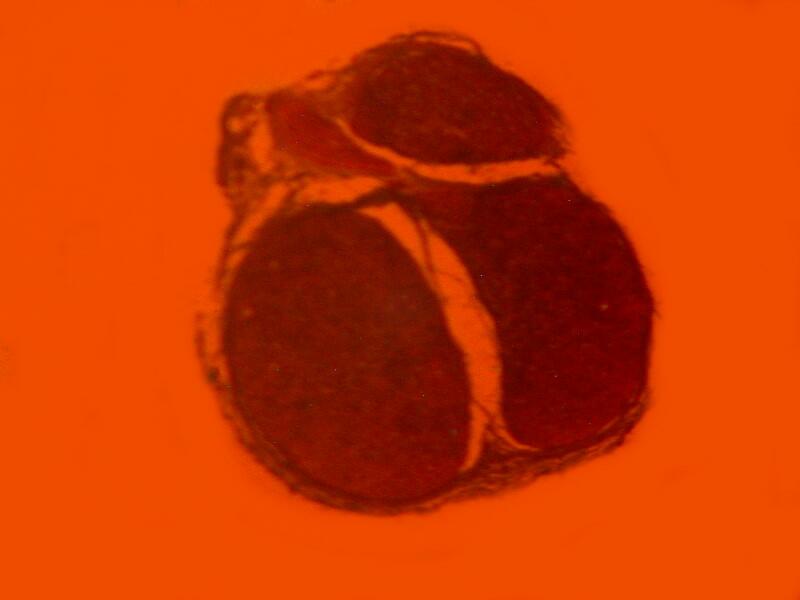
3) Yesterday, afternoon, I got curious as to why someone should use this procedure. I examined the 20 slides going back and forth between brightfield and polarization. I remind you that most of these slides are stained and some rather elaborately so. The 2 basic things I was looking for were improvements in contrast and/or resolution. I went back and forth between 2 different stereo microscopes trying to make a critical judgment regarding the possible enhancement as a consequence of using this mica strip technique. Unfortunately, the results were not especially encouraging. In fact the sections when examined with brightfield actually showed, to my eye, more detail and contrast and so, I am still puzzled about why this mounting technique was used. One consideration might be that this method does show up a specimen under polarization even though it is not birefringent but it still does not increase contrast nor resolution.
Let me show you 3 sets of examples and I think you’ll agree that the brightfield images are superior. I have added 2 other images where I “cheated” a bit and used the computer graphics program to enhance the images but, even in this case there is no significant improvement. In each pair, the first image is the brightfield one and the second one is with fully crossed polars.

And the next 2 are the computer enhanced images.
And now back to ordinary sections, brightfield and then polar.
4) My next question is this: If there is no significant enhancement then, why go to the not insignificant amount of time and effort to produce such slides? Consider what has to be done.
a) The specimens need to be thin enough for transmitted light observation. There is the possibility of doing incident polarized illumination for opaque objects, but this requires special (and expensive) microscopes.
b) In many instances, the section will need to be stained and often with more than one stain.
Steps a) and b) assume proper fixation, dehydration, and sectioning and these are required for producing permanent slides in general.
c) Now, we begin to get to the differences. You must cut some thin sections of mica (usually rectangles in these slides) and position the strips where you want to place the specimen. Then, you must prepare balsam or some other mounting medium with an appropriate viscosity to form a nice dome-shaped drop over the strip and the specimen. Using a very fine micro-needle, you then position the strip with the specimen in the center of the drop.
e) Another critical stage–placing a cover glass on the drop. In earlier times, microscopists favored circular cover glasses, largely, I think, for aesthetic reasons. It’s fascinating to me that for many humans from radically different cultures, there is a sort of rough hierarchy of aesthetic rank in relation to geometric forms with circles, spheres, square, cubes, and spirals ranking at the top. I must admit that I prefer circular cover glasses on slides over squares or rectangles, but they are more expensive and more difficult to work with.
The cover glass should be lowered at an angle onto the drop and allowed to slowly distribute the mountant by the pressure of its weight. If the mountant is too thin, the cover glass may crush certain kinds of specimens; if it is too thick, then one may lose resolution. Using a dissecting needle, one may be able to exert enough gentle pressure to force the excess mountant out from under the cover glass. This is generally not a problem for, as the mountant begins to set up, one can take a sharp, fine-pointed scalpel and remove the excess. Thereafter, one can use varnish around the edges to seal it. Various sorts of substances have been mixed with varnishes to provide different colors. The most usual color is black but, one finds slides with white rings, red ones, orange, yellow, and even the occasional blue.
f) This last stage of applying the cover glass is where one may run into 2 other kinds of difficulties. The first one is a problem even when there isn’t any mica strip to be concerned about and that is the problem of air bubbles. Some mounting media are much more susceptible than others. There are some methods that are sometimes successful in removing air bubbles if you have only a few, but, they are sufficiently demanding and frustrating so that I refuse to raise my blood pressure by discussing them here. There are plenty of accounts which you can find in older books on microtechnique.
g) Now, the crux of the matter: with this mica strip, we have extra problems. First, the position of the specimen on the strip. With some kinds of specimens, it may be possible to attach them to the strip with a drop of mountant, let it set up enough to hold it in place, transfer the strip to a clean slide and then add the large drop of balsam.
Whether you are using a round, square, or rectangular cover glass, you may find it helpful, before you actually start mounting, to place the cover glass on the blank slide and using a very fine-pointed pen, trace around the edge of the cover glass the place you intend to put it on the slide. This will provide you with a frame of reference for positioning the strip once you have immersed it in the mountant. If the mica strip moves to an undesirable position once you have put on the cover glass, then your only recourse will be to remove the cover glass and start the mounting procedure over from the beginning.
Now we are back to my most basic problems: Why go through these extra steps and potential frustrations when there doesn’t seem to be any significant improvement in either contrast or resolution?
I don’t want to be unfair or precipitous in judging this technique, so I decided to re-examine the slides and re-think the issues (and, I promise, I’ll give you some additional pictures. However, I think it will be best if we start over in Part 2, since this essay is already long enough and we’ll start with some further examples comparing brightfield and polarized images.
All comments to the author Richard Howey are welcomed.
Editor's note: Visit Richard Howey's new website at http://rhowey.googlepages.com/home where he plans to share aspects of his wide interests.
Microscopy UK Front
Page
Micscape
Magazine
Article
Library
Published in the June 2012 edition of Micscape Magazine.
Please report any Web problems or offer general comments to the Micscape Editor .
Micscape is the on-line monthly magazine of the Microscopy UK website at Microscopy-UK .
© Onview.net Ltd, Microscopy-UK, and all contributors 1995 onwards. All rights reserved. Main site is at www.microscopy-uk.org.uk .